This article describes the steps to create FSSO connector and enable FSSO Encryption between FortiAuthenticator and FortiGate using certificates.
Scope
FortiAuthenticator and FortiGate
Solution
FortiAuthenticator uses TCP Port 8000 for FSSO communication with FortiGate. To check this, login to FortiAuthenticator > Fortinet SSO Methods > General.
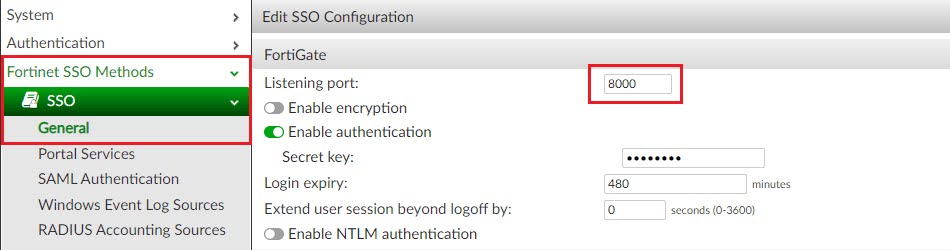
In FortiAuthenticator firmware 6.4.5 and 6.4.6, there is a new option introduced to Enable Encryption when communicating with FortiGate using FSSO.
Note: In FortiAuthenticator 6.4.5, this is enabled by default but in FortiAuthenticator 6.4.6, this needs to be enabled manually, as certificates needs to be setup before using it. If not, this will result in the dis-connectivity of FSSO sessions and the FSSO connector in Firewall, will be down.
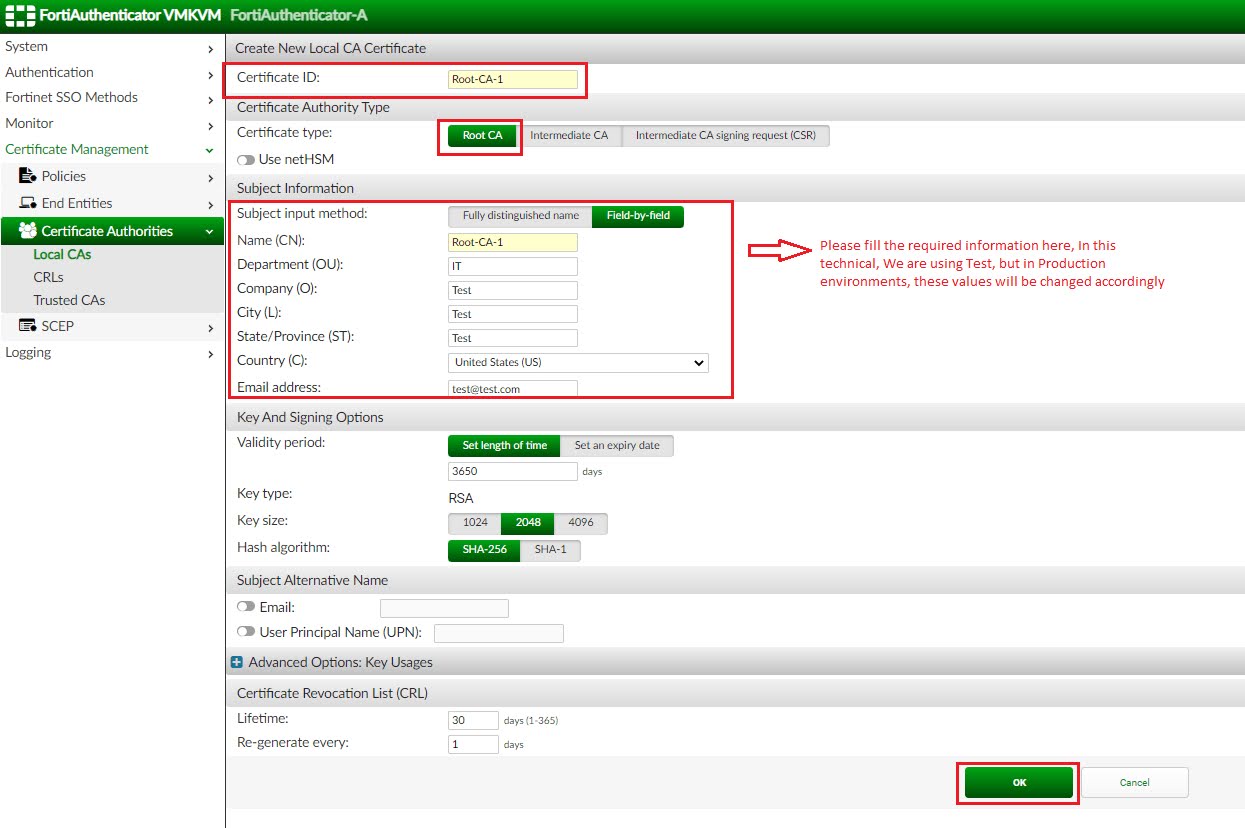
So in order to use this encryption feature, first issue a certificate and assign it to the FSSO in FortiAuthenticator. In this article, FortiAuthenticator is being used as a Root Certificate Authority, which will issue certificate to FSSO.
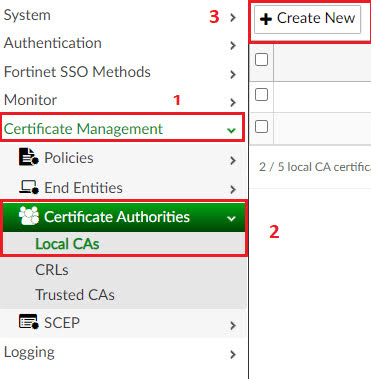
Step 1: Go to FortiAuthenticator > Certificate Management > Certificate Authority > Local CAs > Select Create New.
Step 2: Enter the required information in the Local CA certificate creation task and then select OK. Test information is just used for demonstration purposes, one might need to change the values accordingly.
Step 3: Once the CA certificate is generated, it will be shown in the list.
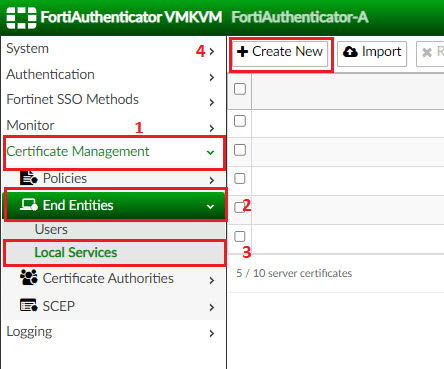
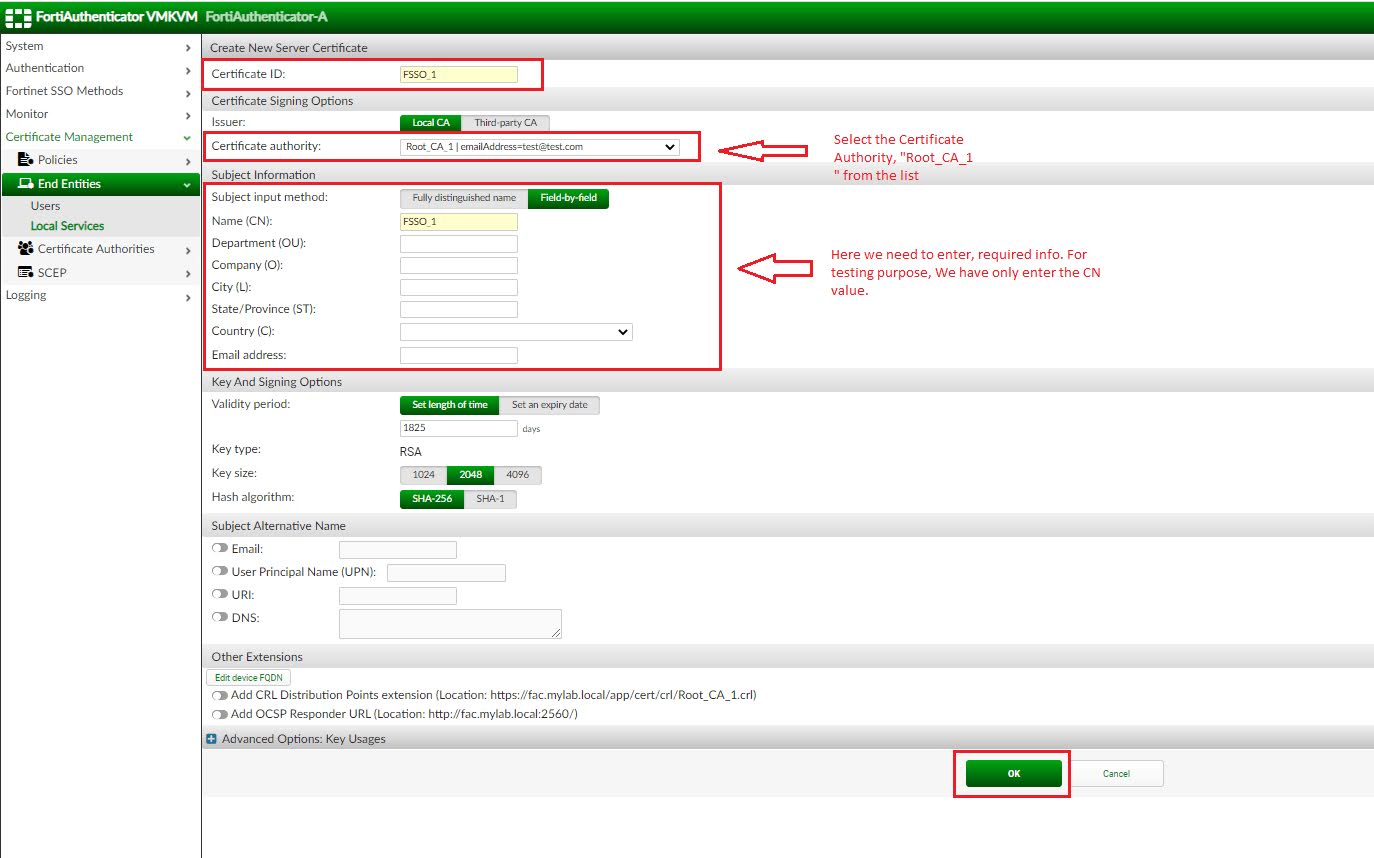
Step 4: Now create a Local Service certificate, which will be linked to the FSSO encryption settings in FortiAuthenticator.
Step 5: Fill the required information and select the Root_CA_1 from the certificate authority list and select OK.
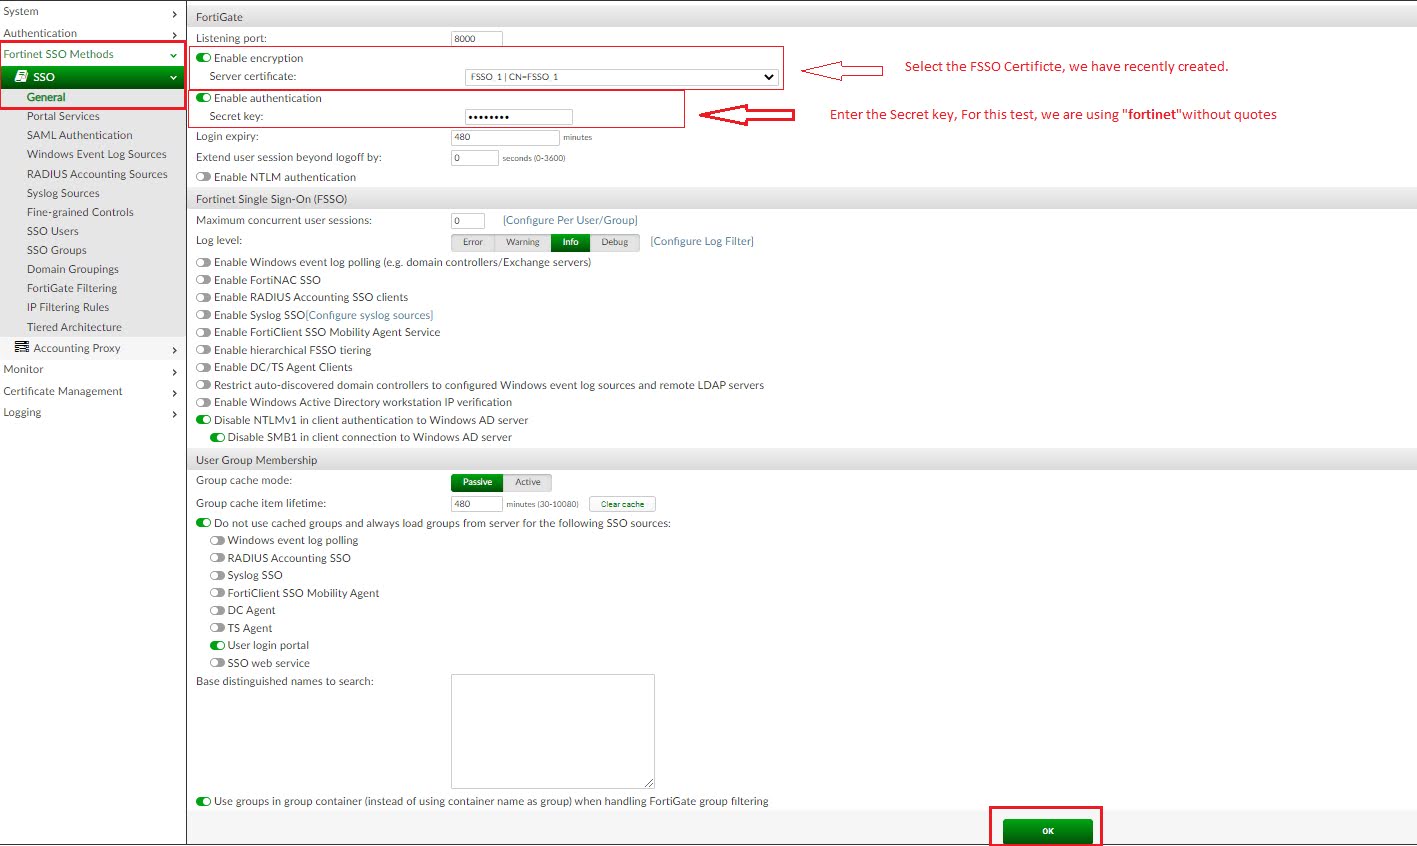
Step 6: Now assign this certificate in the encryption settings of FSSO in FortiAuthenticator.
Step 7: Go to FortiAuthenticator > Select Fortinet SSO Methods > Select SSO > Select General > Now on the right-hand side, enable Enable encryption and select the recently created FSSO certificate.
Step 8: Then select Enable authentication and enter ‘Secret Key’. Select OK to save the settings.
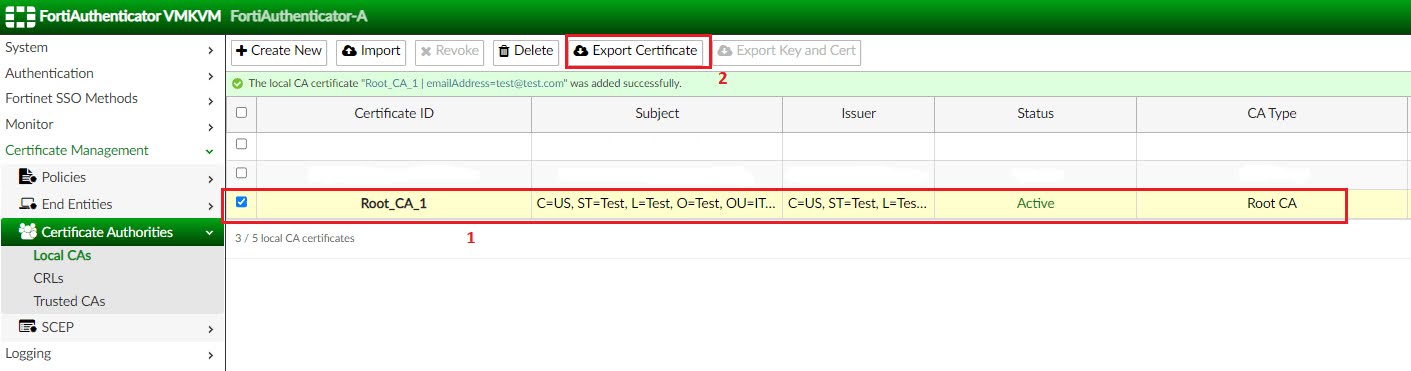
Step 9: At this stage, configurations of FortiAuthenticator side are almost completed, as a last step export certificate of the recently created ROOT CA.
Step 10: Go back to the Local CAs under Certificate Authorities, select the Certificate and select Export Certificate.
Step 11: A File with the name of certificate will be downloaded automatically. In this case it is named as Root_CA_1.crt.
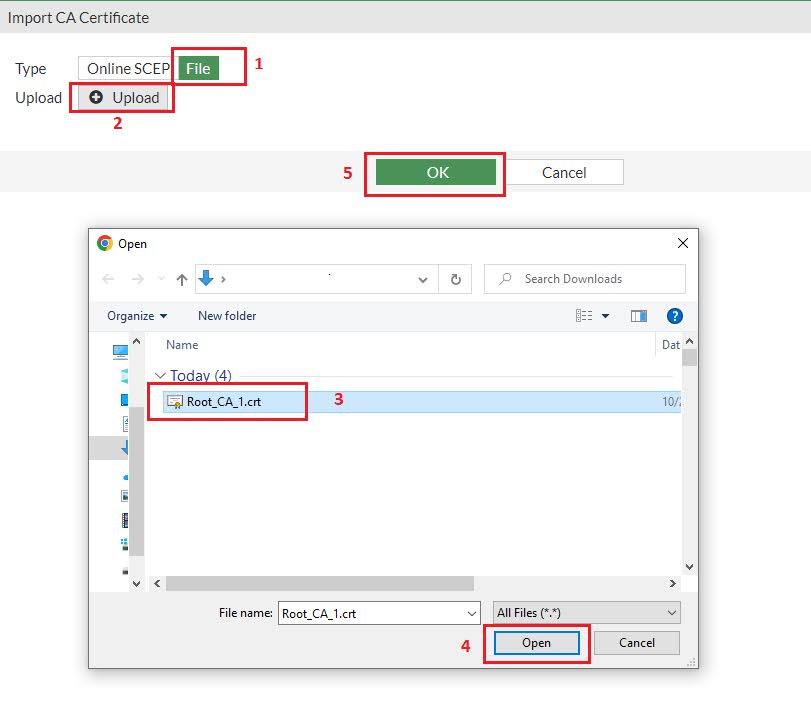
Step 12: Next step is to import this Root CA to FortiGate Remote CA Certificate list.
Step 13: Login to FortiGate, Select System > Certificates > select Create/Import > select CA Certificate.

Step 14: In the new Window, select File and then select Upload and select the recently downloaded CA certificate from FortiAuthenticator and select Open and then select OK.
Step 15: The certificate will be listed under Remote CA Certificate list. Double Click on the certificate to show the details. Select close once finished with it.

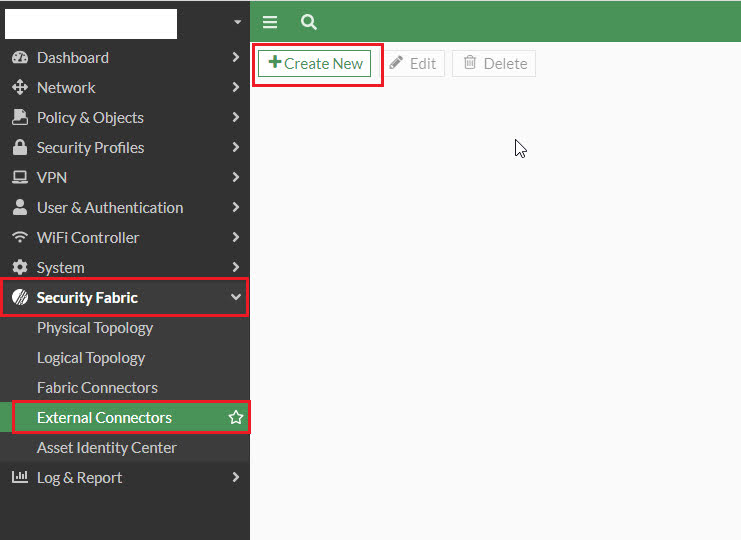
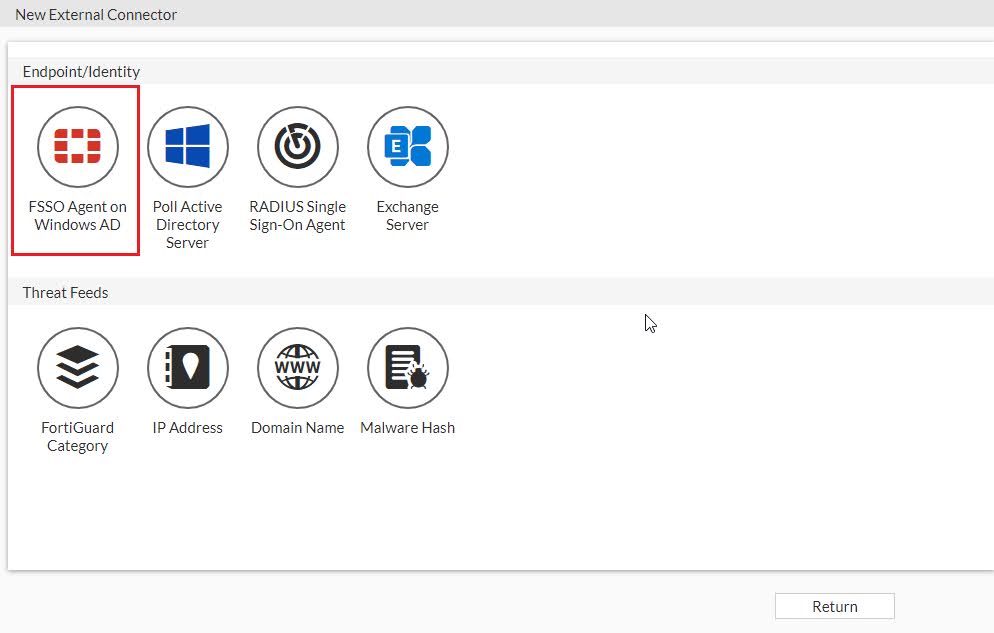
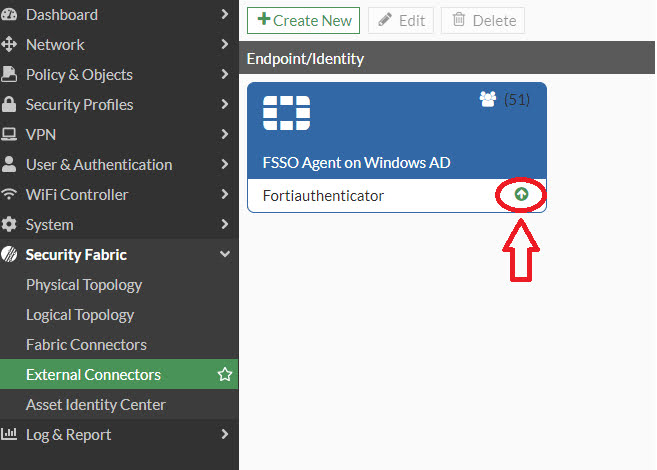
Step 16: Now create a FSSO External connector with FortiAuthenticator. While still logged in to FortiGate, Select Security Fabric > Select External Connector and select Create New.
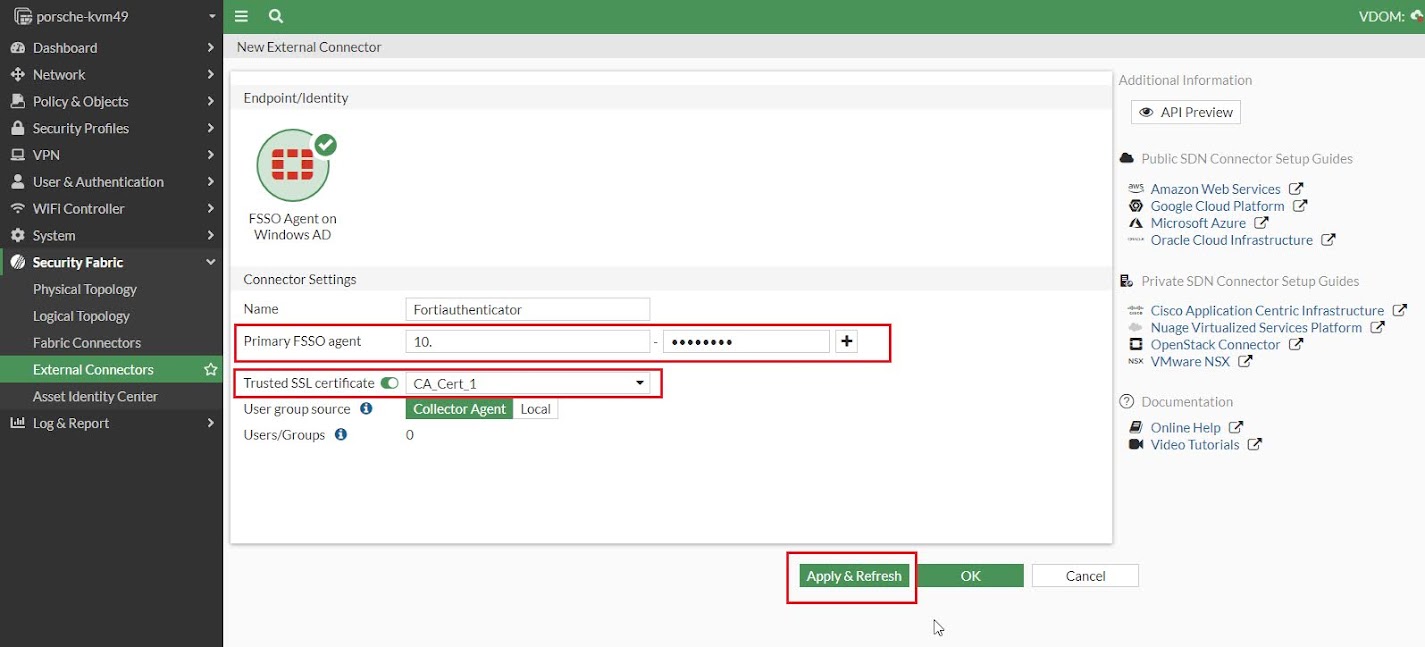
Step 17: Enter the Server Name/IP address and the encryption key defined in FortiAuthenticator FSSO settings, then toggle Trusted SSL Certificate and select recently imported Root CA of FortiAuthenticator from the list and then chose Apply and Refresh and then select OK.
Important Note: Encryption key should be the same on both FortiAuthenticator and FortiGate.
Step 18: At this stage, it will show as disconnected, this will be resolved in the next steps.
Step 19: Now login to FortiGate CLI and check the configurations of FSSO. The port is changed to 8001.
Basically, FortiGate uses TCP Port 8000 for FSSO communication with FortiAuthenticator
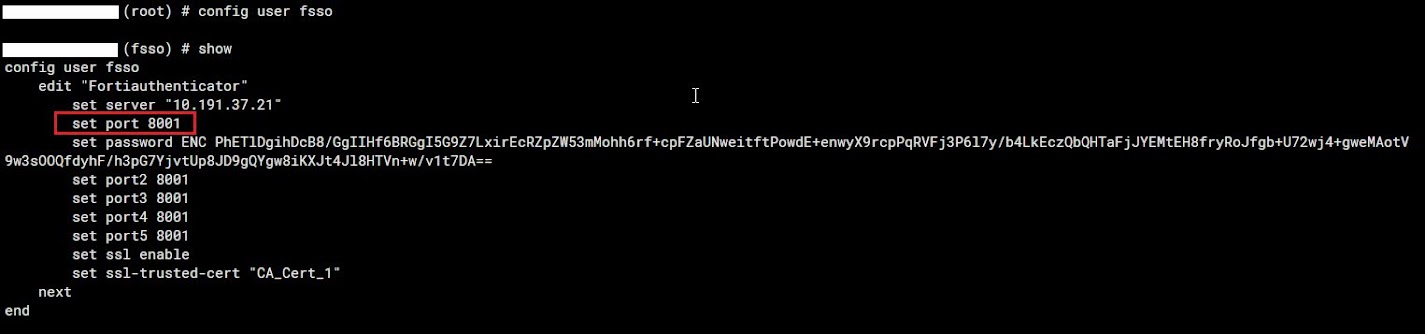
Step 20: At this stage, manually change the port back to 8000.
FGT (root) # config user fsso
FGT (fsso) # edit Fortiauthenticator
FGT (Fortiauthenticator) # set port 8000
FGT (Fortiauthenticator) # end
FGT (root) #
Step 21: Now go back to GUI console of FortiGate and check FSSO Agent, It will be shown as connected. Green up arrow shows that FSSO is connected successfully.
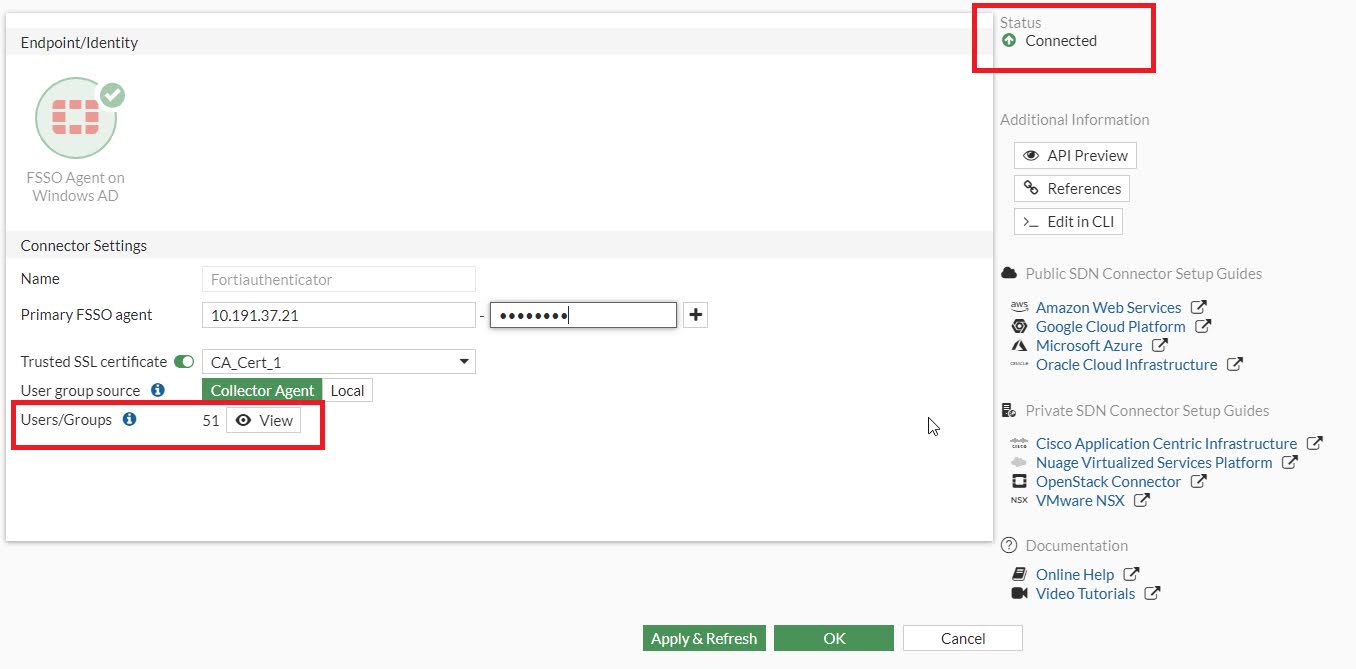
Step22: Double click on the FSSO agent settings, to check the status.
Important Note: If OK is selected or Apply & Refresh in GUI console, the port will be overwritten to 8001 and the FSSO will be down again. If that is the case then go back to CLI and change the port to 8000 in FSSO configs.