This article outline all the general troubleshooting steps to resolve common Windows update installation failed or download error for common error code. Follow the recommended solution steps to fix Windows update problem.
The detail error message as below:
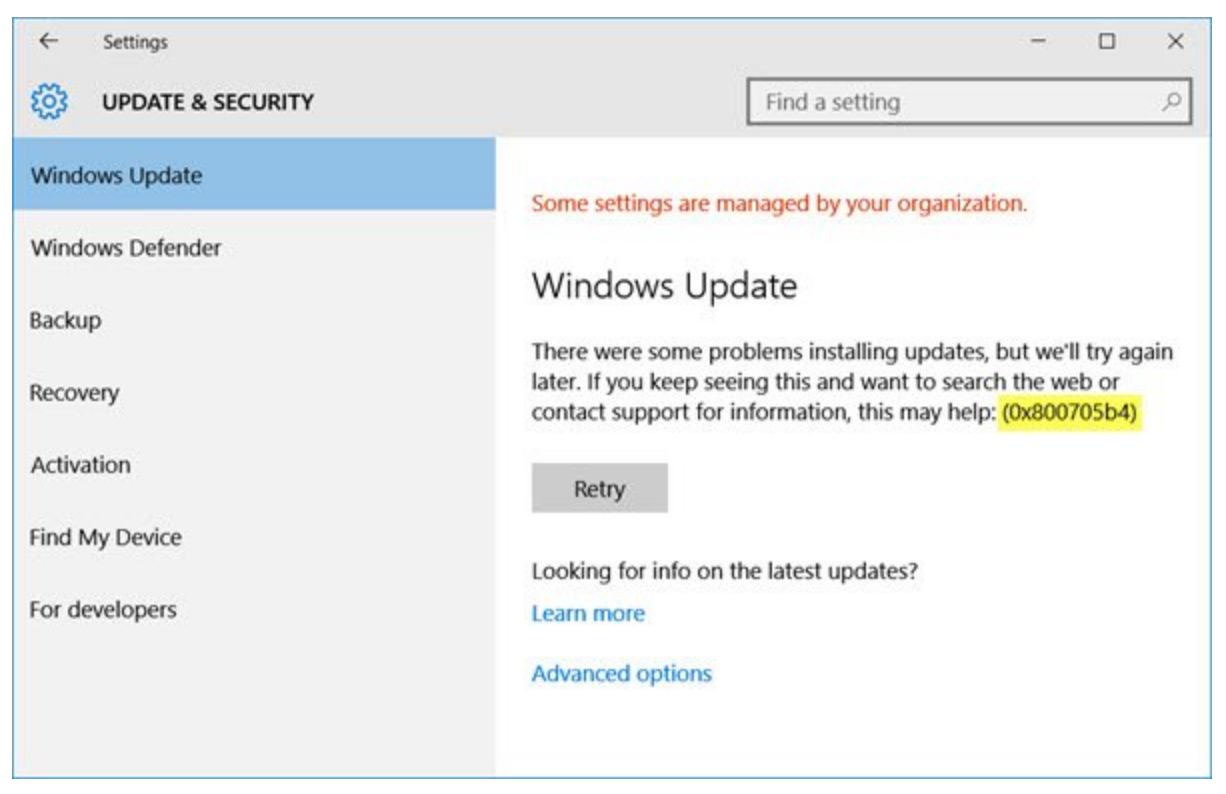
Windows Update
There were some problems installing updates, but we’ll try again later. If you keep seeing this and want to search the web or contact support for information, this may help:
Windows Update
Updates failed
There were problems installing some updates, but we’ll try again later.

Windows Update
Error encountered
There were some problems installing updates, but we’ll try again later. If you keep seeing this and want to search the web or contact support for information, this may help:

Windows Update
Updates available
Download error

Windows Update
Updates failed
Some update files are missing or have problems. We’ll try to download the update again later.

Windows Update
Windows could not search for new updates
An error occurred while checking for new updates for your computer.
Error(s) found:

Windows Update
Some updates were not installed
Error(s) found:

Solution 1: Delete Temporary Files and Browser Cache
Table of Contents
- Solution 1: Delete Temporary Files and Browser Cache
- Solution 2: Execute Windows Update Troubleshooter
- Solution 3: Change Settings in the Component Services console
- Solution 4: Execute DISM to repair Windows Updates
- Solution 5: Execute SFC
- Solution 6: Execute System Update Readiness tool
- Solution 7: Execute Background Intelligent Transfer Service Troubleshooter
- Solution 8: Clear and flush the SoftwareDistribution folder
- Solution 9: Clear the BITS queue
- Solution 10: Manually Reset Windows Update Components to default using Reset Windows Update Agent
- Solution 11: Directly download the Windows 10 ISO or the Update
- Solution 12: Manually download the update from Microsoft Update Catalog
- Solution 13: Execute Windows Update in Clean Boot State
- Solution 14: Microsoft Virtual Agent
Clear the temporary files, browser cache and cookies. Restart your Windows and try the update again. Below are the steps to clear cache and cookies in Google Chrome, Mozilla Firefox, Internet Explorer, Microsoft Edge, and Opera.
Clear cache and cookies in Google Chrome:
Step 1: At the top right, click More (the icon with 3 dots in vertical).
Step 2: Click More tools > Clear browsing data.
Step 3: At the top, choose a time range or select All time to delete everything.
Step 4: Check the box for Cookies and other site data and Cached images and files.
Step 5: Click Clear data.
Reference: Google Support > Clear cache & cookies
Clear cache in Mozilla Firefox
Step 1: In the upper right corner of the browser, click the Menu button.
Step 2: Click Preferences.
Step 3: Select Privacy & Security from the menu on the left.
Step 4: Scroll down click Clear data in the Cookies and Site Data section.
Step 5: In the Time Range to Clear dropdown menu, select Everything.
Step 6: Under History, uncheck everything except Cache.
Step 7: Click OK.
Reference: Mozilla Support > How to clear the Firefox cache
Delete Cached Files and Cookies in Internet Explorer (version 9 or later)
Step 1: Click Settings Internet Explorer Settings Icon.
Step 2: Click Internet Options.
Step 3: Under Browsing History, click Delete.
Step 4: Uncheck everything except Temporary Internet files and website files.
Step 5: Click Delete.
Reference: Pearson > Internet Explorer: Delete Cached Files and Cookies
Clear browsing data in Microsoft Edge
Step 1: In the upper right corner of the browser, click Settings and more > Settings > Privacy and services.
Step 2: Hover over History, then from the menu on the left, click Clear browsing data.
Step 3: In the Time Range drop-down menu, select All time.
Step 4: Uncheck everything except Cached images and files and Cookies and other site data.
Step 5: Click Clear now.
Reference: Microsoft Support > View and delete browser history in Microsoft Edge
Clear cookies, cache, history and everything in Opera
Step 1: Press Ctrl + H to open the history page.
Step 2: Click Clear browsing data in the top-right corner.
Step 3: Select what you want to delete and the time range, like recent history or all time.
Step 4: Click Clear data.
Reference: Opera > How to clear cookies, cache, history – everything
Solution 2: Execute Windows Update Troubleshooter
Run the in-built Windows Update Troubleshooter and see if that helps to resolve the Windows Update error.
Step 1: Go to Settings > Update & Security > Troubleshoot tab.
Step 2: Click on Windows Update option and follow the instructions on the screen after the Windows Update troubleshooter opens.
Step 3: Navigate to Troubleshoot section again and open Internet Connections troubleshooter.
Step 4: Restart the computer and perform Windows Update again.
Alternatively, you can download Windows Update Troubleshooter for Windows 10, Windows 7 and Windows 8.
For Older Versions of Windows:
Step 1: Pressing Windows key + R to open a Run box.
Step 2: Type control and press Enter to open the Classic Control Panel interface.
Step 3: Type troubleshoot in the search bar located at the top-right corner of the screen.
Step 4: From the list of search results, click on the Troubleshooting entry.
Step 5: Click on Fix problems with Windows Update under System and Security to open the Windows Update Troubleshooter.

Step 6: Click on Advanced.

Step 7: Check the box associated with Apply repairs automatically.
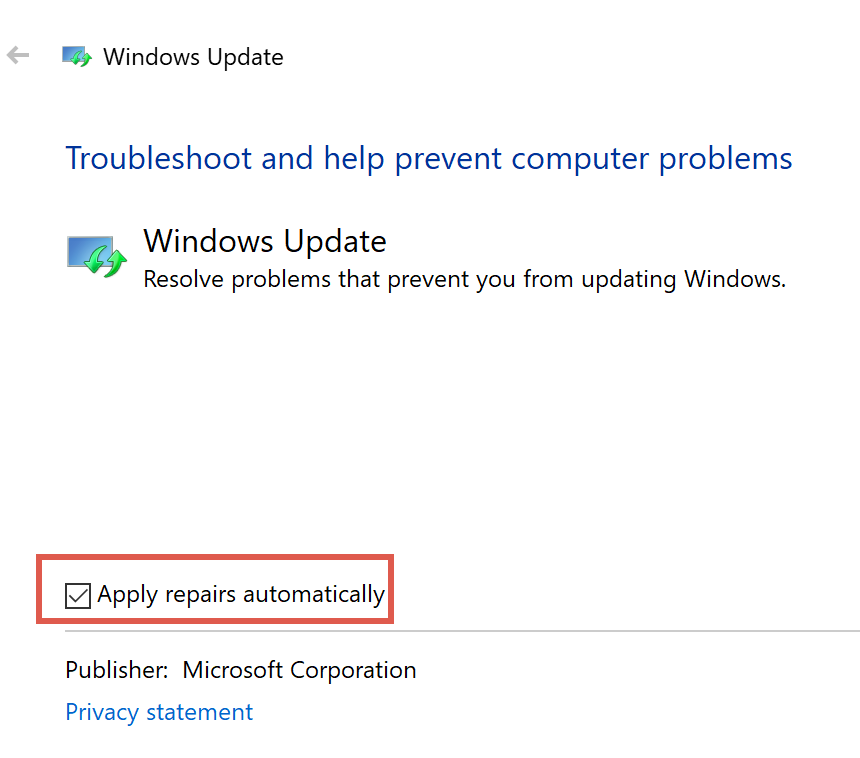
Step 8: Click on Apply this Fix and follow the on-screen prompts.

Step 9: Restart your PC.
More detail about Windows Update Troubleshooter at Windows Update: FAQ and Fix Windows Update errors.
Solution 3: Change Settings in the Component Services console
Step 1: Press Windows + R to open the Run dialogue box.
Step 2: Type dcomcnfg.exe and press Enter to open the Component Services.
Step 3: Expand Component Services in the left pane.
Step 4: Click Computers under Component Services.
Step 5: Select My computer, then right-click on it and select Properties from the context menu.
Step 6: Go to the Default Properties tab and make sure the settings below:
- Default Authentication Level: Connect
- Default Impersonation Level: Identify

Step 7: Click Apply > OK.
Step 8: Restart your Windows.
Solution 4: Execute DISM to repair Windows Updates
Deployment Image Servicing and Management (DISM) tool will replace potentially corrupted or missing system files with good ones.
Step 1: Press Windows key once.
Step 2: Type cmd in the search box.
Step 3: Choose Run as administrator option to open an elevated command prompt. If you are prompted for an administrator password or for a confirmation, type the password, or select Allow.
Step 4: Type the following command and press Enter to perform an advanced scan to check if the Windows 10 image has any problems: DISM /Online /Cleanup-Image /ScanHealth
Step 5: Type the following command and press Enter to run an advanced scan and repair any problems automatically: DISM /Online /Cleanup-Image /RestoreHealth

If the Windows Update client is already corrupted, you will be prompted to use a running Windows installation as the repair source or use a Windows side-by-side folder from a network share, as the source of the files. Type the following command and press Enter: DISM.exe /Online /Cleanup-Image /RestoreHealth /Source:C:\RepairSource\Windows /LimitAccess
*Replace the C:\RepairSource\Windows placeholder with the location of your repair source.
Alternatively, you can execute the DISM/Cleanup-Image tool in PowerShell with Run as administrator option.
Repair-WindowsImage -Online –CheckHealth

Repair-WindowsImage -Online –ScanHealth

Repair-WindowsImage -Online –RestoreHealth
Step 6: Once the process is complete, DISM will create a log file in %windir%/Logs/CBS/CBS.log and capture any issues that the tool finds or fixes.
Step 7: Once the DISM scan and repair is completed, close the elevated CMD window and restart the computer.
Solution 5: Execute SFC
Run System File Checker (SFC) to replace potentially corrupted system files.
Step 1: Press Windows key once.
Step 2: Type cmd in the search box.
Step 3: Choose Run as administrator option to open an elevated command prompt. If you are prompted for an administrator password or for a confirmation, type the password, or select Allow.
Step 4: Type the following command and press Enter: sfc /scannow

Step 5: Wait until the message The operation completed successfully or Windows Resource Protection did not find any integrity violations show then close Command Prompt.
Step 6: Restart the computer.
Also Read: How to fix vcruntime140_1.dll missing error?
Solution 6: Execute System Update Readiness tool
Step 1: Download the System Update Readiness tool.
- x86-based (32-bit) versions of Windows 7 SP1
- x64-based (64-bit) versions of Windows 7 SP1
- x64-based (64-bit) versions of Windows Server 2008 R2 SP1
- Itanium-based versions of Windows Server 2008 R2 SP1
Step 2: Double-click to tun the downloaded executable file.
Step 3: Select Download on the Download Center webpage.
Step 4: To install the tool immediately, select Open or Run, and then follow the instructions on your screen.
Step 5: In the Windows Update Standalone Installer dialogue box, select Yes.
Step 6: When you see Installation complete, select Close.
Step 7: Reinstall the update or service pack you were trying to install previously.
Solution 7: Execute Background Intelligent Transfer Service Troubleshooter
Background Intelligent Transfer Service (BITS) helps in the transfer, download or upload of files between a client and server, and provides progress information related to the transfers. BITS also plays a role in the download of files from a peer. Run the Background Intelligent Transfer Service Troubleshooter and see if it helps.
Step 1: Open Control Panel.
Step 2: Switch the View by the drop-down menu at the top-right to Large icons option.

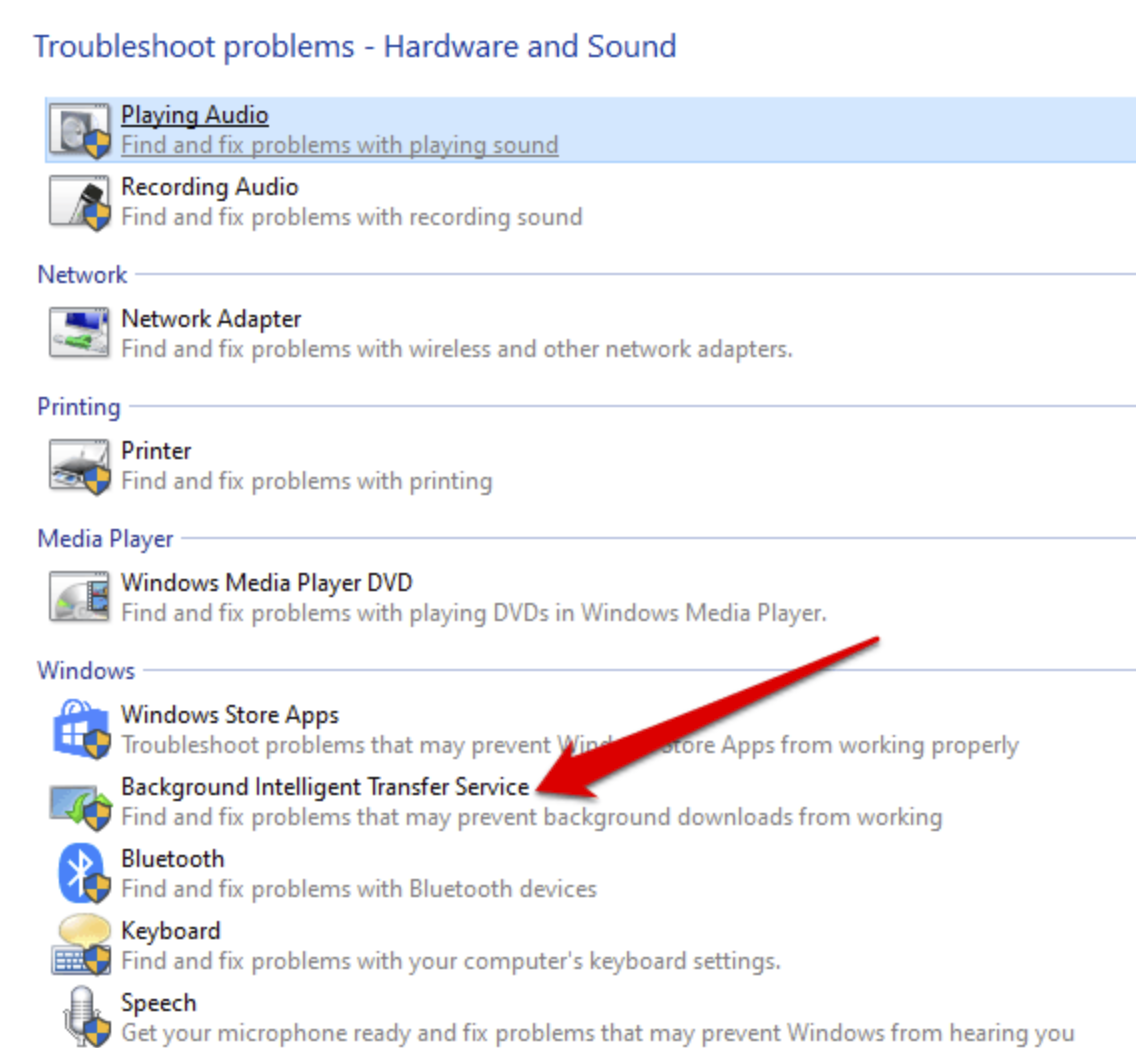
Step 3: Click the Troubleshooting > Hardware and Sound.


Step 4: Click the Background Intelligent Transfer Service troubleshooter under Windows section. If you can’t find Background Intelligent Transfer Service troubleshooter, you can also download the troubleshooter for Windows 10.
Step 5: Click the Advanced option.

Step 6: Check the Apply repairs automatically option then click the Next button.

Step 7: Click the View detailed information option.

Step 8: Review the Detection details.

Step 9: Click the Next button.
Step 10: Click the Close button.
Solution 8: Clear and flush the SoftwareDistribution folder
The Software Distribution folder in Windows 10 operating system is a folder located in the Windows directory and used to temporarily store files that may be required to install Windows Update on your computer. Clear the contents of the SoftwareDistribution folder and then retry the update process again.
Step 1: Disable Internet connection.
Step 2: Press Windows key once.
Step 3: Type cmd in the search box.
Step 4: Choose Run as administrator option to open an elevated command prompt. If you are prompted for an administrator password or for a confirmation, type the password, or select Allow.
Step 5: Type the following command and press Enter after each command to reset the SoftwareDistribution folder:
net stop wuauserv

net stop cryptSvc

net stop bits

net stop msiserver

net stop appIDSvc

ren C:\Windows\SoftwareDistribution SoftwareDistribution.old

ren C:\Windows\System32\catroot2 Catroot2.old

rmdir C:\Windows\SoftwareDistribution\DataStore

rmdir C:\Windows\SoftwareDistribution\Download

net start wuauserv

net start cryptSvc

net start bits

net start msiserver

net start appIDSvc

exit
Step 6: Restart the computer.
Step 7: Enable back the Internet connection.
Step 8: Press the Windows logo key and type PowerShell and in the resulting list, Right-click on Windows PowerShell and select Run as Administrator option from context menu.
Step 9: Enter the following command in the PowerShell and press enter: wuauclt.exe /updatenow
Solution 9: Clear the BITS queue
Step 1: Press Windows key once.
Step 2: Type cmd in the search box.
Step 3: Choose Run as administrator option to open an elevated command prompt. If you are prompted for an administrator password or for a confirmation, type the password, or select Allow.
Step 4: Type the following command and press Enter to clear the BITS queue of any current jobs: bitsadmin.exe /reset /allusers
Solution 10: Manually Reset Windows Update Components to default using Reset Windows Update Agent
Use the Reset Windows Update Agent Tool which helps to reset and repair all Windows Update Client related components & registry keys, detect corruptions, replace corrupted system files, fix corrupted system image, Reset Winsock settings and so on.
Step 1: Download Reset Windows Update Agent from TechNet Script Center.
Step 2: Unzip ResetWUEng.zip
Step 3: Right-click on the ResetWUEng.cmd script and select Run as Administrator option from the context menu.
Step 4: Type Y and press Enter to continue.
Step 5: Type the number corresponding to the Resets the Windows Update Components option and press Enter to continue.
Step 6: Restart your Windows.
Solution 11: Directly download the Windows 10 ISO or the Update
Download the Windows 10 ISO image file from the Microsoft website, double-click the ISO image to mount it as a virtual drive then double-click the setup.exe file to start the in-place upgrade process.
Solution 12: Manually download the update from Microsoft Update Catalog
Step 1: Visit Windows update history page to find out which is the latest released update for Windows 10.
Step 2: Copy the KB (Knowledge Base) number next to the latest released update for Windows.
Step 3: Open Microsoft Update Catalog in Internet Explorer.
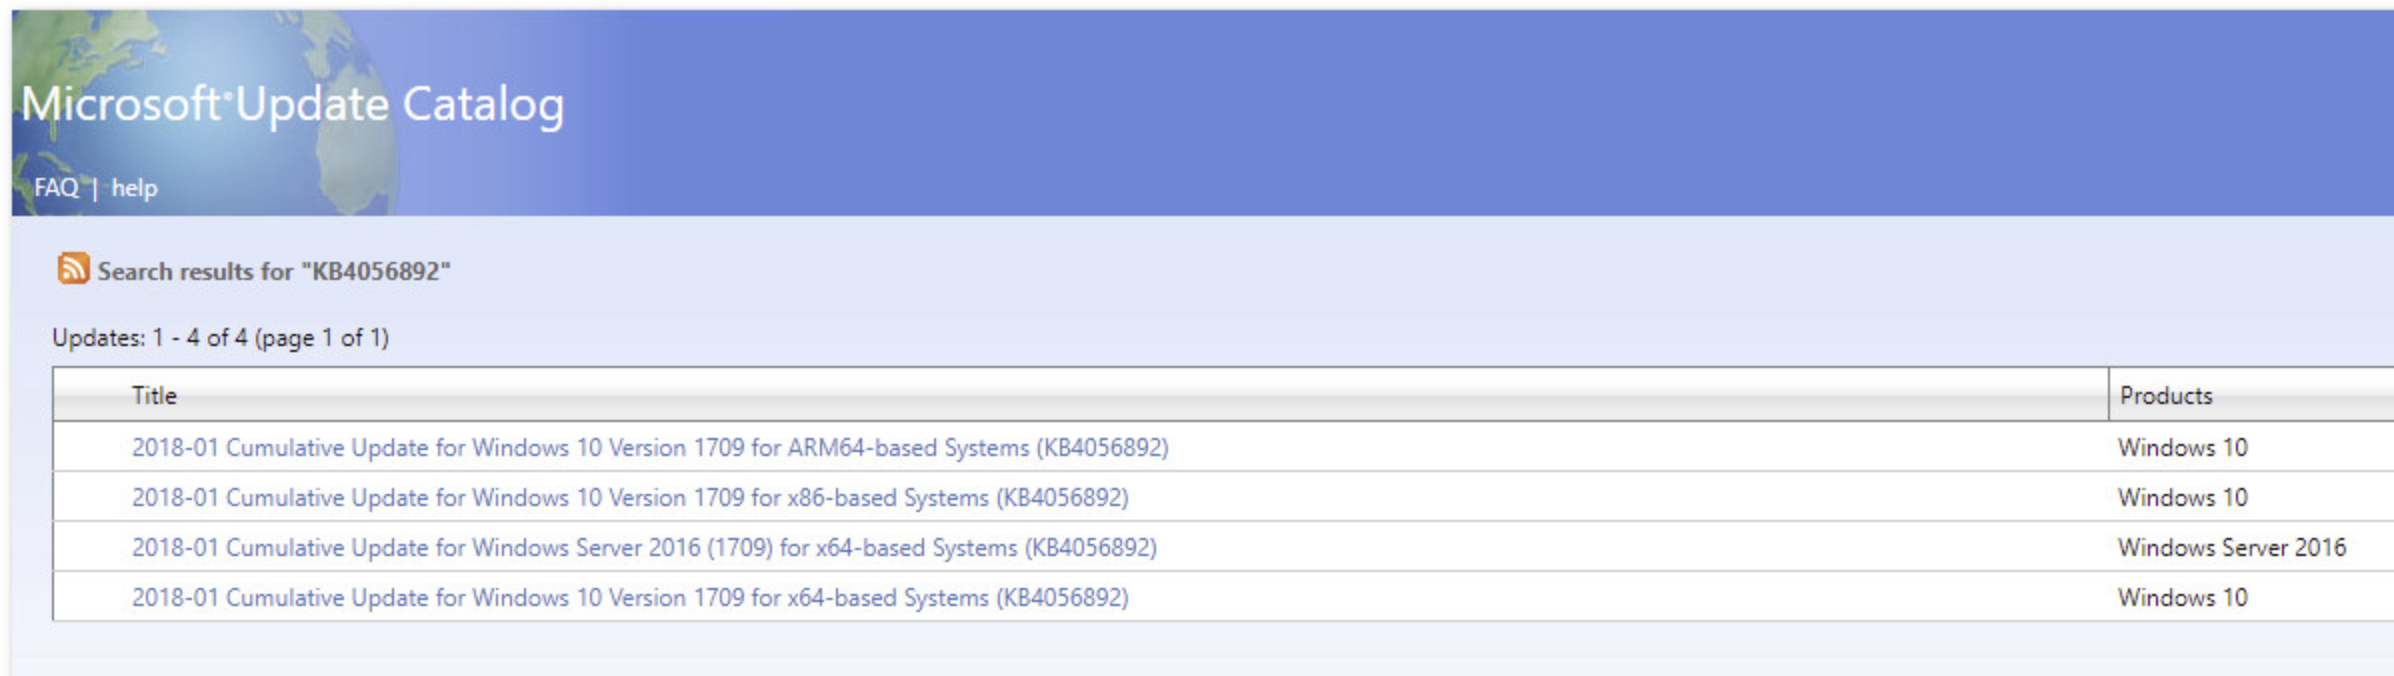
Step 4: Search for the failed update KB using the search function located at the top-left corner of the screen.

Search for the failed update KB using the search function located at the top-left corner of the screen.
Step 5: Download the appropriate Windows Update according to the CPU architecture (32bit or 64bit) and the Windows OS version.
Step 6: Execute the downloaded .msu installer with Run as Administrator option and follow the on-screen instruction to install it.
Step 7: Restart the computer.
Solution 13: Execute Windows Update in Clean Boot State
Start Windows in Clean Boot state will use a minimal set of drivers and startup programs to help eliminate software conflicts that occur when you install a program or an update or when you run a program in Windows.
Step 1: Press Windows key + R to open the Run box.
Step 2: Type msconfig and press Enter to open the System Configuration. If the UAC (User Account Control) prompted then click Yes to grant administrative access.
Step 3: In the General tab, click on the radio button beside Selective startup. Uncheck the Load startup items checkbox.

Step 4: Choose the Services Tab, then check on Hide All Microsoft services and click on Disable all button.

Step 5: Click the Apply button, and then click on the OK button. Choose Restart Later option.
Step 6: Press Windows + R key to open a Run box.
Step 7: Type msconfig and click OK to open the system configuration window.
Step 8: Choose Startup and select Open Task Manager.
Step 9: Disable all applications in the list to prevent it from startup when the computer is booting up.
Step 10: Close Task Manager and click Apply button in System Configuration windows then click OK.
Step 11: Choose to restart when prompt to do so.
Solution 14: Microsoft Virtual Agent
Ask Microsoft Virtual Agent.
