Table of Contents
Problem Symptom
Overview in Windows Backup options showing 0 bytes for size of backup with the Your data is not yet backed up message. Back up process is not started and nothing happens after clicking on the Back up now button.

Some Windows users reported that Windows System Image backup was completed successfully but showed 0 bytes on the external hard drive backup folder.

Follow the below solution steps to resolve 0 bytes backup size happen to Windows backup issue.
Potential Causes
- Bad sectors exist on the external hard drive.
- The folder called WindowsImageBackup is inaccessible.
Pre-check
- Check and confirm that you have the latest Windows update installed.
- If this issue happen after a recent Windows update, you can try to perform System Restore or uninstall the related Windows update.
- Try to map Network Drive to local disk.
- Make sure the backup drive is well-connected and formatted to NTFS file system.
- If the error File History has found files that are encrypted with Encrypting File System prompt, make sure there is no encrypted files (efs) in the backup queue because File History do not backup it.
Solution 1: Execute CHKDSK (check disk) command
Execute an Automatic CHKDSK check disk scan command with the ‘Scan for and attempt recovery of bad sectors’ option to verifies the file system integrity of a volume and fixes logical file system errors..
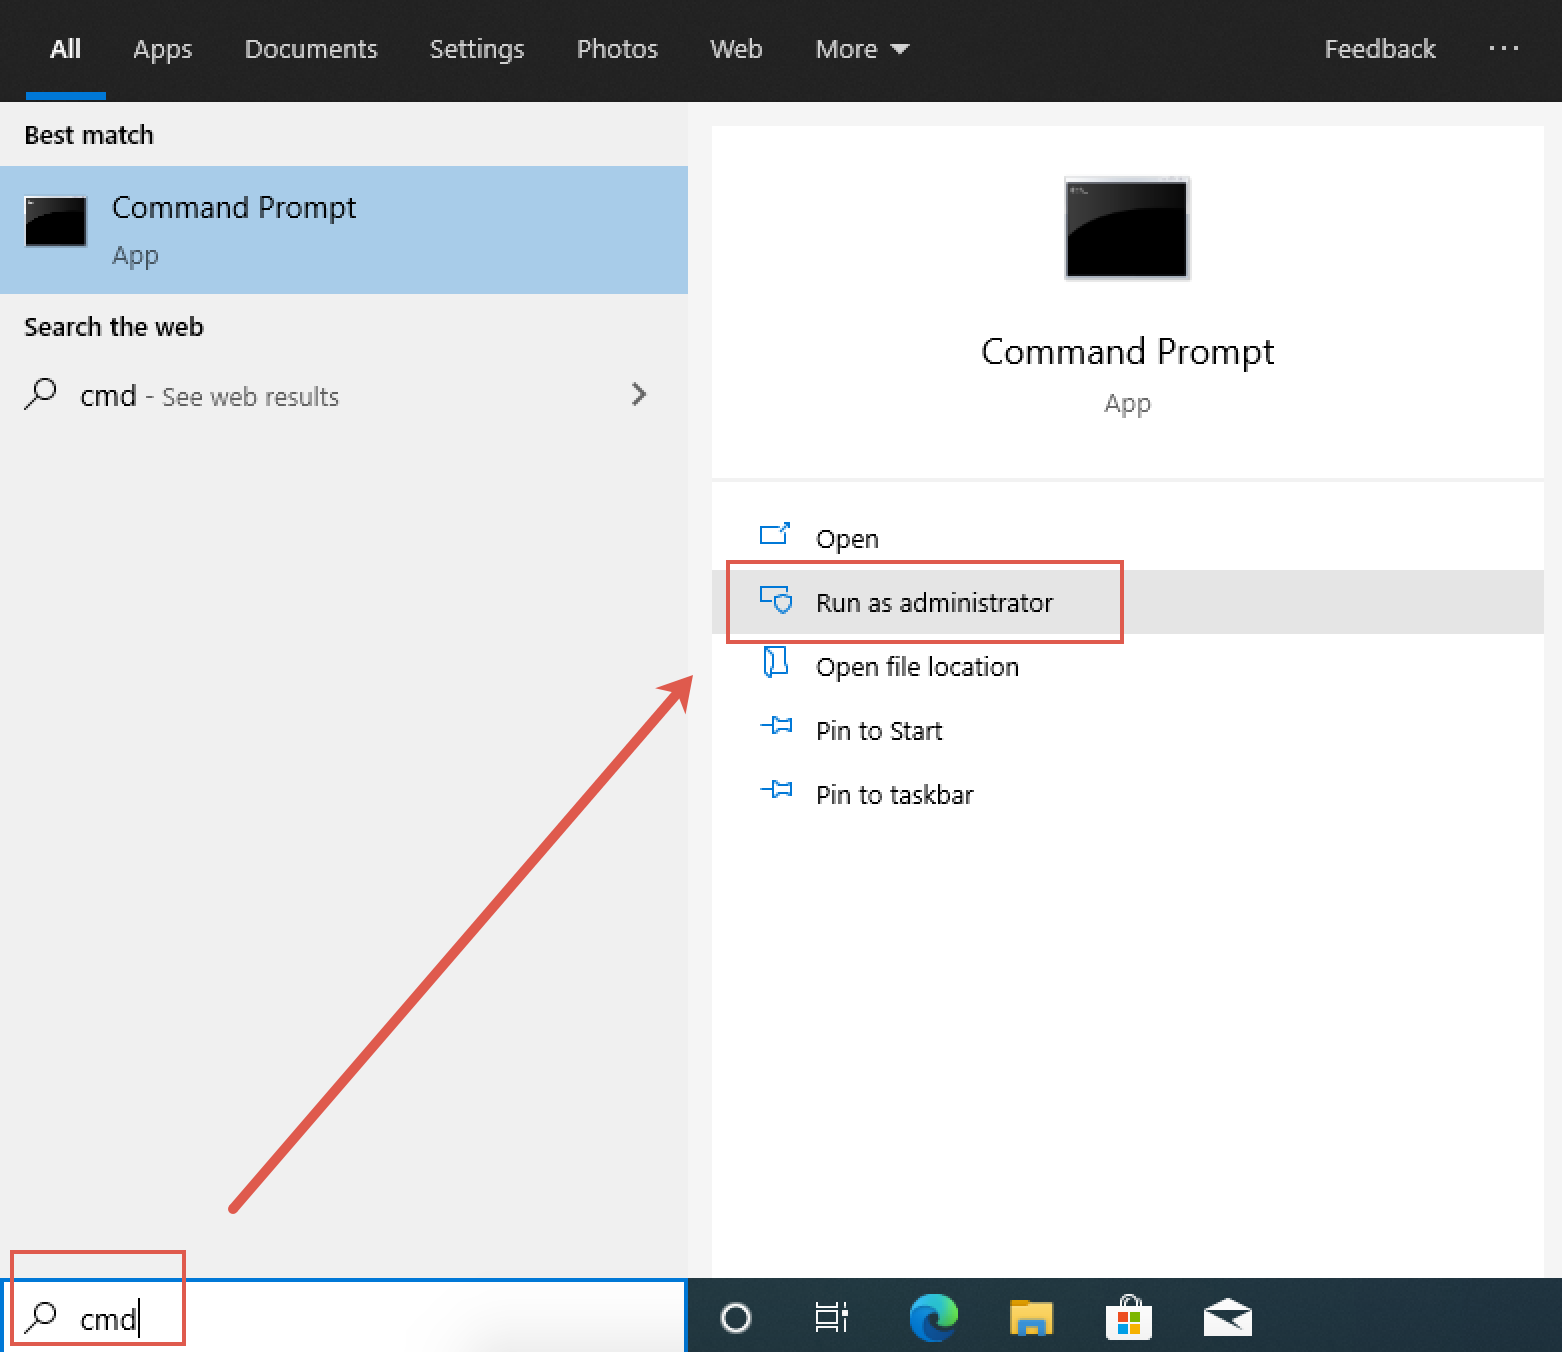
Step 1: Press Windows key once
Step 2: Type cmd in the search box.
Step 3: Choose Run as administrator to open an elevated command prompt. If the UAC prompts then click on Yes to proceed further.
Step 4: Type CHKDSK X: /R and press Enter.
Note: X indicated the backup drive letter.
Step 5: Restart the computer.
Solution 2: Format the external storage drive to NTFS
Step 1: Make sure the external hard drive for backup is well-connected to the PC.
Step 2: Press the Windows + X key and select Windows PowerShell (Admin) to open the Windows PowerShell with administrator privilege.
Step 3: Enter the following command to identify the disk that you want to format: Get-Disk

Step 4: Find the name of the external hard drive in the Friendly Name column.
Step 5: Enter the following command to format the external hard drive: Clear-Disk -Number 2 -RemoveData
Note: Replace 2 with the drive number that is assigned to the backup hard drive.
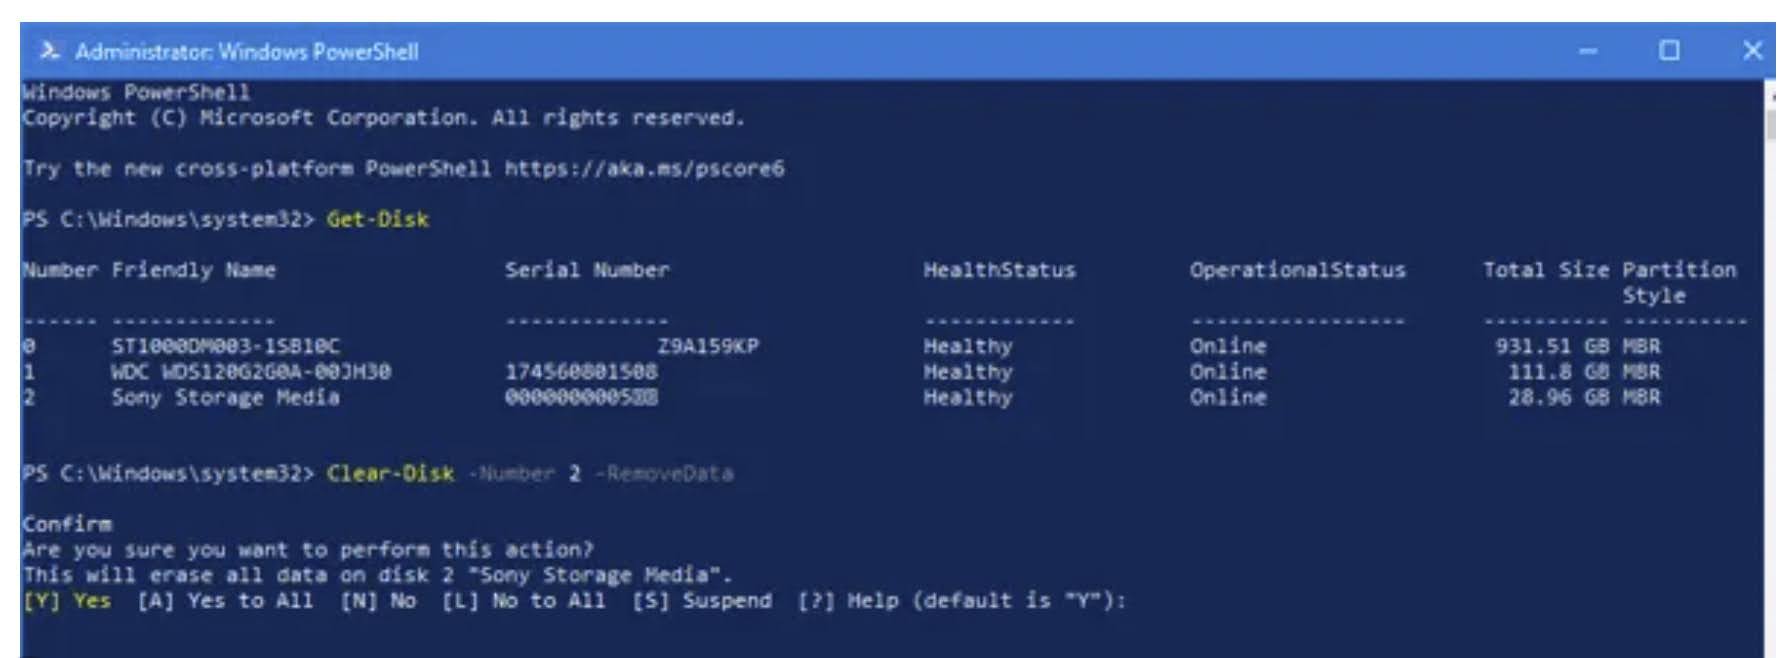
Step 6: Type Y and press the Enter key to confirm.
Step 7: Enter the following command to create new partition: New-Partition -DiskNumber 2 -UseMaximumSize -IsActive -DriveLetter Z
Note: Replace 2 with the drive number that is assigned to the backup hard drive, and the Z represents the drive letter that will be assigned to the external hard drive or USB drive.
Step 8: Enter the following command to format it to NTFS file system: Format-Volume -DriveLetter Z -FileSystem NTFS -NewFileSystemLabel USB
Read more: [Solved] How to Fix The File “is Too Large for the Destination File System” Error When Copy or Move
Solution 3: Remove WindowsImageBackup folder
Step 1: Type cmd in the search field.
Step 2: Right-click the entry for Command Prompt, and select the Run as administrator option.
Step 3: Type the following command and press the Enter key to check the contents of the folder: dir /s /a Q:\WindowsImageBackup
Note: Replace Q with the correct drive letter for the backup external drive.
Step 4: Type the following command and press the Enter key to delete the folder: rd /s /q Q:\WindowsImageBackup