Syncing cloud storage data error can happen with any game in the Origin client due to outdated Windows update and system drivers, DNS, or corrupted installation of the game. Click on Play Anyway may proceed sometime but some users reported give the option to Retry Sync.
The detail error message as below:
ERROR SYNCING CLOUD STORAGE DATA
You latest cloud storage data may not be available.


Try the following solution steps to resolve this error.
Table of Contents
- Solution 1: Common Workarounds
- Solution 2: Switch Origin Client to Offline, then Online
- Solution 3: Execute Origin Client with Run as administrator
- Solution 4: Disable Antivirus and Firewall
- Solution 5: Use Different Network or Through Cable
- Solution 6: Update Windows and System Drivers
- Solution 7: Delete Temp Folder
- Solution 8: Perform Windows clean state
- Solution 9: Clear Origin Cache
- Solution 10: Flush DNS Cache
- Solution 11: Change DNS Server
- Solution 12: Reset Hosts File
- Solution 13: Scan and Repair Game
- Solution 14: Reinstall Problematic Game and Origin Client
- Solution 15: Restore Save Option
- Solution 16: Origin Error Reporter
Solution 1: Common Workarounds
- Restart the Origin client.
- Make sure that you have an active EA account.
- Restart Windows and networking equipment such as router etc.
- Make sure you have a working and stable internet connection. Preferred to use a wired connection as compared to Wi-Fi.
- Check @EAHelp Twitter or Down Detector for any server outage incident.
- Make sure your Origin client installed is updated.
Solution 2: Switch Origin Client to Offline, then Online
Step 1: Launch the Origin client.
Step 2: Go to Origin menu > Go Offline.
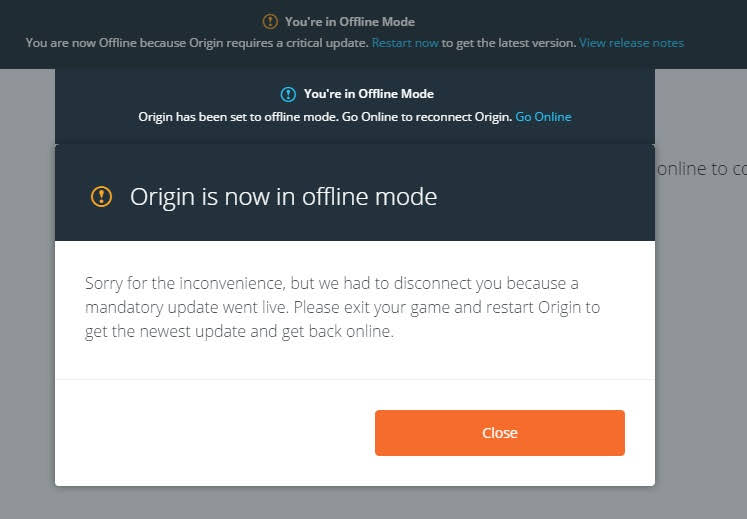
Step 3: Revert to Online status again.
Solution 3: Execute Origin Client with Run as administrator
Step 1: Exit the Origin client and terminate all its related processes through Task Manager.
Step 2: Right-click the Origin client icon on the Desktop.
Step 3: Choose Run as Administrator from the context menu. Click Yes to grant administrative access if UAC (User Account Control) prompt.
Solution 4: Disable Antivirus and Firewall
Step 1: Exit the game and Origin client.
Step 2: Disable antivirus software on your Windows.
Step 3: Turn off the firewall as well.
Step 4: If the same error not showing again, then add an exception for the game and Origin client in the settings of the antivirus and firewall.
Step 5: Not to forget to turn on antivirus and firewall applications.
Solution 5: Use Different Network or Through Cable
Step 1: Quit the game.
Step 2: Switch to another network or using cable instead of WiFi. If no other network is available, you can use a mobile hotspot or VPN to check if the issue is caused by your ISP.
Step 3: Launch the game again.
Solution 6: Update Windows and System Drivers
Step 1: Press Windows key and type Updates.
Step 2: Click on Check for Updates in the search results displayed.
Step 3: Click on the Check for Updates button in the update window.

Step 4: Click on the Download button to download and install if any updates are available.

Step 5: Download the Windows 10 Update Assistant.
Step 6: Execute the downloaded file and follow the on-screen prompts to complete the update process.
Step 7: Additionally, check the manufacturer’s website for updates as well.
Solution 7: Delete Temp Folder
Step 1: Exit the Origin client and terminate all its related processes through Task Manager.
Step 2: Press Windows + R key to open a Run box.
Step 3: Type %temp% and press Enter.
Step 4: Press Ctrl + A to select all and delete all the contents of the temp folder.
Solution 8: Perform Windows clean state
Step 1: Press Windows + R key to open a Run box.
Step 2: Type msconfig and click OK to open the system configuration window.
Step 3: Choose the Services Tab, then check on Hide All Microsoft services and click on Disable all button.

Step 4: Click the Apply button, and then click on the OK button. Choose Restart Later option.
Step 5: Press Windows + R key to open a Run box.
Step 6: Type msconfig and click OK to open the system configuration window.
Step 7: Choose Startup and select Open Task Manager.
Step 8: look at the last field called Startup Impact and disable all the ones with High Impact by right-clicking on it and choose Disable.
Step 9: Restart your PC and it will startup in the clean boot mode.
Step 10: If the same error not showing again, then try to find out the problematic application by adding one application or driver at a time to clean boot selection and check.
Solution 9: Clear Origin Cache
Step 1: Exit the Origin client and terminate all its related processes through Task Manager.
Step 2: Press Windows + R key to open a Run box.
Step 3: Type %ProgramData% and press Enter.
Step 4: Find and open the Origin folder.
Step 5: Delete all the contents of the Origin folder (EXCEPT LocalContent folder).
Step 6: Press Windows + R key to open a Run box.
Step 7: Type %AppData% and press Enter.
Step 8: Find and delete the Origin folder.
Step 9: Click on the word AppData in the address bar of the Roaming folder.
Step 10: Find and open the Local folder.
Step 11: Find and delete the Origin folder.
Step 12: Restart your PC.
Solution 10: Flush DNS Cache
Step 1: Exit the Origin client and terminate all its related processes through Task Manager.
Step 2: Press Windows key and type Command Prompt.
Step 3: Right-click on the Command Prompt and choose Run as administrator option in the context menu.
Step 4: Type the following commands in the command prompt and press the Enter button after each command:
ipconfig /flushdns
ipconfig /registerdns
ipconfig /release
ipconfig /renew
netsh winsock reset

Step 5: Restart your PC.
Solution 11: Change DNS Server
Step 1: Exit the Origin client and terminate all its related processes through Task Manager.
Step 2: Right-click on the Network icon in the System Tray.
Step 3: Click on the Open Network and Internet settings.
Step 4: Under the Change your network settings section, click on Change adapter options to open the Network Connections folder.
Step 5: Find the primary network connection. Right-click on it, and then choose Properties from the context menu.
Step 6: Locate the Internet Protocol Version 4 (TCP/IPv4) and then click the Properties button.
Step 7: In the General tab, choose the Use the following DNS server addresses and enter the primary and secondary DNS servers of your choice then click the OK button to save the changes.
Google’s public DNS server
- Primary DNS server: 8.8.8.8
- Secondary DNS server: 8.8.4.4
OpenDNS’s public DNS
- Primary DNS server: 208.67.222.222
- Secondary DNS server: 208.67.222.220
Norton connect Safe’s public DNS
- Primary DNS server: 199.85.126.10
- Secondary DNS server: 199.85.127.10
Step 8: Locate the Internet Protocol Version 6 (TCP/IPv6) and then click the Properties button.
Step 9: Enter the following DNS server addresses then click the OK button to save the changes:
- Preferred DNS server: 2001:4860:4860::8888
- Alternate DNS server: 2001:4860:4860::8844
Step 10: Click the Close button to apply the new DNS settings.
Solution 12: Reset Hosts File
Step 1: Press Windows key and type notepad.
Step 2: Right-click on the Notepad and choose Run as administrator option in the context menu. Click Yes to grant administrative access if UAC (User Account Control) prompt.
Step 3: Click on File > Open.
Step 4: Copy and paste the following path into the address bar %WinDir%\System32\Drivers\Etc then press the Enter button.
Step 5: Change the File type from to All Files (*.*).
Step 6: Select the file named hosts and click on the Open button.
Step 7: Press Ctrl + A to select all and delete all the contents of the Hosts file.
Step 8: Copy and paste the following text (Microsoft’s default Hosts file configuration) into the hosts file:
# Copyright (c) 1993-2009 Microsoft Corp.

#

# This is a sample HOSTS file used by Microsoft TCP/IP for Windows.

#

# This file contains the mappings of IP addresses to hostnames. Each

# entry should be kept on an individual line. The IP address should

# be placed in the first column followed by the corresponding host name.

# The IP address and the host name should be separated by at least one

# space.

#

# Additionally, comments (such as these) may be inserted on individual

# lines or following the machine name denoted by a '#' symbol.

#

# For example:

#

# 102.54.94.97 rhino.acme.com # source server

# 38.25.63.10 x.acme.com # x client host

# localhost name resolution is handled within DNS itself.

# 127.0.0.1 localhost

# ::1 localhost
Step 9: Save the changes and exit Notepad.
Solution 13: Scan and Repair Game
Step 1: Launch the Origin client.
Step 2: Click on My Game Library.
Step 3: Right-click on the problematic game and choose on Repair Game from the context menu.

Solution 14: Reinstall Problematic Game and Origin Client
Step 1: Launch the Origin client.
Step 2: Click on My Game Library.
Step 3: Right-click the game icon you want to remove.
Step 4: Choose Uninstall from the context menu. Follow the prompts on the screen to complete the uninstallation process.

Step 5: Press the Windows key and type Control Panel.
Step 6: Click on the Control Panel in the search results shown.
Step 7: Click on Uninstall a Program under Programs.
Step 8: Locate the Origin client in the list of installed applications then right-click on it.
Step 9: Click on the Uninstall option in the context menu.
Step 10: Click on Uninstall. Follow the prompts on the screen to complete the uninstallation process.
Step 11: Restart your PC.
Step 12: Download the latest version of the Origin client from the official site.
Step 13: Execute the downloaded file with admin privileges and complete the installation of the Origin client.
Step 14: Reinstall the problematic game.
Solution 15: Restore Save Option
Step 1: Exit the Origin client and terminate all its related processes through Task Manager.
Step 2: Right-click the Origin client icon on the Desktop.
Step 3: Choose Run as Administrator from the context menu. Click Yes to grant administrative access if UAC (User Account Control) prompt.
Step 4: Click on My Game Library.
Step 5: Right-click the problematic game icon.
Step 6: Choose the Game Properties from the context menu.
Step 7: Go to the Cloud Saves tab then click on the Restore Save button.
Step 8: When a prompt with the message “You are now reverting to a locally stored save file…” shown, click the OK button to proceed with local save.

Solution 16: Origin Error Reporter
If you are still having issues with the game after applied all the above solution steps, then you should file an error report with Origin by going to Help > Origin Error Reporter to verify your profile whether corrupted. Enter the correct and detailed description of the issue will helpful.
