What’s the goal? To enable Bing Webmaster Tools for website.
Why does it matter? Bing Webmaster Tools will allow you to monitor, maintain, and troubleshoot site’s presence in Bing search engine. It will help you understand and improve how Bing sees site.
What’s the result? Bing Webmaster Tools enabled and ownership of website is verified.
When do you do this? As soon as possible once you launch website. But you will need to do it every time you create a subdomain, or add a new protocol (eg. migrate from http:// to https://).
Any special requirements? Ideally, you need to have Google Search Console or Yoast SEO WordPress Plugin enabled for site. But if you haven’t we’ll also cover the manual verification methods in this guide.
️Who should do it? The owner of the website or the person in charge of analytics.
Where this is done? In the Bing Webmaster Tools website.
How long will this take? about 25 minutes.
Let’s get started, in 25-min you’ll start to get SEO recommendations from Bing Webmaster Tools and receive future alerts from them.
Environment setup
Table of Contents
- We recommend that you use Google Chrome browser to navigate the web,
- Administrator access to website,
- A Google Account (Gmail, G-Suite).
Enabling Bing Webmaster Tools with Google Search Console
Step 1: Go to the Bing Webmaster Tools website.
Step 2: Click on Sign In.

Step 3: Choose to sign in with Google Account.

Step 4: If you use more than one Google account choose the desired one (associated with Google Search Console) from the list.

Step 5: Choose Import underneath Google Search Console verification method.

Step 6: Press Continue.

Step 7: Allow bing.com to access Google Account by clicking on Allow.

Step 8: Choose which site’s data you want to import.

Step 9: Press on Import.

Step 10: Now website’s data is connected to Bing Webmaster Tools.

And that’s it. Bing Webmaster Tools are properly enabled for website. Importing data from Google Search Console is the fastest way to do it.
Enabling Bing Webmaster Tools with manual verification
Step 1: Go to the Bing Webmaster Tools website.
Step 2: Click on Sign In.
Step 3: Choose to sign in with Google Account.
Step 4: If you use more than one Google account choose the desired one from the list.
Step 5: Choose to Add your site manually. Enter site URL.
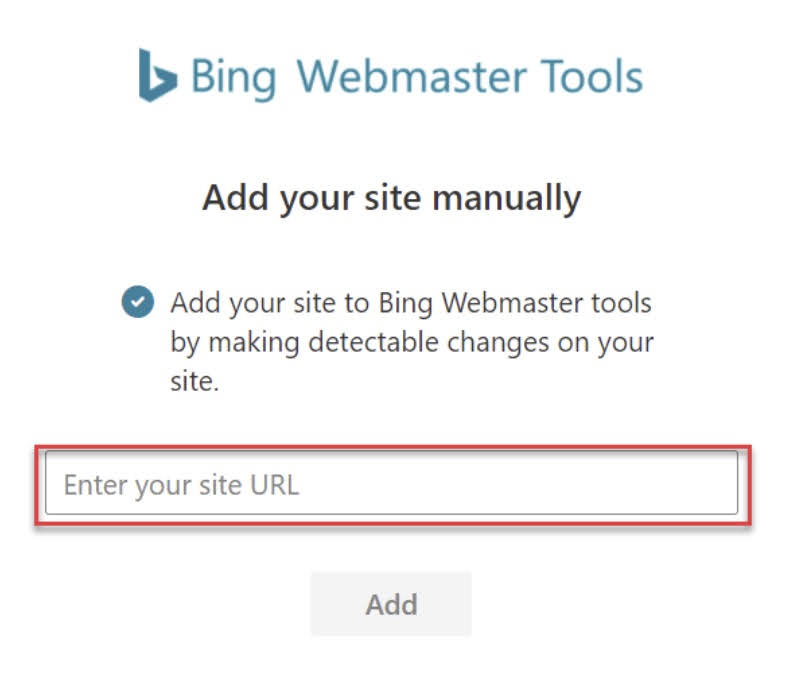
Step 6: Click on Add.

Step 7: Add & verify site window will appear.

Verifying site with XML file
Verification Requirements: You need to have FTP access to server. This is an advanced verification method for system administrator/webmaster. You can easily verify site using other methods.
Step 8: Download provided XML file.

Step 9: Upload the downloaded file to the root folder of site and click on Verify.

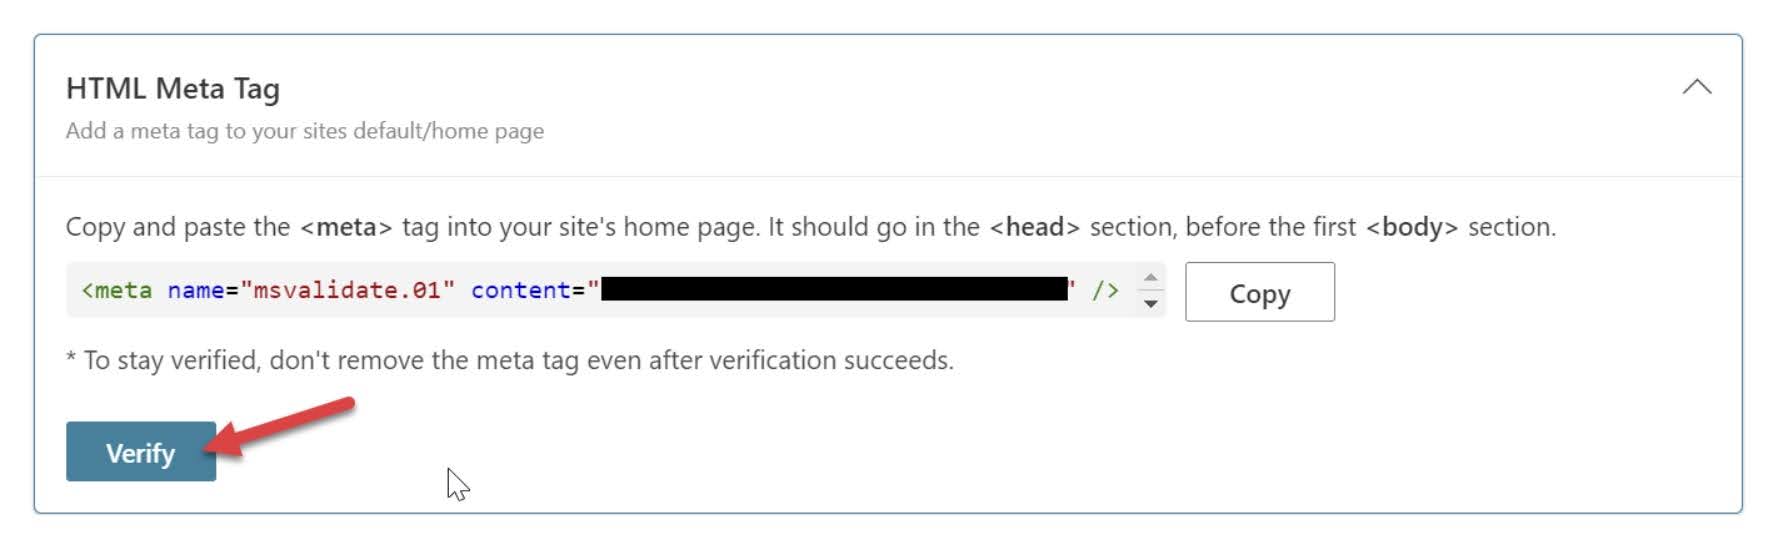
Verifying site with HTML Meta Tag
Step 10: Copy provided <meta> tag.

Step 11: Open a new tab of browser.
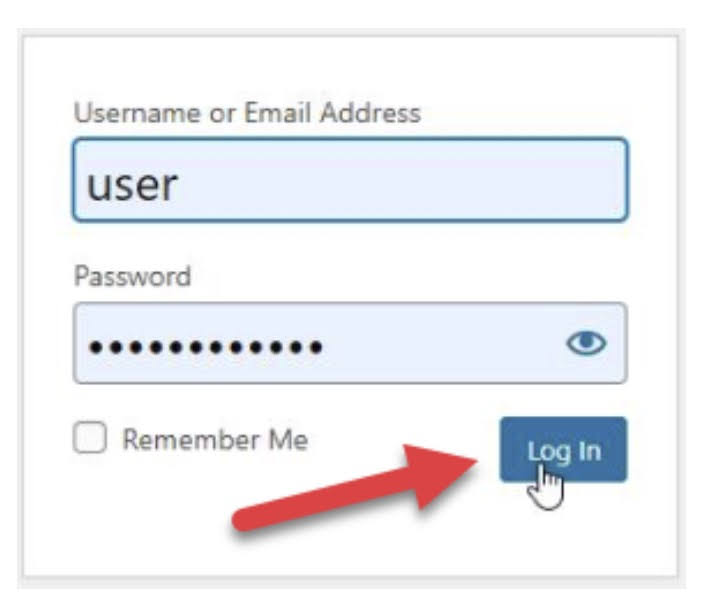
Step 12: Log in to WordPress Admin Panel (yourdomainname.com/wp-admin).
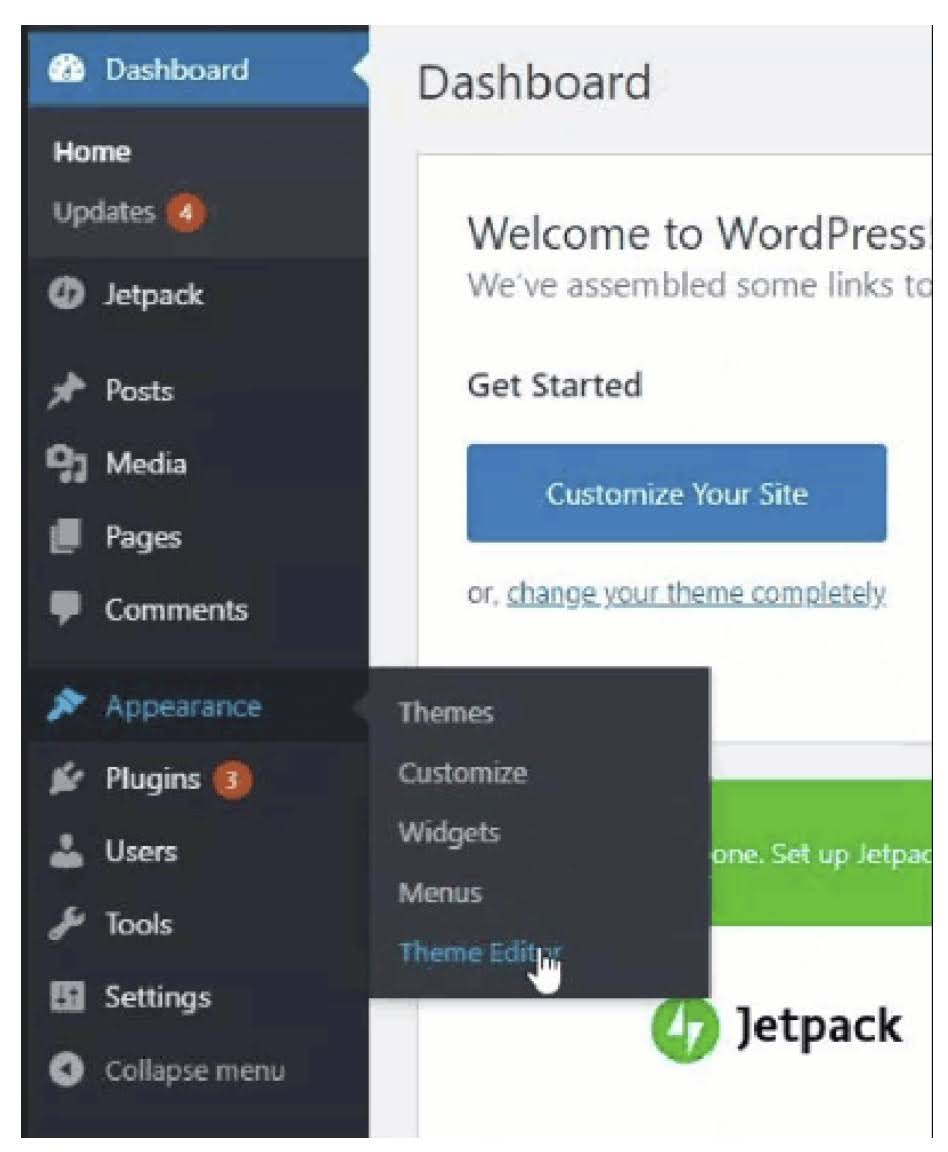
Step 13: On the left-side menu choose Appearance.
Step 14: Click on Theme Editor.
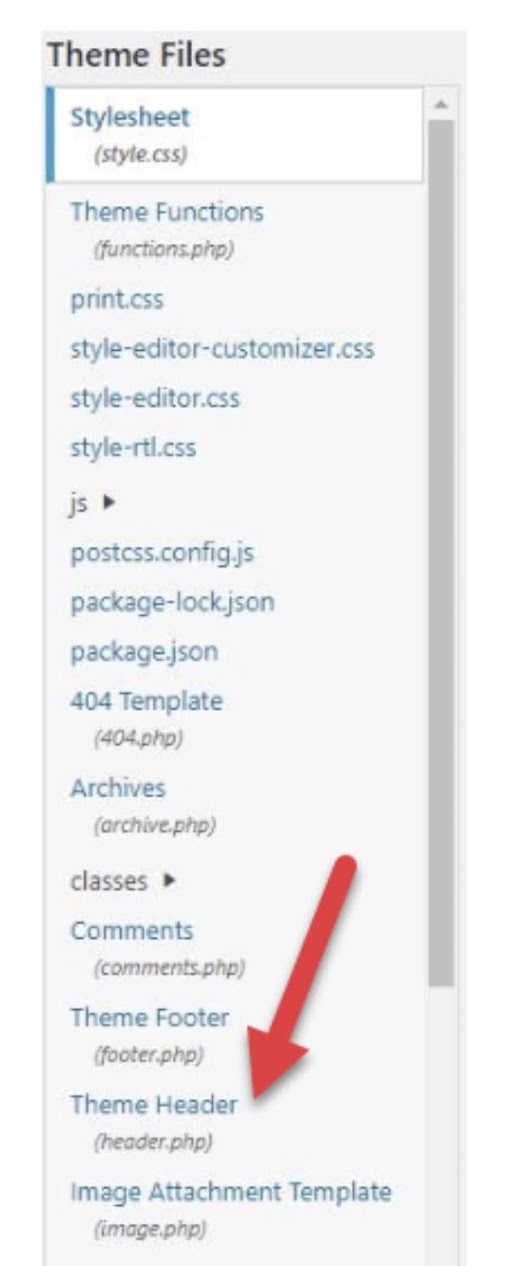
Step 15: From the list on the right side choose Theme Header.
Step 16: Paste (Ctrl + V) meta tag just below the <head> line.

Step 17: Click on Update File.

Step 18: Go back to Bing Webmaster Tools and press on Verify.

Enabling Bing Webmaster Tools with Yoast WordPress Plugin
Verification Requirements: You need to Yoast SEO Plugin installed on website.
Step 1: Copy only verification code from provided HTML Meta Tag (blacked out part).

Step 2: Open a new tab of browser.
Step 3: Go to WordPress Admin panel (eg: “yourwebdomain.com/wp-admin”).
Step 4: Log in to WordPress Admin Panel.
Step 5: On the left-side menu click on SEO.

Step 6: Choose General.

Step 7: Choose the Webmaster Tools tab.

Step 8: All you have to do is paste the Bing verification code into the highlighted box and click on Save changes.

Step 9: Go back to Bing Webmaster Tools and click on Verify.
Enabling Bing Webmaster Tools with CNAME Records (DNS)
Verification Requirements: You need to have DNS set for website. In this guide we will add CNAME record using Cloudflare DNS.
Step 1: Copy highlighted part, it will be the name of the record we will create.

Step 2: Open a new tab of browser.
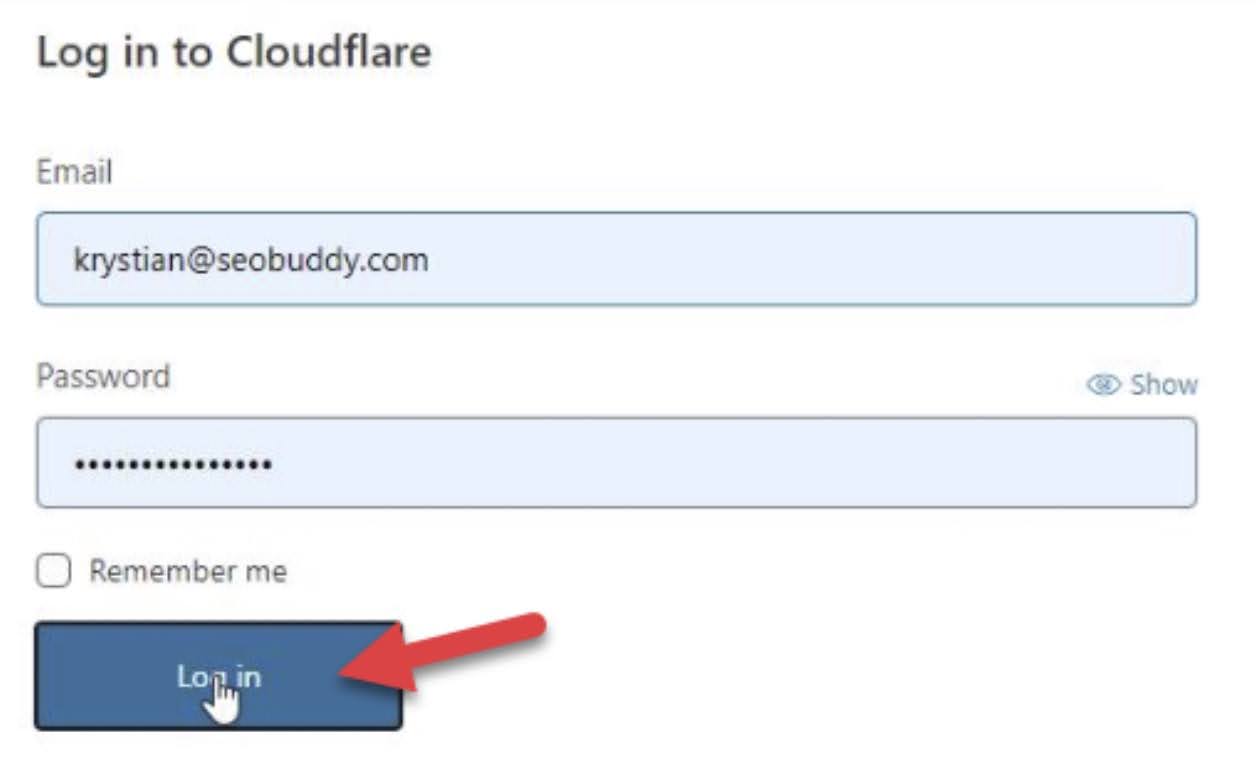
Step 3: Go to cloudflare.com.
Step 4: Click on Log in.

Step 5: Enter credentials and press Log in.
Step 6: Select the domain name you want to verify.

Step 7: Click on DNS in the upper section of the screen.

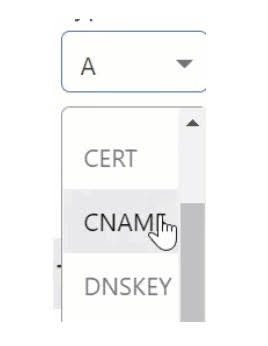
Step 8: Click on Add record.

Step 9: Choose Type to CNAME.
Step 10: Paste a copied name in the Name box and enter verify.bing.com in the Target box.

Step 11: Click on Save.

Step 12: Go back to Bing Webmaster Tools and click on Verify.

Step 13: After successful verification Bing Webmaster Tools will be ready to go.

Step 14: Note that sometimes you have to wait up to 48 hours for changes in DNS record to apply so don’t be alarmed if you can’t verify immediately.
Bing Webmaster Tools is now enabled for website and site is properly verified. Choose verification method that suits you the most. Data should appear in the Bing Webmaster Tools after a couple of days.