Table of Contents
Question
There are a lot of free Kodi builds, plugins, and add-ons available to stream the content over the Internet then plays the media on your local device. The Kodi builds come with complete makeover to Kodi and preinstalled/preconfigured addons act as the bridge between Kodi on your device and the vast world of free content on the Internet.
A lot of users asking how to install and use more than one build on Kodi. YES, it is possible to install and use multiple builds by installing a Kodi fork on the supported device. In this article, I will share how to install multiple Kodi builds on Kodi supported devices including Amazon Firestick and Fire TV Cube after trying different techniques.

Solution
Install Downloader app on Firestick
Step 1: Launch your Fire TV / Stick Home screen.
Step 2: Click on the Settings icon.

Step 3: Scroll down to locate the My Fire TV button and click on it.

Step 4: Click on the Developer Options button.

Step 5: Click on the Install unknown apps button.

Note: Some versions of FireStick may have the option called Apps from Unknown Sources, select this option to turn it ON.
Step 6: Navigate to the Downloader app, select it to turn it ON.

Step 7: Go to the Home screen of Fire TV / Stick.
Step 8: Navigate to the Find > Search on the menu bar in the middle of the home screen.

Step 11: Click on the Downloader app which appear under the APPS & GAMES section.
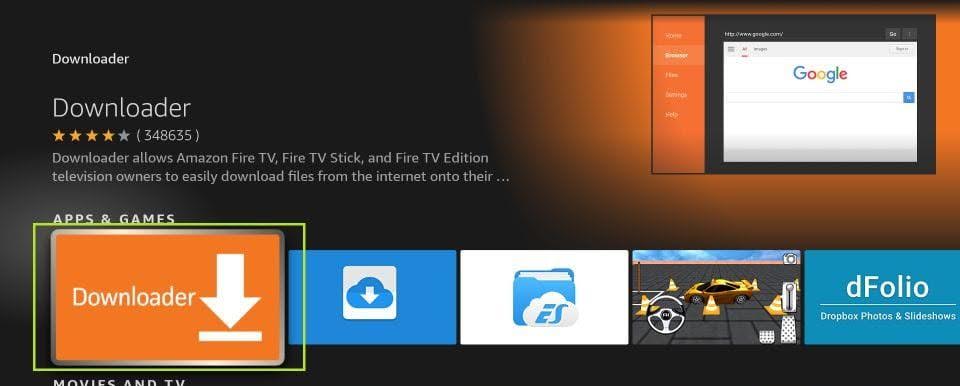
Step 12: Click the Get or Download button to download and install the Downloader app.
Install Kodi Fork on Firestick
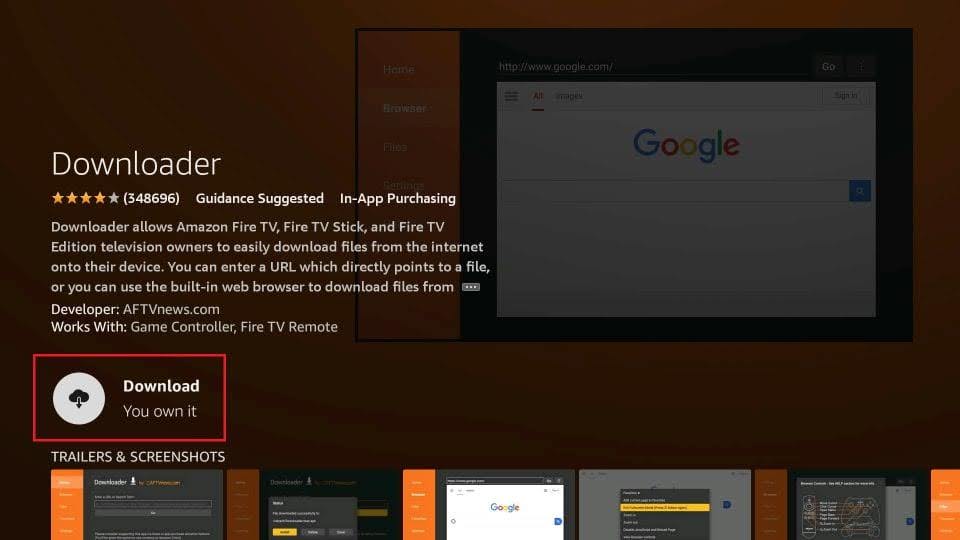
Step 13: Launch the Downloader app from the YOUR APPS & CHANNELS section.
Step 14: If you open the Downloader app for the first time, you may see the Update Notes for Downloader pop-up. Click the OK button to proceed.
Step 15: Click on the Settings option on the left sidebar.
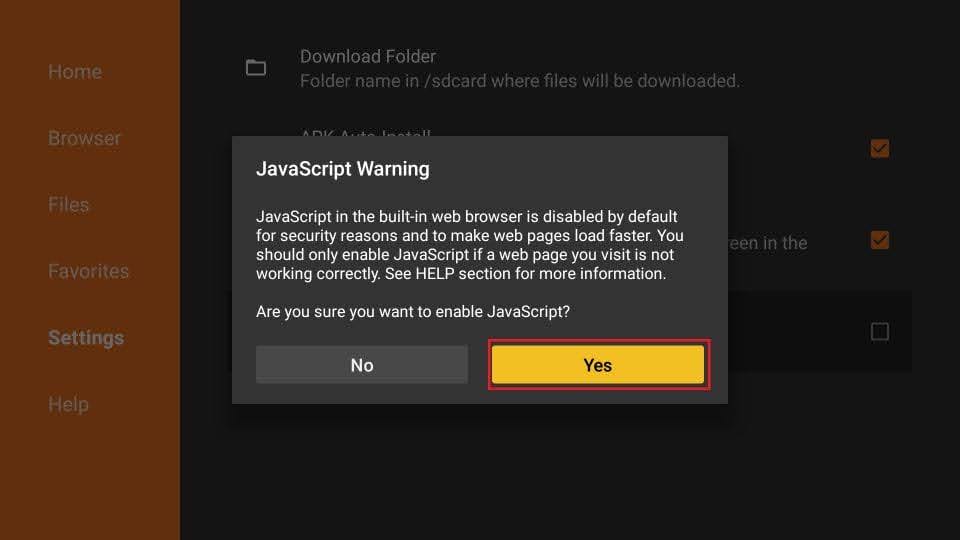
Step 16: Check the box next to Enable JavaScript option otherwise some links will not work correctly.

Step 17: Click the Yes button when the JavaScript Warning message displayed.
Step 18: Click the Home option on top the left sidebar.
Step 19: Click the Browser option on the right side of the Downloader Home screen.
Step 20: Navigate to the address bar on the top of the browser and click inside it to open the onscreen keypad.

Step 21: Click the Clear button located at the bottom right to empty the address bar field.
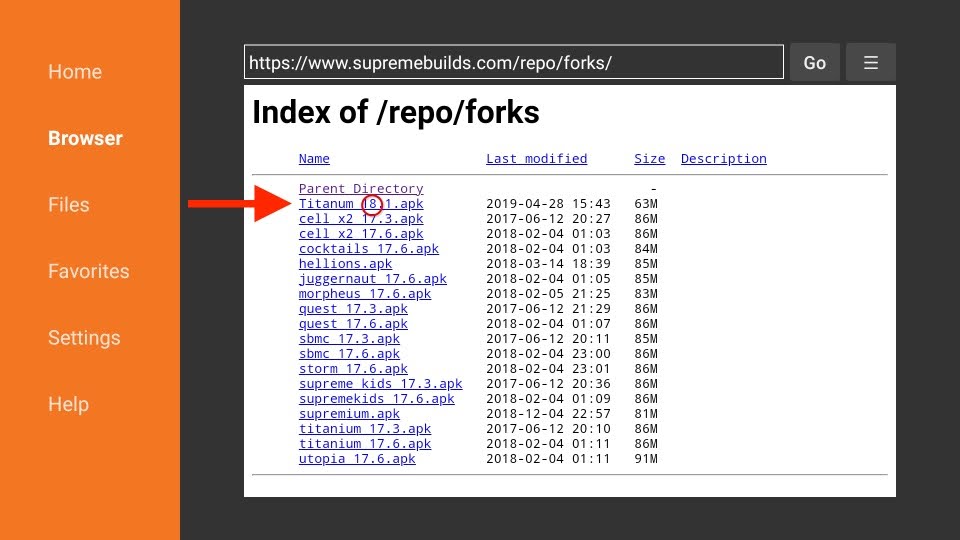
Step 22: Type the following URL in the address bar: repo.supremebuilds.com
Step 23: Click on the Go button.

Step 24: Allow the browser window to redirect.
Step 25: Click the Forks hyperlink on the page.

Step 26: Click on one the Kodi fork you like to install from the list of the Kodi forks available in this repository. for this demonstration, we will proceed to install the Titanium 18.1 fork which gives you a clean Kodi slate with Supreme Builds Wizard addon preinstalled. Click on the Titanium 18.1 apk hyperlink to download the Titanium 18.1 fork APK file onto the FireStick storage.
Step 27: Downloader app will start to install after the APK has finish downloading.

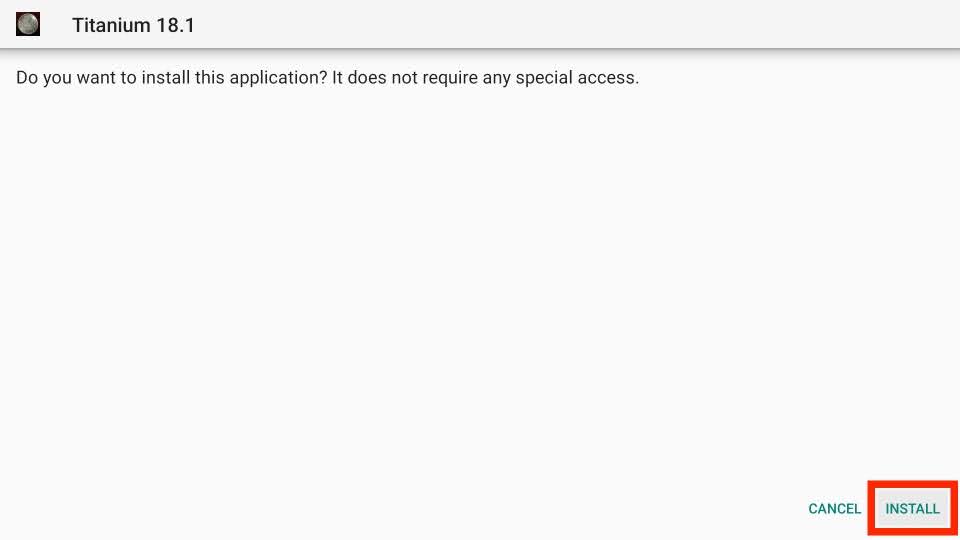
Step 28: Click on the INSTALL option located at the bottom right corner to give your consent to install the Titanium 18.1 Fork.
Step 29: The App installed notification display after the installation completed. Click on the DONE button.

Step 30: Click the Delete button in the Status box to delete the Titanium 18.1 APK file.
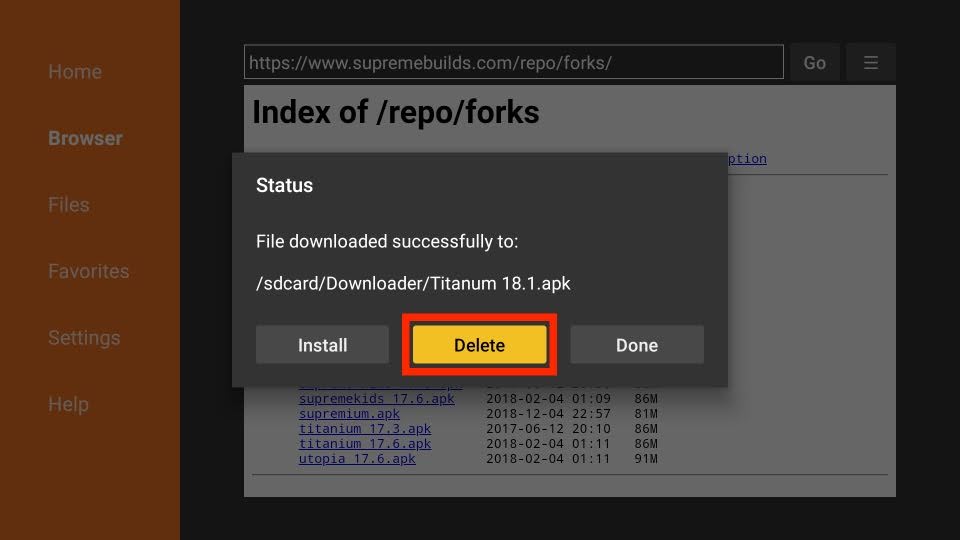
Step 31: Click the Delete button again to confirm the action.

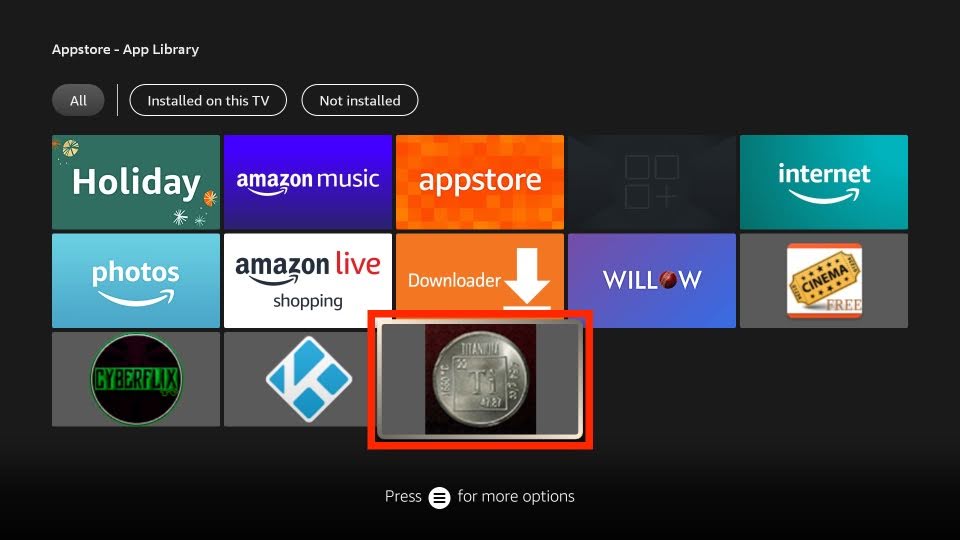
Step 32: Go back to the FireStick Home screen.
Step 33: Click the Apps on the menu.
Step 34: Scroll down to the bottom to find the Kodi and Titanium 18.1 fork icon which coexist on the same system.
Install a Build on Kodi Fork
Step 35: Start the Titanium 18.1 on FireStick.
Step 36: If you start the fork for the first time, you may see versioning pop-ups. Click the Dismiss button.

Step 37: Click on the Continue button on the next pop-up which related to enable settings.

Step 38: Click on the Ignore button on the next pop-up which related to Build Menu selection.

Step 39: Click the Add-ons on the left side, followed by Program Add-ons on the next screen.
Step 40: Click on the Supreme Builds Wizard icon.

Step 41: Click on the (Supreme Builds) Builds option.

Step 42: Choose the build you wish to install and the server from where you like to get it.
