In this article, I will show you the steps for how to download and install the Android SDK Platform-Tools on Windows 11. Android SDK Platform-Tools is a component for the Android SDK that includes tools that interface with the Android platform, primarily adb and fastboot.
You could use the fastboot to boot the device to Stock Recovery and format the device or flash the firmware via ADB Sideload. You could use it to execute ADB Shell commands and remove bloatware or preinstalled apps from the device. Android SDK Platform-Tools is the gateway to entering the custom development market as well.
Follow the below step-by-step guide to download and install the Android SDK Platform-Tools on Windows 11.
Download the Android SDK Platform-Tools
Table of Contents
Step 1: Visit the SDK Platform Tools release notes.
Step 2: Scroll down to the Download section and click on the Download SDK Platform-Tools for Windows download link.

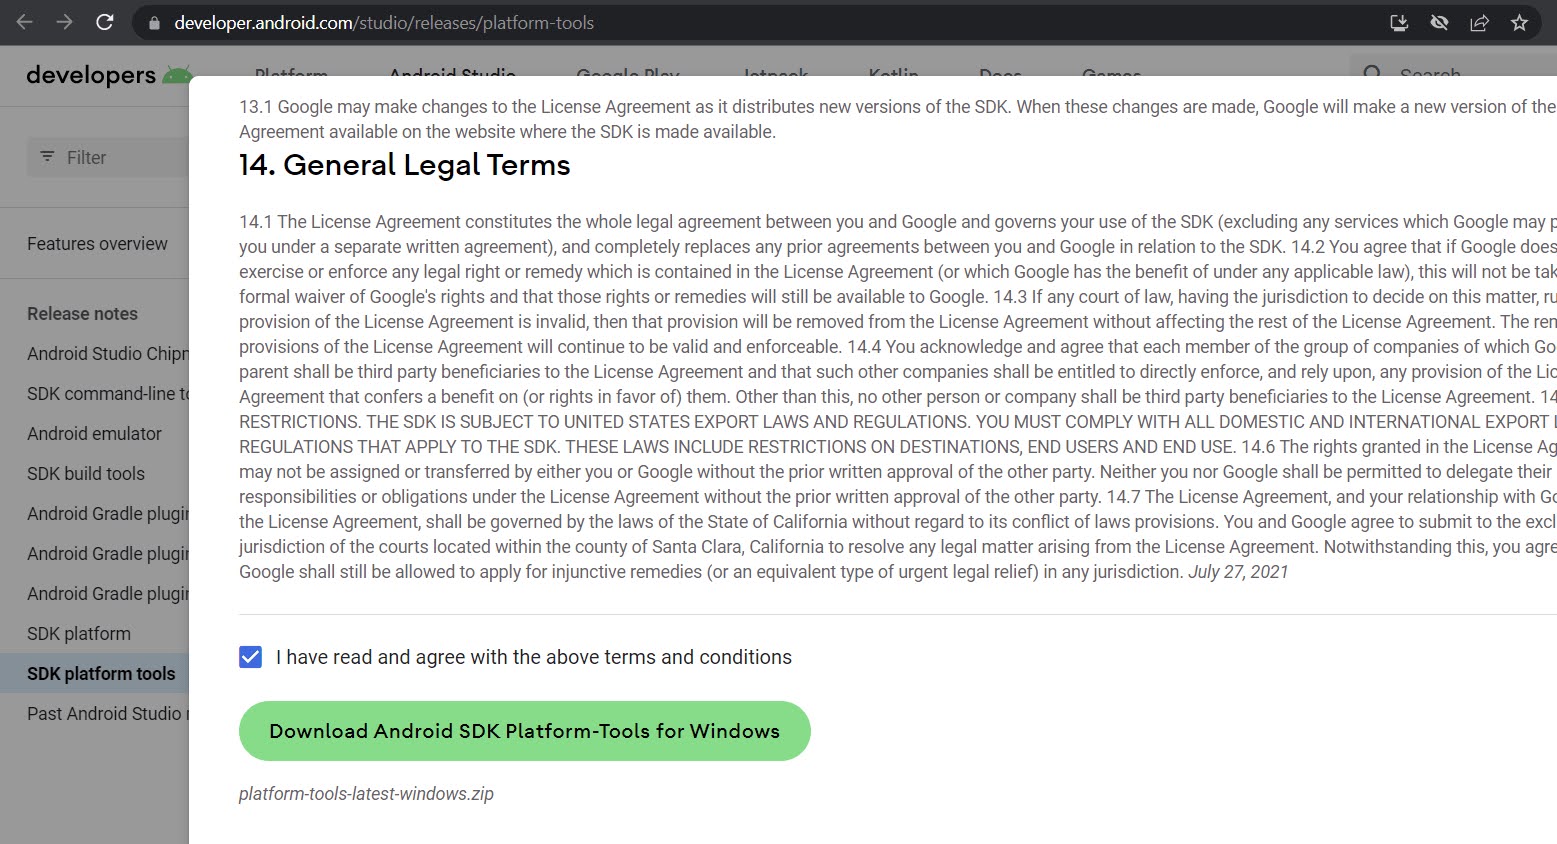
Step 3: The Terms and Conditions for Download Android SDK Platform-Tools will show. Read the term and conditions until the end of the page.
Step 4: Select the I have read and agree with the above terms and conditions checkbox.
Step 5: Click on the Download Android SDK Platform-Tools for Windows button to proceed to download the latest version of Android SDK Platform-Tools for Windows.
Alternatively, you can download the official Android SDK Platform-Tools (ADB and Fastboot binary) provided by Google using the below direct download links:
- Download SDK Platform-Tools for Windows
- Download SDK Platform-Tools for Mac
- Download SDK Platform-Tools for Linux
Note: Above download links are automatically updated from Google’s servers.
Step 6: Extract the downloaded file and move the platform-tools folder to any convenient location on your PC, which will be used throughout this guide.

Enable OEM Unlocking and USB Debugging option on the device
Enable USB Debugging on the devices so that it is recognizable by Windows 11 in ADB mode which further allows you to boot the device to Fastboot Mode.
Step 1: Go to Settings > About Phone > Tap on Build Number for 7 times.
Step 2: Enter the PIN to unlock Developer options, if any.
Step 3: Go back to Settings > System > Advanced > Developer options.

Step 5: Enter the PIN to unlock Developer options, if any.
Step 6: A warning message Allow OEM unlocking? will prompt you to confirm whether you like to proceed. Tap on the Enable option.

Step 7: Toggle on to enable the USB debugging option.
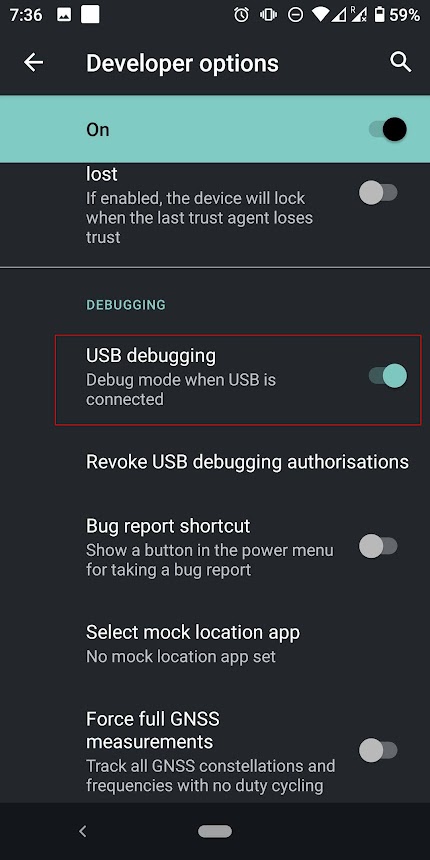
Step 8: A message Allow USB debugging? will prompt you to confirm whether you like to proceed. Tap on the OK option.

Add ADB platform-tools path to the system’s Environmental Variables
Perform the following steps to inform Windows 11 about the ADB path by adding the ADB path to the system’s Environmental Variables.
Step 1: Note down the location where you have extracted the Android SDK Platform-Tools. We suggest moving the platform-tools folder to the root of the D drive.
Step 2: Press the Windows + E key to open the Windows File Explorer.
Step 3: Go to the platform-tools folder and copy its location from the address bar.
Step 4: Go to the Start menu.
Step 5: Type View Advanced System Settings in the search bar.
Step 6: Click to open the View Advanced System Settings.

Step 7: Make sure that you are at the Advanced tab of the System Properties.
Step 8: Click on the Environmental Variables button located at the bottom right corner.

Step 9: Select the Path variable under the System variables section.
Step 10: Click on the Edit button.

Step 11: Click on the New button.

Step 12: Paste the platform-tools folder location in the space provided.
Step 13: Click on the OK button to save this path.

Step 14: Click on the OK button to close Environmental Variable.
Step 15: Click on the OK button to close System Properties.
Step 16: Restart the Windows.
Install fastboot device drivers
Windows 11 wouldn’t be able to identify the connected device in Fastboot Mode unless the necessary Fastboot Drivers (Android Bootloader Interface Drivers) installed. Refer to the below steps for how to install fastboot device drivers in Windows 11.
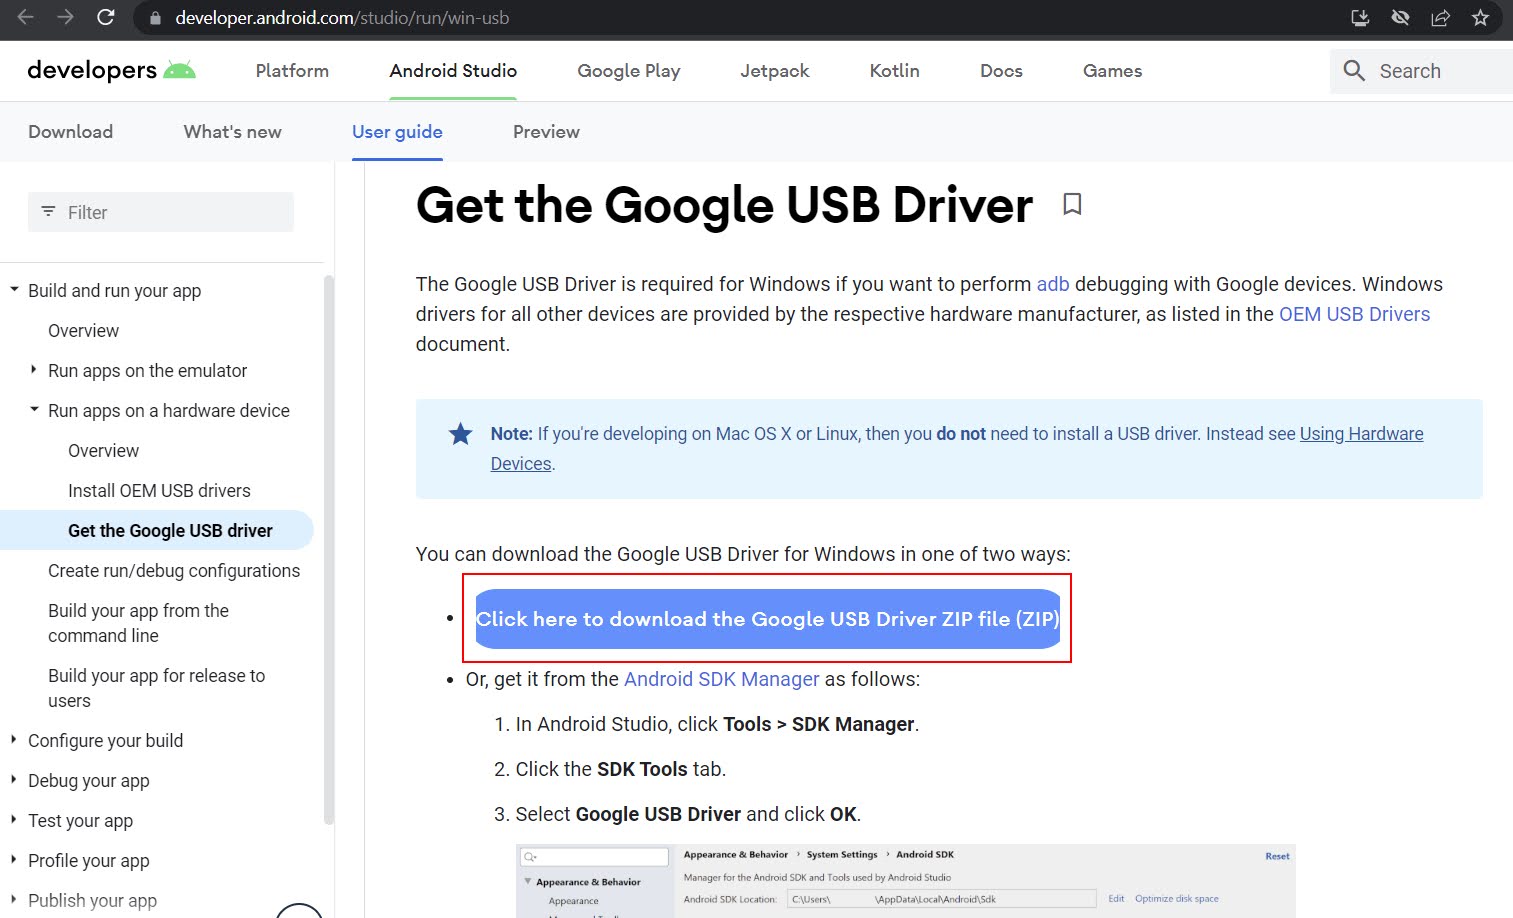
Step 1: Open the browser, navigate to the Android Studio Platform > Get the Google USB Driver page,
Step 2: Click to download the Google USB Driver zip file.
Step 3: The Terms and Conditions for Download the Google USB driver will show. Read the term and conditions until the end of the page.
Step 4: Select the I have read and agree with the above terms and conditions checkbox.
Step 5: Click on the Download the Google USB driver button to proceed to download the latest version of the Google USB driver for Windows.

Step 6: Extract the downloaded Google USB driver file. This shall give you a couple of files, including the android_winusb.inf, which is what we will be using now.

Step 7: Connect your Android device to the PC using a USB cable.
Step 8: Press the Windows + X shortcut keys and select Device Manager from the context menu.
Step 9: Expand the Portable Devices section and your device will be listed there.
Step 10: Right-click on your device and select the Update driver option from the context menu.

Step 11: Choose the Browse my computer for drivers option.

Step 12: Click on the Let me pick from a list of available drivers on my computer option.

Step 13: Click on the Have Disk button.

Step 14: In the prompt that pops up, choose the Browse button.
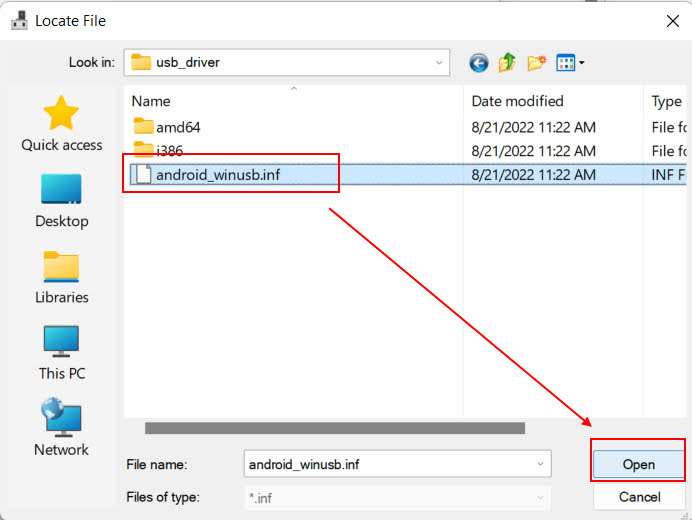
Step 15: Navigate to the folder with extracted content of the Google USB driver.
Step 16: Select the android_winusb.inf file then clicks on the Open button.
Step 17: Click on the OK button.
Step 18: Select the Android Bootloader Interface and click on the Next button.

Step 19: Click on the Install button.

Step 20: The fastboot device drivers are now successfully installed in Windows 11. Click on the Close button.

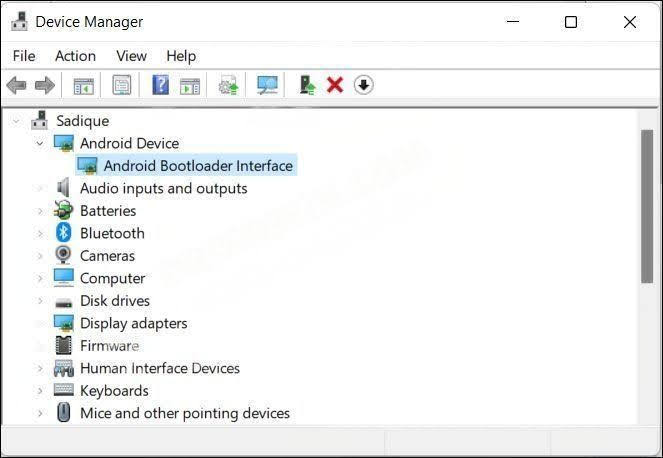
Step 21: The Android Bootloader Interface option shown under the Android Device option.
Verify ADB and Fastboot connection
After successfully adding ADB to System Variables Path and installing Fastboot device drivers on Windows 11, follow the below steps to test the ADB and Fastboot Connection and verify the results.
Step 1: Connect your Android device to the PC using a USB cable.
Step 2: Navigate to the platform-tools folder.
Step 3: Click on the folder’s address bar, type in cmd, and press the Enter key to launch the Command Prompt window with the platform-tools folder directory.

Step 4: Type the following command in the command prompt window to verify the ADB connection:
adb devicesYou should get the unique device ID indicating that the ADB connection has been successfully established.

Step 5: If you get an unauthorized message, then check your device. There will be a prompt to confirm whether you like to Allow USB debugging?, check the Always allow from this computer checkbox and, tap on the Allow option.

Step 6: Execute the above command again to display the unique device ID.
Step 7: Type in the following command in the cmd window that is opened in the platform-tools folder and presses the Enter key to boot your Android device to Fastboot Mode:
adb reboot bootloader
Step 8: Type in the following command in the cmd window that is opened in the platform-tools folder and presses the Enter key to verify the Fastboot Connection:
fastboot deviceYou should get a unique device ID and boot to the Fastboot Mode indicating that the connection was established successfully.
