This article will guide you on how to create different types of Virtual Switches in Hyper-V host and configure VMs to use the newly created Virtual Switches as per requirement. The steps given in this article applies to Windows Server 2022, Windows Server 2019, and Windows Server 2016.
Table of Contents
- What is Hyper-V Virtual Switch Manager?
- Types of Virtual Switch
- External Switch
- Internal Switch
- Private Switch
- Create Virtual Switch using Hyper-V Manager
- Create External Virtual Switch
- Configure VM to use External Virtual Switch
- Create Internal Virtual Switch
- Configure VM to use Internal Virtual Switch
- Create Private Virtual Switch
- Configure VMs to use Private Switch
- Conclusion
What is Hyper-V Virtual Switch Manager?
Hyper-V Virtual Switch is a software-defined layer-2 ethernet network switch available as a part of Hyper-V Manager. A virtual switch allows virtual machines on Hyper-V hosts to communicate with each other and to the networks external to the Hyper-V host.
Hyper-V Virtual Switch supports connecting VMs to both virtual networks and physical networks. Furthermore, Hyper-V Virtual Switch enforces policies for security, isolation, and service levels.
Types of Virtual Switch
There are three types of virtual Switch (Network) you can create and use on a Hyper-V server.
- External Switch
- Internal Switch
- Private Switch
External Switch
External Switch allows the virtual machines to communicate with other physical machines on your network through the physical network adapter on the Hyper-V server.

Internal Switch
Internal switch allows communication between the virtual machines and the physical host machine on which Hyper-V is installed.

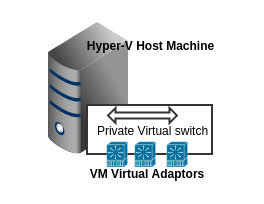
Private Switch
Private Switch allows communication between virtual machines on the same Hyper-V server. A private network is isolated from all external network traffic on the Hyper-V server. This type of network is useful when you must create an isolated networking environment, like an isolated test domain.
Create Virtual Switch using Hyper-V Manager
Step 1: Open the Hyper-V Manager.
Step 2: Click on the Action > Virtual Switch Manager.

Note: Hyper-V Virtual Switch ONLY supports Ethernet, and does not support any other wired local area network (LAN).
Create External Virtual Switch
External Virtual Switch allows Virtual Machines on the host to access other systems on a traditional VLAN or standard switched network. Apply below steps to create External virtual switch network on the Hyper Host of Windows 2016 Server.
Step 1: Open the Hyper-V Manager.
Step 2: Click on the Action > Virtual Switch Manager.
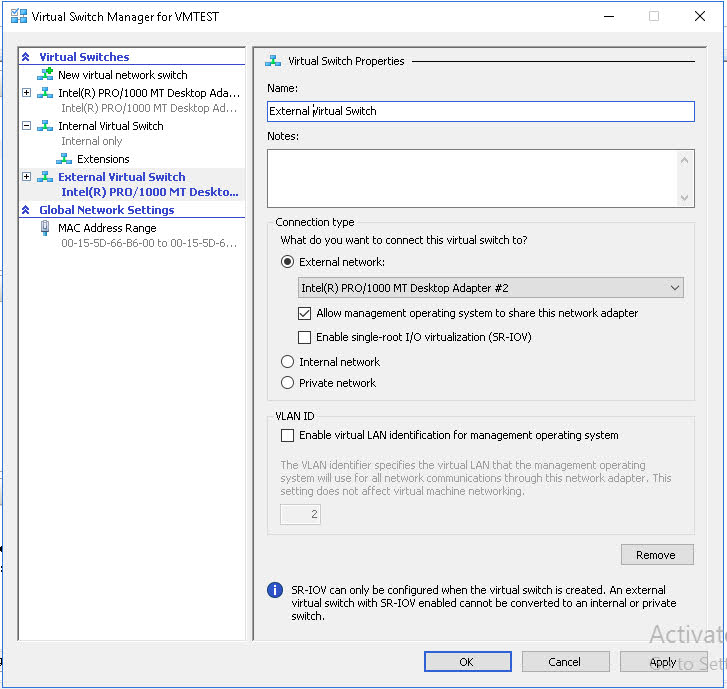
Step 6: The properties for the new external virtual switch will display to let you change the Name of Virtual Switch, add notes and choose the connection type.
Step 7: Select one of the Network Adapter.
Requirement: To create an External Switch you must have one dedicated physical Network card in the Host machine.
Step 8: Click on the OK button to create a new external virtual switch.
Step 9: An alert message regarding disruption of Network connectivity on saving the new virtual switch will prompt, click on the Yes button to create a new external virtual Switch.

Step 10: A new external virtual switch is created under the Virtual Switches section. You can click on the available virtual switches and check their properties.

Step 11: A new virtual adapter labeled with External Virtual Switch is displayed in the Network Connections of Control Panel.

Configure VM to use External Virtual Switch
Step 1: Open the Hyper-V Manager.
Step 2: Right-click on the VM to which you want to update the network connection.
Step 3: Select the Settings option from the context menu to open the settings page.

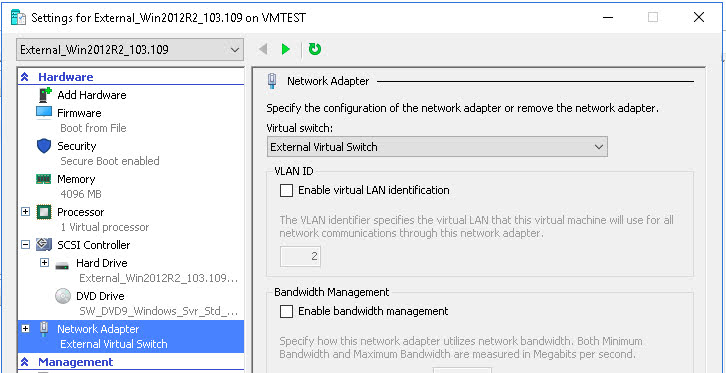
Step 4: Click on the Network Adapter in the Hardware list on the left pane. You can find the newly created external virtual switch in the drop-down list of the Virtual switch.
Step 5: Connect to your virtual machine and configure the IP address. In our example, the physical machine IP address is set to 192.168.102.XXX and the VM IP address 192.168.103.XXX

Step 6: You can ping to an external IP address from VM.

Create Internal Virtual Switch
Step 1: Open the Hyper-V Manager.
Step 2: Click on the Action > Virtual Switch Manager.
Step 6: The properties for the new internal virtual switch will display to let you change the Name of Virtual Switch, add notes and choose the connection type.
Step 7: Click on the OK button to create a new internal virtual switch.

Step 8: A new virtual adapter labeled with Internal Virtual Switch is displayed in the Network Connections of Control Panel.

Configure VM to use Internal Virtual Switch
Step 1: Open the Hyper-V Manager.
Step 2: Right-click on the VM to which you want to update the network connection.
Step 3: Select the Settings option from the context menu to open the settings page.
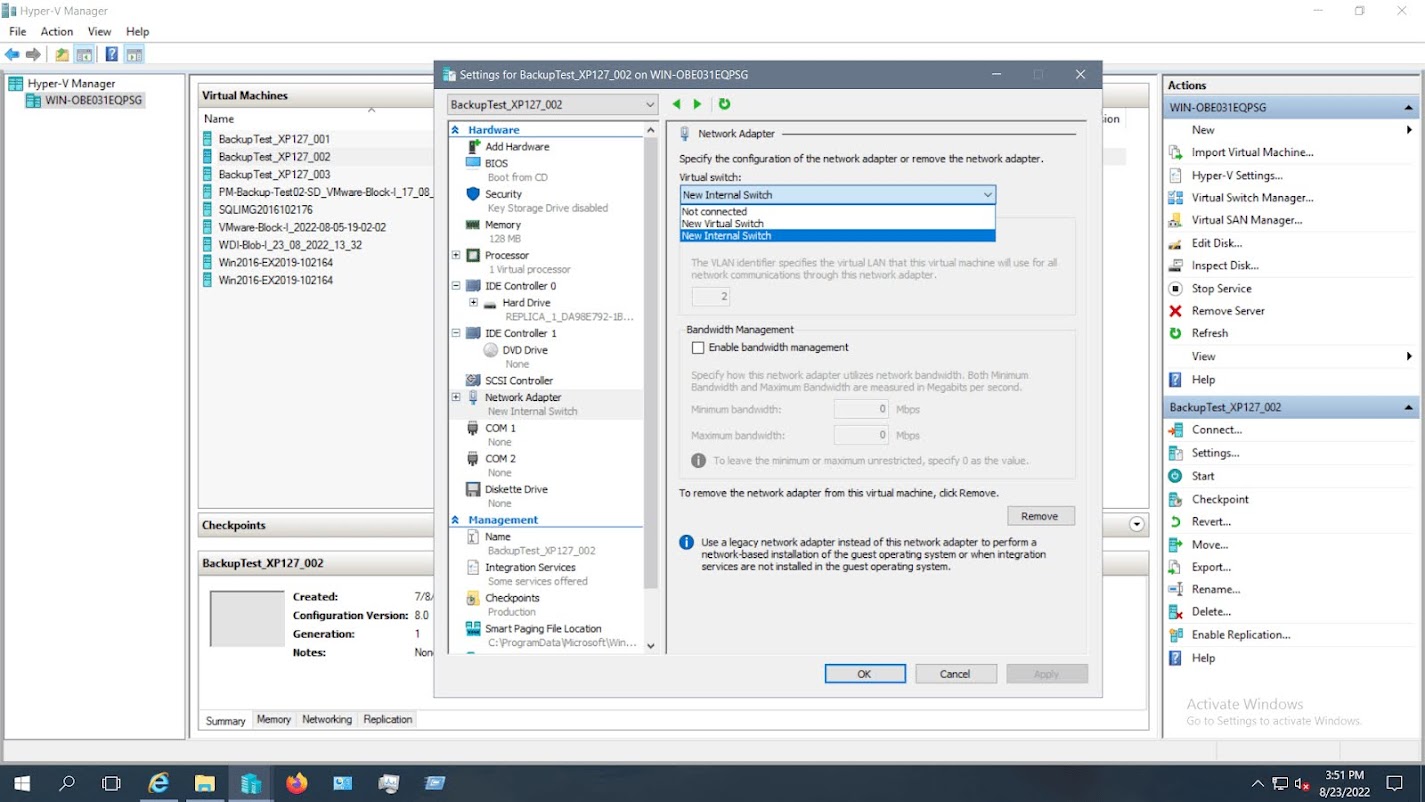
Step 4: Click on the Network Adapter in the Hardware list on the left pane. You can find the newly created internal virtual switch in the drop-down list of the Virtual switch.
Step 5: The IP address of the physical machine’s Network Adapter and VM Network Adapter for the internal switch must be in the same series. In the below example, the IP of the physical machine is 192.168.102.182, and the IP of the VM is 192.168.102.174
Step 6: You will be able to ping the VM from the Physical Host.


Create Private Virtual Switch
Step 1: Open the Hyper-V Manager.
Step 2: Click on the Action > Virtual Switch Manager.
Step 6: The properties for the new private virtual switch will display to let you change the Name of the Virtual Switch, add notes and choose the connection type.
Step 7: Click on the OK button to create a new private virtual switch.

Configure VMs to use Private Switch
Step 1: Open the Hyper-V Manager.
Step 2: Right-click on the VM to which you want to update the network connection.
Step 3: Select the Settings option from the context menu to open the settings page.
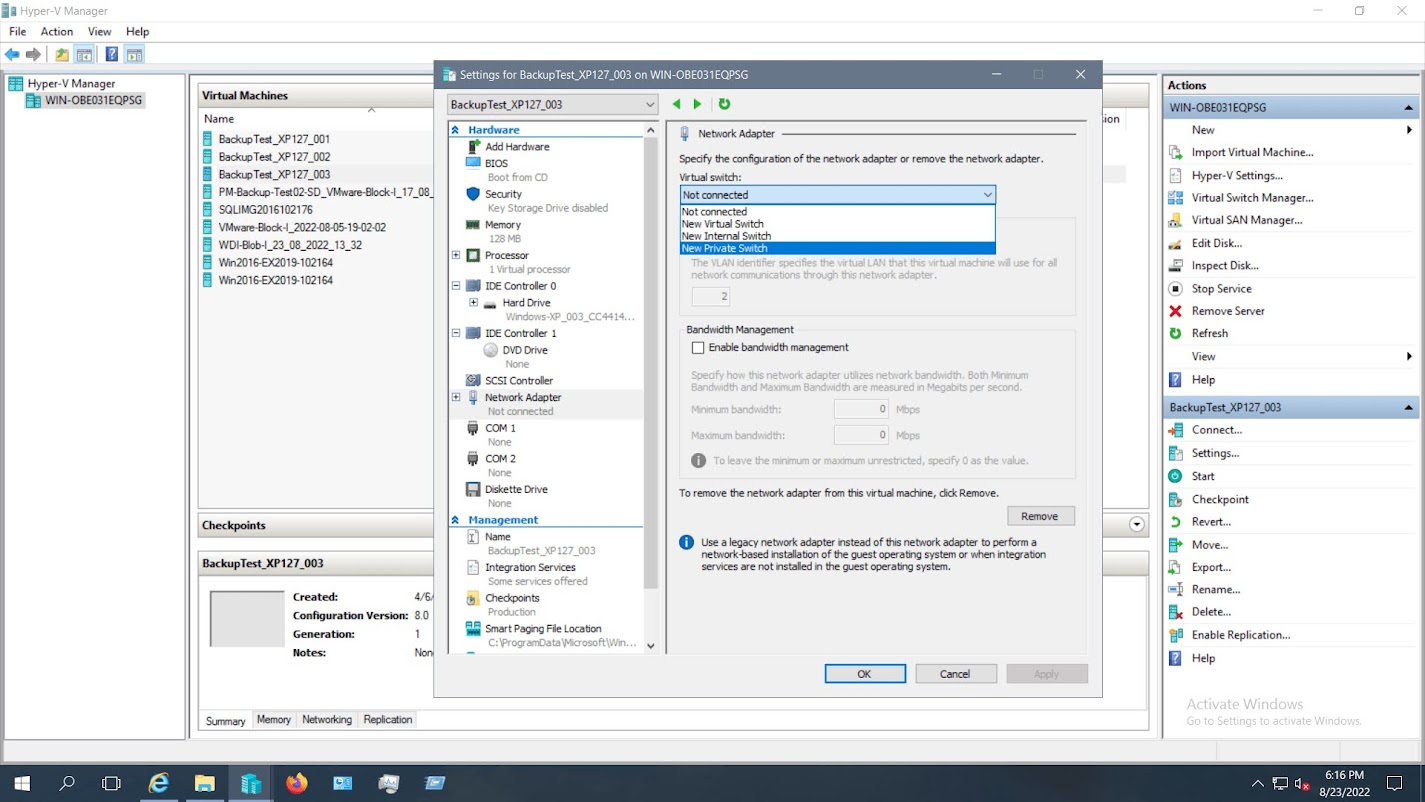
Step 4: Click on the Network Adapter in the Hardware list on the left pane. You can find the newly created private virtual switch in the drop-down list of the Virtual switch.
Step 5: I have created two Virtual machines to demonstrate the Private Switch configuration.
- VM1 IP address: 192.168.102.183
- VM 2 IP address: 192.168.102.141
- As it is a private Switch configuration, DNS is not required
Step 6: Once IP addresses are assigned, you are able to ping the IP address of one VMs from another.
Step 7: I am are able to ping VM1 from VM2.
Step 8: I am able to ping VM2 from VM1.

Conclusion
It is very simple to configure a Hyper-V Virtual switch. There are three operational modes for the Hyper-V virtual switch and you can choose the Virtual Switch based on your needs. You can change your switch interface VLAN tagging based on your Subnet/IP address range.