Question
Before reset Kodi to default factory settings on FireStick, you will need to backup all the add-ons, builds, and customised settings. In this article, we will show you how to install and backup Kodi settings and data using Kodi’s official Backup Addon.
Solution
Step 1: Click the Settings icon on the Kodi Home screen.

Step 2: Click the Add-ons button.

Step 3: Select the Install from repository option from the list of Add-ons / Add-on browser.

Step 4: Select the Kodi Add-on repository option from the list of Add-ons / Install from repository.

Step 5: Select the Program add-ons option from the list of Add-ons / Kodi Add-on repository.

Step 6: Scroll down and select the Backup option from the list of Add-ons / Program add-ons.

Step 7: Click the Install button then wait for the notification Backup Add-on installed display.


Step 8: If the Backup versioning popup display, click on the OK button.

Step 9: Go to the Kodi Home screen.
Step 10: Navigate to the Add-ons > Program Add-ons.
Step 11: Click on the Backup button.

Step 12: Click the Open Settings from the list of Backup – Mode.

Step 13: Click the Remote Dir tab.
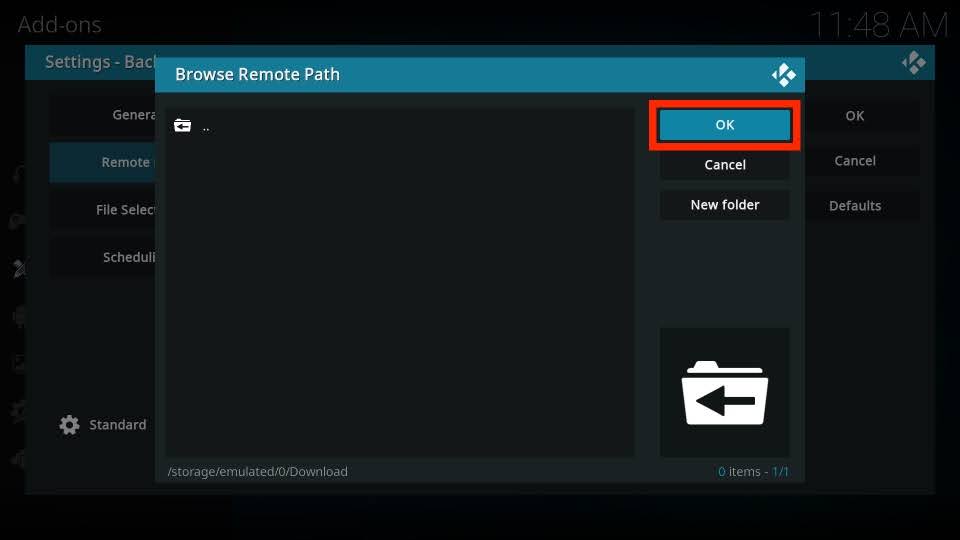
Step 14: Select the Browse Remote Path option.

Step 15: Select the External storage option.

Step 16: Select any folder where you like to save the Kodi backup.

Step 17: Click the OK button to select the backup path.
Step 18: Click the OK button to save the changes.

Step 19: Reopen the Backup addon again.

Step 20: Select the Backup option from the list of Backup – Mode.

Step 21: The Backup addon will start to perform backup for Kodi.
