Windows 10 users reported Windows 10 cumulative update installation failed with the 0x800f0845 error code. In most cases, affected users are reporting that this issue effectively prevents them from installing any new pending Windows update.
![[Solved] How to Fix Windows 10 Cumulative Update Failed with 0x800f0845 Error](https://lh3.googleusercontent.com/pw/ACtC-3fJr5C2My7cyuGg-oW1orlVQS4An8hILqLNbdrxaEYljp3XPYmkNUtffih8uTaH12OUFY5nhI3YVP6vIm7hMaAZ0xnH_vFaehfeQHQNwU2inWlRMwwoWooq7E3DOwzCpMSSPI6gIFq_MTVl0o5vpTDGng=w2182-h1082-no?authuser=0)
Some of the common causes that can trigger 0x800f0845 Windows 10 update error code are:
- Insufficient hard disk space to handle the Windows 10 update
- Incompatible and outdated System BIOS.
- Improperly configured, outdated, or damaged system drivers.
- Corrupted System’s driver or system service
Follow below resolution steps to fix 0x800f0845 error using Windows Update troubleshooter, DISM, SFC or download the update executable from Windows Update Catalog.
Table of Contents
- Solution 1: Unplug all external peripheral device
- Solution 2: Set TrustedInstaller to Auto before the update
- Solution 3: Execute Windows Update troubleshooter
- Solution 4: Reset Windows Update via Update Agent
- Solution 5: Reset Windows Update via elevated CMD
- Solution 6: Execute DISM and SFC scans
- Solution 7: Update using Windows Update Catalog
Solution 1: Unplug all external peripheral device
Step 1: Disconnect and unplug all external and USB peripheral devices. Some peripheral devices like external HDD may disturb the Windows update installation.
Step 2: Perform Windows Update installation again.
Solution 2: Set TrustedInstaller to Auto before the update
Step 1: Press Windows key + R to open a Run box.
Step 2: Type cmd and press Ctrl + Shift + Enter to open up an elevated Command Prompt. Click Yes to grant administrative privileges when UAC (User Account Control) prompted.
Step 3: Type the following command and press Enter: SC config trusted installer start=auto
Step 4: Restart your PC.
Solution 3: Execute Windows Update troubleshooter
Step 1: Pressing Windows key + R to open a Run box.
Step 2: Type control and press Enter to open the Classic Control Panel interface.
Step 3: Type troubleshoot in the search bar located at the top-right corner of the screen.
Step 4: From the list of search results, click on the Troubleshooting entry.
Step 5: Click on Fix problems with Windows Update under System and Security to open the Windows Update Troubleshooter.

Step 6: Click on Advanced.

Step 7: Check the box associated with Apply repairs automatically.
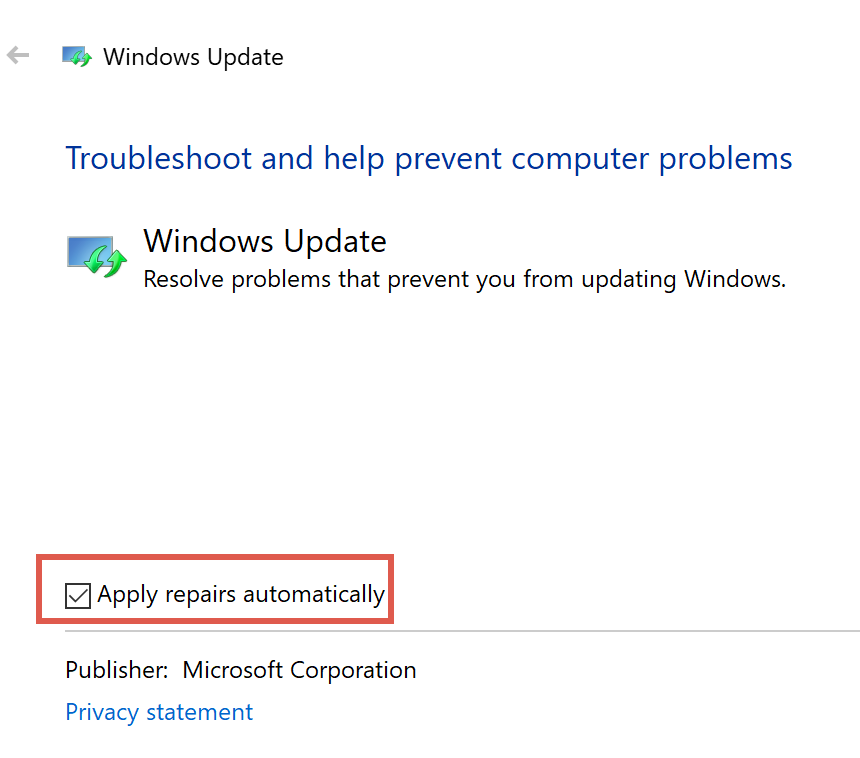
Step 8: Click on Apply this Fix and follow the on-screen prompts.

Step 9: Restart your PC.
Solution 4: Reset Windows Update via Update Agent
Step 1: Visit Microsoft Script Center to download Reset Windows Update Agent. Click on the button labeled with ResetWUEng.zip to download the Reset Windows Update agent.

Step 2: Unzip ResetWUEng.zip.
Step 3: Double-click on ResetWUEng.exe and click Yes when prompted by the User Account Control (UAC) window.
Step 4: Click Yes and wait for the operation to complete.
Step 5: Restart your PC.
Solution 5: Reset Windows Update via elevated CMD
Step 1: Press Windows key + R to open a Run box.
Step 2: Type cmd and press Ctrl + Shift + Enter to open up an elevated Command Prompt. Click Yes to grant administrative privileges when UAC (User Account Control) prompted.
Step 3: Type the following command and press Enter after each one to stop all relevant Windows Update services including Windows Update, MSI Installer, Cryptographic and BITS services:
net stop wuauserv

net stop cryptSvc

net stop bits

net stop msiserver
Step 4: Execute the two following commands in order and press Enter after each one to clear and rename the SoftwareDistribution and Catroot2 folders:
ren C:\Windows\SoftwareDistribution SoftwareDistribution.old

ren C:\Windows\System32\catroot2 Catroot2.old
Step 5: Execute the following commands and press Enter after each command to re-enable the services:
net start wuauserv

net start cryptSvc

net start bits

net start msiserver
Solution 6: Execute DISM and SFC scans
Step 1: Open command prompt with Run as administrator option.
Step 2: Enter sfc /scannow to start the SFC scanning.
Step 3: Restart the PC.
Step 4: Open command prompt with Run as administrator option.
Step 5: Enter the below command to start the DISM scanning.
Dism /Online /Cleanup-Image /CheckHealth

Dism /Online /Cleanup-Image /ScanHealth

Dism /Online /Cleanup-Image /RestoreHealth
Step 6: Restart the PC.
Alternatively, you can execute the DISM/Cleanup-Image tool in PowerShell with Run as administrator option.
Repair-WindowsImage -Online –CheckHealth

Repair-WindowsImage -Online –ScanHealth

Repair-WindowsImage -Online –RestoreHealth
Solution 7: Update using Windows Update Catalog
Step 1: Visit Microsoft Update Catalog.
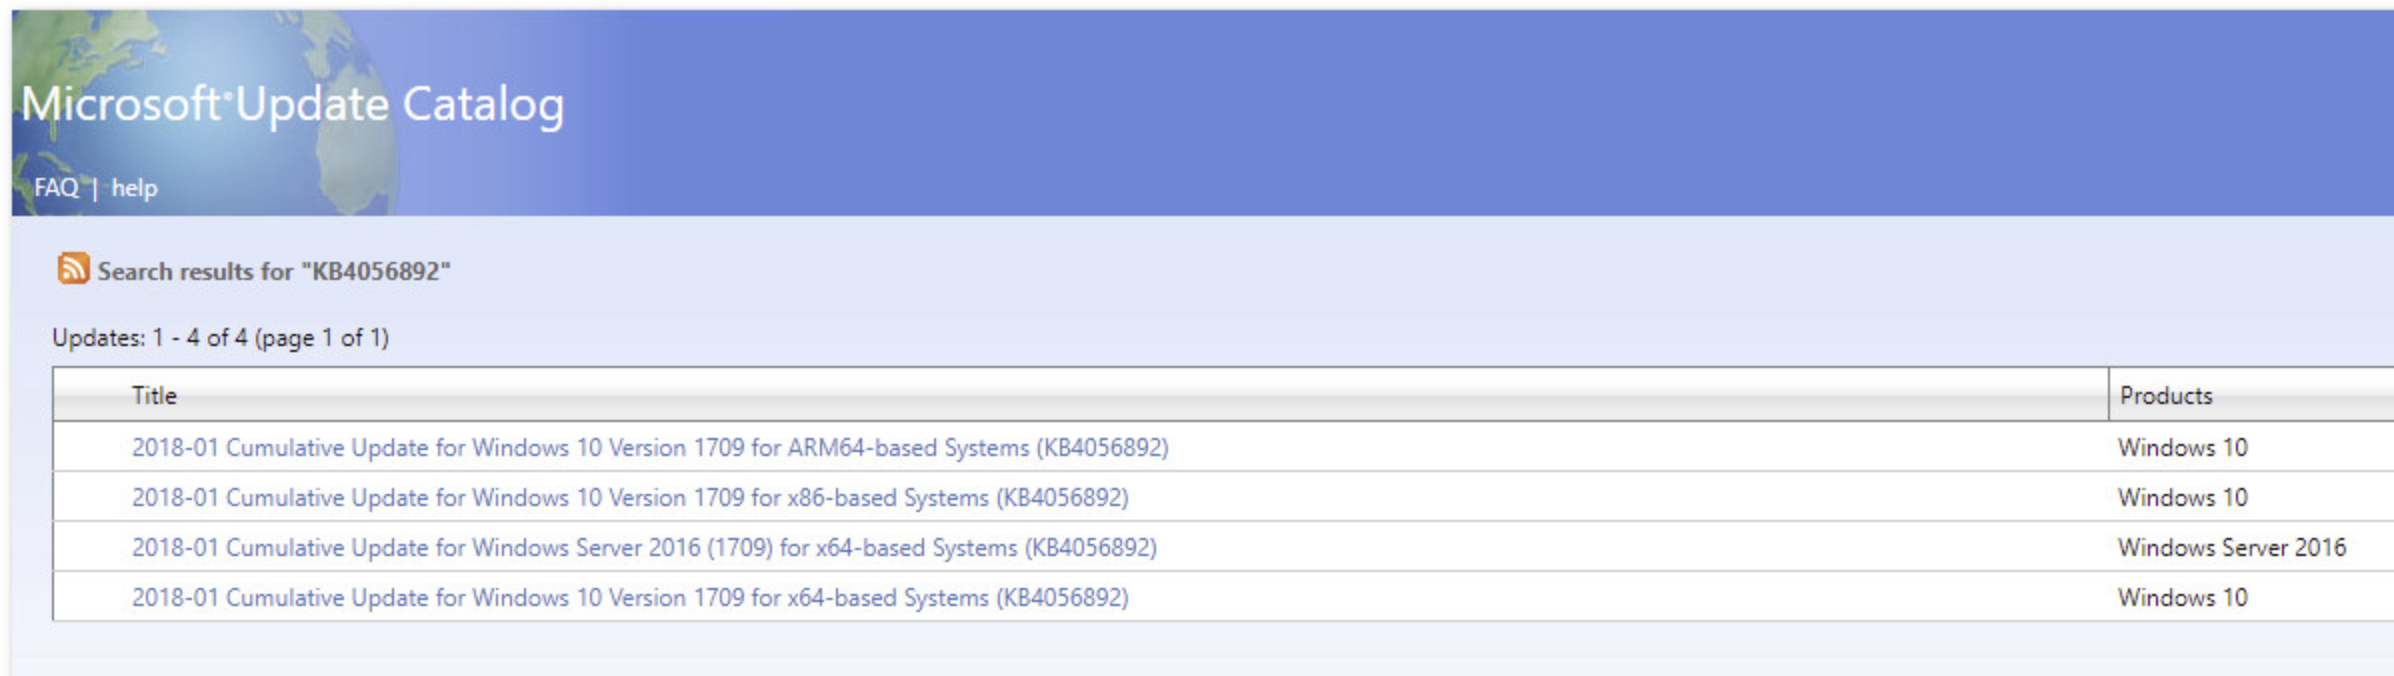
Step 2: Search for the failed update KB using the search function located at the top-left corner of the screen.

Step 3: Download the appropriate Windows Update according to the CPU architecture and the Windows OS version.
Step 4: Click on the .inf file and choose Install from the context menu.

Step 5: Restart your PC after Windows Update installs completed.