Table of Contents
- Problem Symptom
- Potential Causes
- Pre-check
- Solution 1: Make sure BITS is running and startup automatically
- Solution 2: Execute SFC scannow and DISM
- Solution 3: Manually download the update from Microsoft Update Catalog
- Solution 4: Execute Windows Update Troubleshooter
- For Windows 11
- For Windows 10
- For Older Versions of Windows
- Solution 5: Clear and flush the SoftwareDistribution folder
- Solution 6: Disable defer receiving updates group policy
- Solution 7: Manually install Windows Updates from CAB files
Problem Symptom
Recently a lot of Windows users reported 2149842967 or 0x80240017 WU_E_NOT_APPLICABLE error happens when executing Windows MSU update installation manually or trying to check for and install updates on Windows after searching for them automatically.
Based on the report so far, 2149842967 or 0x80240017 WU_E_NOT_APPLICABLE error happen when Windows user tries to install Windows update below:
- KB3189866: Cumulative update for Windows 10 Version 1607: September 13, 2016
- KB2478661: MS11-039: Description of the security update for the .NET Framework 3.5.1 on Windows 7 and on Windows Server 2008 R2: June 14, 2011
- KB2965253: May 12, 2015, update for Office 2013
- Update for Windows Server 2012 R2 (KB3159706)
The detailed error message is as below:
Windows Update Standalone Installer
The update is not applicable to your computer.


Windows Update
There were problems installing some updates, but we’ll try again later. If you keep seeing this and want to search the web or contact support for information, this may help:
-
Update for Microsoft Office 2013 (KB2965253) 32-Bit Edition – Error 0x80240017

The Windows Event Log message for error 2149842967 states that:
Windows update could not be installed because of error 2149842967 (Command line: “C:\Windows\system32\wusa.exe” “C:\Temp\AMD64-all-windows10.0-kb3189866-x64.msu”)
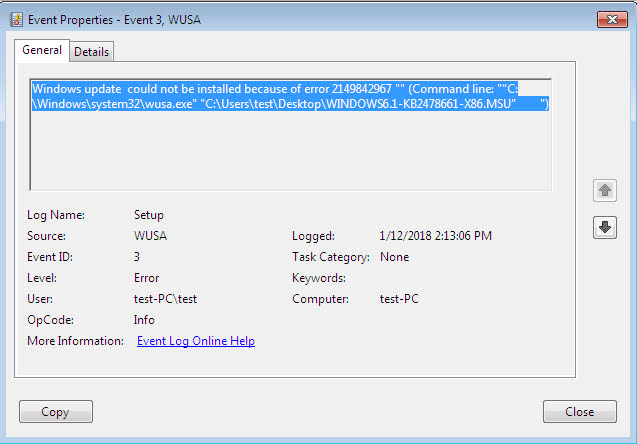


Windows update patch returned the error 2149842967 which converted to a hex value equivalent to 0x80240017. According to the list of WUSA codes stated in Windows Update Agent Result Codes, the error 0x80240017 referred to WU_E_NOT_APPLICABLE which means the operation was not performed because there are no applicable updates.
Follow the below solution steps to resolve Windows Update not applicable error 2149842967 or 0x80240017 WU_E_NOT_APPLICABLE.
Potential Causes
Windows Update not applicable error 2149842967 or 0x80240017 WU_E_NOT_APPLICABLE happen due to:
- Corrupted system file.
- The update is already installed.
- The update you are trying to install might not be suitable for the Windows version.
- The update does not match your Windows version, edition, build, bitness (processor architecture: x86, x64; ARM), or language.
- The update has been replaced or a newer update has been installed that replaces this update.
- The prerequisites for installing this update are not met.
- The .msu update file from provided by third party may have been corrupted.
Pre-check
- Reboot the Windows before starting to perform troubleshooting.
- Make sure you have downloaded the full MSU update for Windows and not the Delta update package.
- Make sure you have first installed the latest available Servicing Stack Update (SSU).
- Make sure you have downloaded an update suitable for your version of Windows. You can check the Windows version, architecture, and build number with the following PowerShell commands:
Get-CimInStance CIM_OperatingSystem| select Caption, OSArchitecture
[System.Environment]::OSVersion.Version.build
Solution 1: Make sure BITS is running and startup automatically
Step 1: Press the Windows + R key to open the Run command.
Step 2: Type services.msc in the Run box and click on the OK button to open the Services management console.

Step 3: Scroll down to locate the Background Intelligent Transfer Service (BITS), right-click on it, and choose the Properties option from the context menu.

Step 4: Select Automatic on the Startup type drop-down menu if the policy is disabled.
Step 5: Click the Start button for the service if it isn’t running.
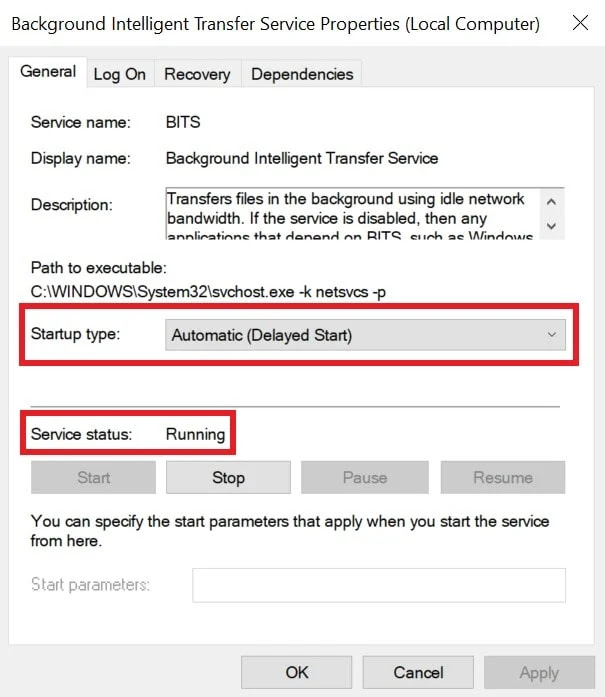
Step 6: Press the Apply button to save the settings.
Step 7: Click the OK button to close the BITS window.
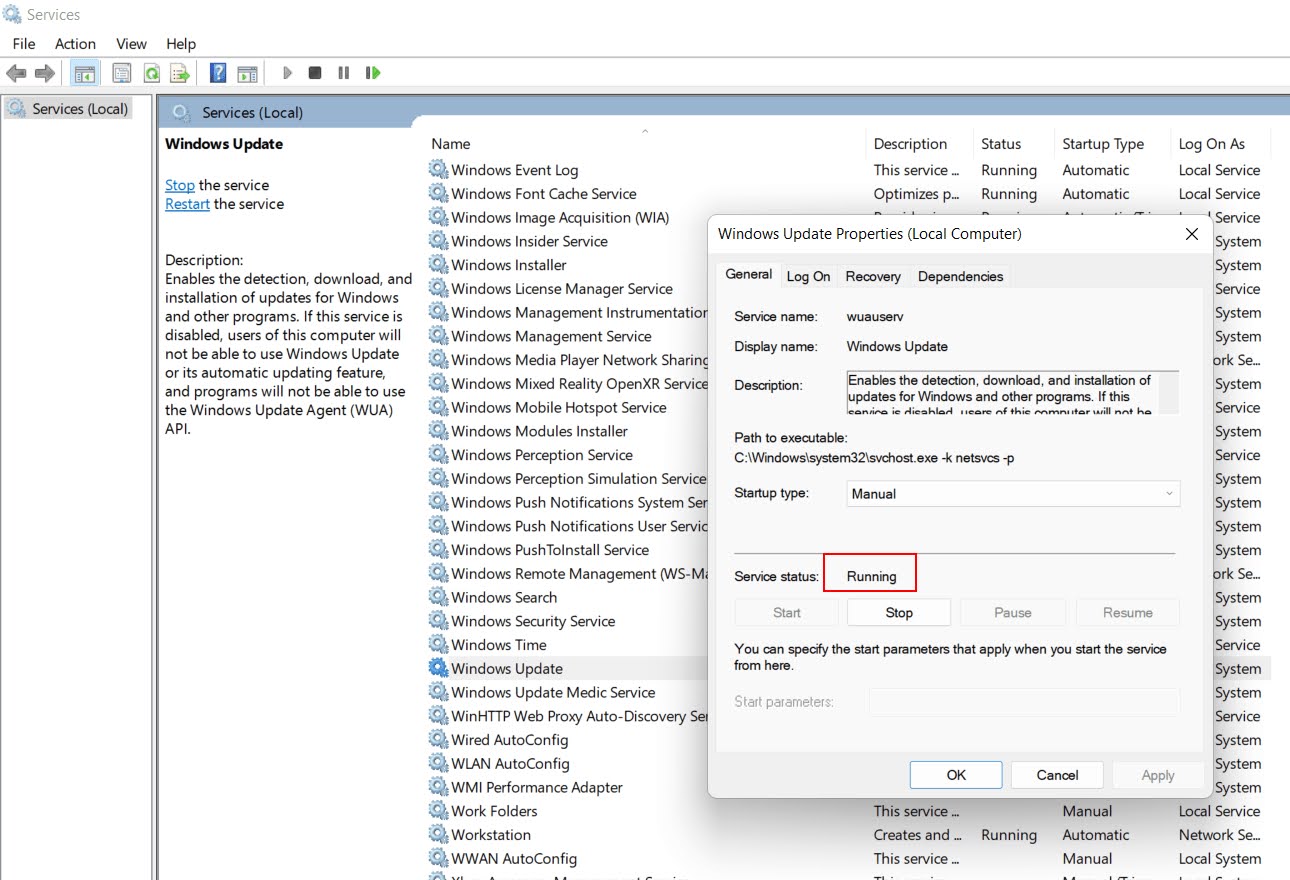
Step 8: Locate the Windows Update service.
Step 9: Right-click on it and select the Start option from the context menu.
Solution 2: Execute SFC scannow and DISM
Step 1: Open the Command Prompt by searching cmd in the search box and clicking Run as Administrator.
Step 2: Type or copy-paste the following command in the command line and press the Enter key:
DISM /online /cleanup-image /restorehealth
Step 3: Allow the process to complete. It might appear to be stuck at some point, but don’t interfere.
Step 4: When the process completes, type and press the Enter key.
sfc /scannow
SFC will automatically scan and repair the system files on your PC.
Solution 3: Manually download the update from Microsoft Update Catalog
If the 2149842967 or 0x80240017 WU_E_NOT_APPLICABLE error prompt after Windows automatically checks for and downloads updates, you can try to install it manually by downloading it from the Windows Update Catalog. Follow below steps to ‘forcibly’ install the Windows update manually by downloading the update executable file from the Windows Update Catalog.
Step 1: Visit the Microsoft support site to find out the KB number for the latest released update located at the top of the list on the left sidebar.
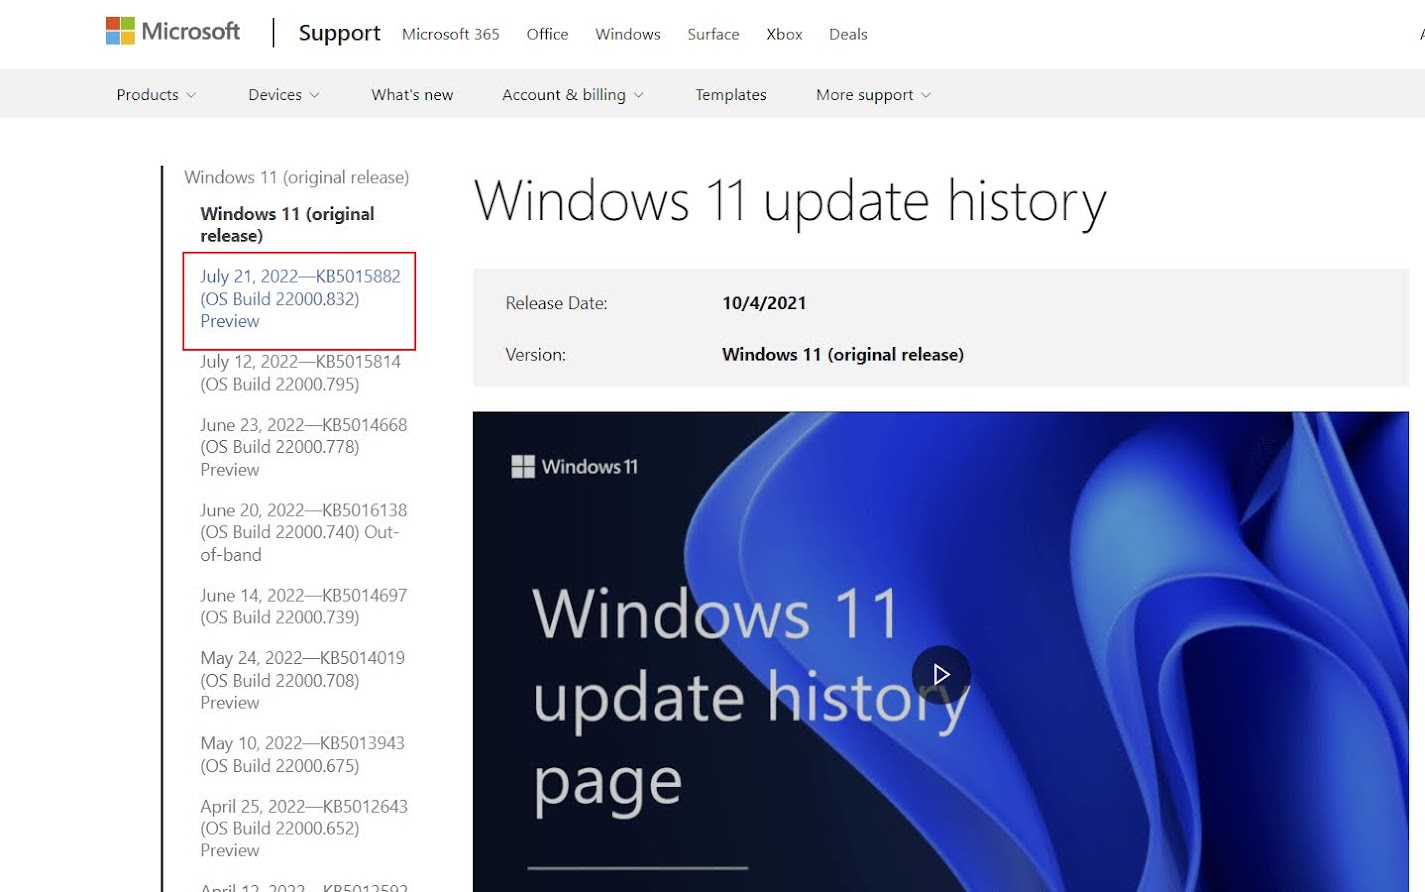
Step 2: Copy the KB (Knowledge Base) number e.g. KB5015882) next to the latest released update for your Windows version.
Step 3: Visit the Microsoft Update Catalog page.
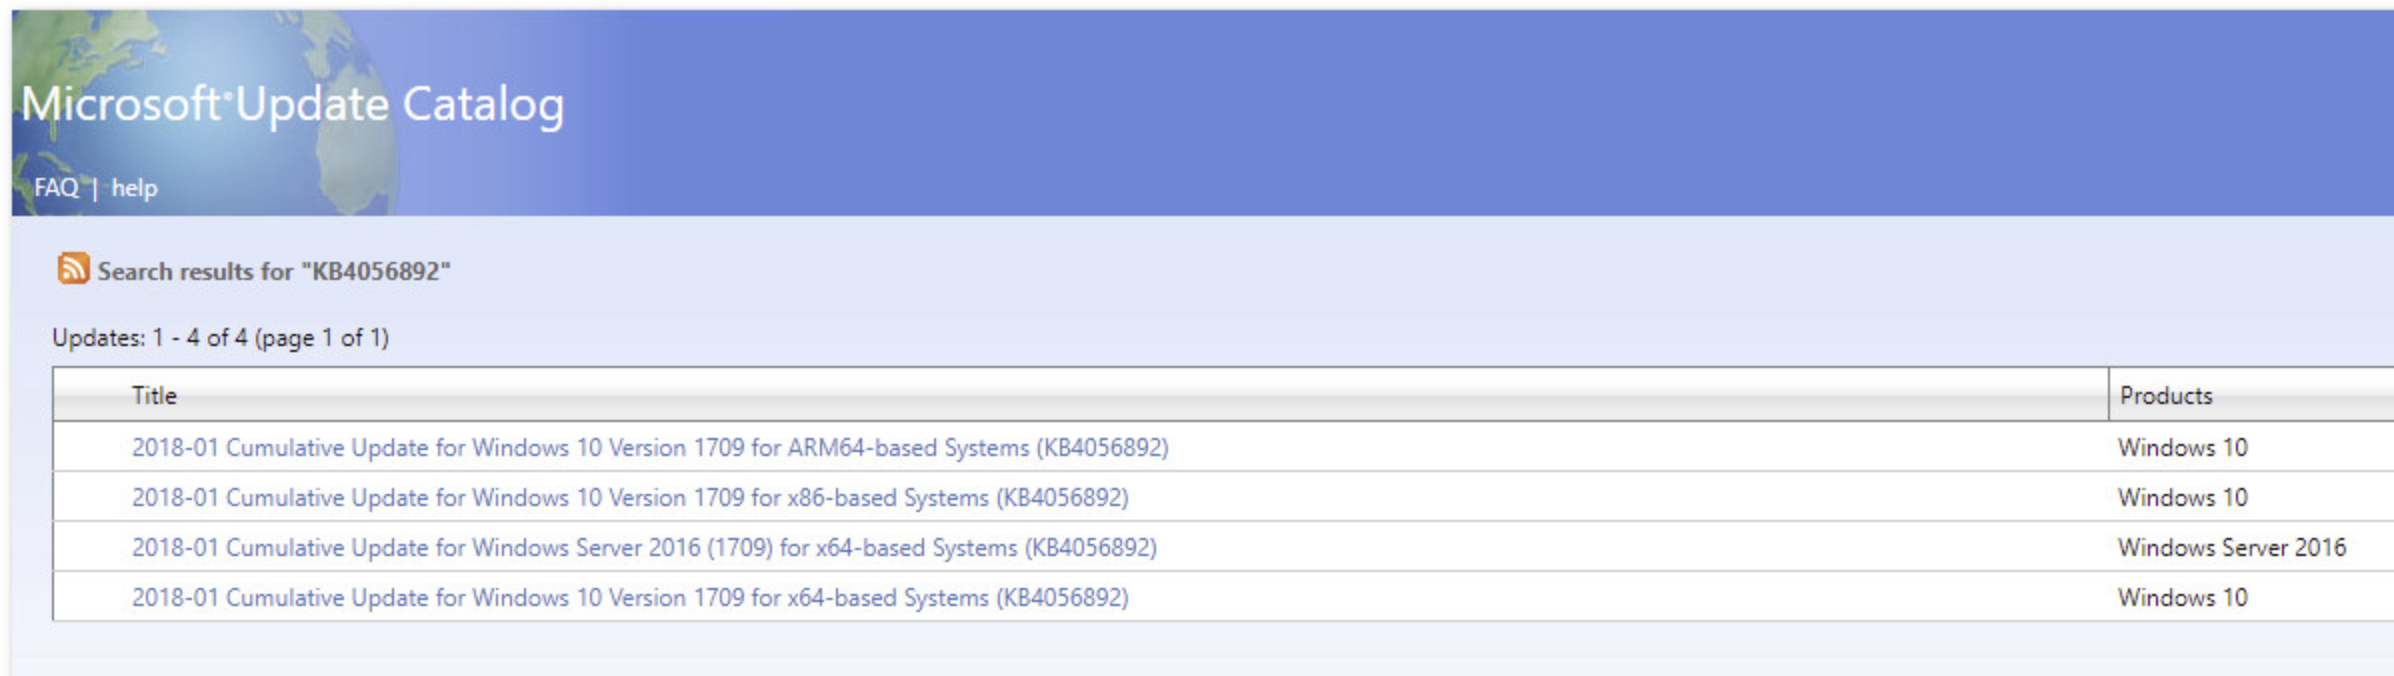
Step 4: Perform a search by pasting the Knowledge Base number you copied located at the top-left corner of the page.
Step 5: Click on the Search button at the top right corner.

Step 6: Click on the Download button at the left and choose the CPU architecture (32bit or 64bit) and the Windows OS version.
Step 7: Execute the downloaded .msu installer with Run as Administrator option and follow the on-screen instruction to install it.
Step 8: Restart the Windows.
Solution 4: Execute Windows Update Troubleshooter
Run the in-built Windows Update Troubleshooter and see if that helps to resolve the Windows Update error.
For Windows 11
Step 1: Press the Window + I key together to open the Settings app.
Step 2: Click the System on the left sidebar.
Step 3: Scroll down and click on the Troubleshoot option in the right pane.

Step 4: Click on the Other troubleshooters option.

Step 5: Click on the Run button for the Windows Update option under the Most frequent section.

Step 6: Restart the Windows after the Windows Update Troubleshooter is finished running.
Step 7: Press the Window + I key together to open the Settings app.
Step 8: Click the Windows Update option.
Step 9: Click on the Check for updates button to download and install any available updates.

Step 10: If the 2149842967 or 0x80240017 WU_E_NOT_APPLICABLE error is not resolved, try to run the troubleshooter again to check for additional errors.
For Windows 10
Step 1: Click on Start.
Step 2: Go to Settings > Updates & Security > Troubleshoot > Additional troubleshooter.
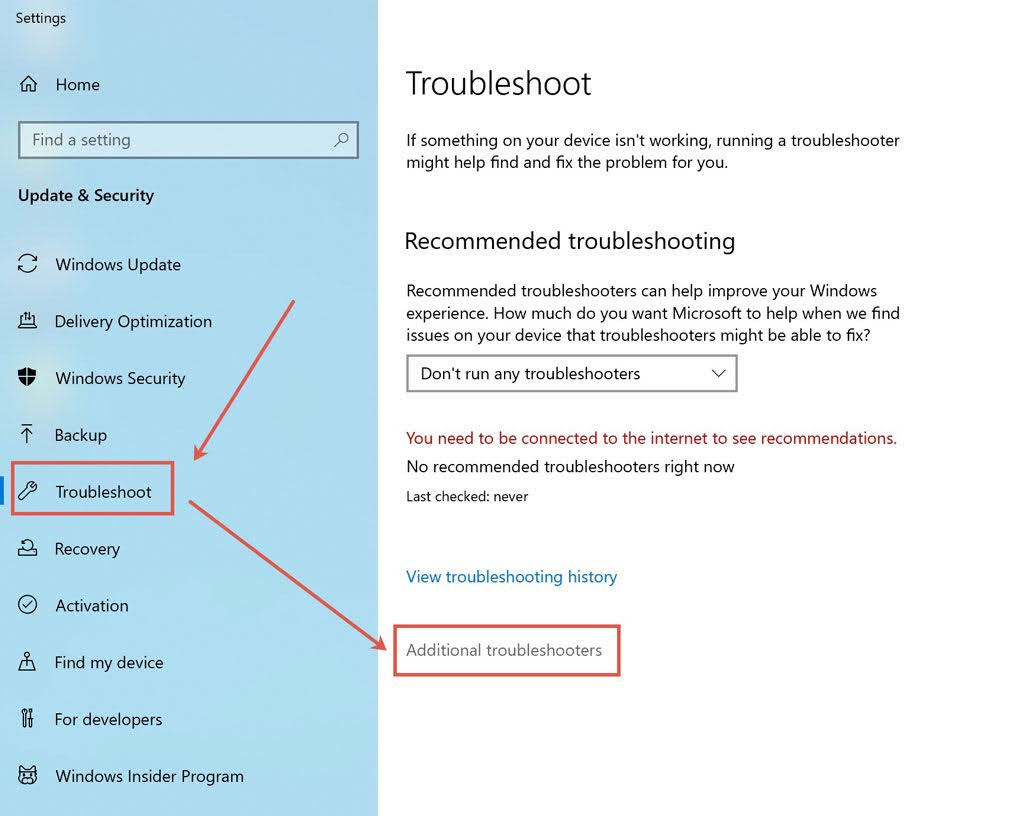
Step 3: Click on the Windows Update in the list of Additional troubleshooters.
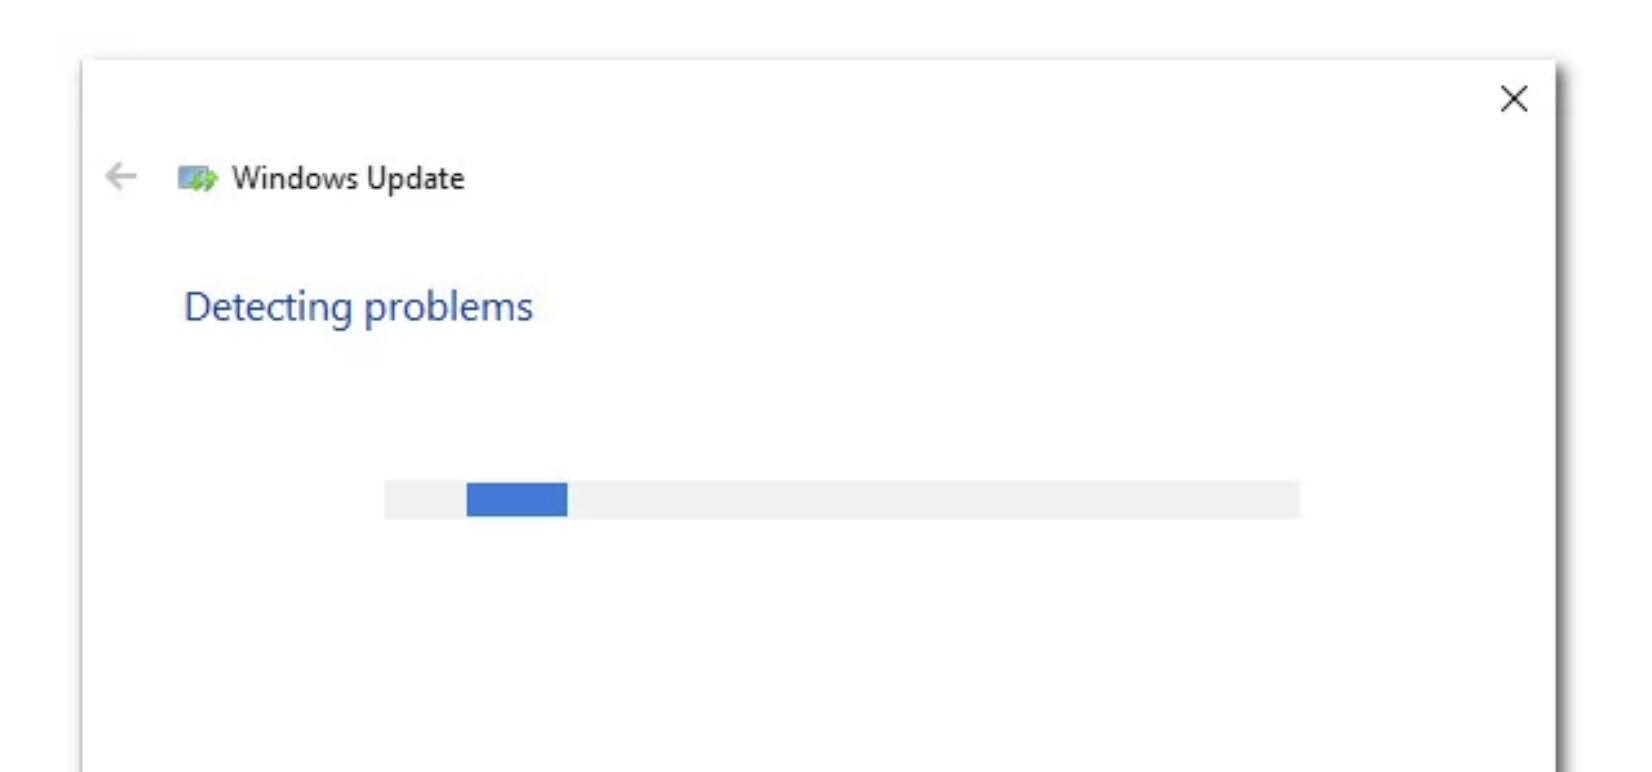
Step 4: Click on the Run the troubleshooter button under the Get up and running section.

Step 5: Windows Update Troubleshooter will start to scan the system for any inconsistencies.
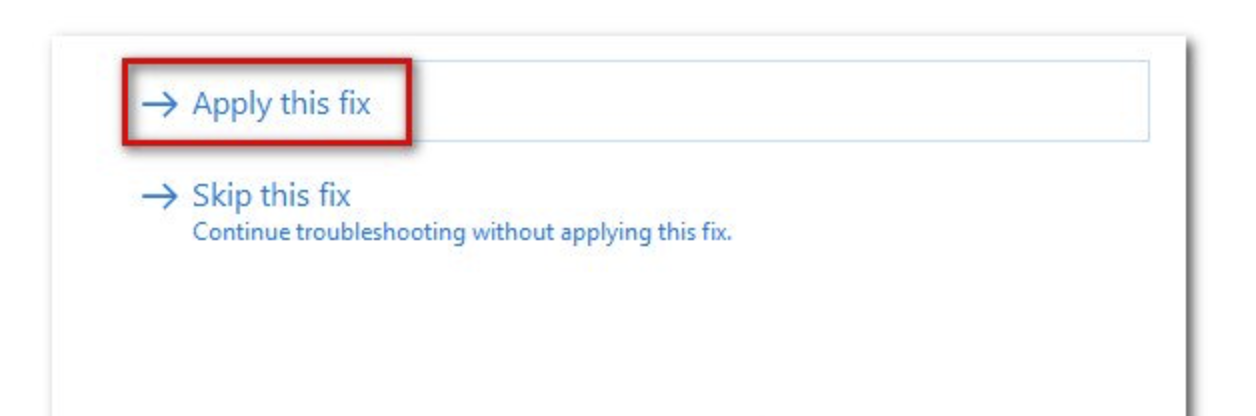
Step 6: Wait until the analysis is complete, then click on Apply this fix if a viable repair strategy is recommended.
Step 7: Restart the Windows after the Windows Update Troubleshooter is finished running.
Step 8: Navigate to the Settings > Update and Security > Windows Update and click on the Check for Updates button to download and install any available updates.
Step 9: If the 2149842967 or 0x80240017 WU_E_NOT_APPLICABLE error is not resolved, try to run the troubleshooter again to check for additional errors.
For Older Versions of Windows
Step 1: Press the Windows + R key to open a Run box.
Step 2: Type control and press the Enter key to open the Classic Control Panel interface.
Step 3: Type troubleshoot in the search bar located at the top-right corner of the screen.
Step 4: From the list of search results, click on the Troubleshooting entry.
Step 5: Click on the Fix problems with Windows Update link under System and Security section to open the Windows Update Troubleshooter.

Step 6: Click on the Advanced link.

Step 7: Check the Apply repairs automatically checkbox.
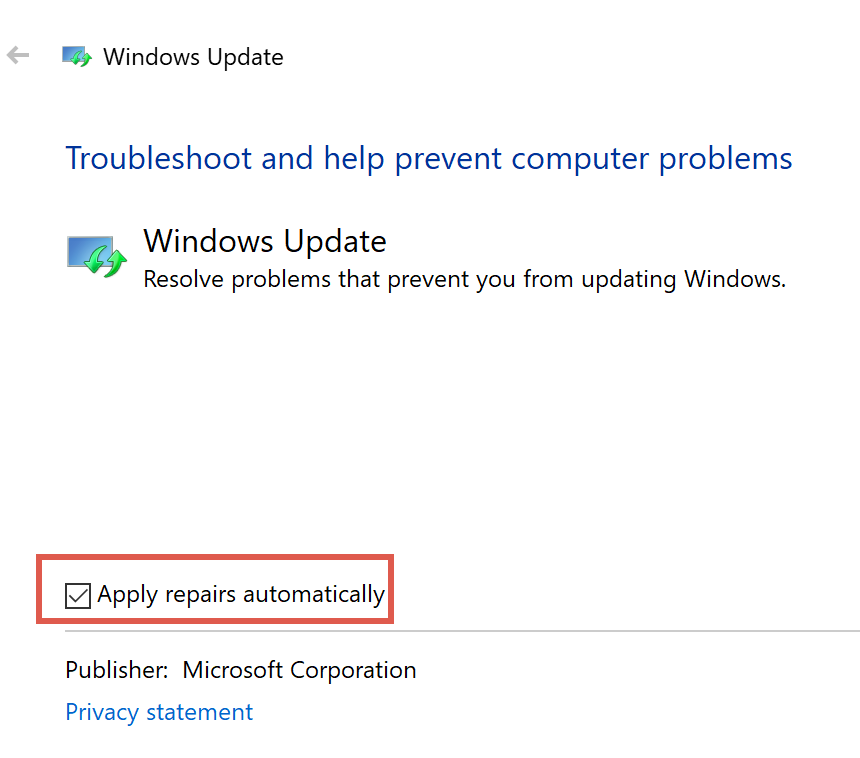
Step 8: Click on the Apply this Fix option and follow the on-screen prompts.

Step 9: Restart the Windows.
Step 10: Perform the Windows Update check again.
Step 11: If the 2149842967 or 0x80240017 WU_E_NOT_APPLICABLE error is not resolved, try to run the troubleshooter again to check for additional errors.
Solution 5: Clear and flush the SoftwareDistribution folder
The Software Distribution folder in Windows is a folder located in the Windows directory and used to temporarily store files that may be required to install Windows Update on your computer. Clearing the contents of the SoftwareDistribution folder will able to reset the Windows Update components
Step 1: Disable the Internet connection.
Step 2: Click on the Start menu.
Step 3: Type cmd in the Search box on the taskbar.
Step 4: Right-click on Command Prompt from the App result, and select the Run as Administrator option from the context menu to open an elevated Command Prompt window. Select Yes if prompted by User Account Control.

Step 5: Type the following command and press the Enter key after each command to stop all the core services related to Windows Update: Background Intelligent Transfer, Windows Update, and Cryptographic Services.
net stop bits
net stop wuauserv
net stop appIDSvc
net stop cryptSvc
net stop msiserver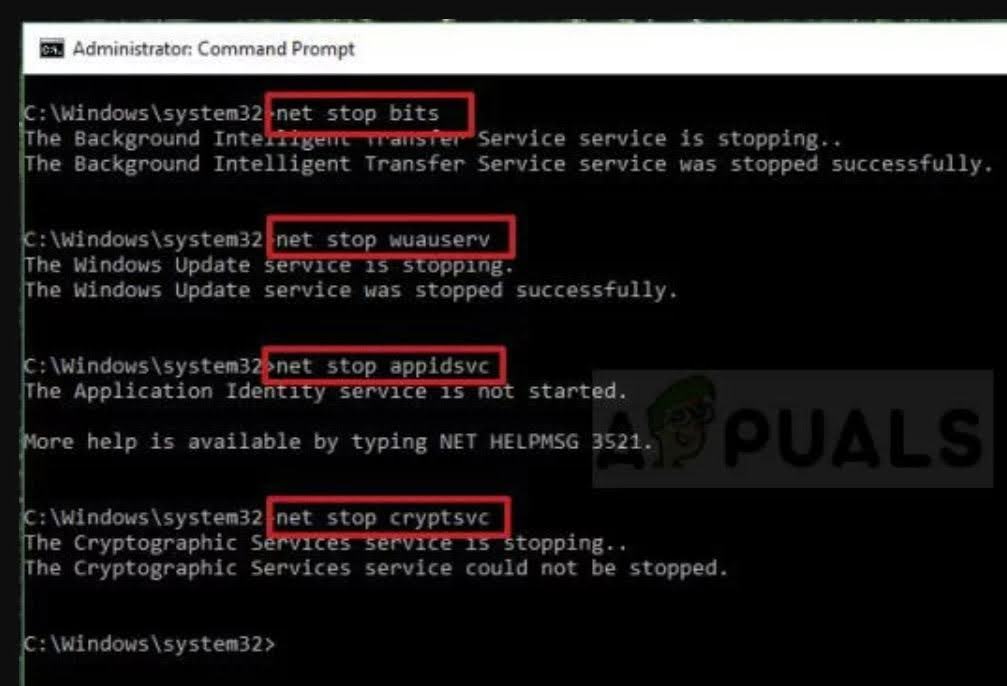
Step 6: Type the following command and press the Enter key after each command to delete some files if you want to continue with resetting the update components.
Del “%ALLUSERSPROFILE%\Application Data\Microsoft\Network\Downloader\qmgr*.dat”
Step 7: Type the following command and press the Enter key after each command to change the name of the SoftwareDistribution and catroot2 folders.
Ren %systemroot%\SoftwareDistribution SoftwareDistribution.bak
Ren %systemroot%\system32\catroot2 catroot2.bak
Step 8: Type the following command and press the Enter key after each command to navigate back to the System32 folder in order to proceed with the final part of this method.
cd /d %windir%\system32
Step 9: Type the following command and press the Enter key after each command to reregister all of the files necessary for the BITS service to run and operate properly.
regsvr32.exe atl.dll
regsvr32.exe urlmon.dll
regsvr32.exe mshtml.dll
regsvr32.exe shdocvw.dll
regsvr32.exe browseui.dll
regsvr32.exe jscript.dll
regsvr32.exe vbscript.dll
regsvr32.exe scrrun.dll
regsvr32.exe msxml.dll
regsvr32.exe msxml3.dll
regsvr32.exe msxml6.dll
regsvr32.exe actxprxy.dll
regsvr32.exe softpub.dll
regsvr32.exe wintrust.dll
regsvr32.exe dssenh.dll
regsvr32.exe rsaenh.dll
regsvr32.exe gpkcsp.dll
regsvr32.exe sccbase.dll
regsvr32.exe slbcsp.dll
regsvr32.exe cryptdlg.dll
regsvr32.exe oleaut32.dll
regsvr32.exe ole32.dll
regsvr32.exe shell32.dll
regsvr32.exe initpki.dll
regsvr32.exe wuapi.dll
regsvr32.exe wuaueng.dll
regsvr32.exe wuaueng1.dll
regsvr32.exe wucltui.dll
regsvr32.exe wups.dll
regsvr32.exe wups2.dll
regsvr32.exe wuweb.dll
regsvr32.exe qmgr.dll
regsvr32.exe qmgrprxy.dll
regsvr32.exe wucltux.dll
regsvr32.exe muweb.dll
regsvr32.exe wuwebv.dll
Step 10: Type the following command and press the Enter key after each command to reset Winsock.
netsh winsock reset
netsh winhttp reset proxy
Step 11: Type the following command and press the Enter key after each command to start the services you closed before.
net start bits
net start wuauserv
net start appidsvc
net start cryptsvcnetsh winhttp reset proxy
Step 12: Restart the Windows.
Step 13: Enable back the Internet connection.
Step 14: Press the Windows logo key and type PowerShell and in the resulting list, Right-click on Windows PowerShell and select Run as Administrator option from context menu.
Step 15: Enter the following command in the PowerShell and press enter: wuauclt.exe /updatenow
Solution 6: Disable defer receiving updates group policy
Windows has a few policies which prevent Windows from installing features, quality, preview builds, or critical updates for a given time range and provoke the error “This update is not applicable to your computer”. Check if one of those policies is set.
Step 1: Go to the Start Menu and type gpedit to perform a search.
Step 2: Click on the Edit group policy to proceed.

Step 3: Go to Computer Configuration > Administrative Templates > Windows Components > Windows Update > Manage updates offered from Windows Update.
Step 4: Make sure the below settings are set to Disabled or Not configured:
- Select when Preview Builds and Feature Updates are received.
- Select when Feature Updates are received.
- Select when Quality Updates are received.


Step 5: Click the OK button to save the change.
Step 6: Restart the Windows.
Solution 7: Manually install Windows Updates from CAB files
You can install the MSU update file by extracting the CAB file and installing it directly to a Windows image using DISM or the Add-WindowsPackage command instead of WUSA tool (Windows Update Standalone Installer).
Step 1: Execute the below command to extract the MSU update file:
expand -f:* "C:\Temp\windows10.0-KBXXXXXXX-x64.msu" C:\Temp\KBXXXXXXXStep 2: A CAB will appear in the C:\Temp\KBXXXXXXX directory with a name like Windows10.0-KBXXXXXXX-x64.cab.
Step 3: Execute the below command to install this CAB update file using DISM.exe:
DISM.exe /Online /Add-Package /PackagePath:c:\Temp\Windows10.0-KBXXXXXXX-x64.cabor
PowerShell command:
Add-WindowsPackage -Online -PackagePath "c:\Temp\Windows10.0-KBXXXXXXX-x64.cab"