Windows users reported that certain updates failed to install with the unknown error Code 646 happen to Windows 7 and Windows 8.1. The detail error message as below:
Some updates were not installed
Error(s) found:
Code 646 Windows Update encountered an unknown error.
![[Solved] How to Fix Windows Update encountered an unknown error Code 646](https://lh3.googleusercontent.com/sZD8JoXqvQxKTv7jmF-u4wMPrqNYZ3DW9GgZW7c-GLlt4DhfILp53xXV0abwc22iJImnZMisI2Ck6plTAF0tQ13e31-jo2CccG3iFew88Nw7-x-KDNWLxNvqtY2Bo6eUumXg7PQau5BYZIvV0L5Y8QRbRXNfddy5EAx5JRhkr7BC-V0Cdt8w34LkBffjZbEBKG4KiR6JHCZFUkNmaXg89t-Ju8gheg2dNvl4cl6gmYqQPiwUXy5iJZyDUFcfmungA5h7bq1qhhH4jKjPEVAfz-vF8iUBTNpYlIb0XnffblCuTEAoOVqV7IzxCRmwg6CDDvWgqfT7DC9mmvnN9UKgssWHHdBx22o3ub2p9NAXkNG4QH9ABdhVGZ37DBPhjpwkZpOnks1603Q6L_t35rNvCebIRo_FKYbcaIjdswv4Ze07Uvx8fBLeNejXqJuQrUIX8RGeq7G4nOofPp3FkyHrHimsZfKfekczWZX9GP2OEiodKOEwXbBgx9NSjYEExGoN7GfGR8zM0s1YCWaDykkx6t-YnFXHcNKUe9YxUGEx018YsJo3tkonuJQITGYxASlR8jky2StYsEnX7IurXAN36KIL8xBlX69MIujMsgDpI1nGOpHYYtWVxyUMnvfAtxfBtEFpk6KUdSD5NSvC6snZj5fFtbJ5_rfo364ALFYCQ7jhgtK2-Jwp3QPyCAf1K13e6n_wtgLwfqWAFfAW0hU-39hjDbufJPyntr_gqBGrmoioUCCsjPOa9Hw=w536-h380-no?authuser=0)
Follow the solution steps below to fix Error Code 646.
Table of Contents
Solution 1: Execute Windows Update Troubleshooter
Step 1: Pressing Windows key + R to open a Run box.
Step 2: Type control and press Enter to open the Classic Control Panel interface.
Step 3: Type troubleshoot in the search bar located at the top-right corner of the screen.
Step 4: From the list of search results, click on the Troubleshooting entry.
Step 5: Click on Fix problems with Windows Update under System and Security to open the Windows Update Troubleshooter.

Step 6: Click on Advanced.

Step 7: Check the box associated with Apply repairs automatically.
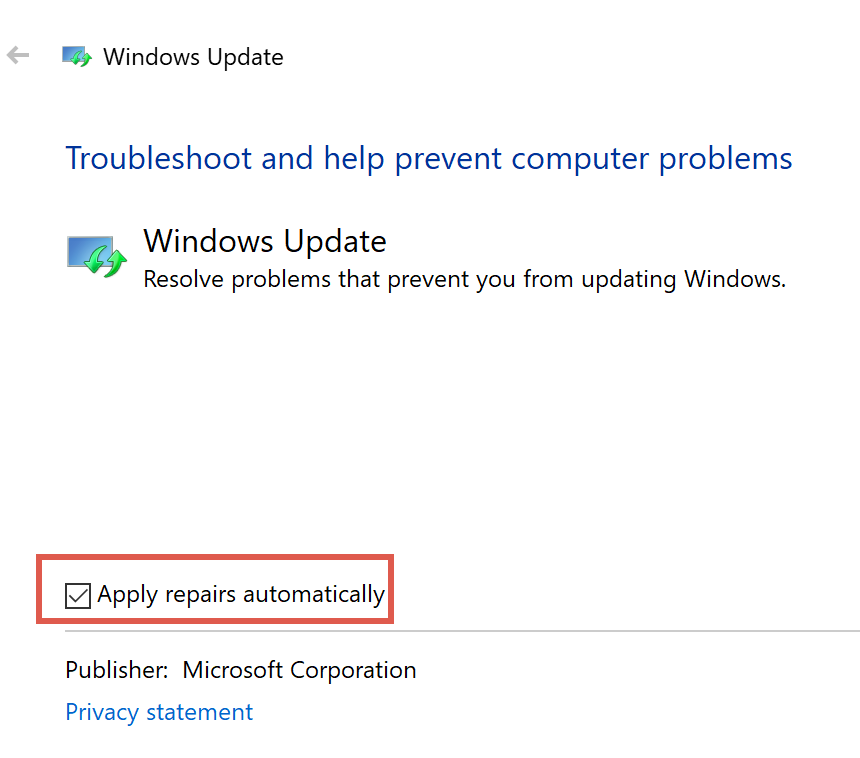
Step 8: Click on Apply this Fix and follow the on-screen prompts.

Step 9: Restart your PC.
Solution 2: Install via Windows Update Catalog
Step 1: Visit Microsoft Update Catalog.
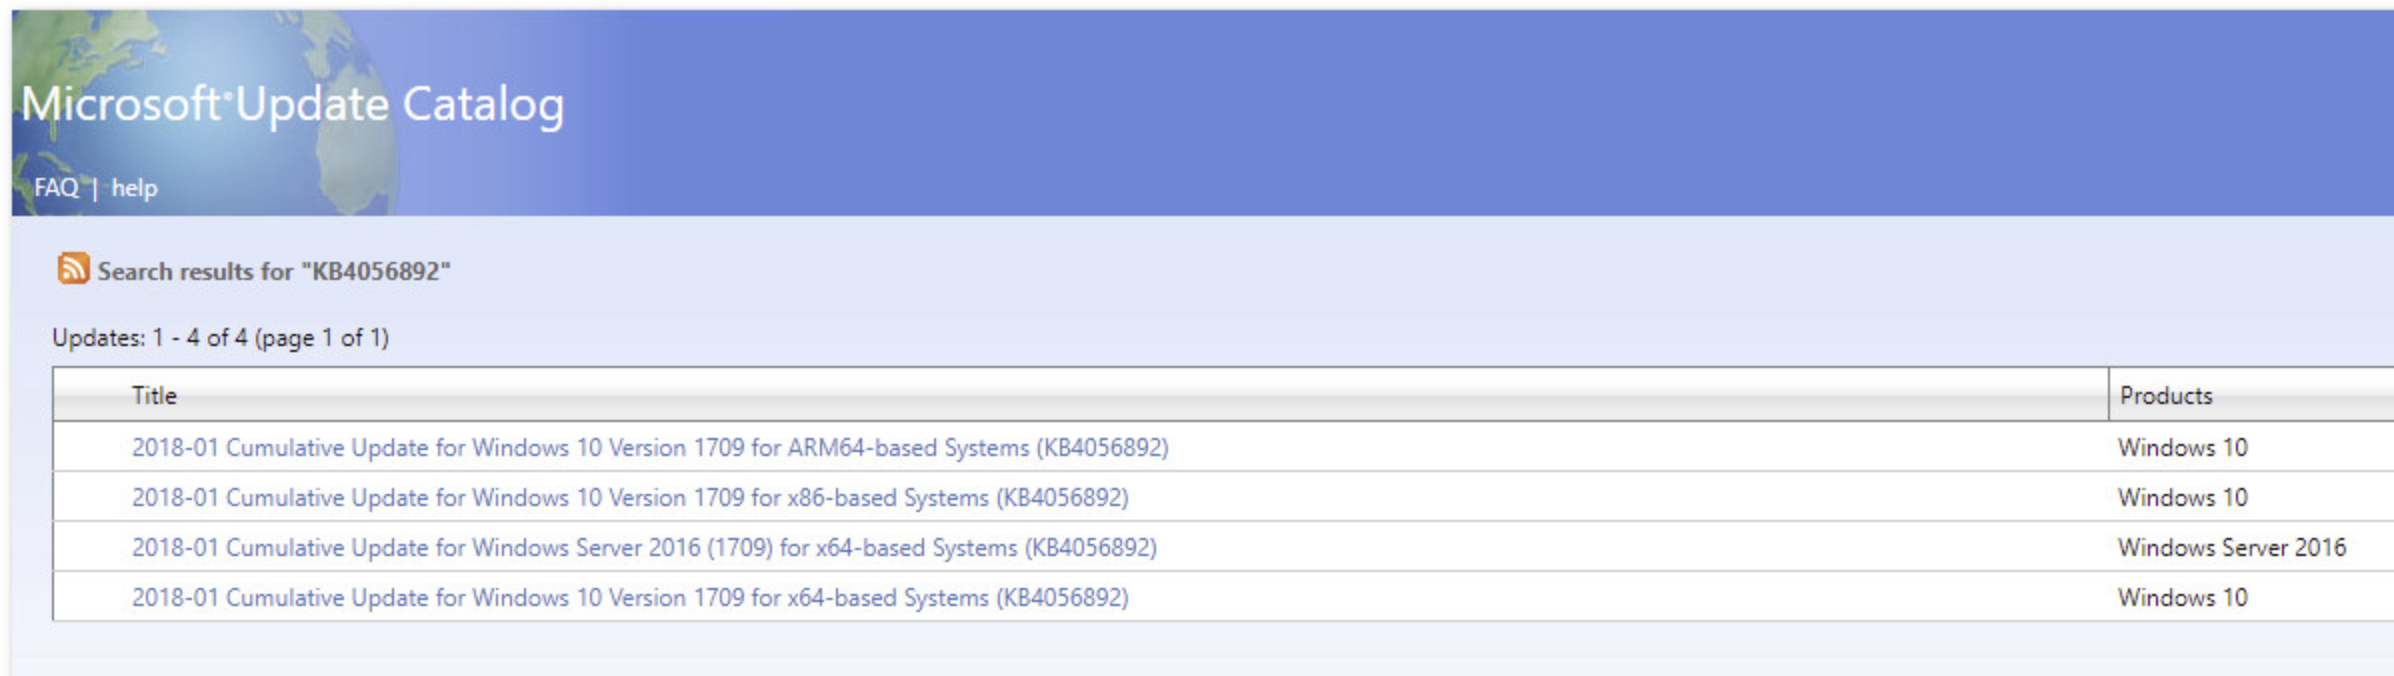
Step 2: Search for the failed update KB using the search function located at the top-left corner of the screen. In most cases, the error code 646 is confirmed to occur with the following Windows Updates:

Step 3: Download the appropriate Windows Update according to the CPU architecture and the Windows OS version.
Step 4: Click on the .inf file and choose Install from the context menu.

Step 5: Restart your PC after Windows Update installs completed.
Solution 3: Force to Start Windows Update and Background Intelligent Transfer services
Step 1: Press Windows key + R to open a Run box.
Step 2: Type services.msc and press Enter to open the Services console.
Step 3: Located Windows Update Service, right-click on it and choose Properties from the context menu.
Step 4: Select the General tab, change the Startup type to Automatic, and click on the Start button.

Step 5: Click on the Apply button to save the changes.
Step 6: Located Background Intelligent Transfer Service, right-click on it and choose Properties from the context menu.
Step 7: Select the General tab, change the Startup type to Automatic, and click on the Start button.

Step 8: Click on the Apply button to save the changes.
Step 9: Restart your PC.
Solution 4: Clear the AppData Key via Registry Editor
Step 1: Press Windows key + R to open a Run box.
Step 2: Type regedit and press Enter to open up the Registry Editor. Click Yes to grant administrative privileges when prompted by the UAC (User Account Control).
Step 3: Navigate to the following location:
HKEY_USERS\.DEFAULT\Software\Microsoft\Windows\CurrentVersion\Explorer\User Shell Folders
HKEY_CURRENT_USER\Software\Microsoft\Windows\CurrentVersion\Explorer\User Shell Folders
HKEY_CURRENT_USER\Software\Microsoft\Windows\CurrentVersion\Explorer\User Shell Folders
Step 4: Double-click on the AppData registry key to ensure the value is %USERPROFILE%\AppData\Roaming. In case the value is different then modify it and click the OK to save the changes.

Step 5: Restart your PC.