Table of Contents
Problem Symptom
Leftover temporary files by Windows and third-party software might be wasting a lot of hard disk storage space. This article shows you how to remove temporary files on Windows and free up disk space using the Storage Sense feature in Windows 11.
What is Storage Sense on my computer?
Windows Storage Sense function is a silent assistant that works with OneDrive to automatically free up space by making locally available files that you aren’t using anymore online-only again.
Is it good to turn on Storage Sense?
Storage Sense is a clean-up tool for you to set to automatically delete files and backup versions of Windows updates files, version upgrades, and empty the Recycle Bin after 30 days. I think it is very useful if you have a small drive, it can be a good way to have the machine automatically delete some junk files for you.
When should I run storage sense? Should I run storage sense every day?
The default setting is every month which should be perfect for most of the users. But you can switch it to run for every day, week, month, or when low disk space.
Does Windows Storage Sense affect performance?
Storage Sense cleanup actions may temporarily decrease the performance of your Windows.
Solution: How to remove temp (temporary) files in Windows 11 using Storage Sense
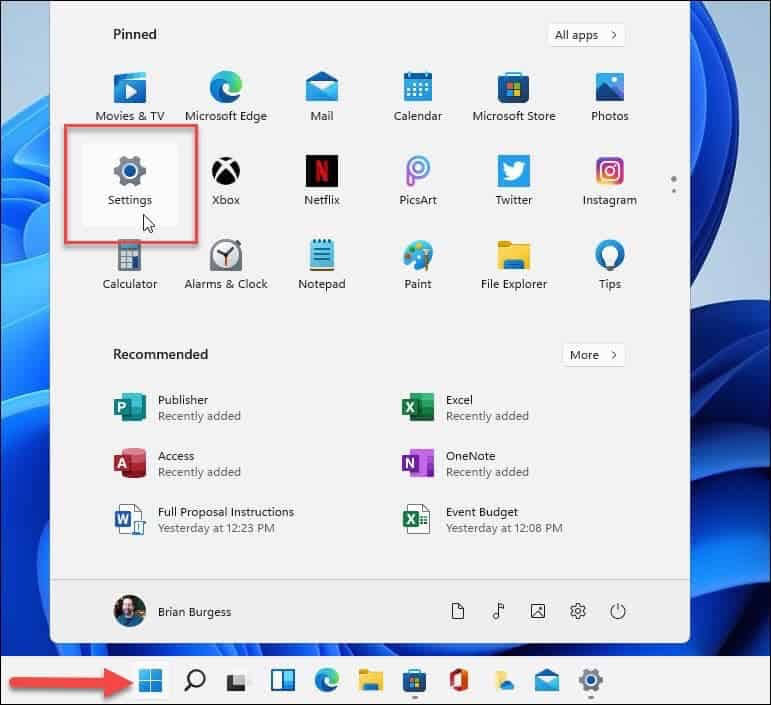
Step 1: Click the Start button to open the Settings app, or, you can press the Windows + I keyboard shortcut to open the Settings app directly.
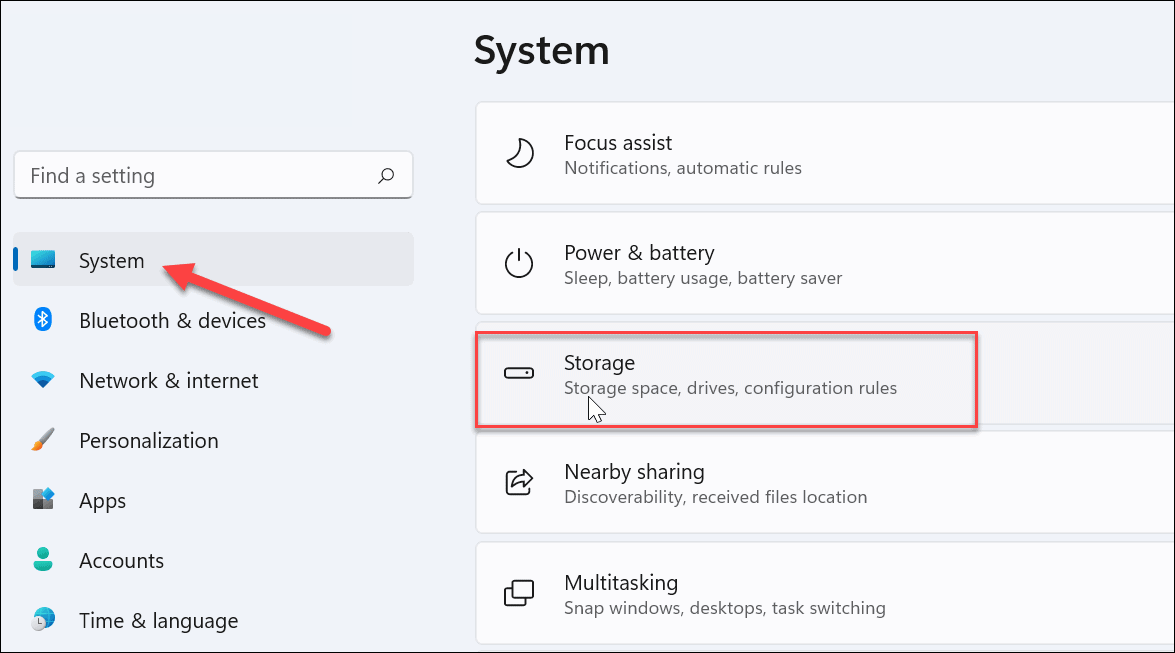
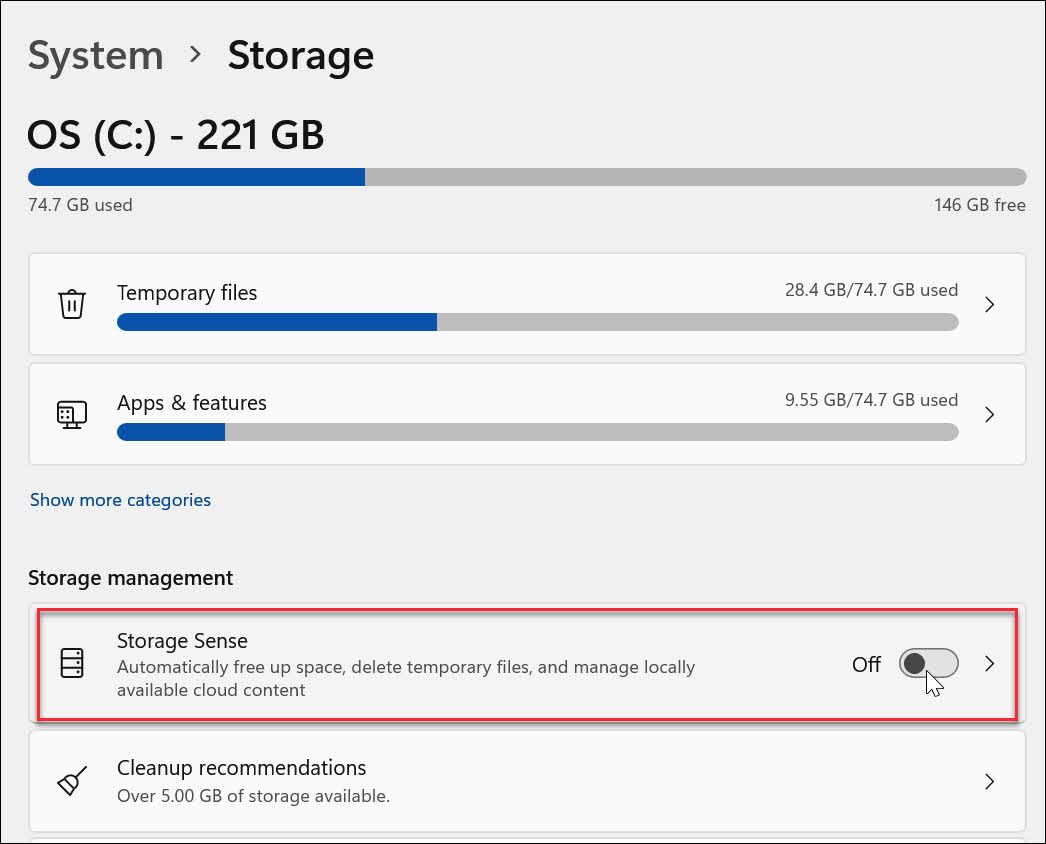
Step 2: Click System from the list option on the left pane.
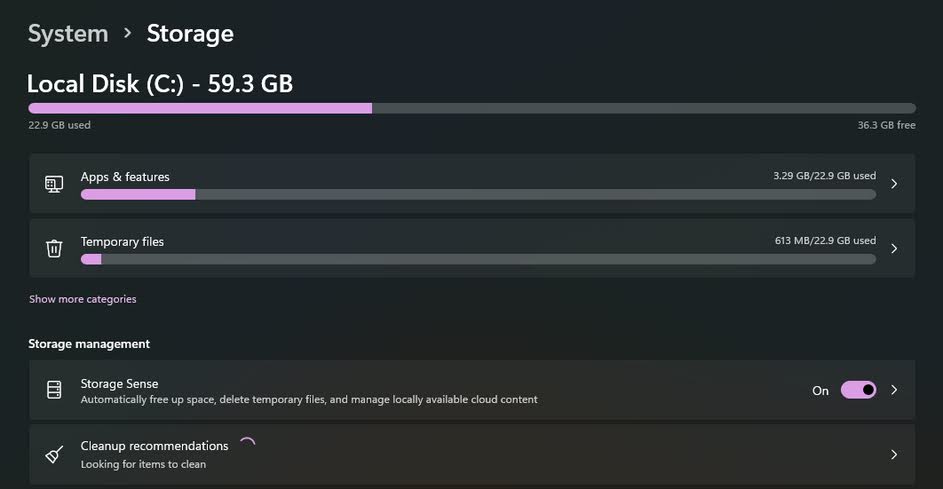
Step 3: Scroll down, click the Storage option on the right pane.
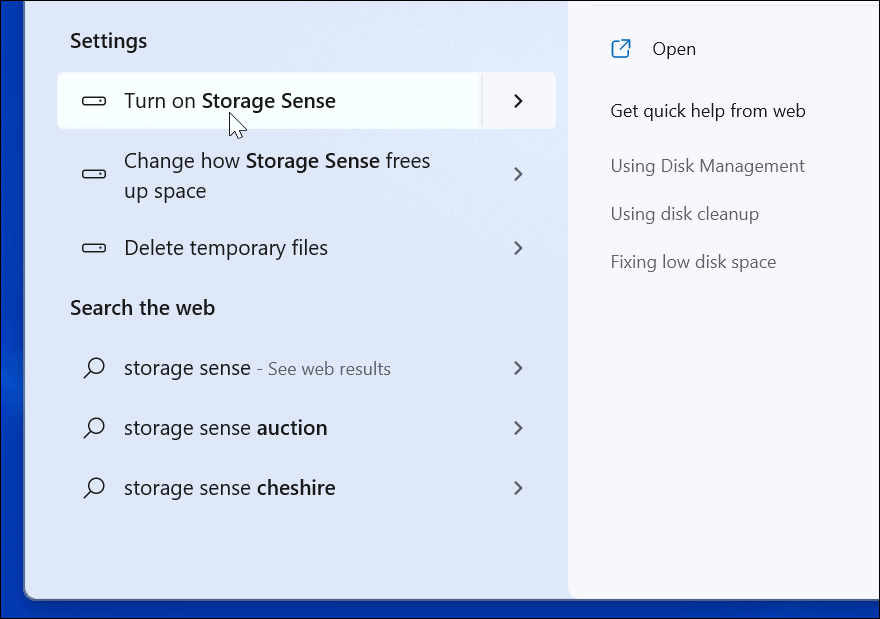
Note: For quicker access to Storage Sense function, you can click on the magnifying glass taskbar icon or press on the Windows Key to open the Windows 11’s search tool, type storage sense in the search box, then click Turn on Storage Sense from the list of search result.
Step 4: The Storage section in Settings will show how much space is being used by files on your system. Toggle on the Storage Sense function under the Storage management section.
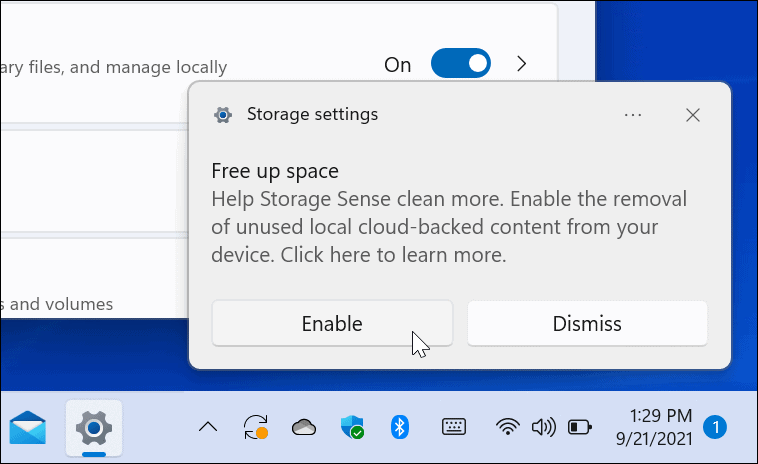
Step 5: You should see a notification pop up letting you know you’re about to turn it on. Click the Enable button.
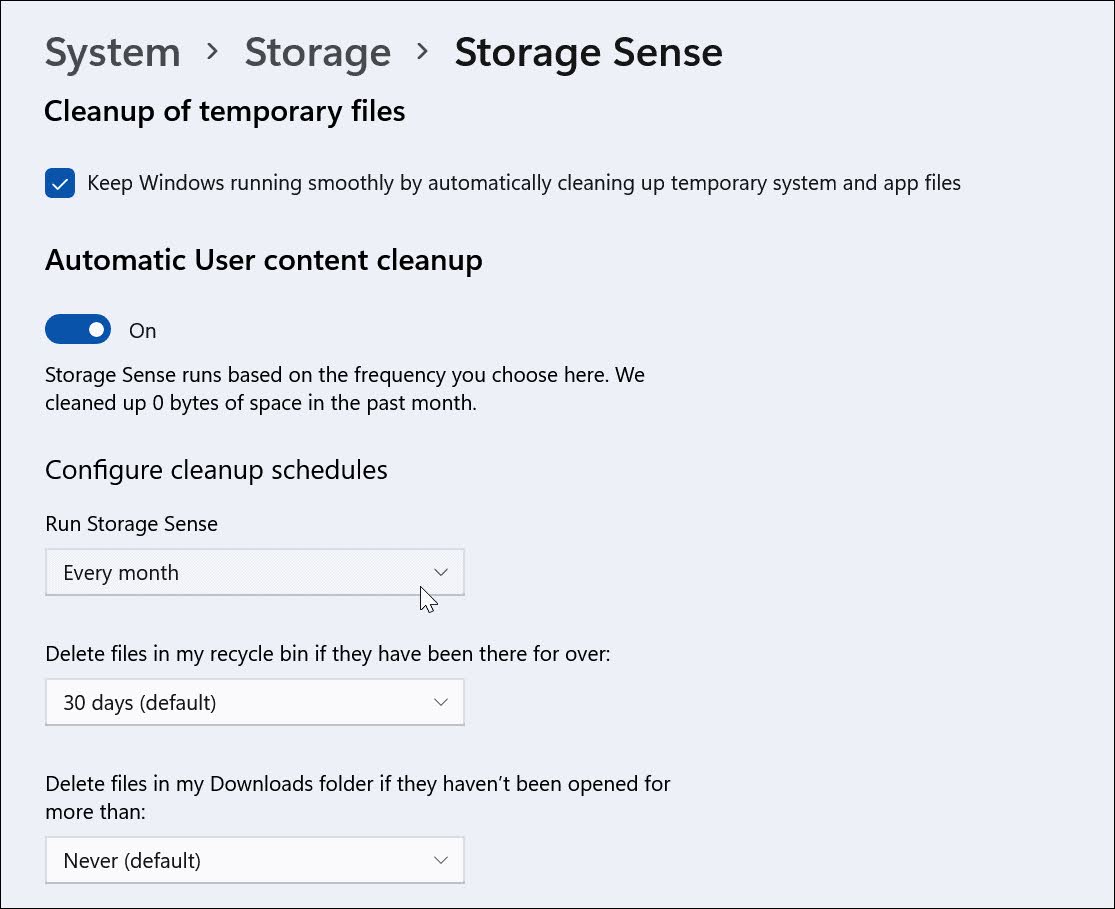
Step 6: Click the > arrow on the Storage Sense option to configure the settings.
Step 7: Check the Keep Windows running smoothly by automatically clearing up temporary system and app files checkbox.
Step 8: Toggle on Automatic User content cleanup option.
Step 9: Click the Run Storage Sense drop-down menu to select an automatic cleanup schedule for deleting temporary files. Select the Every day option for the most regular scheduling or keep the Every month option as default.
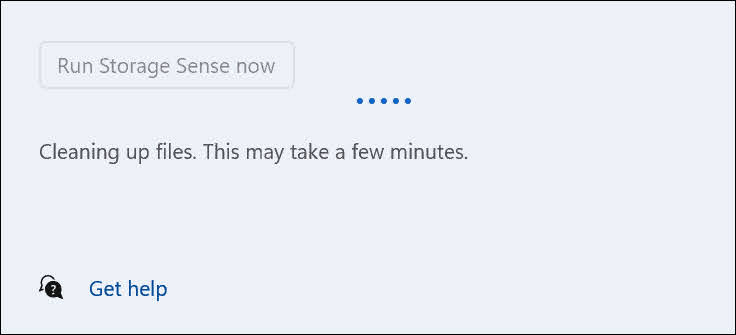
Step 10: Press the Run Storage Sense now button to manually delete temporary files with Storage Sense immediately.
Note: Storage Sense will delete files in the Downloads folder if they haven’t been opened for a set amount of time from one day, 14 days, 30 days, 60 days, or never (default). The option to remove temp files is enabled by default. In general, keeping the default settings should be good for most Windows users.

Reference
- Microsoft Support > Manage drive space with Storage Sense
- Microsoft Support > Use OneDrive and Storage Sense in Windows 10 to manage disk space
- Microsoft Community > Storage Sense configuration for deleting temporary files