Table of Contents
- Problem Symptom
- Potential Causes
- Pre-check
- Solution 1: Set date and time to automatic
- Solution 2: Temporary turn off the Antivirus or Windows Defender
- Solution 3: Allow the Mail app to communicate through Windows Firewall
- Solution 4: Delete then re-add the account
- Solution 5: Sign in using an Advanced setup
- For Google
- For Outlook
- Solution 6: Reset Mail and Calendar app
- Solution 7: Re-register Mail and Calendar app
Problem Symptom
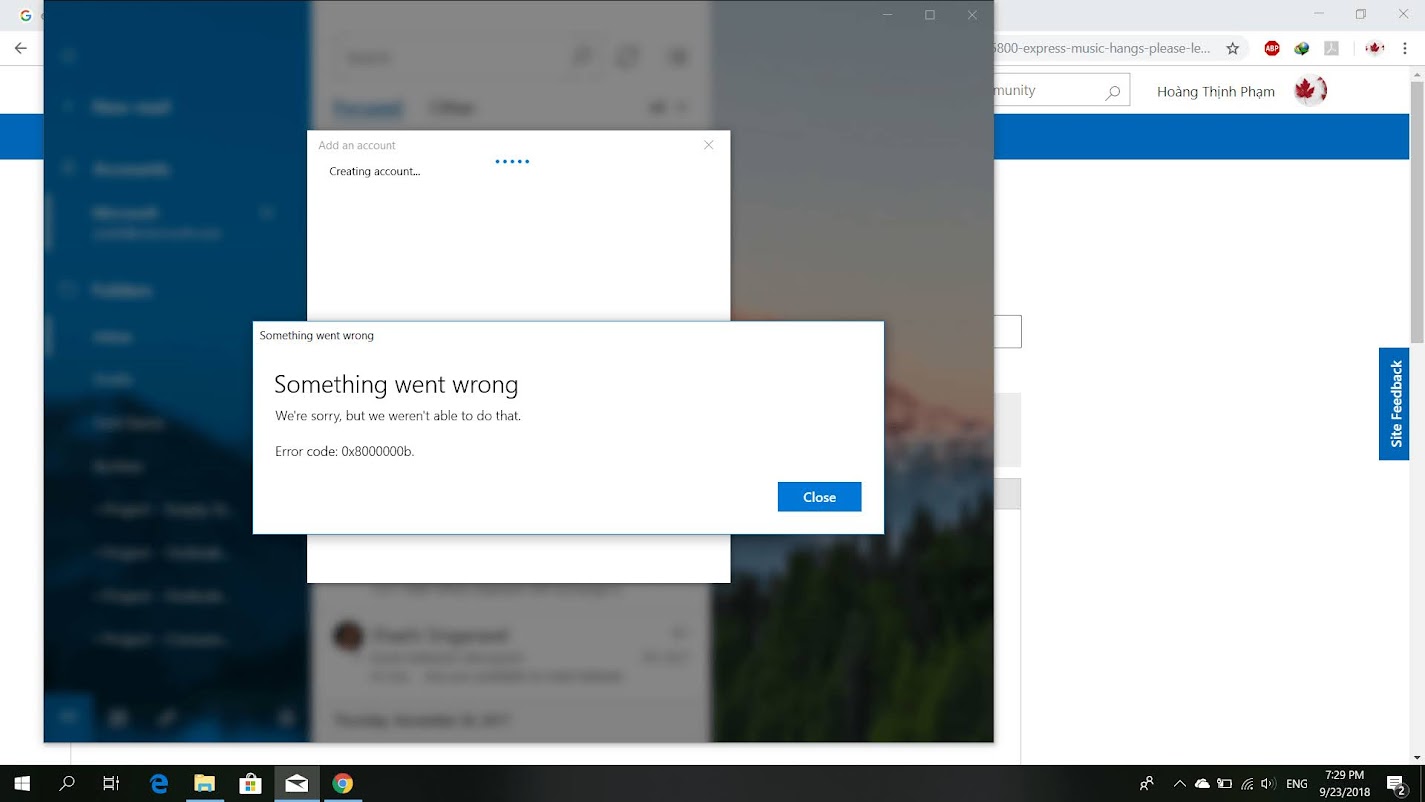
Recently a lot of Windows users experiencing error 0x8000000b when trying to add, login, or synchronize third-party email accounts using the Windows built-in Mail app with Gmail, Yahoo, Outlook, or any other accounts.
The detailed error message is as below:
Something went wrong
We’re sorry, but we weren’t able to do that.
Error code: 0x8000000b.

Follow the below solution steps to resolve the 0x8000000b error issue in the Mail and Calendar app. The resolution steps below also applied to other similar error codes including 0x8007042b, 0x80040154, 0x8000ffff, 0x8007000d, 0x80c8043e, 0x80070435, 0x8007006d, 0x80070425 associated with the same error message.
Potential Causes
- Post Office Protocol (POP) and Internet Message Access Protocol (IMAP) settings are not enabled in the email server.
- Windows Firewall service is blocking the request sent by the Mail application.
- Third-party antivirus or Windows Defender could potentially be blocking the request sent by the Windows Mail app.
- Mail and Calendar application is not working properly.
- Incorrect password.
- Email server have issue.
- Unstable Internet connection.
- Outdated Windows
Pre-check
- Make sure the firewall allows outbound connections to ports 993, 465, and 587.
- Verify you have entered the correct password.
- Make sure your Internet connection is stable.
- Make sure you have installed the latest Windows update.
- Verify the date and time in the Windows setting configure correctly.
Note: We recommend creating a System Restore point before starting to troubleshoot. If something goes wrong during the process then you can easily restore it to the previous working state.
Solution 1: Set date and time to automatic
Step 1: Right-click on the Date and time widget located at the bottom-right of the screen.
Step 2: Select the Adjust time and date option from the context menu.
Step 3: Toggle OFF the Set time automatically option and Set time zone automatically option.
Step 4: Wait a few seconds and toggle both settings to ON again.

Solution 2: Temporary turn off the Antivirus or Windows Defender
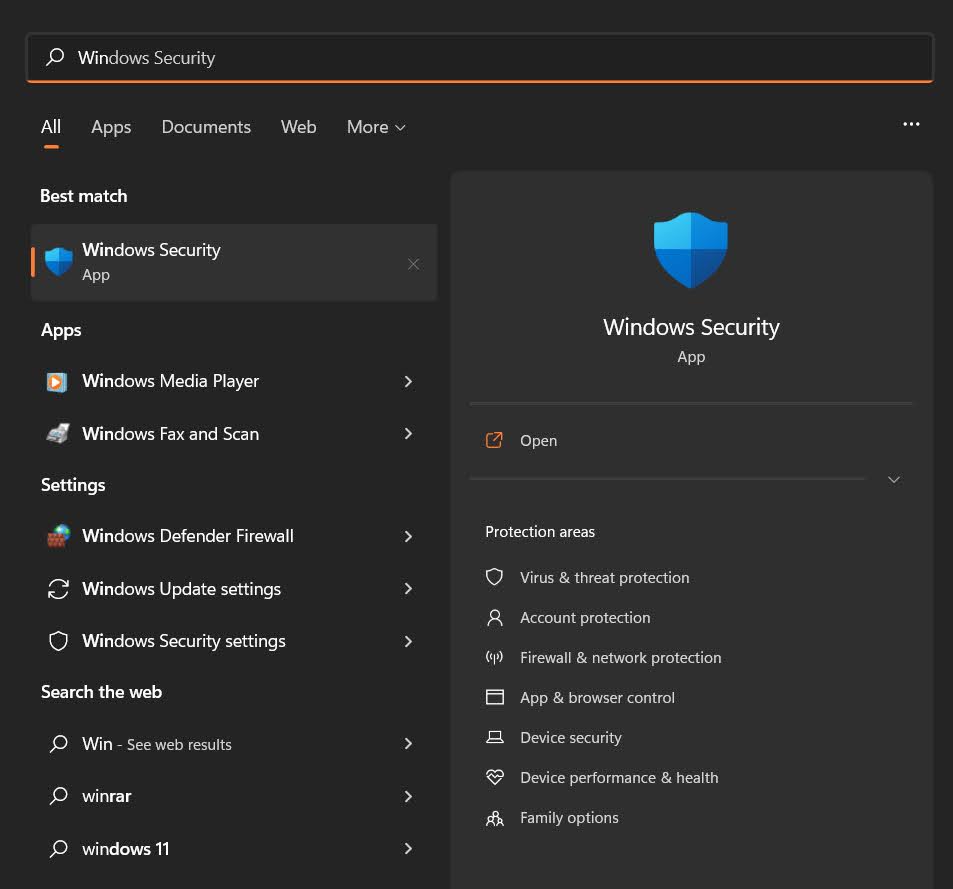
Step 1: Click on the Start menu.
Step 2: Type Windows Security in the Search box.
Step 3: Click on the Windows Security app from the search results.
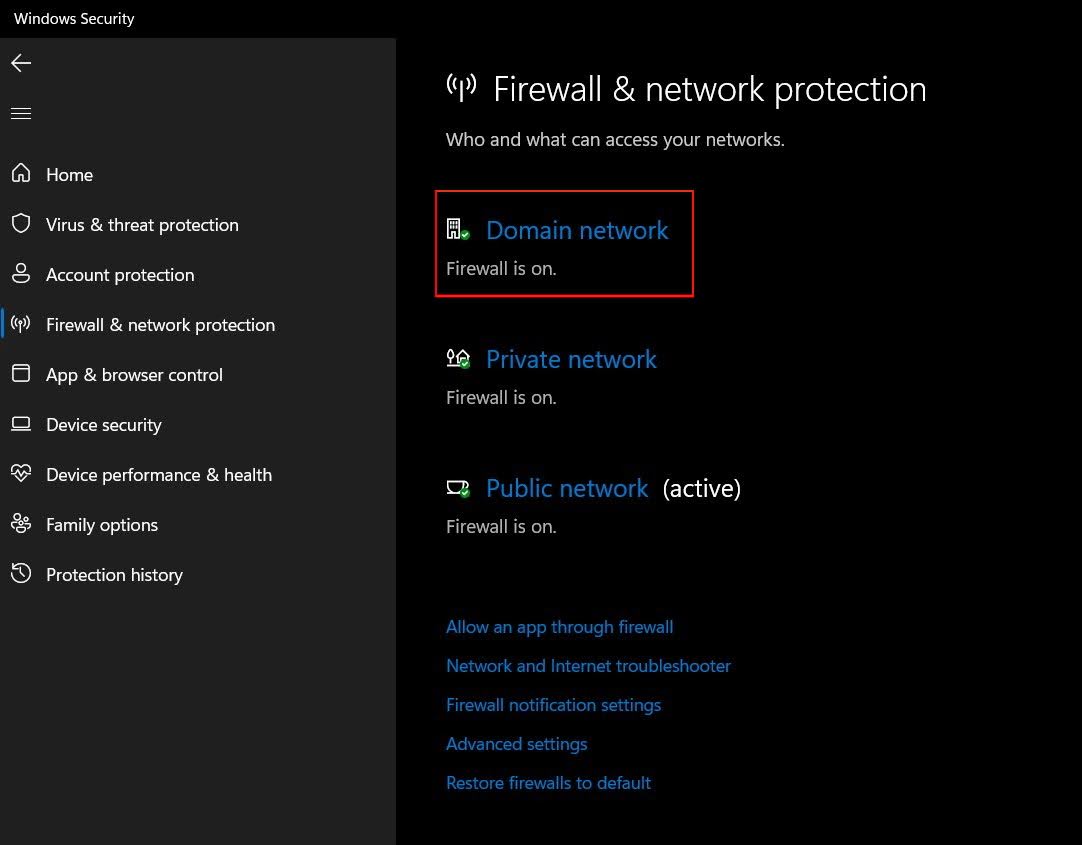
Step 4: Click on the Firewall and network protection.

Step 5: Choose a network profile.
Step 6: Toggle off Windows Defender Firewall.
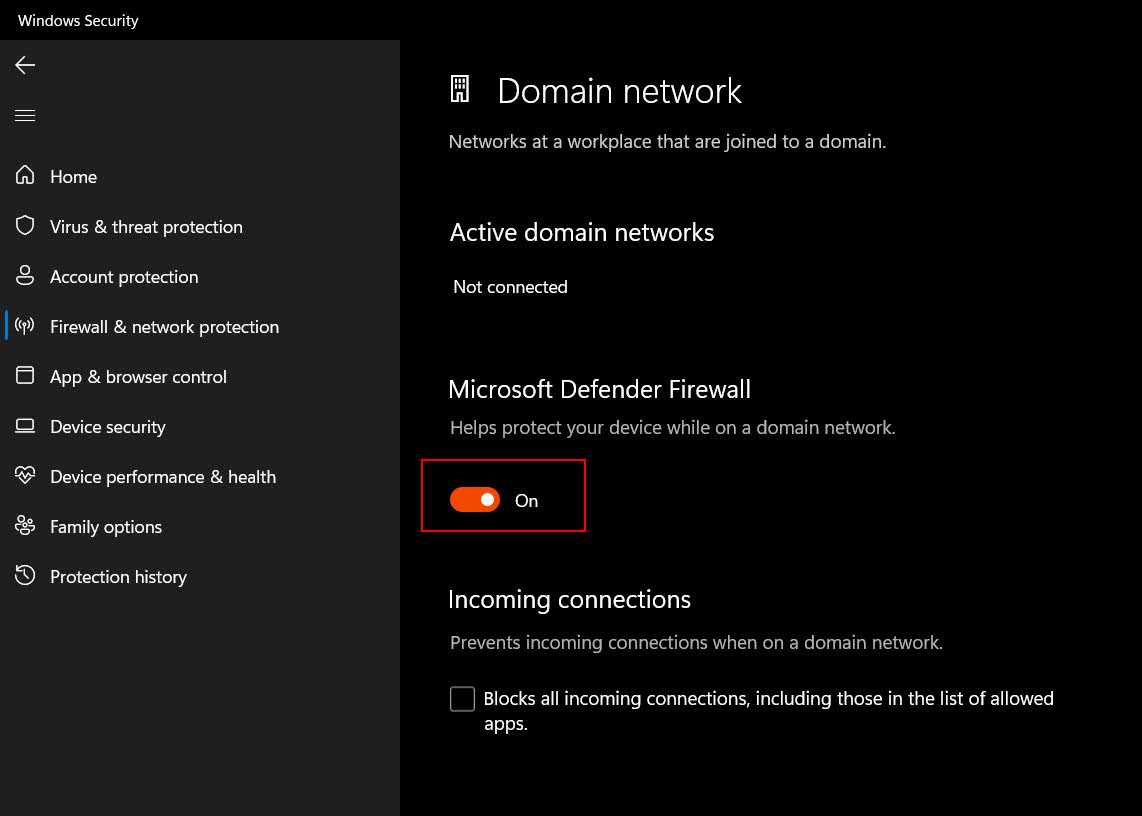
Step 7: Click on the Yes button if User Account Control (UAC) is prompt.

Step 8: Perform the same step for each network profile present.
Step 9: Go back to Windows Security app.
Step 10: Click on the Virus & threat protection.

Step 11: Click on the Manage setting link under the Virus & threat protection settings.
Step 12: Toggle OFF Real-time protection function.
Step 13: Click on the Yes button if User Account Control (UAC) is prompt.
Step 9: Try to sync your email again.
Solution 3: Allow the Mail app to communicate through Windows Firewall
Step 1: Click on the Start menu.
Step 2: Type Windows Security in the Search box.
Step 3: Click on the Windows Security app from the search results.
Step 4: Click on the Firewall and network protection.
Step 5: Click on the Allow an app through firewall link.

Step 6: Click on the Change settings button.
Step 7: Scroll down to locate the Email and accounts apps in the list of allowed applications, make sure to select and check the both Private and Public boxes.
Step 8: Click on the OK button to save the change.

Step 9: Try to sync your email again.
Solution 4: Delete then re-add the account
Step 1: Click on the Start menu.
Step 2: Type Mail in the Search box.
Step 3: Click on the Settings icon at the bottom of the Mail navigation pane.
Step 4: Choose the account you to remove and select the Delete account option.
Step 5: Add your account again.
Step 6: Try to sync your email again.
Solution 5: Sign in using an Advanced setup
For Google
Step 1: Log in to your Gmail account using the browser.
Step 2: Click on the Gear icon to open Gmail Settings.
Step 3: Click on the Forwarding and POP/IMAP tab.
Step 4: Look for the IMAP access settings, and click the radio button next to Enable IMAP.
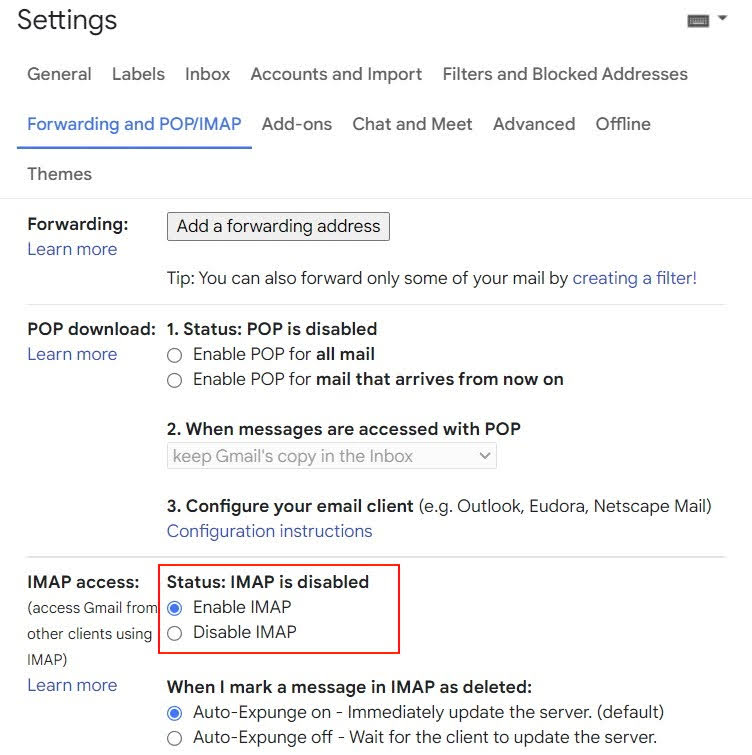
Step 5: Click on the Save Changes button.
Step 6: Click on the Labels tab.
Step 5: Make sure the Show in IMAP checkbox is checked for Inbox, Sent, Trash, and All Messages folders. You can also choose to View in IMAP for other tags you want to see in Outlook or Mail for Windows 10.
Step 6: Turn ON the Allow less secure apps setting in your Gmail account settings.
Note: Allow less secure apps setting is not available for accounts with 2-Step Verification enabled.
Step 7: Click on the Start menu.
Step 8: Type Mail in the Search box.
Step 9: Click on the Settings icon at the bottom of the Mail navigation pane.
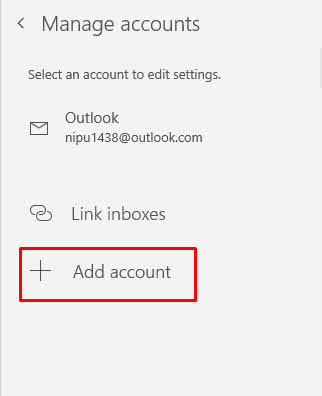
Step 10: Click the Manage accounts option.

Step 11: Click the Add account option.
Step 12: Click on the Advanced setup option.

Step 13: Choose the Internet email option for the email account type.
Step 14: Enter your account details below:
- For the Incoming email server box, type in: imap.gmail.com:993
- Select IMAP4 as the Account type
- For the Outgoing email server box, type in: smtp.gmail.com:46
- Check for the Outgoing server requires authentication checkbox.
- Check for the Use the same user name and password for sending email checkbox.
- Check for the Require SSL for incoming email checkbox.

Step 15: Click on the Sign-in button.
Step 16: Try to sync your email again.
For Outlook
Step 1: Click on the Start menu.
Step 2: Type Mail in the Search box.
Step 3: Click on the Settings icon at the bottom of the Mail navigation pane.
Step 4: Click the Manage accounts option.
Step 5: Click the Add account option.
Step 6: Select the Exchange option.
Step 7: Enter your email address, and click on the Next button.
Step 8: You’ll be asked to enter your password. Enter your email and password.
Step 9: Click on the Sign-in button.
Step 10: Try to sync your email again.
Solution 6: Reset Mail and Calendar app
Step 1: Press the Window + I key together to open the Settings app.
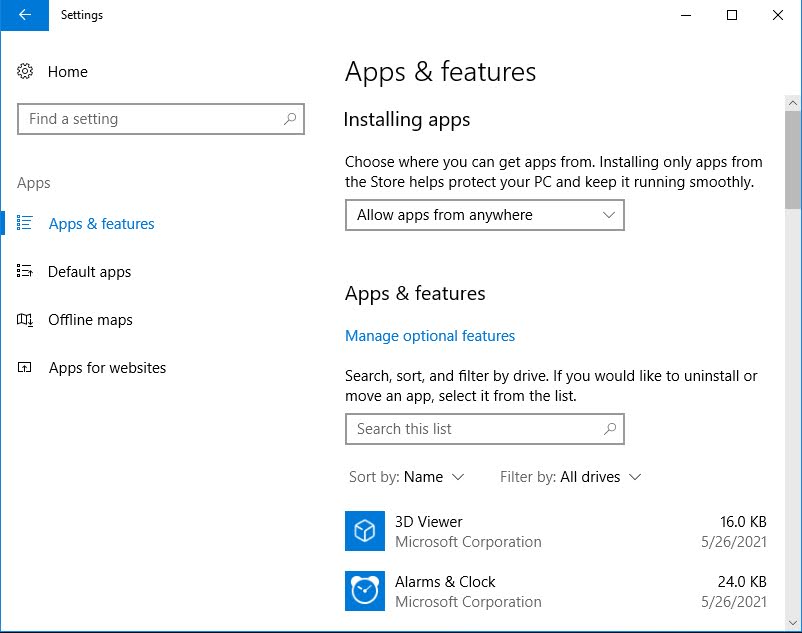
Step 2: Click the Apps on the left sidebar.
Step 3: Click the Apps & features option in the list.
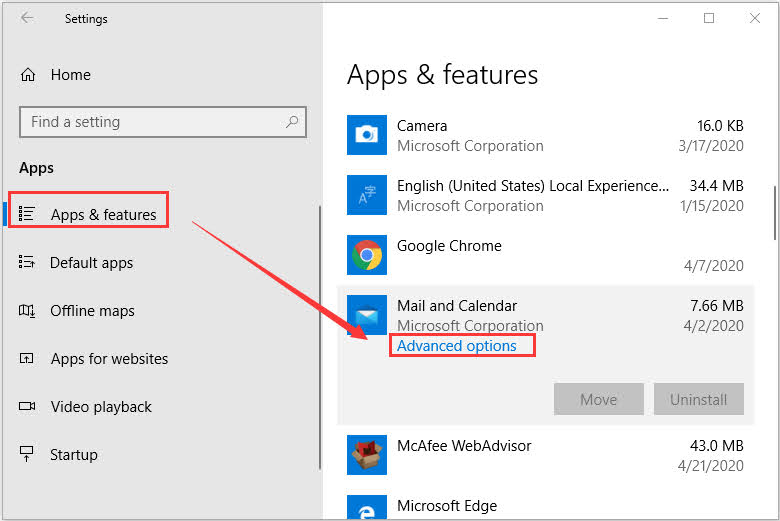
Step 4: Scroll down to locate the Mail and Calendar app.
Step 5: Click on the Advanced options link.
Step 6: Click on the Reset button.

Step 7: A new pop-up window will appear for final confirmation, click on the Reset button to confirm the operation to reinstall and revert to its default settings.

Step 8: Close the Settings app.
Step 9: Add your account again.
Step 10: Try to sync your email again.
Solution 7: Re-register Mail and Calendar app
Step 1: Click on the Start menu.
Step 2: Type cmd in the Search box on the taskbar.
Step 3: Right-click on Command Prompt from the App result, and select the Run as Administrator option from the context menu to open an elevated Command Prompt window. Select Yes if prompted by User Account Control.

Step 4: Type the below command and press the Enter key to re-register the Mail and Calendar app:
PowerShell -ExecutionPolicy Unrestricted -Command "& {$manifest = (Get-AppxPackage *windowscommunicationsapps*).InstallLocation + '\AppxManifest.xml' ; Add-AppxPackage -DisableDevelopmentMode -Register $manifest}"

Step 5: Restart the Windows.
Step 6: Try to sync your email again.