Some Windows users are encountering error 0x80070052 with a detailed message “The directory or file cannot be created.” when copy or move files to removable drives such as flash drive or external HDD. The detail error message as below:
An unexpected error is preventing the operation. Make a note of this error code, which might be useful if you get additional help to resolve this problem:
Error 0x80070052: The directory or file cannot be created.
![[Solved] How to Fix "Error 0x80070052: The directory or file cannot be created." when Copy](https://lh3.googleusercontent.com/ZJabJQajoqm0Kggh1eCwUIpj_xoBOGgmSyldlHsd1YlkhAmuII09lNKr2PEajEqd8hWLDSF1fCveS7whWsAu_TevIH9CG1Fa_NVbBoeLD_De_ioF6cPdK5vYZrxszefbjnBzvkQk3T0pyQLlW_4naPg841kD9PuJS3VQifkiFrkzlcZXZlKsj7bd6lfqRnBuXTNP7_PwZNAKRaXJzkWarsOlxYk0wMGxQPB4D9iOjsca92U_nr-iZozdjkJZE_cpaIDOcEgOa99S5cuuHtkmpYOFkPw55CymHT3TnZsUfZai9JyS9mo4cRejrwEOGTBZfzTUb-1VhatstimGPq20d-WZuU5bua8PgWudVwpUhjMK3U7XOr6pSfcpL9g-5xm82jD3QL5wXCojlTM6RuPQ2FagL2p3QNwaIvWe0Qq9uVBIBpgAttA_WEN2_boSUIIZ_Q56Fu3NMaLQDQb3IgjpJg9sxGl_jCG_0xR7HVxDAShU0HA2qxHw_uWWVpf9mV2VYhHnsYgVkTUnxkcr8EN7QJztIAXnAIyH4HjZ5bTVj7tfG9cENVoy-IiIQI-m7mMN5snnlLGqcxowEu0pkLDwkKtSSrbv1qSCerjDct4BiWfv_nS-gv6AUO3nLbHMc3L3UCw75z3bLhVJHi5SHiKuJQj-k5VsijHvGl3Vy9rNddZQtTGig8WARTaEcwaSN_fazeqApkpPtAFU-sJOOf_A9W5mADI--fmZKya7Poc5vRu44q71=w980-h492-no)
Table of Contents
- Solution 1: Reconnect removable drive to other USB port
- Solution 2: Copy or move the files into a subfolder
- Solution 3: Rename the folder or file
- Solution 4: Free up more space in removable drive
- Solution 5: Change files permission
- Solution 6: Perform Windows clean boot
- Solution 7: Format the destination drive to the FAT32 or NTFS file system
- Solution 8: Copy encrypted files
- Solution 9: Repair the destination drive for corruption
Solution 1: Reconnect removable drive to other USB port
Windows unable to detect the USB device if the connection between the USB port and the motherboard is loose. You just need to reconnect the USB device or connect it to other USB ports on the computer.
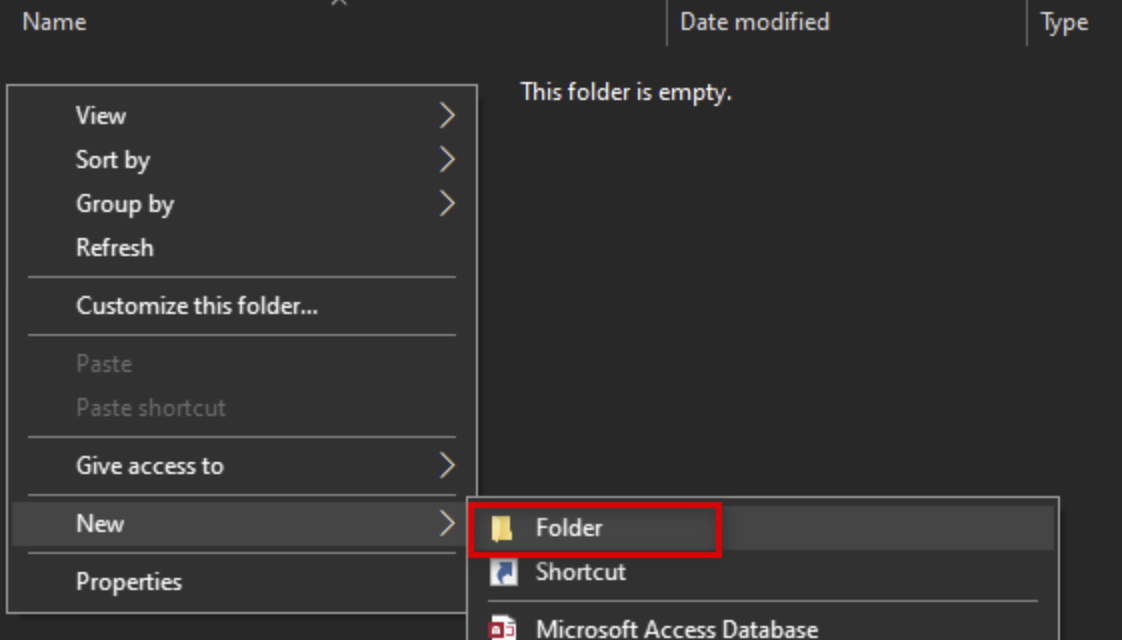
Solution 2: Copy or move the files into a subfolder
Reminder: Perform below steps only when your destination folder is the root folder of the removable drive.
- Open the destination drive, right-click on a space and choose New > Folder.
- Paste the files into the new folder.
Solution 3: Rename the folder or file
Change the name of the file or folder on the computer to avoid using special characters such as & and then copy to the removable drive.
Solution 4: Free up more space in removable drive
Only copy or move the files with a capacity that removable drive able to hold or you can delete unused files on the drive to free up some space.
Solution 5: Change files permission
- Right-click the file or folder for which you want to set permissions, choose Properties option.
- Click the Security tab.
- Click on the Edit… button to open the Permission dialog box.
- Perform the below actions:
- Click Add button to set permissions for a group or user that does not appear in the Group or User Name field, then enter the name of the group or user for whom you want to set permissions.
- Click on the name of the group or user to change or delete permissions for an existing group or user.
- Select the Allow or deny checkbox for the type of authorization.
- Click the Remove button to remove the group or user from the Group or user name field.
- Click the OK button.
Solution 6: Perform Windows clean boot
- Press Windows key + R to open the Run box.
- Type
msconfigand press Enter to open the System Configuration. If the UAC (User Account Control) prompted then click Yes to grant administrative access. - Click the Services tab, check the Hide all Microsoft services check box, then click Disable all button.
- Click the OK button.
- Restart your PC.
Solution 7: Format the destination drive to the FAT32 or NTFS file system
Reminder: Perform below steps only when your destination driver’s file system is FAT16.
- Open File Explorer, right-click on the destination drive and choose the Format option from the context menu.
- Ensure that File System drop-down menu set to FAT32 (Default) or NTFS, Allocation unit size set to 4096 bytes and uncheck the Quick Format.
- Click the Start button to launch the drive format operation.


Solution 8: Copy encrypted files
Make sure the 3rd party program such as McAfee Drive Encryption is running. Ignore this step if you’ve only used the built-in Windows encryption.
- Press Windows key + R to open the Run box.
- Type
service.mscand press Enter to open the Services console. - Scroll down through the list of locally installed services to find the Credential Manager service.
- Right-click on Credential Manager service and choose Properties option from the context menu.
- Select the General tab and ensure that the Startup type is set to Automatic.
- Click on the Start button to ensure that the service is currently running and click the Apply button to save the changes.

Solution 9: Repair the destination drive for corruption
- Open File Explorer, right-click on the destination drive and choose Properties option from the context menu.
- Go to Tools tab then click on the Check button under the Error checking section. If the UAC (User Account Control) prompted then click Yes to grant administrative access.
- Click on Scan and repair drive link and wait for the process to complete.
