Row-level security (RLS) allows you to create a single or a set of reports that targets data for a specific user. In this article, you will learn how to implement RLS by using either a static or dynamic method and how Microsoft Power BI simplifies testing RLS in Power BI Desktop and Power BI service.
What you’ll learn:
- Configure row-level security by using a static method.
- Configure row-level security by using a dynamic method.
When sharing Excel sheets across the organization, creating new sheets of data for different departments is a hassle. Additionally, sharing unnecessary data may stir up internal security issues.
With row-level security for Excel, you can hide data from different roles in the organization with ease. For example, if you want to share data on product sales with the marketing team, row-level security enables you to hide data that is irrelevant to them.
By learning how to implement row-level security, you are one step closer to being an Excel master.
Table of Contents
- Introduction
- Configure row-level security with the static method
- Create a report in Power BI Desktop
- Create RLS roles in Power BI Desktop
- Test the roles in Power BI Desktop
- Deploy the report to Power BI service
- Add members to the role in Power BI service
- Test the roles in Power BI service
- Configure row-level security with the dynamic method
- Check your knowledge
- Question 1
- Question 2
- Summary
Introduction
Microsoft Power BI can help you secure reports and workspaces by allowing you to share them to active directory users and groups. You can also share a single report but have users see different data according to their job role.
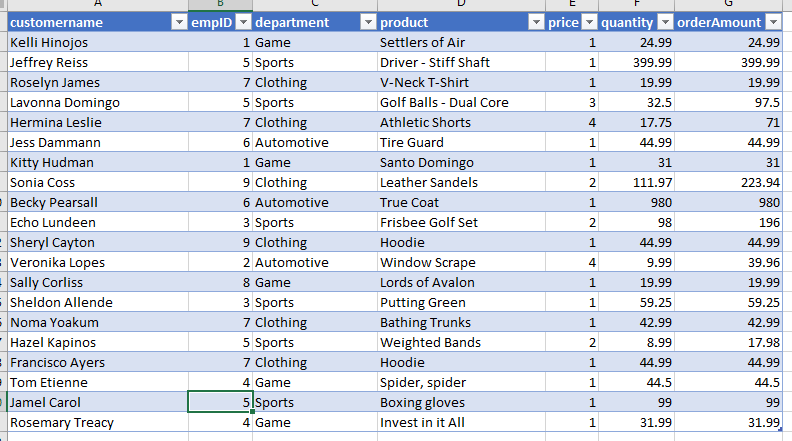
For example, consider a scenario where you work for Tailspin Traders. You use the following table to track sales.
You also use the following table for employee information.

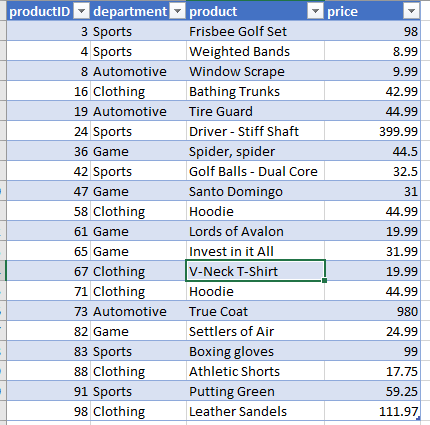
The following table shows the list of products.
You want to make one report where employees in a specific department can only see the sales for that department. For instance, Maria Cameron works in the Game department and should only see the sales from that department, not sales from the Sports, Clothing, or Automotive departments.
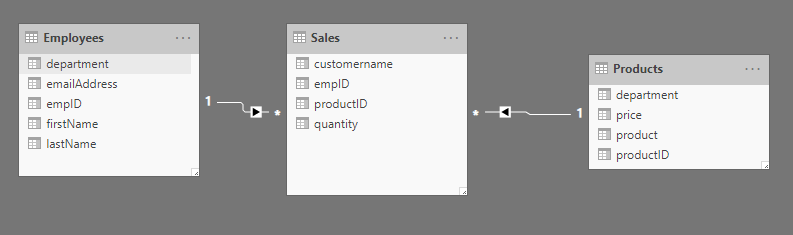
This data is organized in a star schema. The Sales table contains all attributes of a fact table, while employees and products are dimension tables. The data model is shown in the following screenshot.
Two ways of implementing row-level security in Power BI are the static method and the dynamic method.
Row-level security (RLS) uses a DAX filter as the core logic mechanism. This module will demonstrate how you can implement row-level security in Power BI by using DAX to ensure that only the appropriate person can view the appropriate records.
Configure row-level security with the static method
The static method in row-level security (RLS) uses a fixed value in the DAX filter, while the dynamic method uses a DAX function.
RLS involves several configuration steps, which should be completed in the following order:
- Create a report in Microsoft Power BI Desktop.
- Import the data.
- Confirm the data model between both tables.
- Create the report visuals.
- Create RLS roles in Power BI Desktop by using DAX.
- Test the roles in Power BI Desktop.
- Deploy the report to Microsoft Power BI service.
- Add members to the role in Power BI service.
- Test the roles in Power BI service.
Create a report in Power BI Desktop
Follow the typical steps to create a report in Power BI Desktop. Use Microsoft Power Query to retrieve and clean the data. Then, confirm that the relationship exists between the two tables by using the Modeling tab; it should be a one-to-many relationship on the empID column.
Your next step is to create a Power BI report.

Notice how the preceding table has rows for all sales, including all departments. You will be limiting visibility so that only employees of a specific department can see their own sales.
Create RLS roles in Power BI Desktop
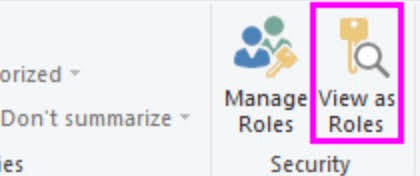
To create RLS roles in Power BI Desktop, select the Modeling tab, and then select Manage Roles.

On the Manage roles page, select Create.

Power BI row-level security (RLS) uses DAX to control who can see which data. Consider it as always adding another filter to the appropriate users, regardless of the filters, slicers, or interactions that the users choose on a Power BI report.
On the Manage roles page, create a role for each department and then add a DAX expression to it. For instance, you can create a role called Game and then add the DAX expression [department] = “Game”. Then, whenever a member of that role interacts with the report, Power BI will add that filter to their interactions, thus limiting what they see.
A fixed value is used in the filter on the right side of the equal sign (in this case, “Game”). The intention is that, if you ever need to add a category, you will need to create a new role with a new value in the DAX expression.

Notice how the DAX filter is applied on the dimension table. Row-level security performs better when the data is organized in a star schema. Apply the DAX filter to a dimension table, as was done with the Products table.
The DAX filter is applied to every interaction, slicer, and filter that the user applies. If you have a DAX filter that performs poorly, the user experience will be negatively impacted. Therefore, keep the DAX filter as simple as possible.
Test the roles in Power BI Desktop
You can validate that the filter is working by selecting the Modeling tab and then selecting View as Roles.
In the View as roles window, select the Game role. The report now renders as if you were in that role, and you will only see the records that are included in the Game department.

You can undo this filter by selecting View as roles again and then selecting None.
Deploy the report to Power BI service
You can deploy the report to Power BI service by selecting the Publish button on the Home tab and then selecting a workspace.
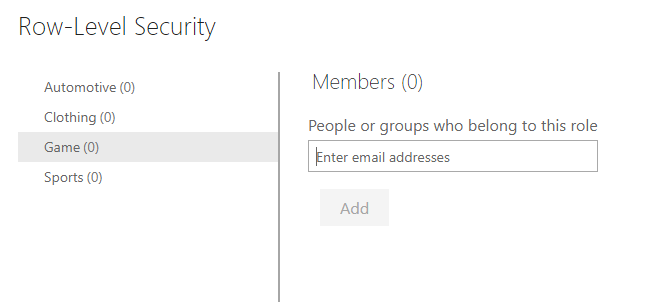
Add members to the role in Power BI service
To add members to the role in Power BI service, go to your workspace in Power BI service. Find the dataset that you created with the same name as your report. Select the ellipsis (…) button and then select Security.

In the Row-Level Security screen, you can add Microsoft Azure Active Directory (Azure AD) users and security groups to the security role. When members are added to this role, the DAX filter that you previously defined will be applied to them. If members are not added to the role, but they have access to the report, RLS will not apply to them. You can add the three people in the Game department to the Game role. Now, when those members sign in, they will only see the report with data that applies to them.
Test the roles in Power BI service
You can test the roles inside Power BI service by selecting the ellipsis (…) next to the Game role on the Row-Level Security screen and then selecting Test as role.

This selection will display the report as if you were a member of the role in Power BI service.
And there you have it! We’ve successfully implemented row-level security in Power BI.
Configure row-level security with the dynamic method
You can set up row-level security only once, without the need to continue maintaining it dynamically.
As the admin at Tailwind Traders, you want Power BI row-level security to only show sales to the person who made them. In this example, Russel King has made four sales. When viewing your report, Russel should only see the sales that he’s responsible for and no other sales. You can configure row-level security exactly the way you configured it previously, with only a single change. Instead of creating four roles, you only need to create one role. The DAX filter for that role would look similar to the following image.

Notice that instead of the fixed string, such as Game or Clothing, this uses a DAX function in the row-level security filter. The userprincipalname() function will compare the email address from the Employees table with the email that the user entered when signing in to Power BI service. If Russel King uses the email address [email protected] to sign in to Power BI service, the system will compare that value to the email address in the Employees table. Assuming that a relationship has been created between Employees and Sales, Russel will only see his four sales.
Check your knowledge
Answer the following questions to see what you’ve learned.
Question 1
Which function will tell you the username of the person who is signed in to Power BI service?
A. USERPRINCIPALNAME()
B. LOOKUPVALUE()
C. USEROBJECTID()
Correct Answer:
A. USERPRINCIPALNAME()
Answer Description:
The USERPRINCIPALNAME() function will tell you which user is signed in to view a report.
Question 2
Where can you test RLS by using different security roles?
A. Power BI Desktop only
B. Power BI service only
C. Both Power BI Desktop and Power BI service
Correct Answer:
C. Both Power BI Desktop and Power BI service
Answer Description:
You can use Power BI Desktop and Power BI service to test RLS.
Summary
This article described row-level security (RLS), the ability in Power BI to limit what a user sees on a specific report. RLS targets the data to a specific user, for instance, only allowing a manager to see the salary of their direct reports. RLS is implemented with a combination of Power BI Desktop and Power BI service. To implement RLS, you can create a DAX formula that restricts their data access, which makes RLS versatile. You can use DAX to indicate that someone can only see records in the United States or sales transactions that are below a certain dollar amount. This programmatic approach means that RLS can be used in a variety of solutions. After you have created the DAX formula in a specific security role, you can deploy the report and then add users to that role. RLS is an effortlessly implemented, the powerful security feature of Power BI.