If you’re an Amazon Prime member, you have a fantastic opportunity to show your support for your favorite Twitch streamer without spending an extra dime. Amazon Prime doesn’t just bring you speedy deliveries and exclusive deals; it also includes a complimentary Twitch Prime membership. In this blog, we’ll guide you through the simple steps to connect your Amazon and Twitch accounts, unlocking a world of benefits through Twitch Prime, all at no additional cost.
Table of Contents
What is Twitch Prime?
Twitch Prime is an exclusive offering within the realm of video game streaming, and it’s a perk that comes bundled with an Amazon Prime subscription. With Twitch Prime, users gain access to a premium experience on the platform, which encompasses a variety of exciting advantages. These perks range from receiving bonus games to enjoying exclusive in-game content and more.
However, one standout feature that many find incredibly valuable is the ability to make a free Twitch channel subscription, which is included as part of their Prime membership. What makes this subscription so significant is that it directly contributes to the well-being of your favorite Twitch streamer. Essentially, by using your Twitch Prime subscription, you’re extending your support to the streamer you admire.
Even more appealing is the fact that you can repeat this gesture every month, and it won’t cost you a cent extra. The only requirement is that you maintain an active Amazon Prime membership that’s linked to your Twitch account. This means you can consistently back your preferred streamer and enhance their experience, all while enjoying the myriad other benefits of your Amazon Prime subscription. It’s a win-win situation that lets you indulge in your gaming passions while giving back to the content creators who entertain and inspire you.
For an extensive list of Twitch Prime perks and answers to frequently asked questions, make sure to visit the Twitch Prime Guide FAQ page. It’s your one-stop resource to discover all the advantages and get answers to any queries you may have about Twitch Prime.
How to link Amazon Prime account and Twitch.tv accounts
To link your Twitch and Amazon Prime accounts and access a complimentary Twitch Prime membership, follow these straightforward steps:
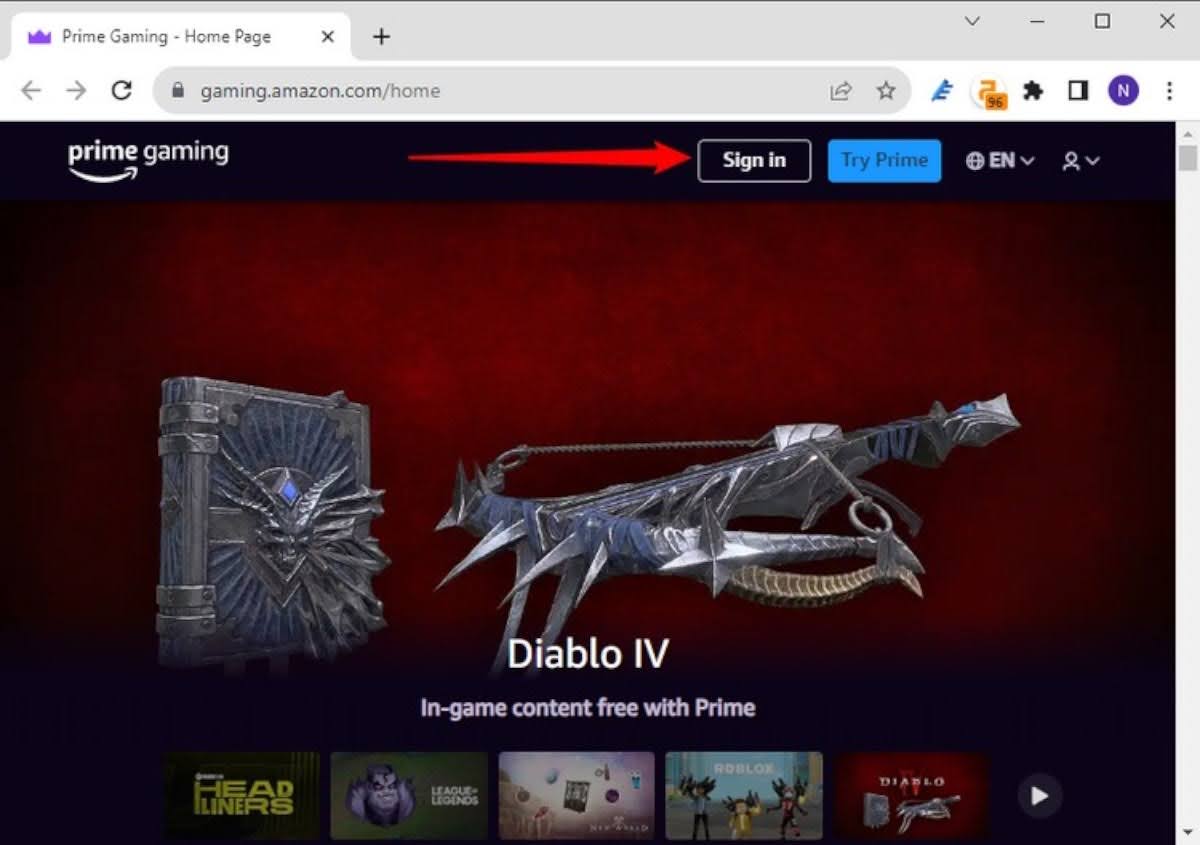
Step 1: Visit Amazon Twitch Prime: Begin by going to the Amazon Twitch Prime website.
Step 2: Sign In: In the top-right corner of the page, click on “Sign In.” You’ll need to enter your Amazon Prime account login details here.
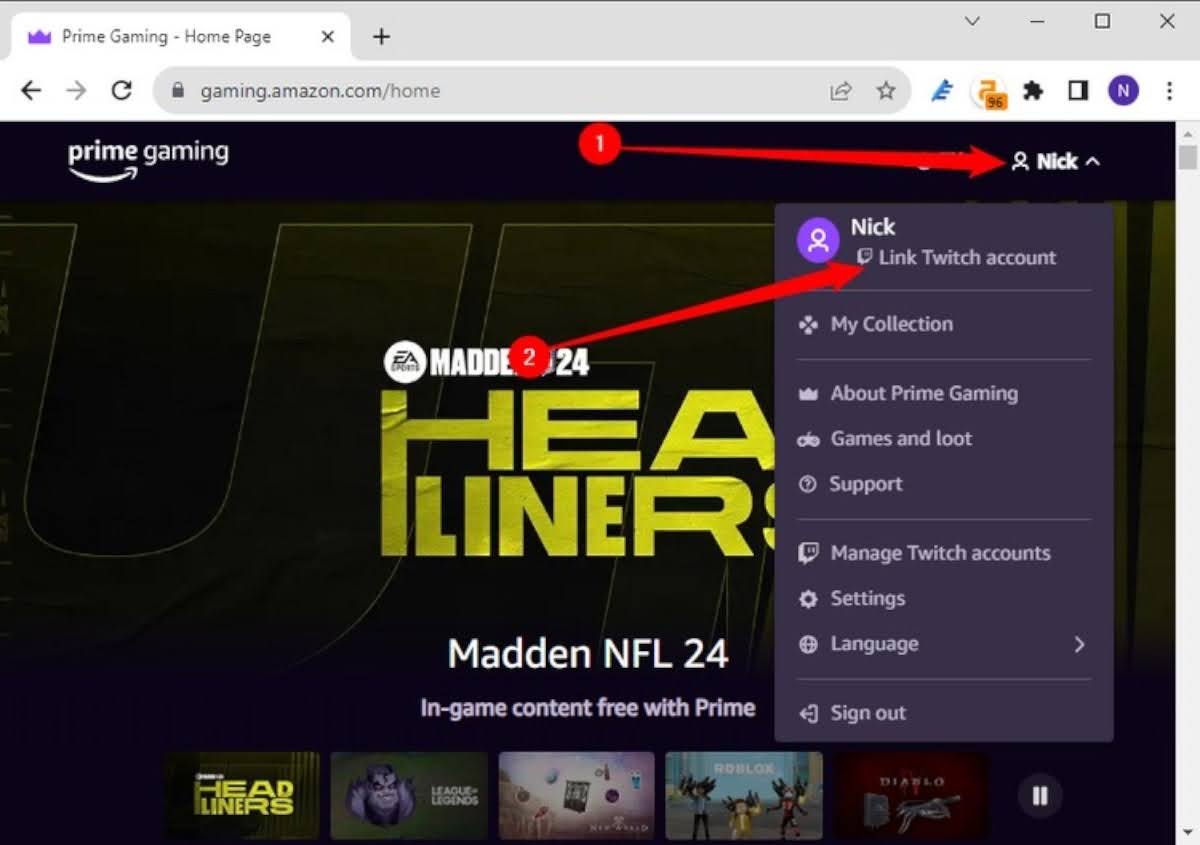
Step 3: Link Your Twitch Account: Once you’ve successfully logged into your Amazon account, locate your profile name at the top-right corner of the page. Click on it, and from the dropdown menu, select “Link Twitch Account.”
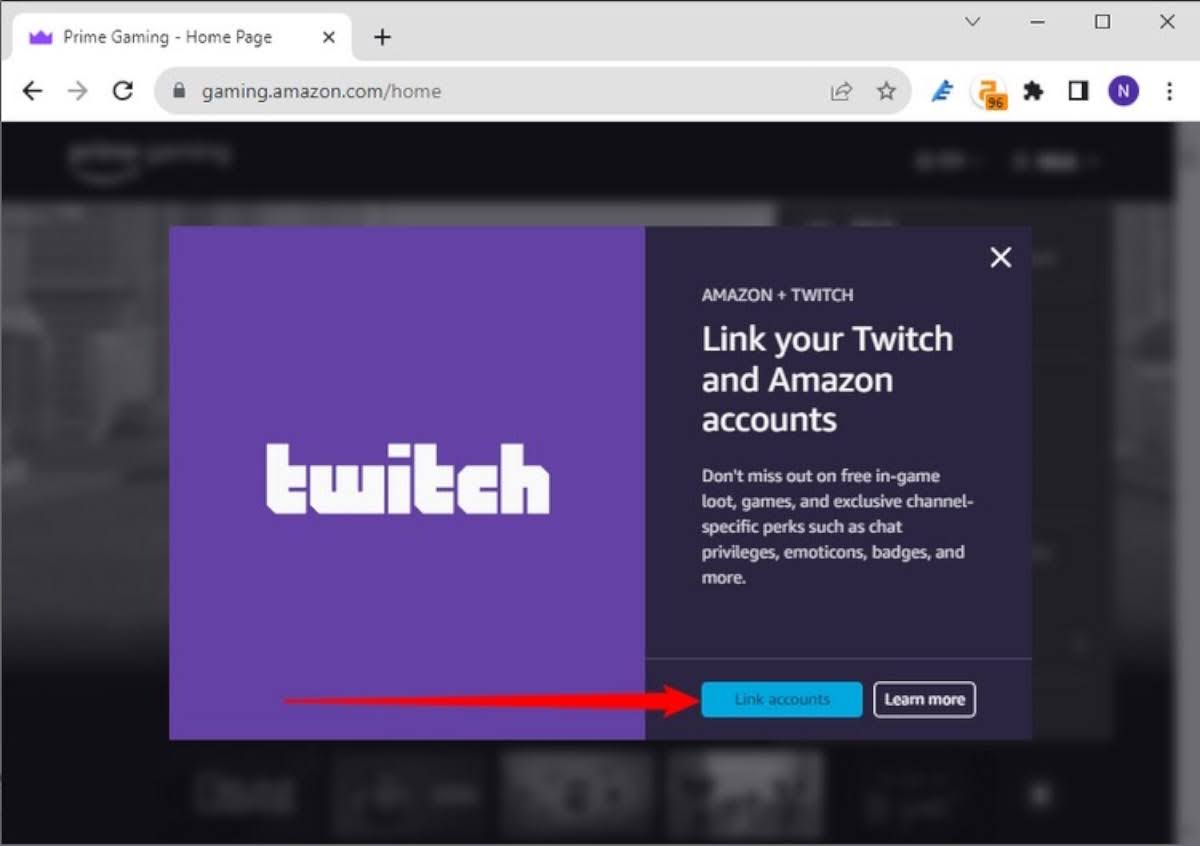
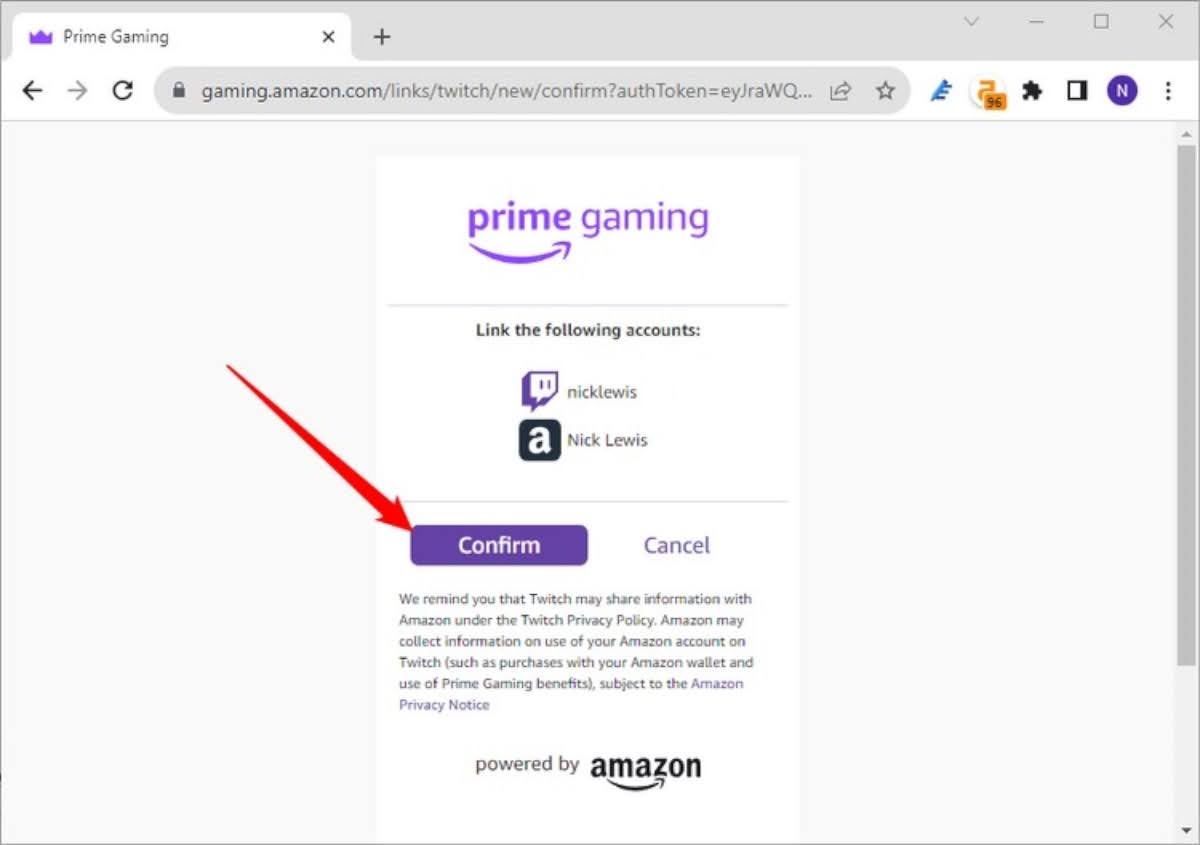
Step 4: Confirm the Link: A confirmation prompt will appear, verifying that you want to establish the link between your Twitch and Amazon accounts. Confirm your choice.
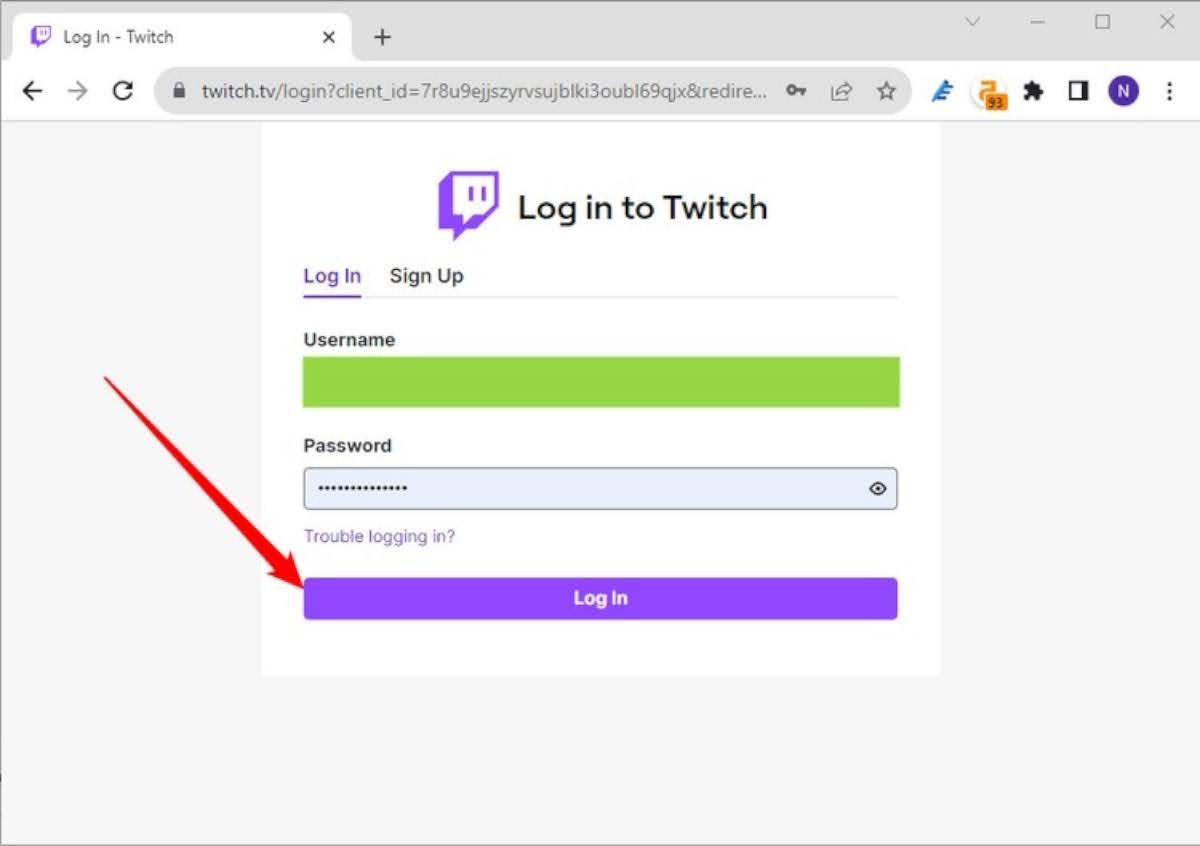
Step 5: Sign In to Twitch: You’ll then be prompted to sign in to your Twitch account. Go ahead and do that to complete the process.
Step 6: Verification: Double-check to ensure that your accounts are successfully linked. Once confirmed, you can proceed to Twitch to begin enjoying the benefits of your new Twitch Prime subscription.
By following these simple steps, you’ll effortlessly connect your Amazon Prime and Twitch accounts, granting you access to a range of exclusive benefits through Twitch Prime.
Subscribing to a Twitch Streamer via Prime Membership
When you decide to subscribe to a Twitch streamer using your Prime membership, you’re effectively contributing $4.99 to support that streamer. Here’s a step-by-step guide to help you through the process:
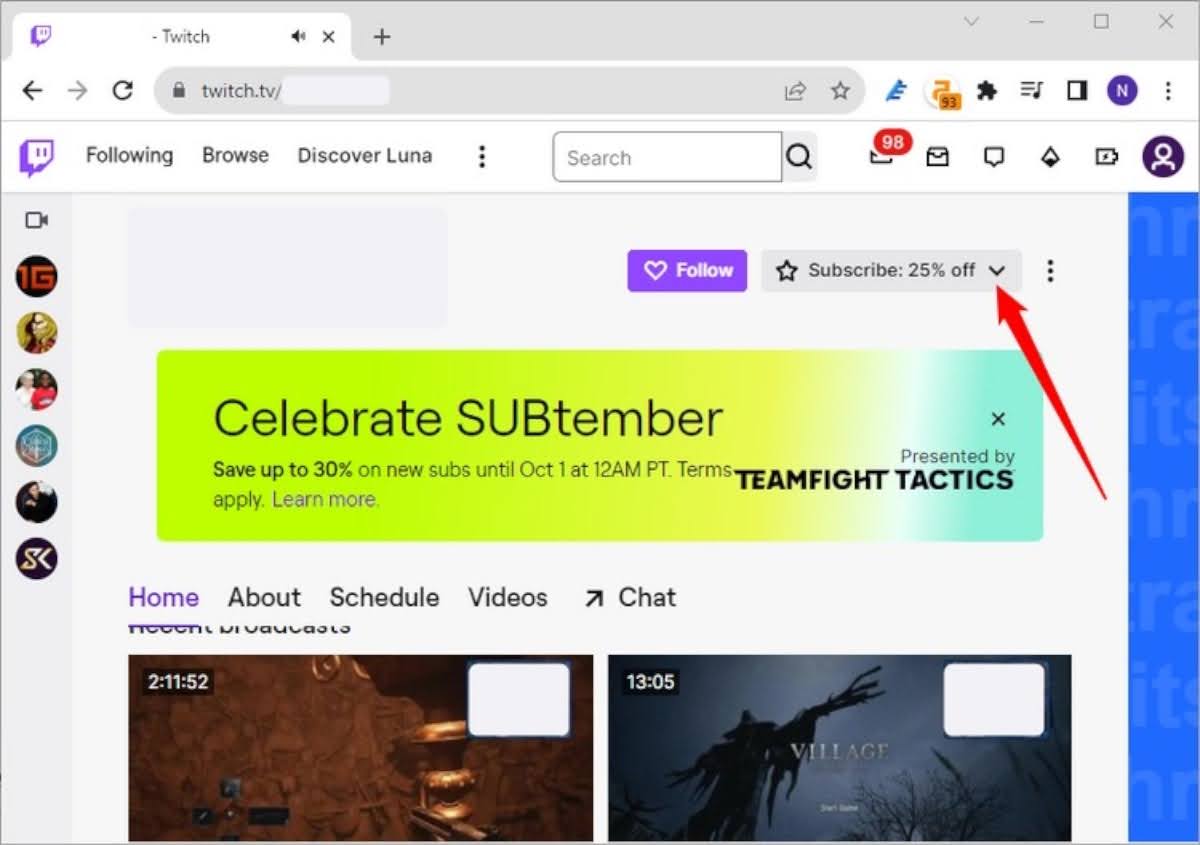
Step 1: Find the Streamer’s Profile
Begin by navigating to the profile of the Twitch streamer you wish to support. Once you’re on their page, look towards the top and locate the “Subscribe” button.
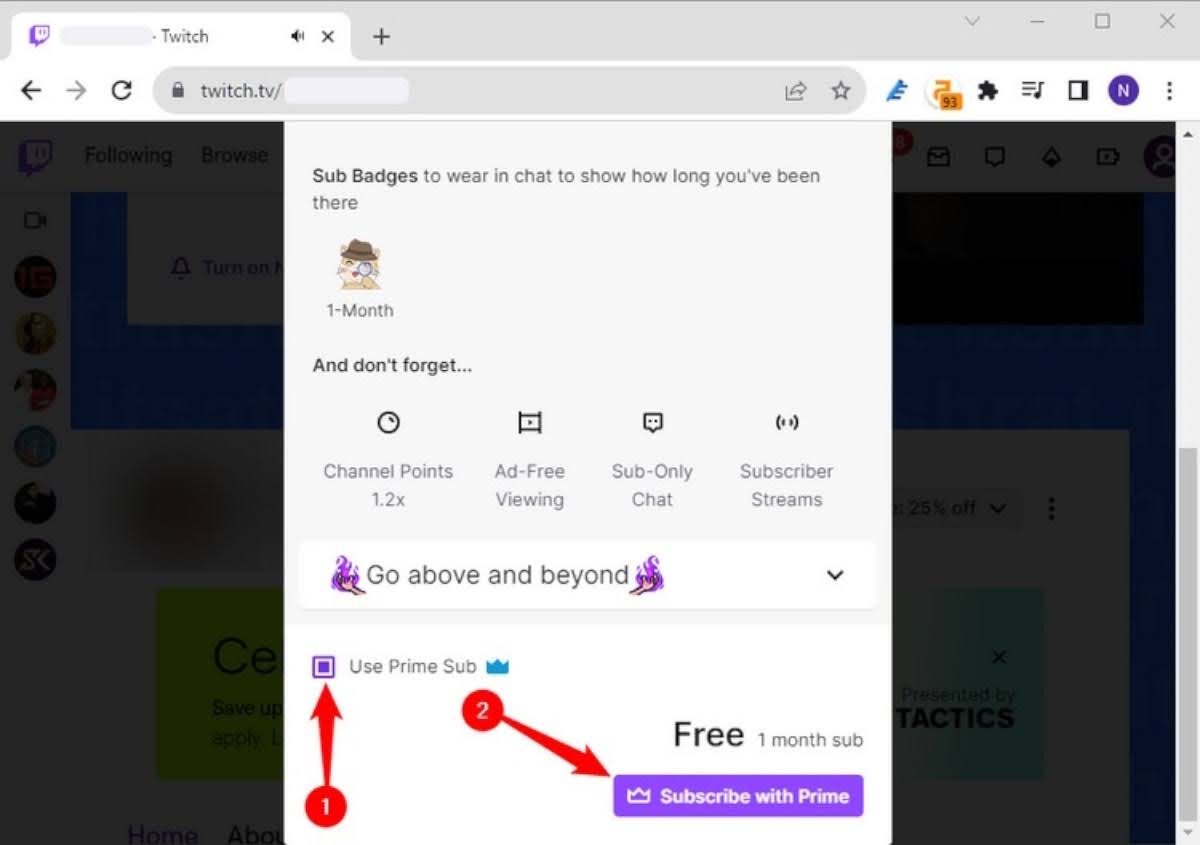
Step 2: First-Time Subscription
If this is your initial time subscribing to a streamer from your Twitch Prime account, you’ll encounter a prompt. It will ask if you want to use your monthly free subscription for this specific streamer. To subscribe to them for one month at no extra cost, simply click “Yes.”
Step 3: Waiting Period
After subscribing to a streamer through your Prime membership, there’s a one-month waiting period before you can use your free subscription again. However, if you wish to establish a recurring subscription, click “Subscribe” once more, and then select the “Continue Sub” option.
Should you decide to convert your Prime subscription into a recurring one, you’ll be billed the monthly fee of $4.99. To maintain your Twitch Prime subscription and continue supporting your chosen streamers, you’ll need to manually subscribe to them every 30 days. This way, you can consistently enjoy the benefits of Twitch Prime while providing ongoing support to your favorite creators.
How to Check Your Current Subscriptions on Twitch
Keeping track of your Twitch subscriptions is easy, and you can do it at any time. Here’s a simple guide to help you find your current subscriptions:
Step 1: Accessing Your Subscriptions
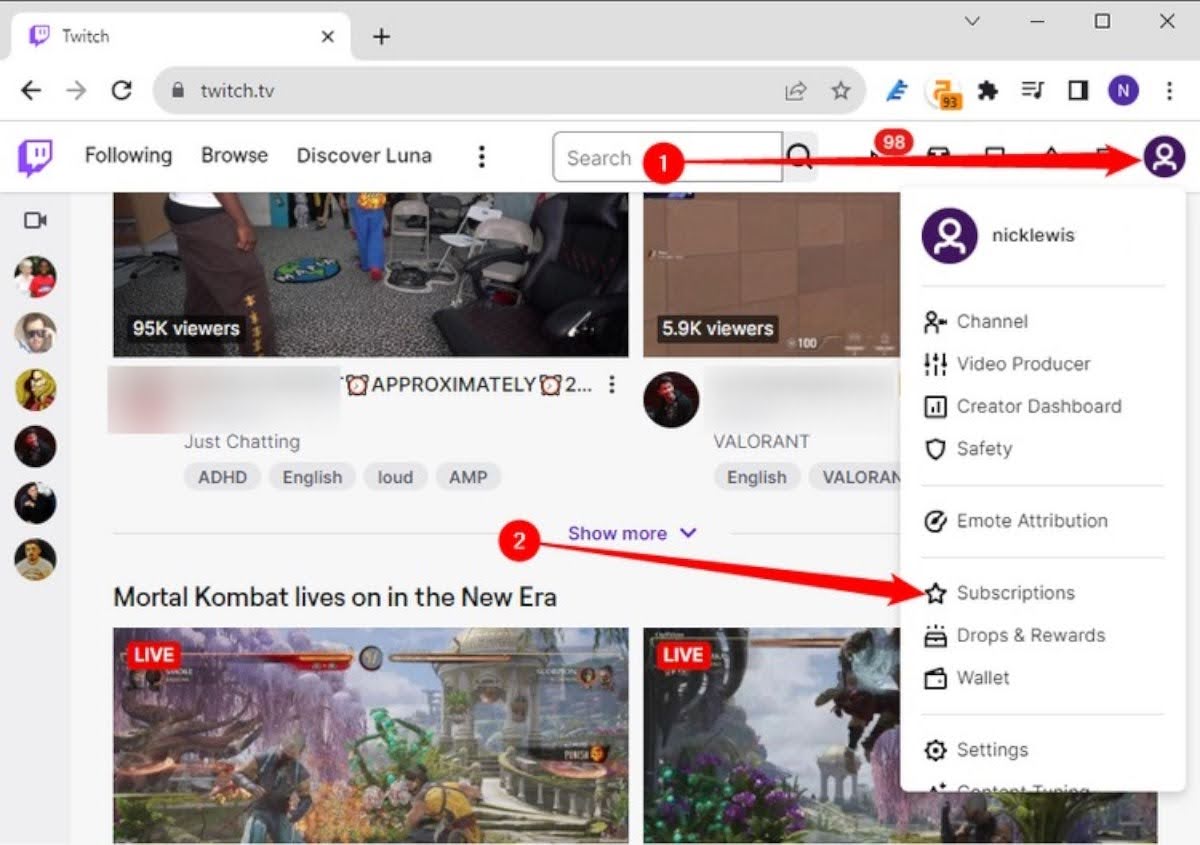
To get started, go to Twitch and click on your profile picture located in the top-right corner of the page. From the dropdown menu that appears, select “Subscriptions.”
Step 2: View Your Subscriptions
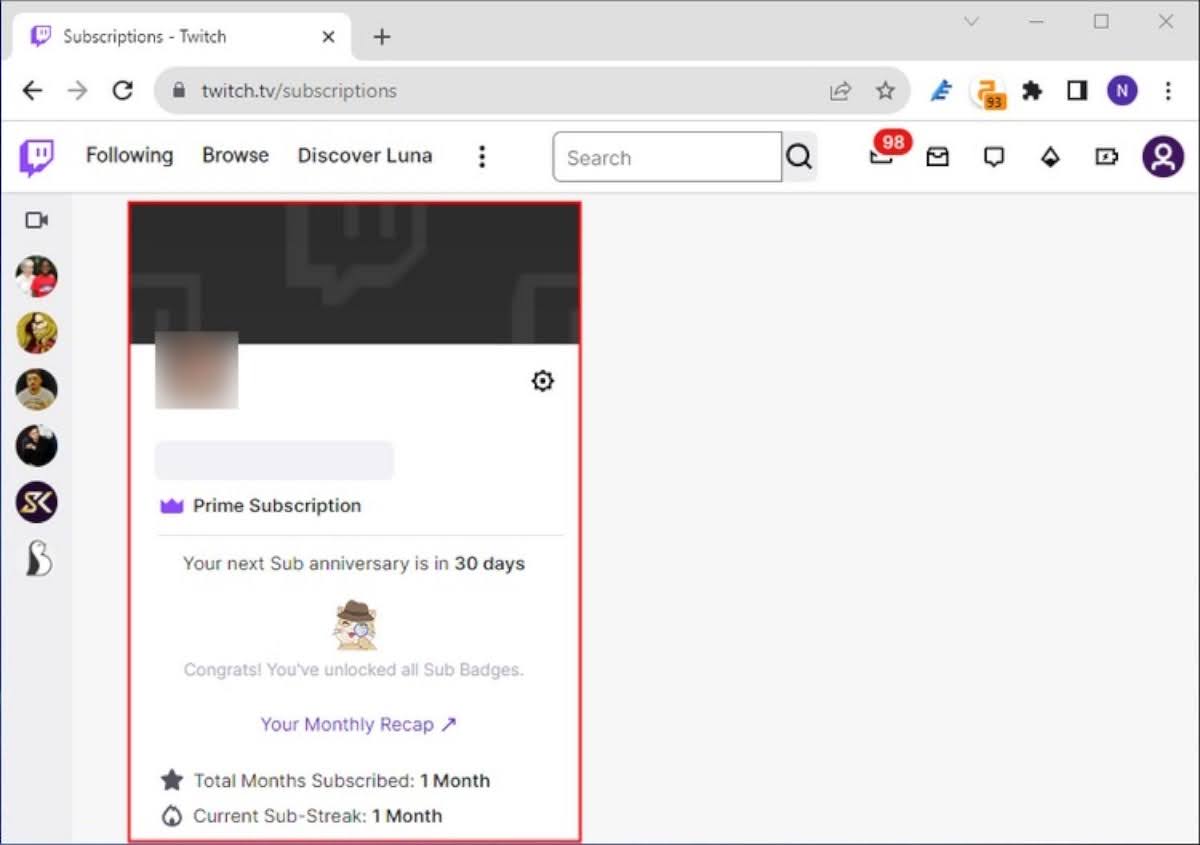
On the “Subscriptions” page, you’ll find a comprehensive list of all your current subscriptions. This includes both active and expired subscriptions, and you’ll see essential details such as the associated benefits, expiration dates, and whether each subscription is paid or part of your Twitch Prime membership.
By following these steps, you can easily stay informed about your Twitch subscriptions, ensuring you enjoy all the benefits and perks they offer without any confusion.
How to Resubscribe to a Streamer Using Twitch Prime
Once you’ve subscribed to a streamer through your connected Prime account, there’s a one-month waiting period before you can resubscribe. Here’s a clear guide on how to do it:
Step 1: Check Your Subscriptions
Begin by verifying your subscriptions. Click on your avatar, typically located in the top-right corner of your Twitch screen. Then, select “Subscriptions.” This action will present you with a list that includes your existing, gifted, and expired subscriptions.
Step 2: Locate Your Current Subscriptions
Under the “Your Subscriptions” tab, you’ll find a list of your active subscriptions. Here, you can see which streamers you’re currently subscribed to. In the example below, a Prime membership was used to subscribe to a streamer.
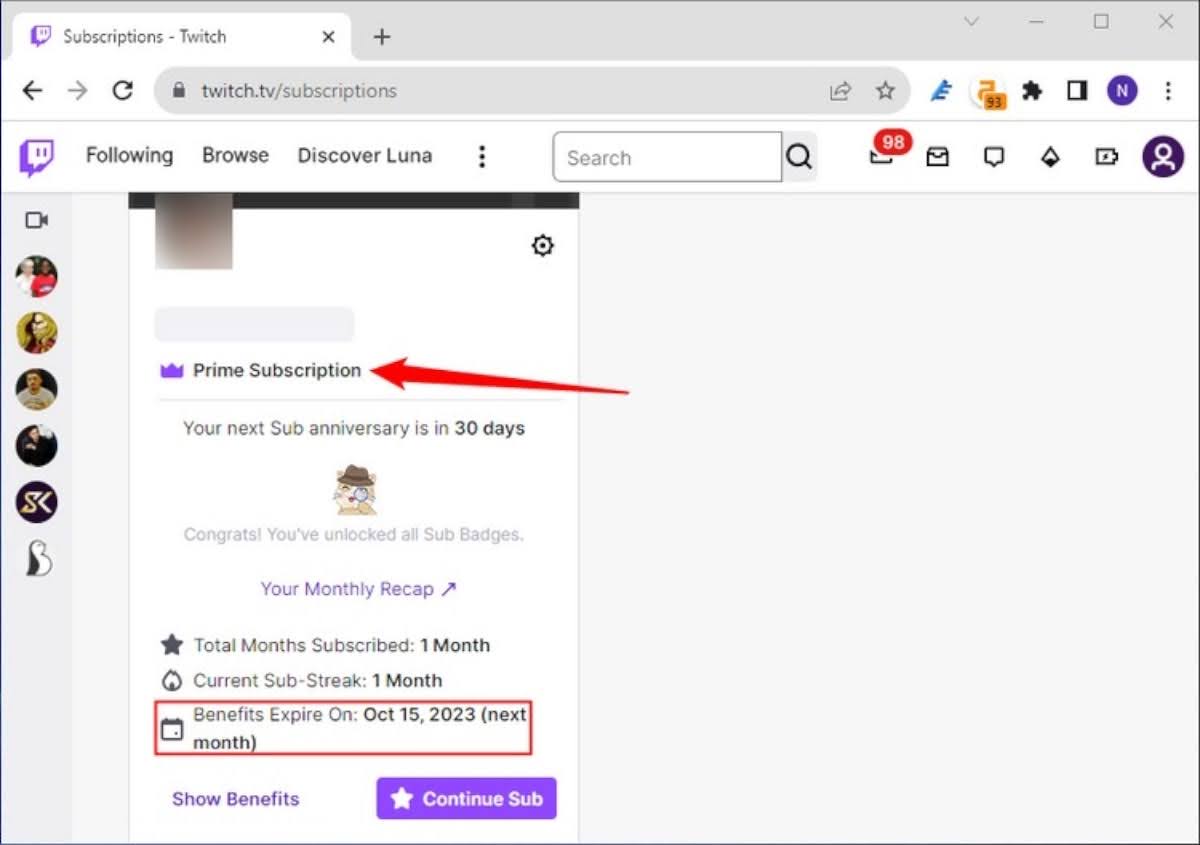
Step 3: Resubscribe with Twitch Prime
After the waiting period has passed, you have two options. You can either pay to resubscribe right away, or you can utilize your Twitch Prime membership to cover the cost of another subscription to the streamer once your existing subscription expires.
By following these straightforward steps, you can efficiently manage your Twitch subscriptions and choose when and how to resubscribe to your favorite streamers using Twitch Prime.
In Conclusion: Supporting Your Favorite Twitch Streamers
Subscribing to your preferred Twitch streamers is a fantastic way to show your financial support. The best part? If you choose to subscribe using your Twitch Prime membership, you can extend your support without any cost to you! It’s a win-win situation where you get to enjoy content and help your favorite creators thrive.