Learn how to record screen and audio on Mac with Background Music, a free and open-source app that can capture system sound and microphone input.
Recording screen and audio on Mac can be useful for various purposes, such as creating tutorials, demos, presentations, podcasts, and more. However, not all screen recording tools can capture the audio coming from your Mac, such as the sound of a video, a game, or an app. If you want to record both screen and audio on Mac, you need a tool that can record system sound, not just the microphone input.
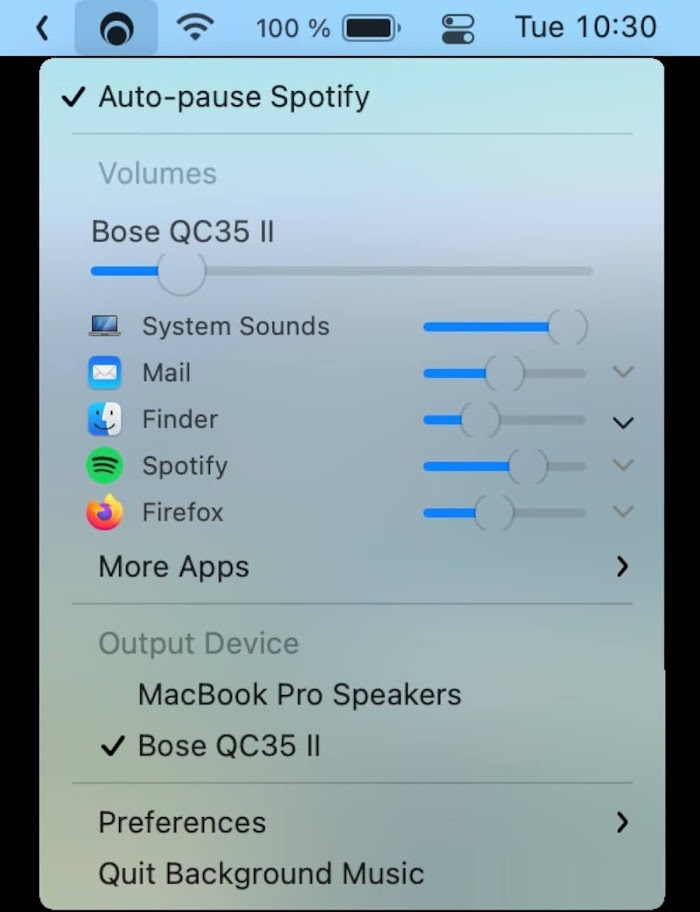
One of the best tools for this task is Background Music, a free and open-source app that can record system audio on Mac. Background Music can also adjust the volume of individual apps, pause music during phone calls, and automatically pause and resume music playback.
In this article, you will learn how to use Background Music to record screen and audio on Mac with QuickTime Player, the built-in screen recording app on Mac.
How to Install Background Music on Mac
Table of Contents
Before you can use Background Music to record screen and audio on Mac, you need to install it on your Mac. Here are the steps to install Background Music on Mac:
- Go to the Background Music GitHub page and download the latest release of the app.
- Open the downloaded DMG file and drag the Background Music icon to the Applications folder.
- Launch Background Music from the Applications folder or the Launchpad. You may need to grant permission for the app to run and access your microphone.
- You will see a music note icon in the menu bar, indicating that Background Music is running. You can click on it to access the app’s settings and preferences.
How to Record Screen and Audio on Mac with Background Music and QuickTime Player
After installing Background Music on your Mac, you can use it to record screen and audio on Mac with QuickTime Player. Here are the steps to do that:
- Launch QuickTime Player from the Applications folder or the Launchpad.
- Select File > New Screen Recording (or New Audio Recording) from the menu bar.
- Click the arrow next to the record button and select Background Music as the input device. This will allow QuickTime Player to record the system audio from your Mac.
- Optionally, you can also adjust the recording options, such as the quality, the save location, and the mouse clicks.
- Click the record button to start recording. You can choose to record the entire screen or a portion of it.
- To stop recording, click the stop button in the menu bar or press Command + Control + Esc.
- Save the recording to your desired location and name it as you wish.
After recording screen and audio on Mac with Background Music and QuickTime Player, you can edit and share your recording with others. Here are some tips to do that:
- To trim your recording, select Edit > Trim from the menu bar and drag the yellow handles to select the part you want to keep. Click Trim to confirm.
- To rotate or flip your recording, select Edit > Rotate Left, Rotate Right, Flip Horizontal, or Flip Vertical from the menu bar.
- To export your recording to a different format, select File > Export As from the menu bar and choose the format you want, such as 4K, 1080p, 720p, or Audio Only.
- To share your recording via email, messages, AirDrop, or social media, select File > Share from the menu bar and choose the option you want.
Conclusion
Recording screen and audio on Mac can be easy and convenient with Background Music and QuickTime Player. Background Music is a free and open-source app that can record system sound on Mac, while QuickTime Player is a built-in app that can record screen and audio on Mac.
With these two tools, you can create high-quality screen recordings with audio for various purposes. You can also edit and share your recordings with others using QuickTime Player’s built-in features. If you have any questions or feedback about this article, please leave a comment below.