The Nintendo Switch edition of Minecraft is based on the Bedrock Edition, and it offers cross-platform play with users of PC, Xbox, and PS4/PS5. It should be noted that gameplay is limited to Minecraft Realms, which is Mojang’s paid hosting service, as well as specific public servers that have been approved by Mojang/Microsoft.
As per platform regulations, the Nintendo Switch is restricted from accessing private servers. Unlike other platforms, users cannot simply input an IP address to join any open server of their choice. This restriction is primarily in place to comply with legal requirements of console manufacturers and age ratings. Only servers that meet the necessary criteria, including adequate chat moderation and trustworthiness, are permitted to be included in the “featured” list.
Minecraft Realms offer a convenient solution for playing with friends, however, they are associated with certain limitations and costs. The platform lacks support for numerous plugins and managing worlds and datapacks can be challenging through the game’s interface. Additionally, the cost of Minecraft Realms is higher compared to self-hosted servers. Therefore, for those looking for a more comprehensive server hosting option, self-hosting may be a more viable and cost-effective solution.
By making some simple setting changes, it is possible for you to access and play on any Minecraft open server available on the Nintendo Switch gaming platform.

Table of Contents
Join any Minecraft open server on Nintendo Switch using BedrockConnect
To circumvent the platform restrictions, we will use the services of BedrockConnect. BedrockConnect uses a proprietary DNS server to deceive Minecraft into believing you are connected to an authorized server, while in reality, you are connected to the proxy. This allows you to add any publicly accessible server by providing its address and connect to it seamlessly.
The process of using BedrockConnect is straightforward once it has been properly configured. As a parent interested in setting it up for your child, you can be assured that they will be able to easily connect to custom servers without encountering any complications.
BedrockConnect is compatible with GeyserMC, a customized plugin for Minecraft Java Edition servers that enables Bedrock Edition players to connect to it. By using GeyserMC in conjunction with a BedrockConnect proxy (known as GeyserConnect), even Nintendo Switch users can successfully access any open server, including those that do not support Bedrock, such as Hypixel.
Modify DNS settings on Nintendo Switch
To use either BedrockConnect or GeyserConnect proxies, the first step involves modifying the Nintendo Switch’s DNS settings. This ensures that requests for the designated Switch servers are directed to the BedrockConnect instance.
Step 1: Open the System settings from the home screen.
Step 2: Go to the Internet Settings.
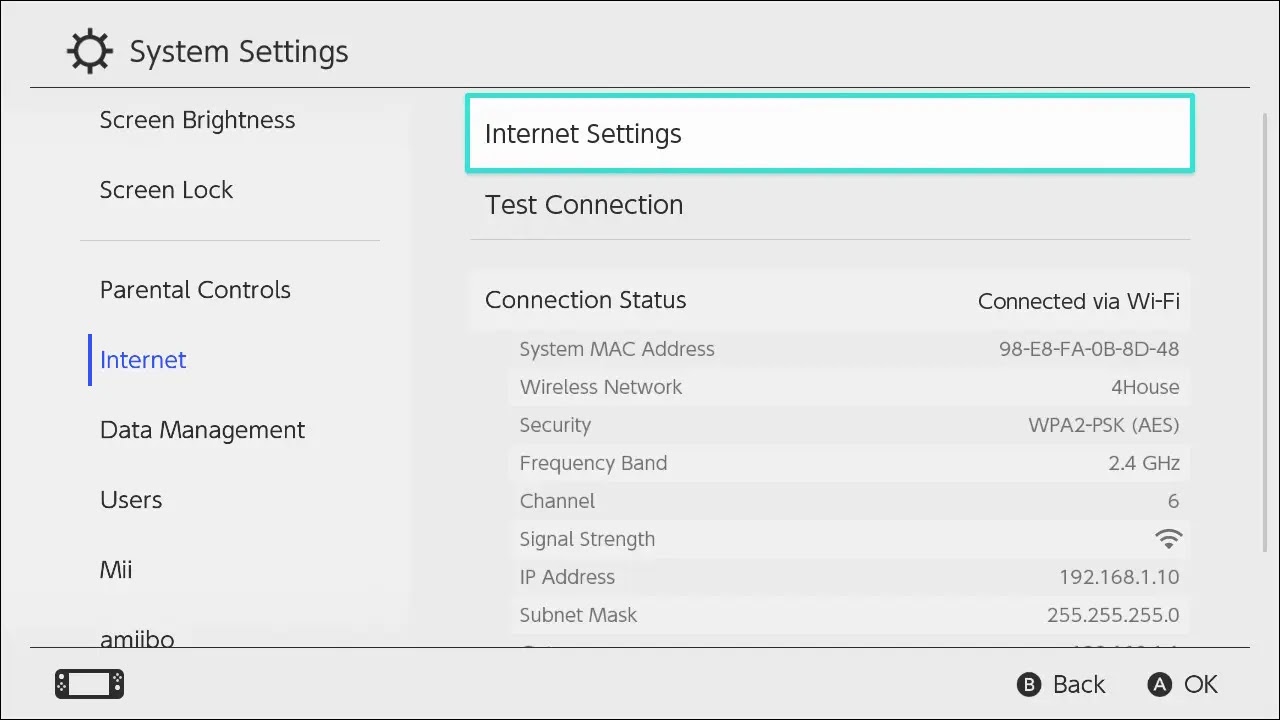
Step 3: Choose your home WiFi network from the available options. Kindly note, if you have multiple WiFi networks, you will need to configure the DNS settings for each network separately.
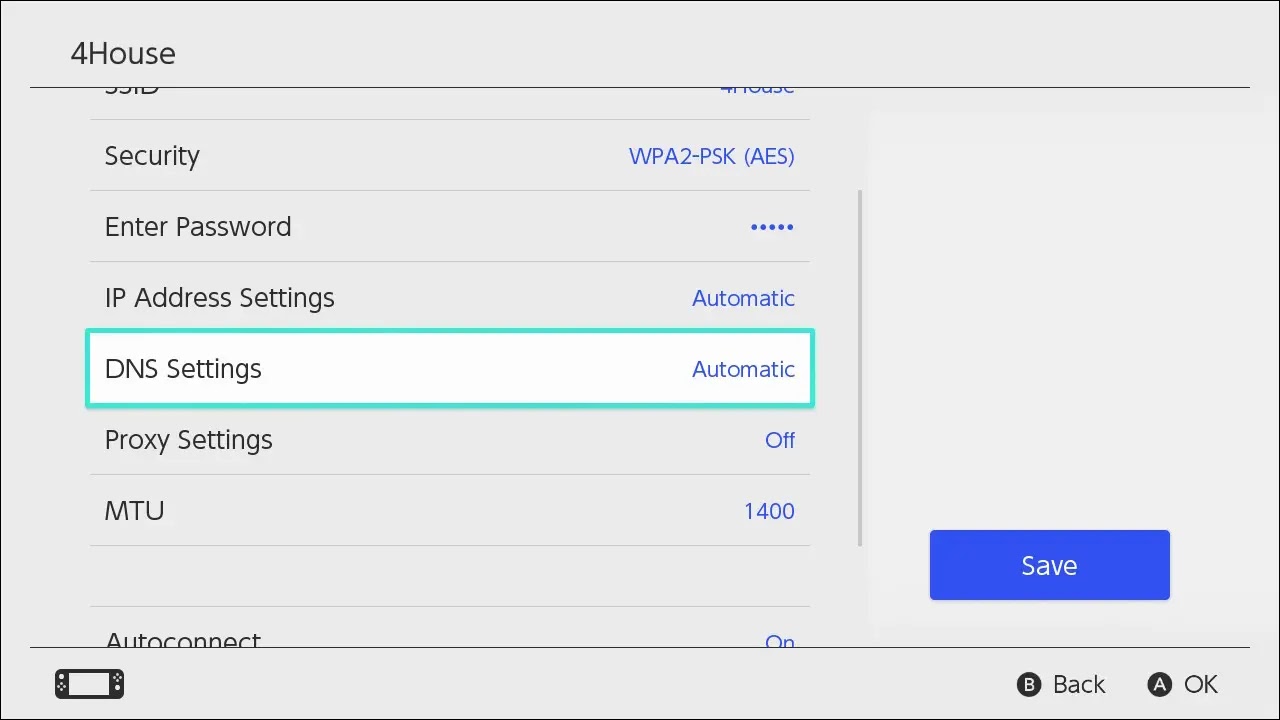
Step 4: Scroll down to the DNS Settings option, and switch it from Automatic to Manual.
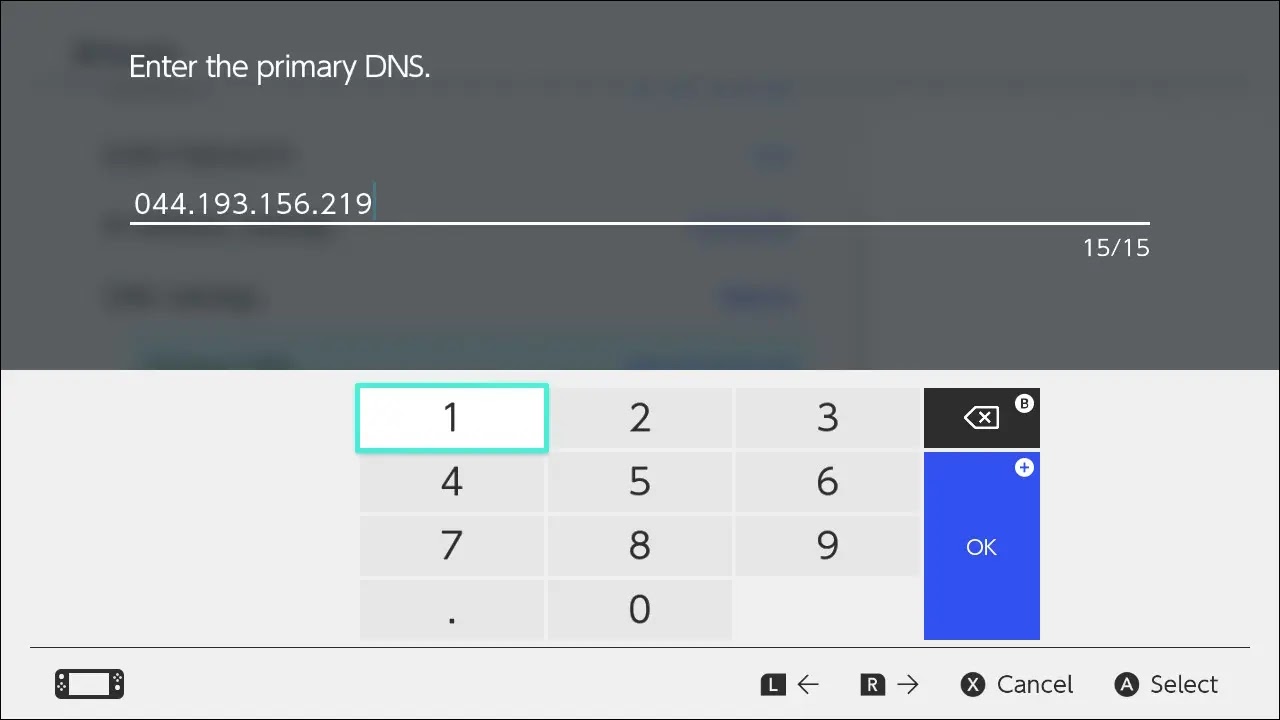
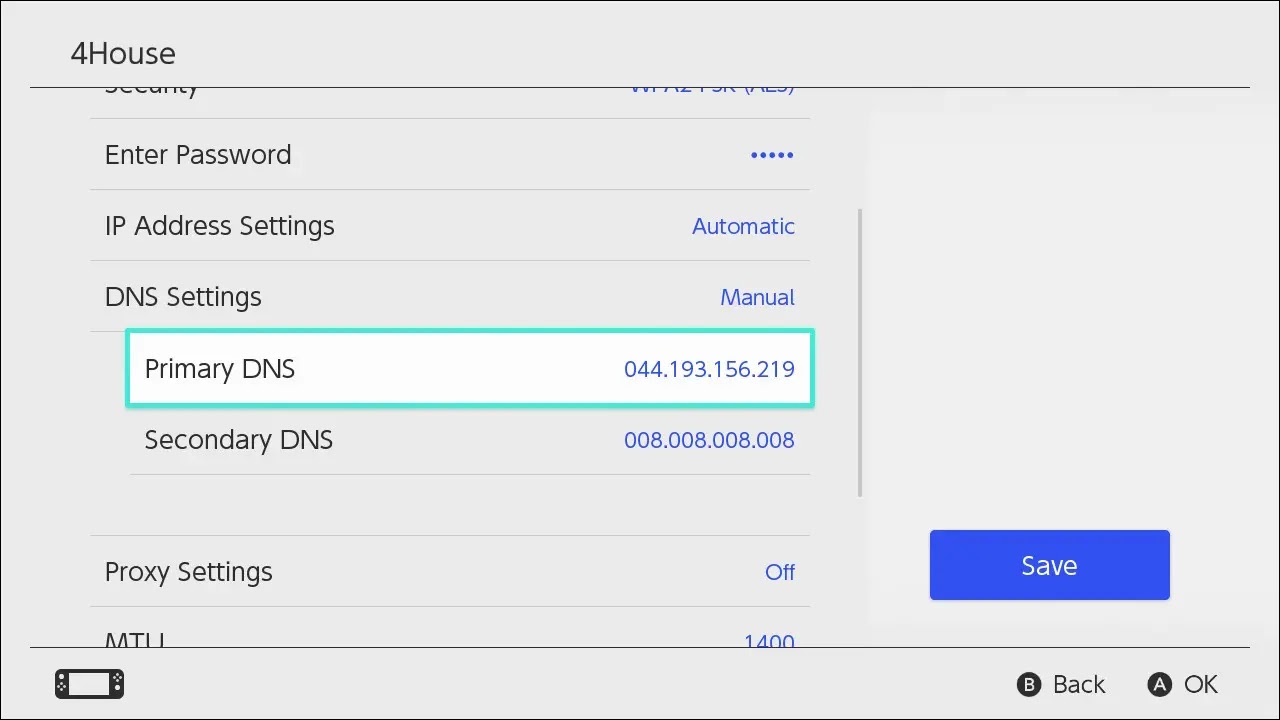
Step 5: For primary DNS address, enter the IP of BedrockConnect instance: 104.238.130.180
Step 6: For secondary DNS, enter the IP of Google DNS: 8.8.8.8. This serves as a contingency plan to ensure uninterrupted internet access on your Nintendo Switch in the event that the BedrockConnect instance experiences downtime or becomes inaccessible.
Step 7: Restart the Nintendo Switch or wait around 30 minutes to clear the DNS cache.
Step 8: To access Minecraft’s multiplayer feature, launch the game and select any of the featured servers from the multiplayer menu. You can confirm successful connection when the featured servers display the message Join to open Server List.

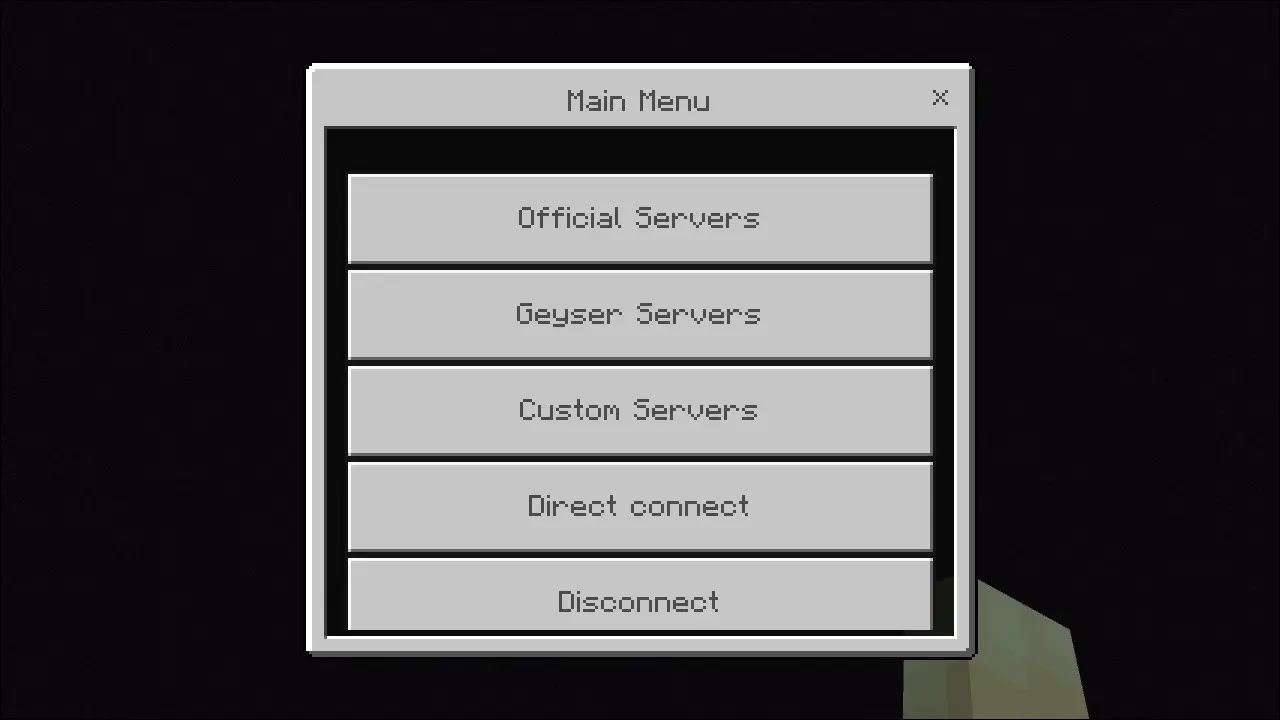
Step 9: Upon accessing the interface, a menu screen will be displayed, offering you the option to connect to Official Servers, featured BedrockConnect servers, or any custom server that you wish to add to your list of connections.
Conclusion
In conclusion, while the Nintendo Switch does have limitations when it comes to accessing private servers in Minecraft, it is still possible to play on any open server with a few simple tweaks. While Minecraft Realms can be a great option for playing with friends, it does come with certain restrictions and can be more expensive than hosting your own server. By exploring alternative options for hosting your own server, you can enjoy all the benefits of playing on a community-driven server while still adhering to the necessary legal restrictions and age ratings. With a little bit of effort, you can easily expand your Minecraft gameplay experience on the Nintendo Switch.