Both System Protection and System Restore function in Windows allows you to undo unwanted system changes that may be causing issues, by reverting your PC to a previous restore point.

How to Enable System Protection; Create System Restore Point, and Undo System Changes on Windows
If a critical issue happens after performing an update for Windows, device driver, application, or after modifying system settings incorrectly using the Registry or another tweaking tool, you can use one of the available restore points to restore the PC to an earlier working state.
Since System Protection is disabled by default, you must enable System Protection before Windows start to create restore points automatically or you can create a restore point manually. In this article, we will show you step-by-step how to enable System Protection, create System Restore Point manually, and recover back to the previous working state using created System Restore Point. This article applied to Windows 10, Windows 8.1, and Windows 7.
System Protection: By enabling system protection, you can undo unwanted or undesired system changes by reverting your computer to a previous point in time.
System Restore: Function to create a snapshot of the PC’s current working state as a restore point when system changes are detected. You can undo system changes by reverting your computer to a previous restore point recorded on your PC to restore Windows.
Important note: System Protection and System Restore are not a replacement for the backup solution or an option to reset the computer to the factory default settings.
Table of contents
Enable System Restore on Windows
Create a System Restore Point on Windows
Recover using System Restore on Windows in Normal mode
Recover using System Restore on Windows in Recovery mode
Enable System Restore on Windows
Step 1: Type system restore in the Search box located at Taskbar.
Step 2: Click on the Create a restore point option in the search result to open the System Protection tab on the System Properties page.

Click on the Create a restore point option in the search result to open the System Protection tab on the System Properties page.
Step 3: The Protection Settings status for all drive showing Off. Select the System drive under the Protection Settings section.
Step 4: Click the Configure button.

Select the System drive under the Protection Settings section then click the Configure button.
Step 5: Select the radio button for the Turn on system protection option.

Select the radio button for the Turn on system protection option.
Step 6: Optional step: Windows will manage the disk space usage automatically or you can use the slider to specify the maximum disk space usage. The purpose of the Remove button is for you to remove all restore points created previously in order to free up disk space.
Step 7: Click the Apply button.
Step 8: Click the OK button.
Step 9: Optional step: If you have additional drives that you like to protect with System Restore, repeat the same steps again for every drive.
Create a System Restore point on Windows
Windows will start to create a restore point automatically when applying a new update or when specific system changes are made. However, you can always create a restore point manually before modify the system configuration.
Step 1: Type system restore in the Search box located at Taskbar.
Step 2: Click on the Create a restore point option in the search result to open the System Protection tab on the System Properties page.
Click on the Create a restore point option in the search result to open the System Protection tab on the System Properties page.
Step 3: Click the Create button under the Protection Settings section.

Click the Create button under the System Protection Settings section.
Step 4: Type a description for the system restore point, for example: before modifying the Registry settings.

Type a description for the system restore point.
Step 5: Click the Create button.
Step 6: Click the Close button.
Step 7: Click the OK button.
Step 8: Click the Close button.
Recover using System Restore on Windows in Normal mode
When something wrong happens after modifying system settings on Windows, you can undo the changes by applying a previous system restore point. If you still have access to the Windows normally, you can revert changes with System Restore using the following steps:
Step 1: Type system restore in the Search box located at Taskbar.
Step 2: Click on the Create a restore point option in the search result to open the System Protection tab on the System Properties page.
Click on the Create a restore point option in the search result to open the System Protection tab on the System Properties page.
Step 3: Click the System Restore button. If the System Restore button is grayed out, which means that is no system restore point available.

Click the System Restore button. If the System Restore button is grayed out, which means that is no system restore point available.
Step 4: Click the Next button.
Step 5: Select the system restore point to revert changes.

Select the system restore point to revert changes.
Step 6: Click the Scan for affected programs link to confirm the application software that will be removed because they were added after creating the restore point.

Click the Scan for affected programs link to confirm the application software that will be removed because they were added after creating the restore point.
Step 7: Click the Close button.
Step 8: Click the Next button.
Step 9: Click the Finish button. The changes causing the problem will be removed with the previously created restore point return the device back to a good-known working state.
Step 10: Restart your computer.
Recover using System Restore on Windows in Recovery mode
When something wrong happens after modifying system settings on Windows, you can undo the changes by applying a previous system restore point. If you are unable to boot into Windows normally, you can revert changes with System Restore in recovery mode via advanced startup settings.
Step 1: Startup your PC.
Step 2: As soon as the Windows logo appears on the screen, press the power button repeatedly to interrupt the boot sequence until the device boots into the recovery experience. Alternatively, you can press the F11 key as soon as the computer powers on to get to the Advanced Startup Options menu.

As soon as the Windows logo appears on the screen, press the power button repeatedly to interrupt the boot sequence until the device boots into the recovery experience. Alternatively, you can press the F11 key as soon as the computer powers on to get to the Advanced Startup Options menu.
Step 3: Click the Advanced options button.

Click the Advanced options button.
Step 4: Click on Troubleshoot.

Click on Troubleshoot.
Step 5: Click on Advanced options.

Click on Advanced options.
Step 6: Click on System Restore.
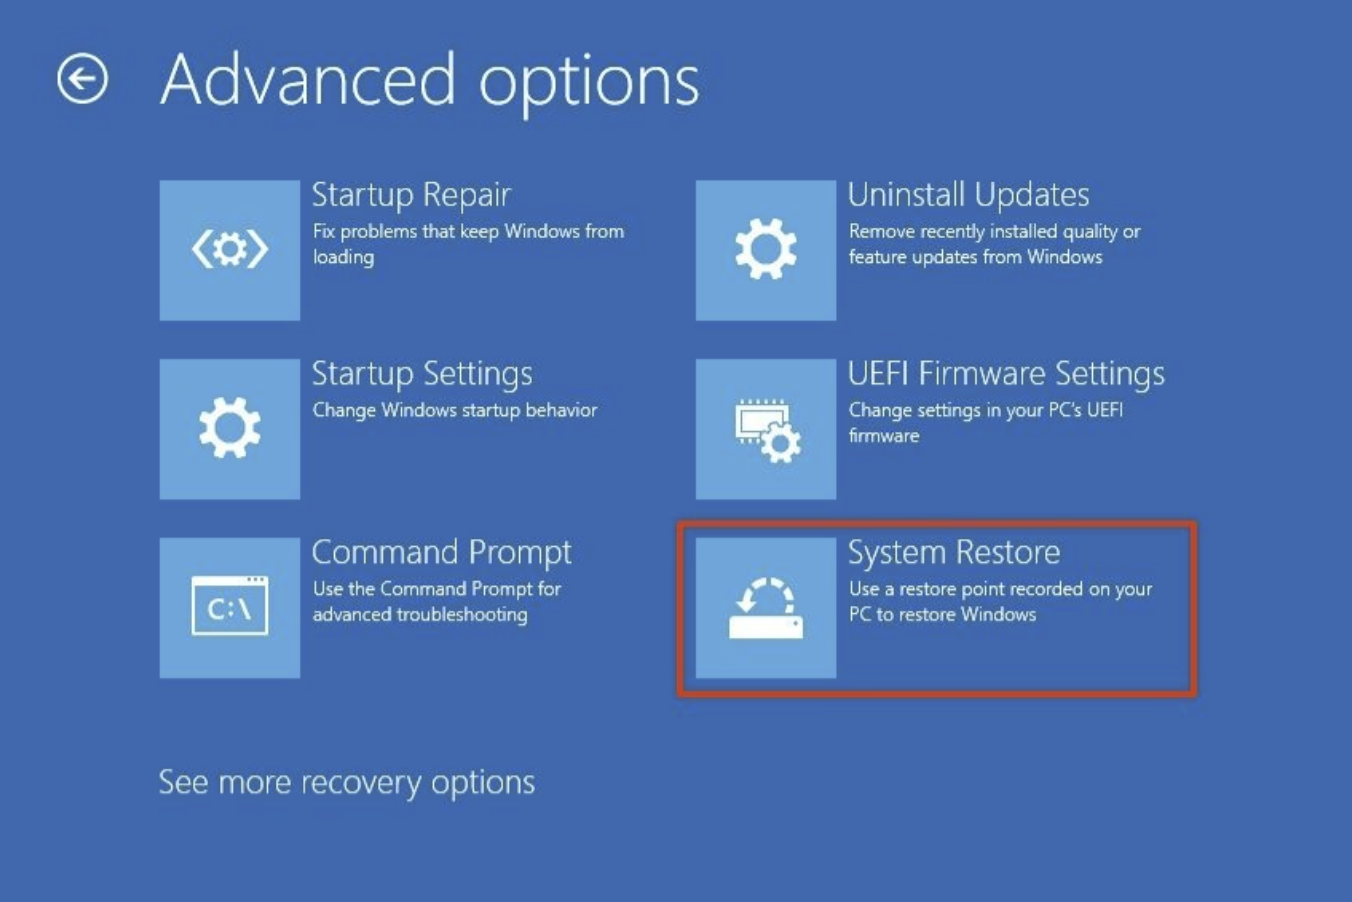
Click on System Restore.
Step 7: Select your Windows login account.
Step 8: Enter the account password.

Select your Windows login account and enter the password.
Step 9: Click the Continue button.
Step 10: Click the Next button.
Step 11: Select the system restore point to revert changes.

Select the system restore point to revert changes.
Step 12: Click the Scan for affected programs link to confirm the application software that will be removed because they were added after creating the restore point.
Click the Scan for affected programs link to confirm the application software that will be removed because they were added after creating the restore point.
Step 13: Click the Close button.
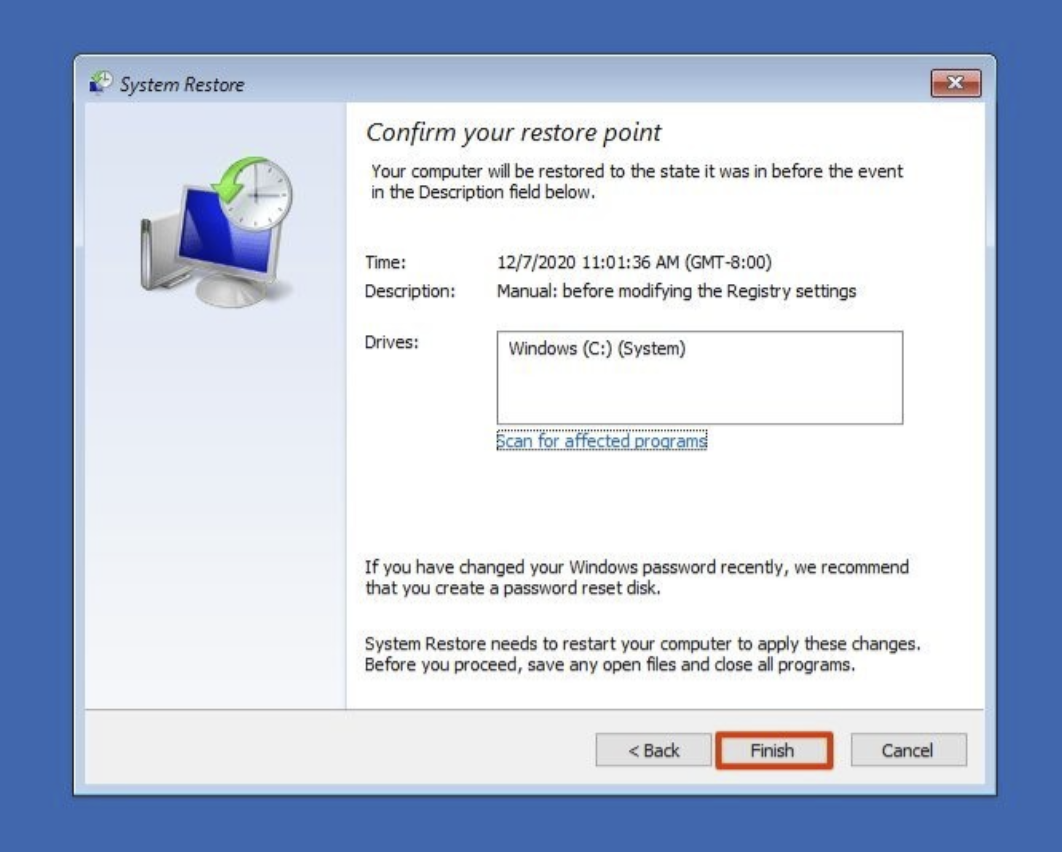
Step 14: Click the Next button.
Step 15: Click the Finish button. The changes causing the problem will be removed with the previously created restore point return the device back to a good-known working state.
Step 16: Restart your computer.