Problem
Table of Contents
- Problem
- Solution 1: Take Control of the Service
- Solution 2: Reinstall Problematic Service
- Solution 3: Delete Certain Files (For MySQL Service only)
- Solution 4: Tweak MySQL Configuration Files (For MySQL Service only)
- Solution 5: Reinstall SQL Server (For MySQL Service only)
- Solution 6: Method for EAServer Windows Service
- Solution 7: Manually clear out IndexQueue SQL table using osql (For Laserfiche Server)
- Solution 8: For Bamboo Build Server Service
- Solution 9: For BlackBerry Enterprise Server 4.1 SP3 to 5.0 SP1
- Solution 10: For BlackBerry Enterprise Server 3.6 SP7
- Solution 11: For Spectrum 9
- Solution 12: For Sysload Collector service
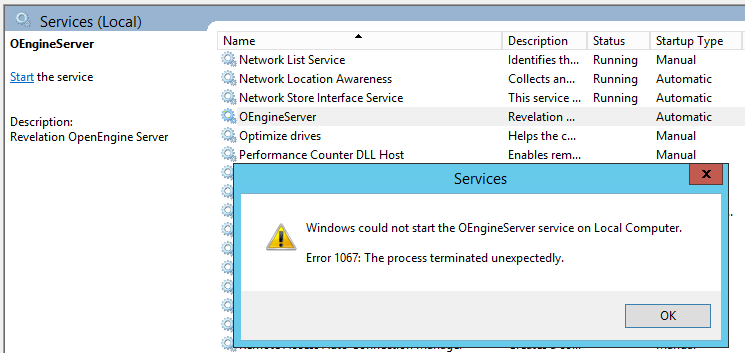
Windows Services “Error 1067: The process terminated unexpectedly” prompt when try to start particular service manually.
Solution 1: Take Control of the Service
- Open cmd.exe with Run as administrator option.
- Type:
services.msc, then enter. - Locate the service which is giving you the error in the services list, right-click on it and select Properties option.
- Stop the service if the service is started.
- Navigate to Log On tab, click the radio button for This account and click Browse… button.
- Under Enter the object name to select entry box, type in your account’s name, click on Check Names and wait for the name to become available.
- Click OK when you are finished and type in the password in the Password box when you are prompted with it, if you have setup a password.
Solution 2: Reinstall Problematic Service
- Open cmd.exe with Run as administrator option.
- Type:
regedit, then enter. - Navigate to the following key:
HKEY_LOCAL_MACHINE\SYSTEM\CurrentControlSet\Services - Locate the problematic service key, right-click on it and choose Delete option.
- Restart computer afterwards.
- Open CMD (command prompt) with Run As Administrator option.
- Type following command:
sfc /scannow, then press Enter. The result will be shown after SFC scan completed.
Solution 3: Delete Certain Files (For MySQL Service only)
- Open cmd.exe with Run as administrator option.
- Type:
services.msc, then enter. - Locate MySQL service in the services list, right-click on it and select Properties option.
- Click on Stop and click OK.
- Navigate to the folder where you have installed MySQL (normally
C:\\Program FilesorC:\\Program Files (x86)folder), open the folder and double-click on data folder inside. - Locate the two files called ib_logfile0 and ib_logfile1, right-click on both of them and choose Delete option.
- Back to Services window and start MySQL service.
Solution 4: Tweak MySQL Configuration Files (For MySQL Service only)
- Navigate to the root folder where you have installed MySQL (normally
C:\\Program FilesorC:\\Program Files (x86)path), open the folder and locate my.ini file. - Right click on my.ini and choose Open with… Notepad option.
- Use Ctrl + F key combination and type in
innodb_flush_method - Set it to normal:
innodb_flush_method=normal - If such command doesn’t exist then you can add it to the bottom.
- Make sure you save the changes using Ctrl + S key combination.
- In the same root folder,locate and open my-default.ini file.
- Right click on it and choose Open with… Notepad option.
- Under
[mysqld]line in the file, make sure the code same as below:basedir="Full path to the install location of MySql (the folder where you are currently located)" datadir="The same path but with the data folder opened; e.g. C:\MySql\data" port=3306 server-id=1 bind-address=127.0.0.1
- Make sure you save the changes using Ctrl + S key combination.
- Restart computer afterwards.
Solution 5: Reinstall SQL Server (For MySQL Service only)
- Login Windows as Administrator.
- Go to Control Panel > Programs and Features.
- Select SQL Server entry and click Uninstall.
- Restart computer afterwards.
- Open the Registry Editor window with Administrator right. Locate and delete the following keys in the Registry:
HKEY_LOCAL_MACHINE\SOFTWARE\Microsoft\Microsoft SQL Server
HKEY_LOCAL_MACHINE\SOFTWARE\Microsoft\MSSQLServer
- Navigate to following location in the registry and delete all keys which reference SQL Server:
HKEY_LOCAL_MACHINE\SOFTWARE\Microsoft\Windows\CurrentVersion\Uninstall
HKEY_LOCAL_MACHINE\SYSTEM\CurrentControlSet\Services
- Search for SQL on your computer and rename all folders referencing it.
- Restart computer afterward.
Solution 6: Method for EAServer Windows Service
- Open the Registry Editor window with Administrator right. Navigate to the following key:
HKEY_LOCAL_MACHINE\SYSTEM\CurrentControlSet\Services - Locate EAServer entry in the list under Services and click on it.
- Locate SERVERNAME key, right-click and choose Modify option.
- Under the Value data bar, make sure you type EAServer and apply the changes.
Solution 7: Manually clear out IndexQueue SQL table using osql (For Laserfiche Server)
- Open cmd.exe with Run as administrator option.
- Type:
osql -E -S SQLInstance -d DatabaseName, then enter. - Type:
delete from indexqueue, then enter. - Type:
GO, then enter. - Restart Laserfiche Server service.
Solution 8: For Bamboo Build Server Service
- Make sure user running Bamboo Service is a local user.
- Verify only one JDK installed on the server and compatible with the version of Bamboo by referring to Bamboo supported platforms.
- Make sure that wrapper.conf file exists in /conf. If Bamboo can be started manually, it shows that this file exists.
- Run
echo %JAVA_HOME%and check if it’s pointing to the correct JDK. (Ex.: C:\Program Files\Java\jdk1.7.0_10) - Confirm that the %PATH% environment variable contains the current JDK in its definition and that it comes before the system32 path.
- Try to explicitly set the path to the Java installation in the parameter
wrapper.java.commandin the wrapper.conf file. This parameter value is by default java, update it to look into the exact directory (Ex: C:/Program Files/Java/jdk1.7.0_10/bin/java.exe).
Solution 9: For BlackBerry Enterprise Server 4.1 SP3 to 5.0 SP1
- Remove all JRE versions from BlackBerry Enterprise Server.
- Restart BlackBerry Enterprise Server.
- Install JRE version that was included with the BlackBerry Enterprise Server software. The Java installation file is available in the Tools directory from the installation media. If this is not possible, download Java 2 Runtime Environment, Standard Edition 1.4.2_13 (or higher).
- Open Registry Editor with Administrator right.
- Navigate to
HKEY_LOCAL_MACHINE\SYSTEM\CurrentControlSet\Services\BlackBerry MDS Connection Serviceand check for ImagePath string value. - If the ImagePath string value does not exist, re-apply the service pack to recreate the registry key.
- If the ImagePath string value does exist, double-click it and type the correct path to the jvm.dll file in the Value data field, as shown in the following example for BlackBerry Enterprise Server version 4.1 and 5.0:
C:\Program Files\Research In Motion\BlackBerry Enterprise Server\MDS\bin\bmds.exe" -s jvmpath="C:\Program Files\Java\ \bin\client\jvm.dll" -XX:+DisableExplicitGC -Xss128K -Xmx256M -Xms96M -XX:NewSize=32M -XX:MaxNewSize=96M -XX:NewRatio=2 classpathdir="C:\Program Files\Research In Motion\BlackBerry Enterprise Server\MDS\classpath\\" wrkdir="C:\Program Files\Research In Motion\BlackBerry Enterprise Server\MDS\Servers\ \\" webserverdir="C:\Program Files\Research In Motion\BlackBerry Enterprise Server\MDS\webserver\\" -log.console -rbes
- where is the name of the BlackBerry Enterprise Server MDS Connection Service and is the name of the JRE folder located in one of the following locations:
64-bit OS:C:\Program Files (x86)\Java\\bin
32-bit OS:C:\Program Files\Java\\bin - Press Enter and close the Registry Editor.
- Restart BlackBerry MDS Connection Service from the Windows administrative tools.
Solution 10: For BlackBerry Enterprise Server 3.6 SP7
- Remove all JRE versions from BlackBerry Enterprise Server.
- Restart BlackBerry Enterprise Server.
- Install JRE version that was included with the BlackBerry Enterprise Server. If this is not possible, download Java 2 Runtime Environment, Standard Edition 1.4.2_13.
- Go to Control Panel > Programs and Features > Select BlackBerry Enterprise Server and right-click it select Change.
- On the wizard that appears, select Modify option and remove MDS Service #1 component.
- Restart BlackBerry Enterprise Server.
- Go to Control Panel > Programs and Features > Select BlackBerry Enterprise Server and right-click it select Change.
- On the wizard that appears, select the Modify option and add MDS Service #1 component. If prompted for the BlackBerry Enterprise Server software installation media, obtain it and proceed with the installation process.
Solution 11: For Spectrum 9
- Update 2 files (server\app\conf\jdks properties file and sever\bin\wrapper\wrapper.conf file) to point to
C:\ProgramFiles\PitneyBowes\Spectrum\java64directory. - Reinstalling v9 if above step still unable to resolve the error.
Solution 12: For Sysload Collector service
- Press Ctrl + Alt + Del and choose Start Task Manager.
- Select sldrmhst.exe in the processes list and click End Process button.
- Restart Sysload Collector service.