Windows 10 offers a sync feature that allows you to sync settings like themes, passwords, language preferences, ease of access, and other Windows 10 settings across different devices. After you log into another computer and verify yourself successfully, all those settings will appear on that computer.

Some Windows 10 users reported that the sync function doesn’t work, or the sync option is greyed out, or you get an error message stated Sync is not available for your account. This error prevents the user from using the sync page or modifying any settings associated with it. The detailed error message as below:
Sync is not available for your account. Contact your system administrator to resolve this.
Follow the below solution steps to resolve the “Sync is not available for your account” problem in Windows 10.
Table of Contents
- Potential Causes
- Solution 1: Disable then enable sync setting
- Solution 2: Verify Microsoft account
- Solution 3: Check with the administrator
- Solution 4: Enable Microsoft account sync via Registry Editor
- Solution 5: Enable Microsoft account sync via Group Policy
- Solution 6: Enable Syncing from Azure Active Directory
- Solution 7: Reconnect Work or School Account
Potential Causes
What causes the issue that sync is not available for your account?
- Sync is turned off or disabled by the administrator
- The account information is not correct.
- You haven’t verified your account.
- Problem with the Microsoft account.
- Work or school accounts might be connected
- Azure Active Directory doesn’t allow syncing.
- The Registry or Group Policy doesn’t allow syncing.
- The file system is corrupted.
Solution 1: Disable then enable sync setting
Step 1: Go to Settings > Accounts.
Step 2: Click on the Sync your settings option on the left panel.
Step 3: Toggle Off all the Sync settings options.

Step 4: Restart your computer.
Step 5: Go to Settings > Accounts.
Step 6: Click on the Sync your settings option on the left panel.
Step 7: Toggle On the Sync settings option, and whatever you want to sync.
Solution 2: Verify Microsoft account
Step 1: Browse to the official Microsoft account website.
Step 2: Click the Sign in button to continue.

Step 3: Enter the login and password of your Microsoft account.
Step 4: Go to Settings > Accounts > Your Info > Security & Privacy
Step 5: Click the Verify hyperlink.
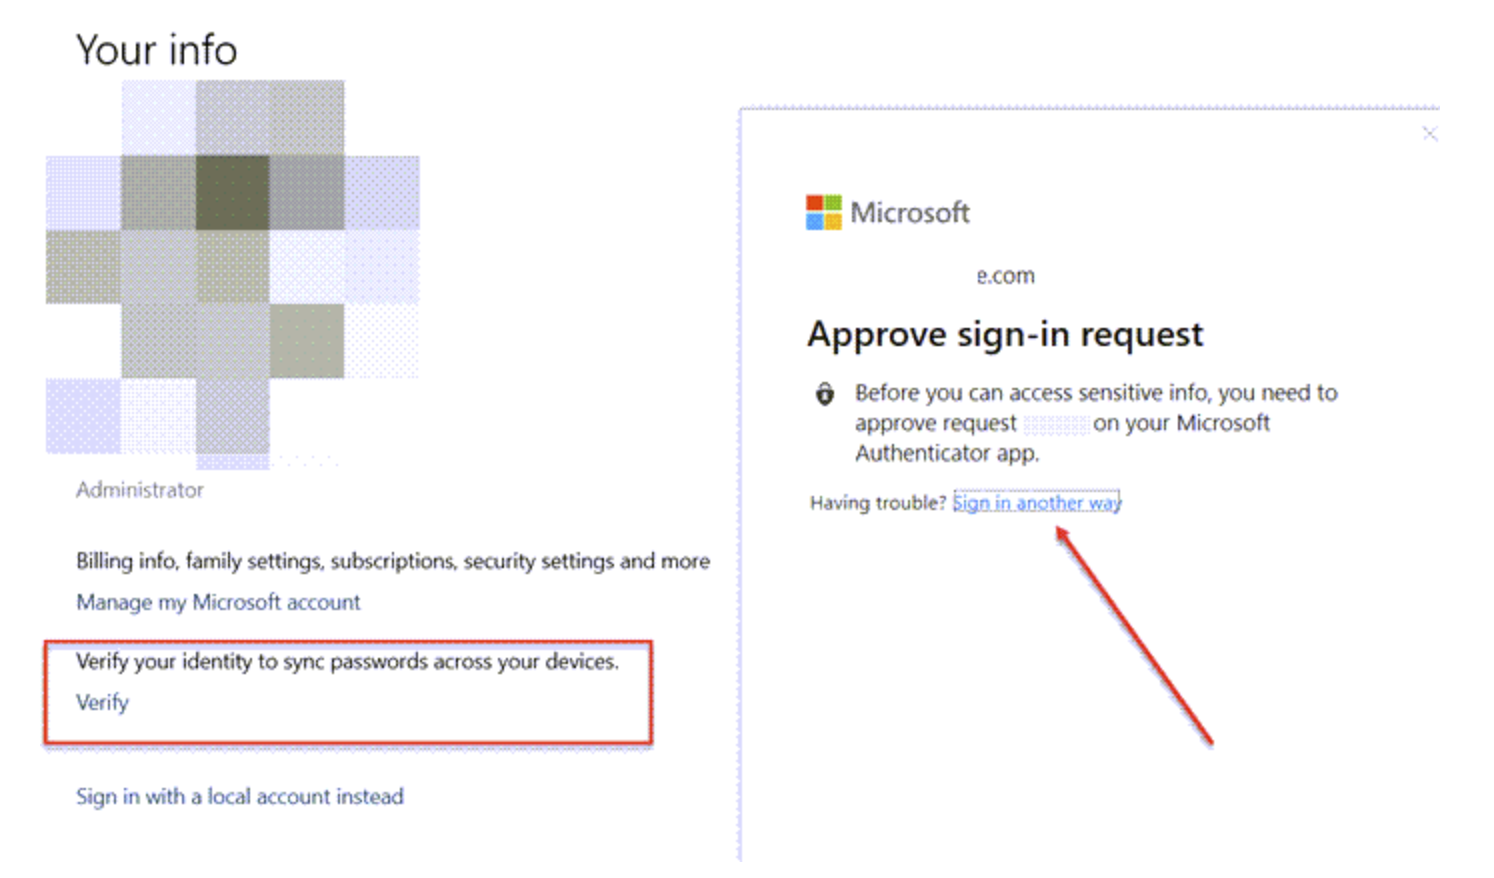
Step 6: Use the verification code that you have received on the verified phone number or email address to complete the verification.
Step 7: Restart your computer.
Step 8: Press Windows + R key to open the Run dialog
Step 9: Type ms-settings:sync in the box and click the OK button.

Step 10: Toggle on the Sync settings option, and whatever you want to sync.

Solution 3: Check with the administrator
If you are using a school or work account, the permission to enable sync control by the administrator either allows the sync on authorized devices or only allows it to work on a single device.
Solution 4: Enable Microsoft account sync via Registry Editor
Step 1: Press the Windows key once.
Step 2: Type regedit in the search box.

Step 3: Choose Run as administrator option to open an elevated command prompt. If you are prompted for an administrator password or for a confirmation, type the password, or select Allow.
Step 4: Navigate to the following location: HKEY_LOCAL_MACHINE\Software\Policies\Microsoft\Windows\SettingSync
Step 5: Create a new DWORD registry key called DisableSettingsSync and set the value as 2.

Step 6: Create another new DWORD (32-bit) registry key called DisableSettingSyncUserOverride, set the Base to Hexadecimal, and value data as 2 to allow users to enable the sync function.
Step 7: Navigate to the following location: HKEY_LOCAL_MACHINE\SOFTWARE\Microsoft\Windows\CurrentVersion\Policies\System
Step 8: Find the NoConnectedUser registry key on the right panel. This registry key is assigned for security policy called Accounts: Block Microsoft accounts. Recommended settings:
- 0: This policy is disabled.
- 1: Users cannot add Microsoft accounts.
- 3: Users cannot add a Microsoft account or log in.
Step 9: Double-click it and change its value data to 0.

Step 10: Restart your computer.
Solution 5: Enable Microsoft account sync via Group Policy
Step 1: Press Windows key + R to open the Run dialog box.
Step 2: Type gpedit.msc and press Enter to open the Local Group Policy Editor. Click Yes if User Account Control (UAC) prompt.
Step 3: Navigate to the following location: Computer Configuration > Administrative Templates > Windows Components > Sync your settings
Step 4: Locate the policy called Do not Sync, and double-click to open it.
Step 5: Set it to Enable and save it. If you are an administrator, you can check the box labeled with Allow users to turn syncing on.

Solution 6: Enable Syncing from Azure Active Directory
Step 1: Login Azure Portal with Azure AD administrator account or Office365 account.
Step 2: Go to Azure Active Directory > Device Settings.
Step 3: Set the User may sync settings and app data across devices to All at the right-hand section.

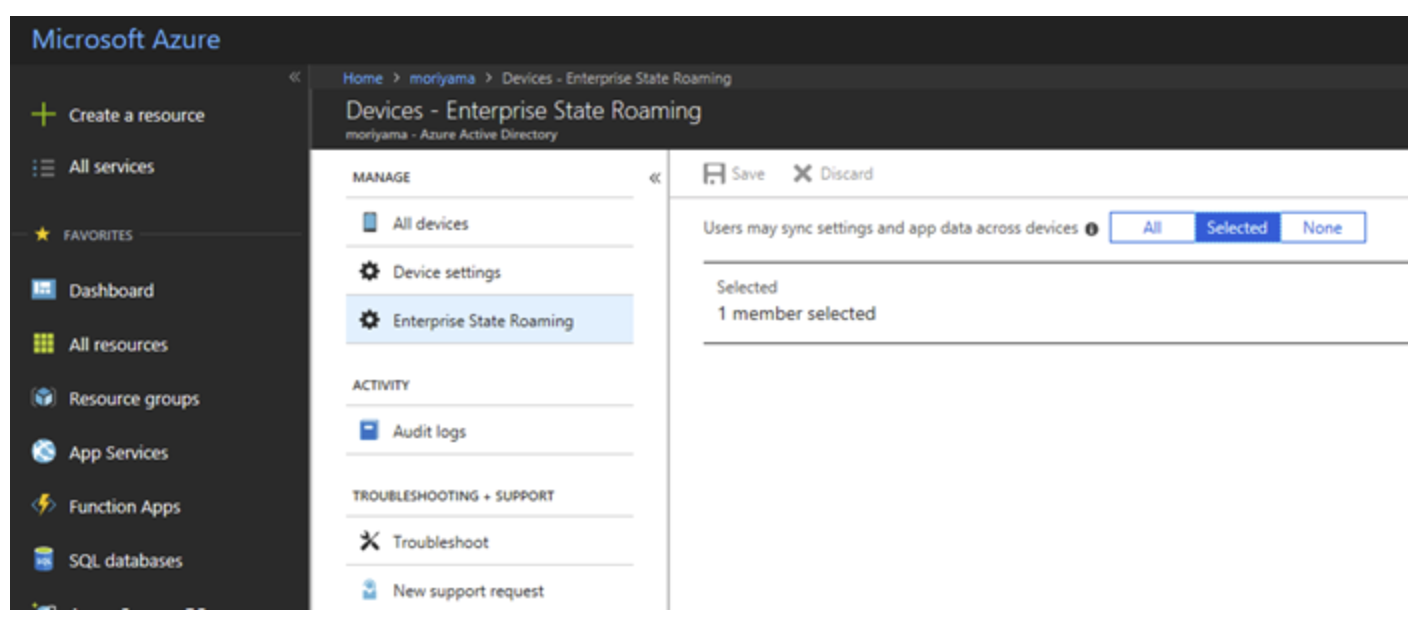
Step 4: Go to Azure Active Directory > Device Settings > Enterprise State Roaming.
Step 5: Change Users may sync settings and app data across devices to All.
Step 6: Go to Sync your settings page again and change Sync settings to On.
Solution 7: Reconnect Work or School Account
Step 1: Press Windows + R key to open the Run dialog.
Step 2: Type ms-settings:workplace in the Run box and click OK.

Step 3: Click the Access work and school option at the left pane.
Step 4: Find the account connected with the Work or school account.
Step 5: Click the Disconnect button, click Yes on the confirmation window.

Step 6: Restart your computer.
Step 7: Press Windows + R key to open the Run dialog
Step 8: Type ms-settings:sync in the box and click the OK button.
Step 9: Toggle on the Sync settings option, and whatever you want to sync.
Step 10: Re-add the Work or School Account that has been connected before.