This article describes some common local Radius failures in FortiNAC, the accompanying debug logs, and few examples.
Enable debug and view logs via UI (versions 9.2 and greater)
Table of Contents
- Enable debug and view logs via UI (versions 9.2 and greater)
- Enable debug and view logs via CLI
- Issue 1: Port already in use
- Associated logs that indicate this
- Cause
- Solution
- Issue 2: No mutually acceptable types found
- Associated logs that indicate this
- Cause
- Solution
- Issue 3: Radius requests rejected or ignored from the NAS client
- Associated logs that indicate this
- Cause
- Solution
The following steps describe how to perform basic debugging via FortiNAC GUI for Local Radius Server, in order to verify if the processes are working as expected or to provide TAC support with additional debug information at the beginning of a ticket.
In 9.2.2 there is an enhanced GUI view for troubleshooting Local Radius in FortiNAC. Both RADIUS service and FortiNAC server debug can be enabled independently.
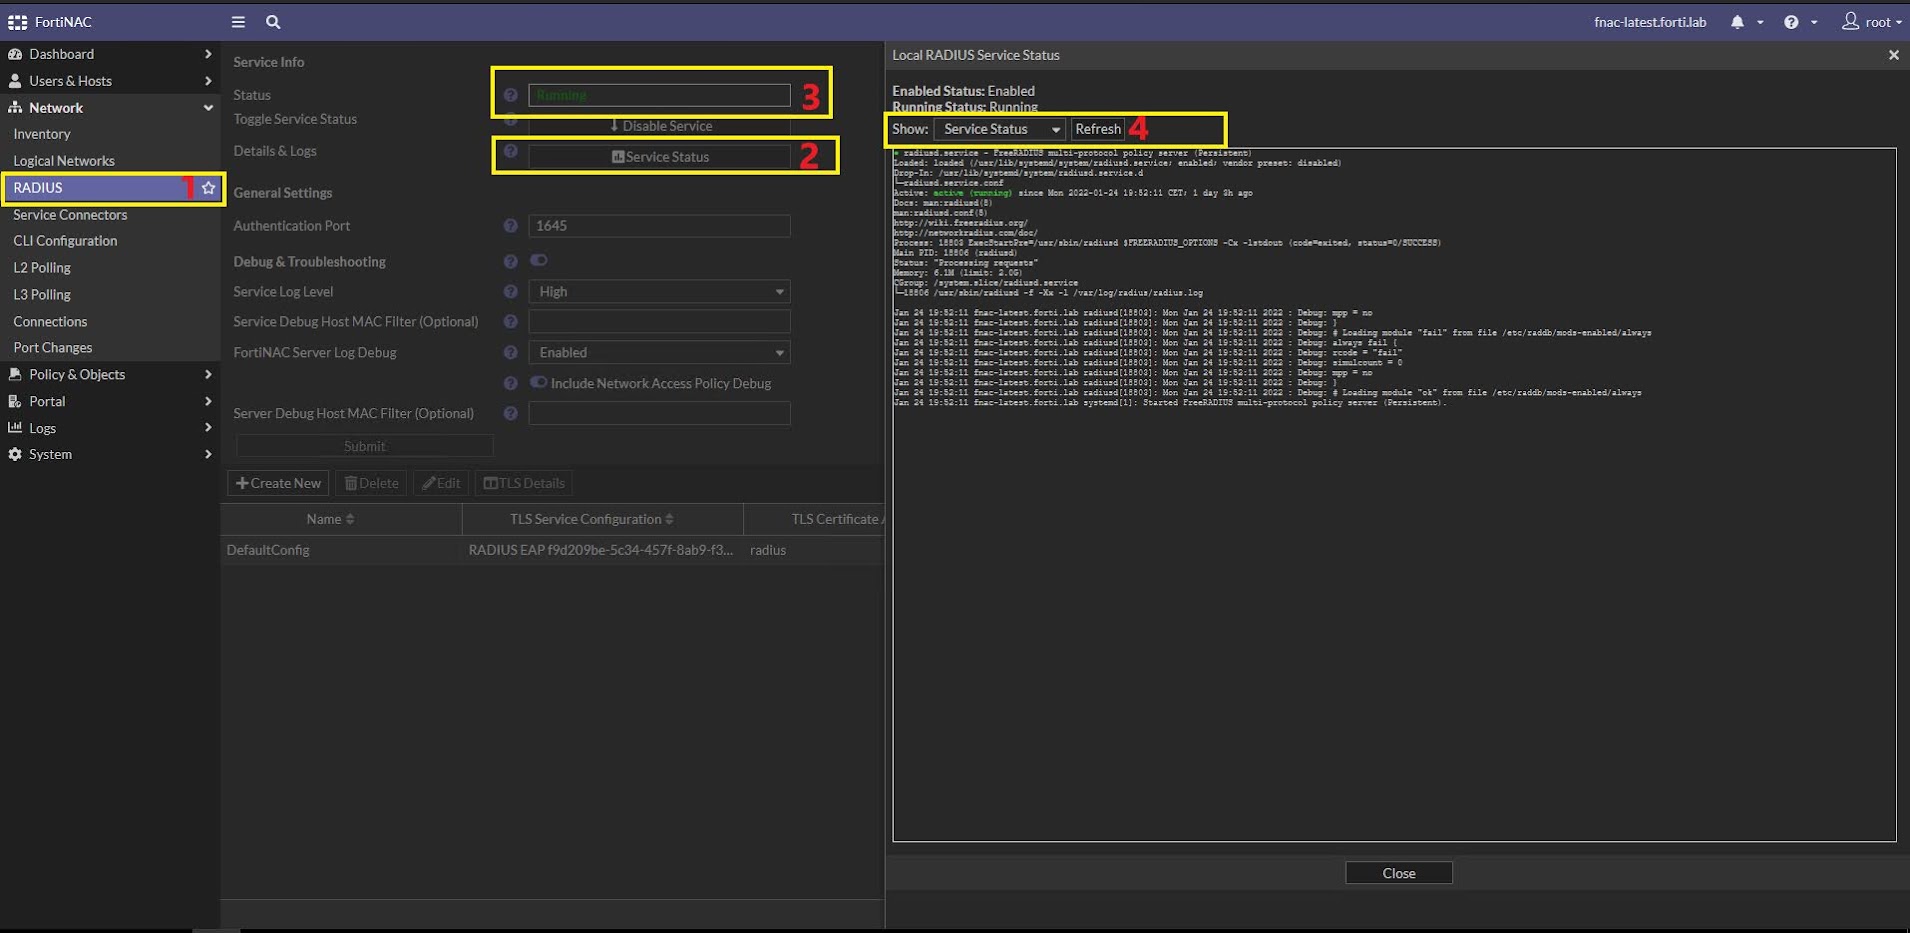
To check if Radius Service is running properly or not, which is a good starting place for authentication and service startup failures.
Step 1: Select Network > RADIUS > Local Service (no.1).
Step 2: On the Local Radius Service status in the right from the drop-down menu(no.4), select Service Status.
Step 3: If the service is not running properly, it is possible to check the debugging logs on the right for any hints or indications of the failure.
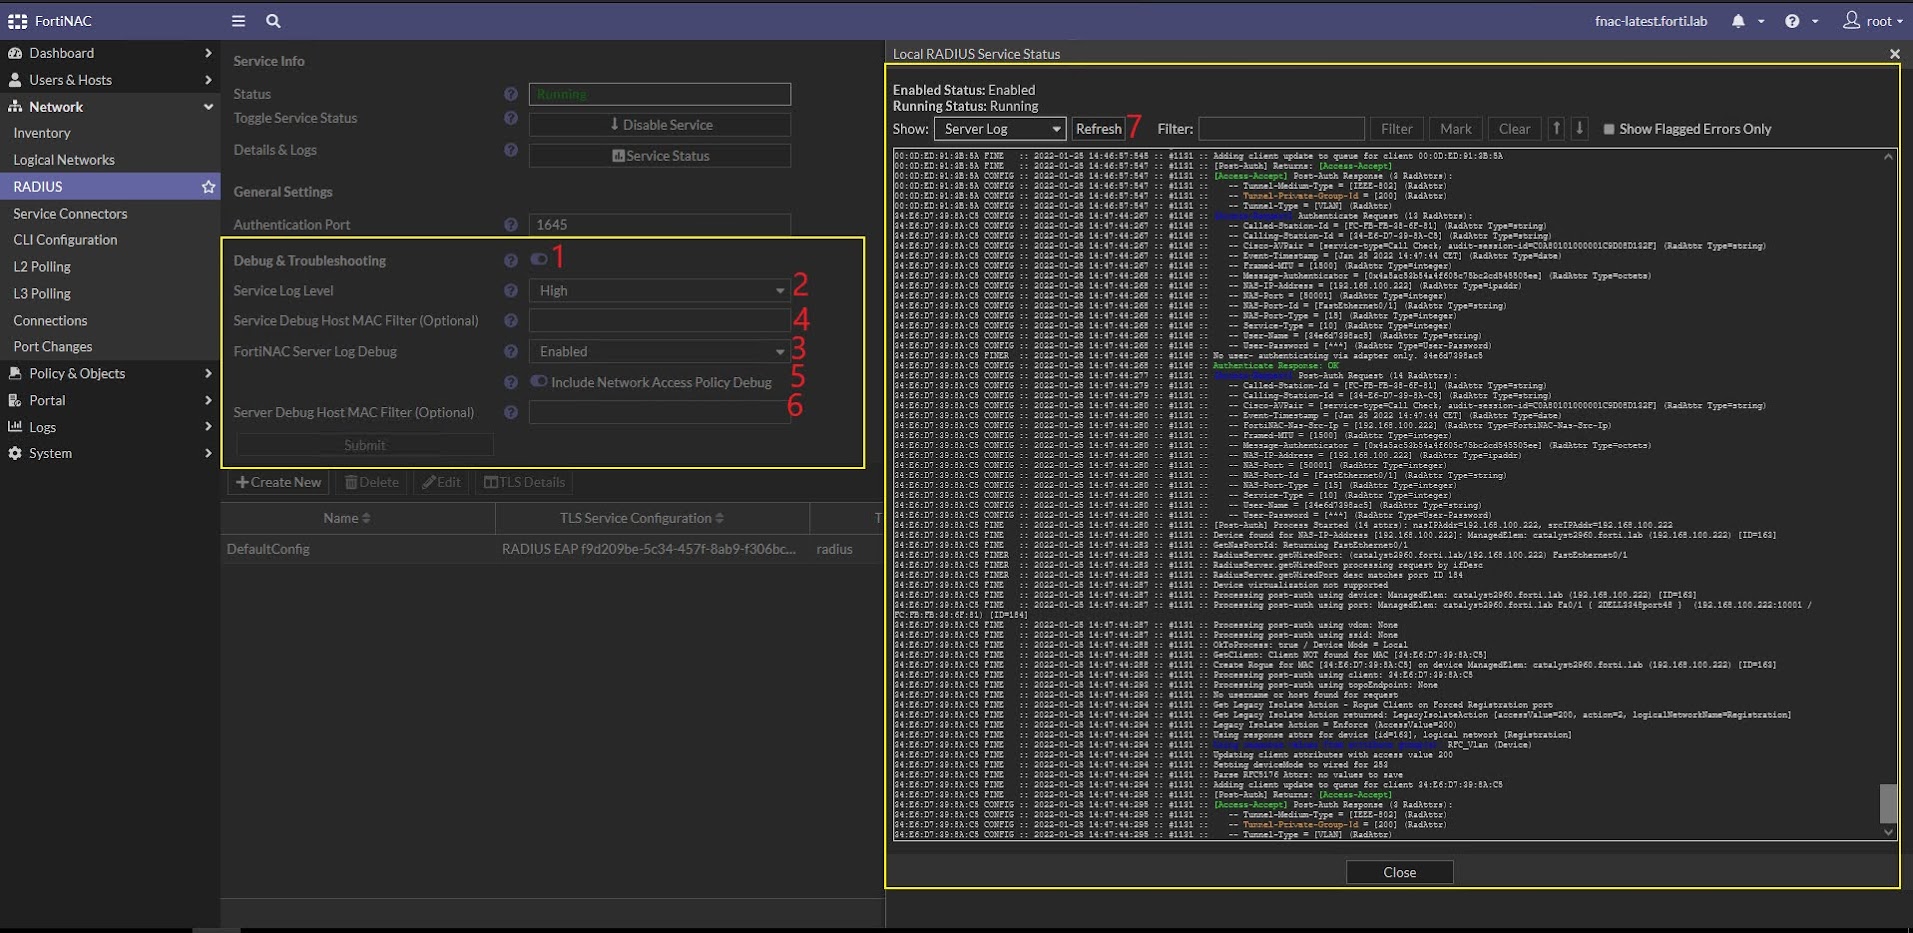
To check Radius Server logs which is useful when authentication succeeds up to the post-auth phase where FortiNAC does post-auth processing and can diagnose why FortiNAC returns deny, incorrect VLAN or filter ID, or wrong/missing response value data.
Step 1: Turn on Debug & Troubleshooting (no.1).
Step 2: Define verbosity level: high, medium, low (no.2).
Step 3: Enable FortiNAC server debug related to local RADIUS access processing.
Debug outputs will be displayed in the right under Local Service tab. Select from the drop-down Service Status > Server Log. (no.3 and no.7).
Step 4: For specific filtering on MAC address, it is possible to specify via no.4 or no.6.
Step 5: For added information regarding the network access policy applied, you can turn it on (no.5).
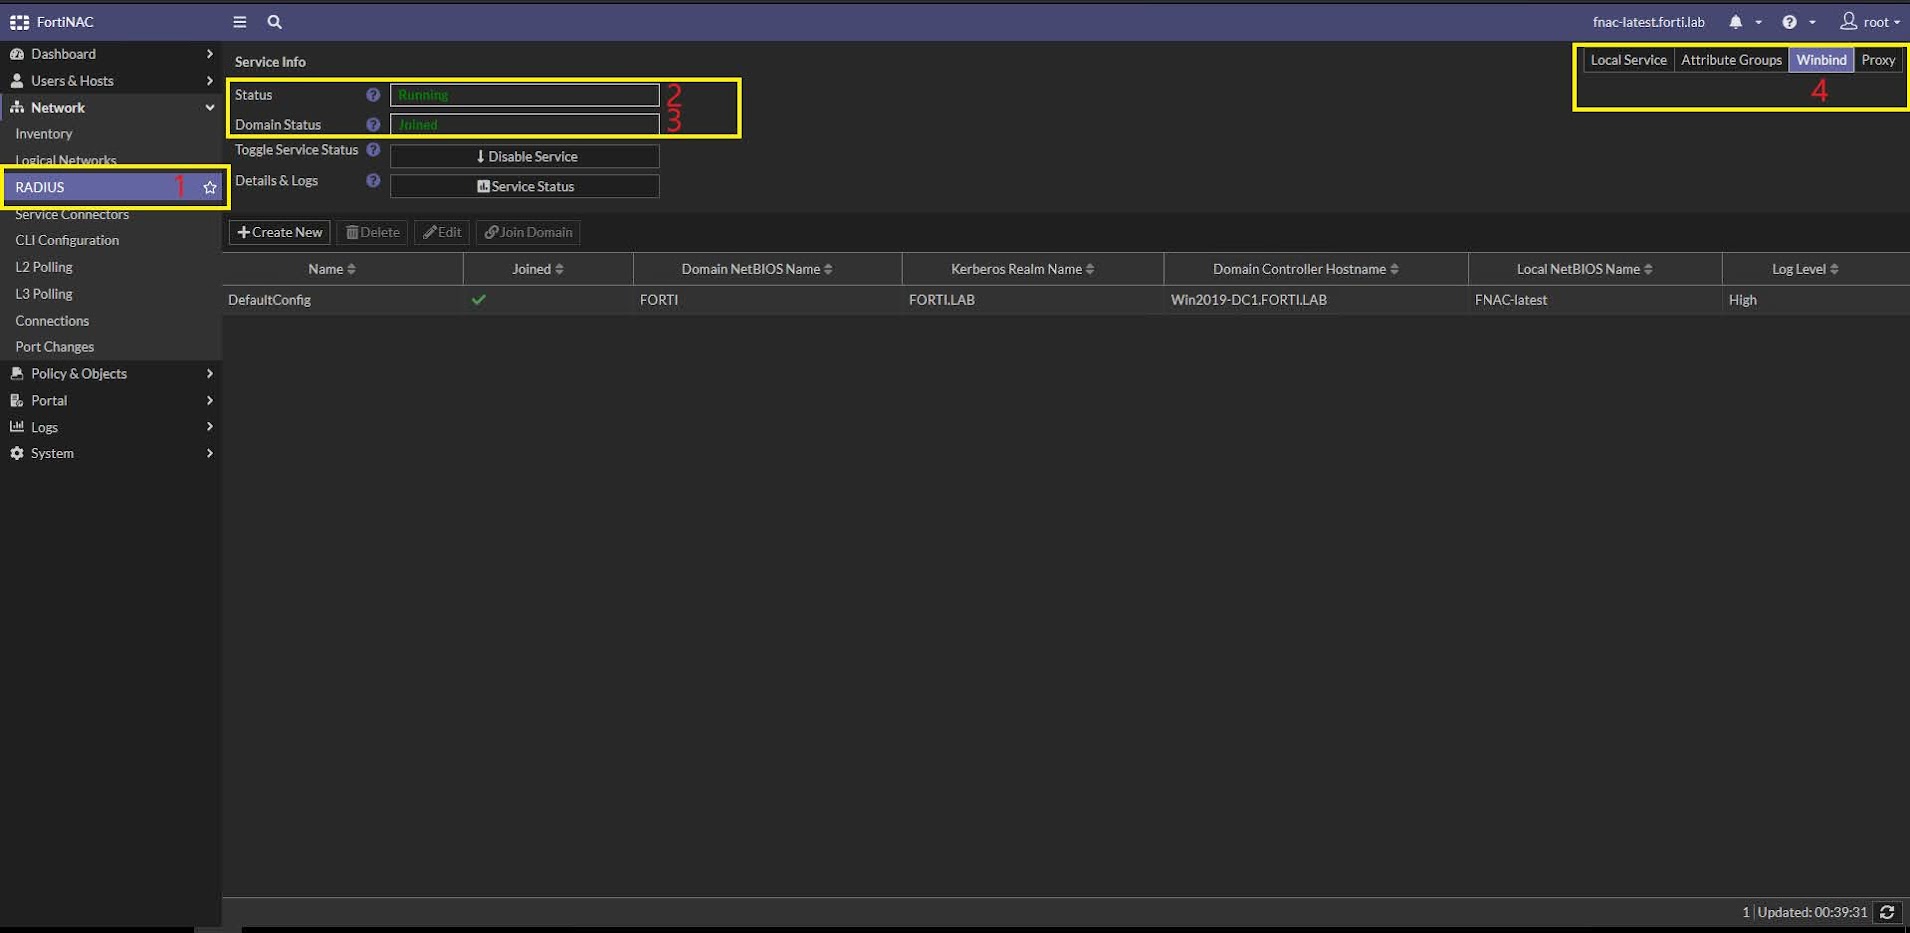
If the FortiNAC is joined to Active Directory for MSCHAPv2 authentication, then the local radius winbind process can be checked via GUI too.
Step 1: Got to Network > RADIUS > Winbind (no.1 and no.4).
Step 2: Check if it is running and the domain is joined (no.2 and no.3).
Enable debug and view logs via CLI
Step 1: Log in as root to the appliance CLI.
Step 2: Type the following command:
tail -F /var/log/radius/radius.logStep 3: Attempt to connect with a test host.
Step 4: Monitor the log.
Issue 1: Port already in use
Associated logs that indicate this
Tue Aug 22 13:06:56 2022 : Error: Failed binding to auth address * port 1812: Address already in useCause
The same listening port is used by local radius service and proxy radius. This will cause a conflict and therefore cause the local radius service to fail starting up
Solution
Change listening port for either local radius or proxy radius. For example, local radius port 1812, proxy radius port 1645.
If one wants to use this port for local RADIUS, perform the following:
Step 1: Go to Network > RADIUS > Proxy tab and change the port of Authentication Port and Accounting Port to 1645 and 1646.
Step 2: If RADIUS Proxy is not used, uncheck the boxes and save the settings.
Step 3: Then select Local Service and Enable the Service.
Keep in mind to align the NAS device to send radius traffic to the appropriate designed port
Issue 2: No mutually acceptable types found
Associated logs that indicate this
Tue Aug 22 13:06:56 2022 : Auth: (414) Login incorrect (eap: No mutually acceptable types found): [host/edvin.fortinet.lab] (from client 10.x.x.c port 574 cli xx-xx-xx-xx-xx-xx)Cause
EAP type mismatch between client and FortiNAC acting as radius server
Solution
EAP types have not been checked in radius configuration. User can enable all of them, so one can accommodate each type of EAP request coming from different clients, it will not cause any compatibility problems.
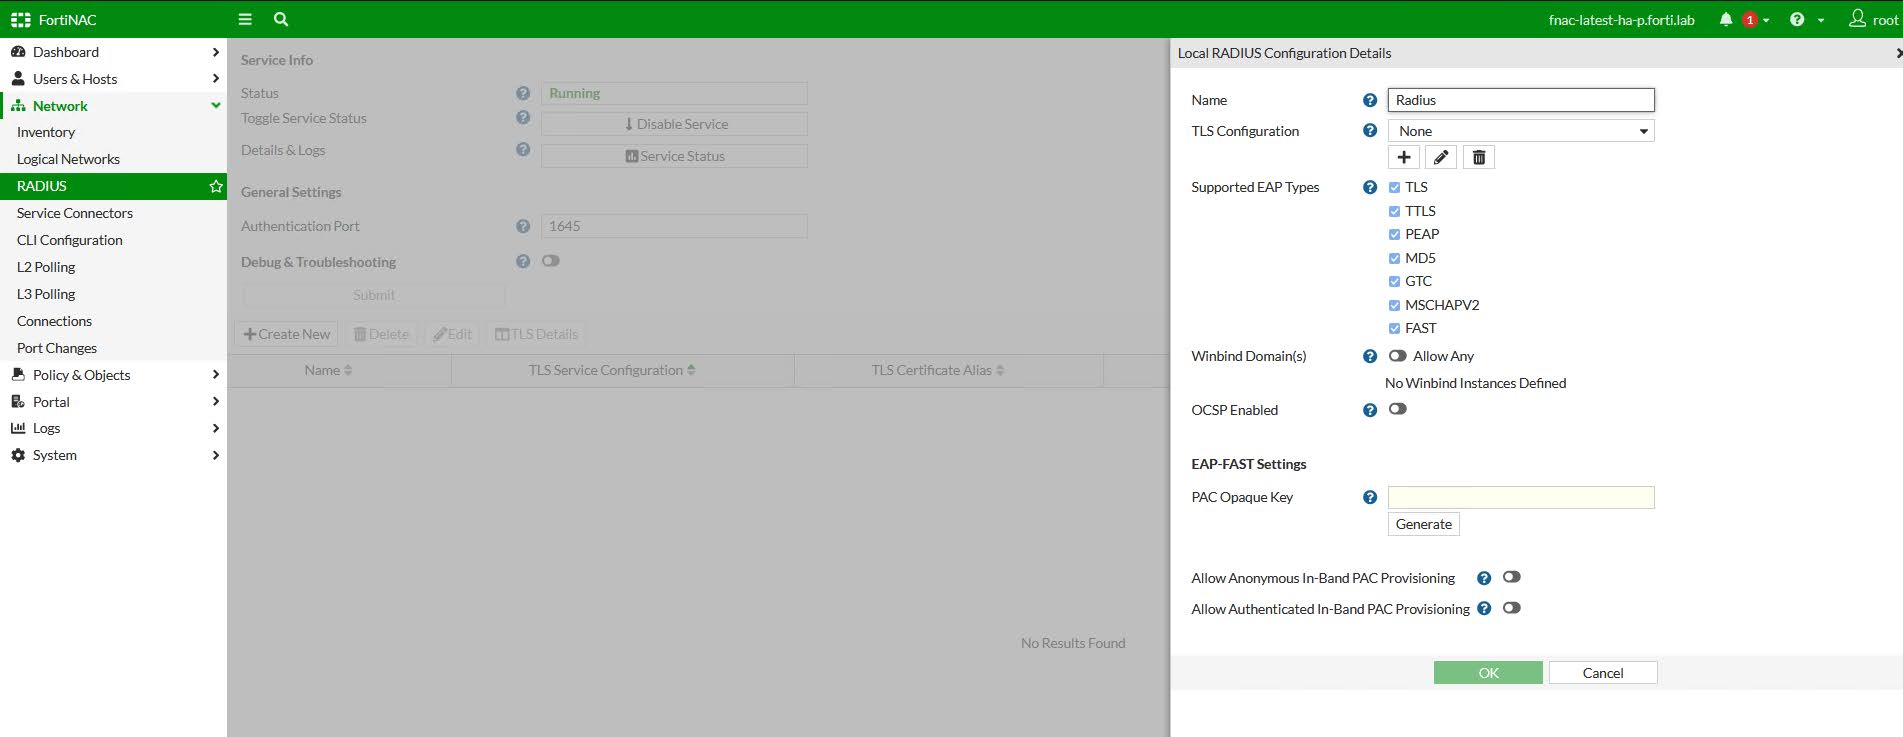
Some clients use legacy TLS protocol/ciphers. In that case, legacy TLS protocols will need to be enabled. To Enable Legacy Ciphers in FortiNAC radius configuration:
Step 1: Navigate to the Local Radius Configuration.
Step 2: Select the modify Icon in the TLS Service Configuration.
Step 3 Enable Ciphers that are supported by the Windows 7 client.
Step 4: Select OK.
Step 5: Select Save Settings.

Issue 3: Radius requests rejected or ignored from the NAS client
Associated logs that indicate this
Tue Aug 22 13:06:56 2022 :Error:Ignoring request to auth address * port 1812 from unknown client x.x.x.x port xxxxx udpCause
This is caused when the NAS IP in the radius request is different from that specified in the Element Tab in the modeled device in FortiNAC.
Solution
Either the IP on the element tab has to be aligned, either the NAS device (switch/WLC) has to be checked so radius requests come from the intended management IP