When you start using a Windows computer for the very first time, something important happens behind the scenes. It’s like setting up your own little space on the computer, and we call it a “user profile.”
Now, this profile holds a bunch of things that make your computer your own. It’s like your personal room in a big house. It keeps track of your favorite desktop background, how your emails are set up, and even how your computer connects to the internet.
But here’s the thing: Over time, you might have created more of these personal rooms (user profiles) than you actually need. Maybe for guests or family members who don’t use the computer anymore.
So, in this guide, we’re going to show you how to tidy up and get rid of those extra user profiles on your Windows computer that you don’t need anymore. It’s like cleaning up your house to make it more organized and efficient.

Table of Contents
Method 1: Using Advanced System Properties
Here’s a simple and effective method to delete a user profile you no longer need on your Windows PC. Think of it as decluttering your computer to make it more organized:
Step 1: Start by pressing two keys on your keyboard: the Windows key (it has a little Windows logo on it) and the letter “R.” This opens up a box called the Run dialog. Now, type in “systempropertiesadvanced” and hit “OK.”

Step 2: In the “Advanced” tab that appears, you’ll see a button labeled “Settings” under “User Profiles.” Click on it.

Step 3: You’ll see a list of user profiles stored on your computer. Find the one you want to get rid of and click on it.
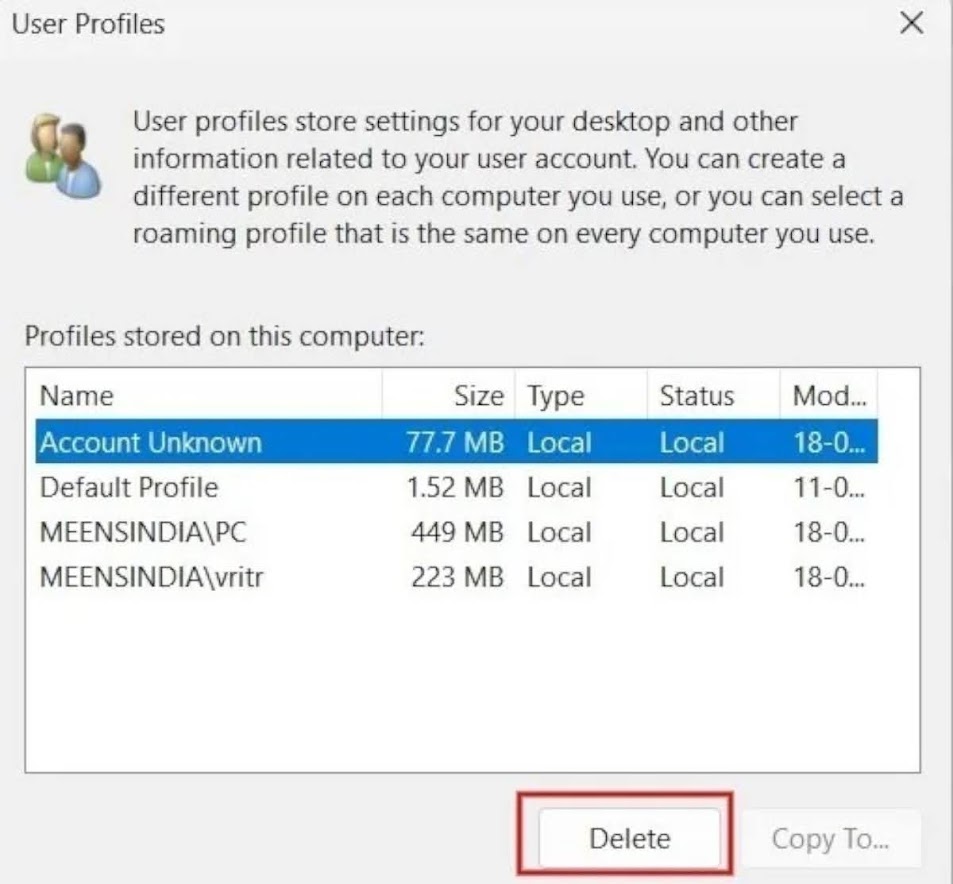
Step 4: A message will pop up, asking if you’re sure you want to delete this profile. Click “Yes.”

Step 5: And that’s it! You’ve successfully deleted the user profile from your computer. It’s like tidying up your room by removing things you no longer need to make your computer cleaner and faster.
Method 2: Using the Settings App
Here’s another method for removing a user profile and all its stuff from your Windows PC. This is like cleaning out a closet to get rid of things you no longer need:
Step 1: Start by clicking on the Start button in the bottom-left corner of your screen. Then, open up the Settings app.

Step 2: Once you’re in the Settings app, look for a section called “Accounts.” It’s on the left side. Click on it.
Step 3: Now, scroll down a bit until you see “Other users” on the right side. Click on it.

Step 4: You’ll see a list of other people who use your computer. Find the one you want to remove and click the little arrow next to their name.
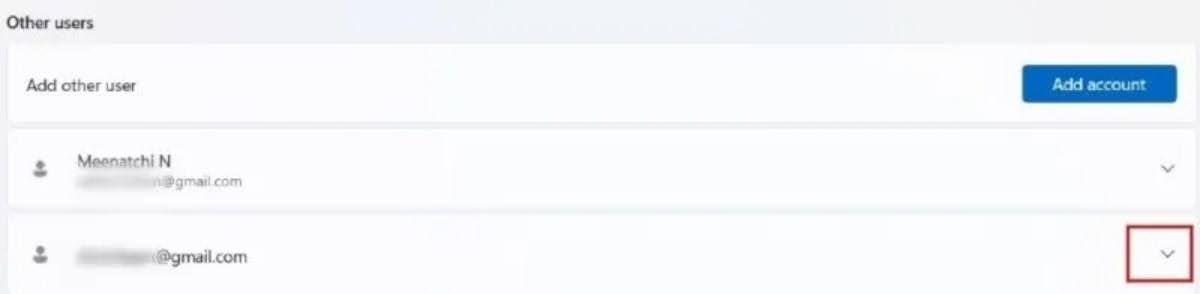
Step 5: A button that says “Remove” will show up. Click on it.

Step 6: Windows will ask if you’re sure you want to do this. Click “Delete account and data” if you’re sure, and you’re all done.

That’s it! You’ve successfully deleted a user profile and all its data from your computer using the Settings app. It’s like clearing out old clothes from your closet to make more space for the things you use.
Method 3: Using the Registry Editor
Let’s break down a method for deleting a user profile on Windows using the Registry Editor. It’s a bit like doing some advanced cleaning on your computer, so you need to be careful. And before you start, make sure you create a backup of your computer’s settings, just in case something doesn’t go as planned.
Step 1: To begin, you’ll need to open a tool called the Run utility. You can do this by pressing two keys on your keyboard: the Windows key (it usually has a little Windows logo on it) and the letter “R.” This will open a small box. Now, type in “regedit” and click “OK.”

Step 2: In the Registry Editor that pops up, you’ll see a bunch of folders and keys. Think of them like secret compartments in your computer. We need to navigate to a specific place, so follow this path: HKEY_LOCAL_MACHINE\SOFTWARE\Microsoft\Windows NT\CurrentVersion\ProfileList.

Step 3: Now, on the left side of the Registry Editor, you’ll see a list of different keys under the ProfileList folder. These are like different rooms in your computer’s house. Click on each one to explore. In the right side, you’ll find a path to a user profile you want to delete. It’s usually in the “Data” field for the “ProfileImagePath” key. For example, if you want to remove a user called “vritr,” find that.
Step 4: When you’ve found the right one, right-click on the “ProfileImagePath” key related to the user profile you want to get rid of. Then, choose “Delete.”

Step 5: A message will pop up, asking if you’re really sure you want to do this. Click “Yes” if you’re certain.

And that’s it! You’ve successfully removed a user profile from your Windows computer using the Registry Editor. Think of it like cleaning up hidden corners in your computer’s attic to make it more organized. Just remember to be cautious while doing this, and it’s always a good idea to back up your computer settings before making any big changes.
Method 4: Using PowerShell
Let’s explore another method to delete user profiles on Windows using PowerShell. Think of PowerShell as a powerful tool that can help you manage various aspects of your computer, like removing user profiles:
Step 1: First, let’s open PowerShell. You can do this by pressing two keys on your keyboard: the Windows key (usually with a little Windows logo on it) and the letter “X.” After that, click on “Terminal (Admin).” This is like entering a special command room in your computer.

Step 2: Now, in PowerShell, type in the following command and hit “Enter.” This command will show you a list of user profiles on your computer. Make a note of the one you want to delete: Get-LocalUser

Step 3: To actually delete a specific user profile, use this command, but replace <userprofilename> with the name of the profile you want to remove from your Windows computer. Then, hit “Enter”: Remove-LocalUser -Name <userprofilename>

Step 4: You might not see a message saying it’s been deleted, so you can use the same command from step 2 to double-check if the user profile was removed.
And that’s how you can use PowerShell to delete a user profile. It’s a bit like using a super-tool to manage your computer’s settings. Just make sure you’re careful and enter the right information, and always double-check your work.
Method 5: Using File Explorer
Here’s another way to delete a user profile and its data on a Windows PC using the File Explorer app. Think of it like tidying up your computer’s storage by removing things you no longer need:
Step 1: To get started, press two keys on your keyboard: the Windows key (it usually has a little Windows logo on it) and the letter “E.” This will open up File Explorer, which is like your computer’s filing cabinet. Now, look for “This PC” on the left side and click on it.

Step 2: Next, double-click on “Windows (C:)” under “Devices and drives.” This is where your computer stores all its important stuff.

Step 3: Inside the “Windows (C:)” folder, find and click on “Users.” This is where all the user profiles on your computer are kept.

Step 4: You’ll see a list of user profile names. Select the name of the profile you want to delete, and then press the “Delete” key on your keyboard. This is like removing a folder from your filing cabinet.

And that’s it! You’ve successfully removed a user profile from your Windows PC using File Explorer. Just make sure you’re logged in as an administrator before you attempt this, and be careful not to delete anything you still need. It’s like cleaning up old files to free up space and keep your computer running smoothly.
Conclusion
In conclusion, we’ve covered a method for cleaning up your Windows PC by removing unused user profiles. Although deleting these profiles won’t make a huge difference in freeing up space on your “C:” drive, there are other ways to recover more space.
If you’ve ever seen the error message that says “User profile service failed the sign-in,” this guide has shown you how to delete a problematic user profile and create a new one, which can help resolve the issue and keep your computer running smoothly. It’s like tidying up your computer’s room to make it more organized and efficient, and there are other cleaning methods you can explore for a more thorough cleanup.
Frequently Asked Question (FAQ)
Question: What is the difference between a user account and a user profile in Windows?
Answer: A user account is the account you sign in with. It has your name, your settings, your desktop image, and all the other features that make your PC your own. A user profile is the set of files and folders that store all the personal data of the user account, such as your documents, pictures, browser favorites, and desktop settings.
Question: What happens when you delete a user profile in Windows?
Answer: When you delete a user profile in Windows, all the associated data and settings for that user account are permanently removed from the computer. This includes files, folders, desktop icons, documents, application settings, and personalized preferences. The user profile’s registry keys and user-specific data stored in the “C:\Users” directory are also deleted. It’s important to note that deleting a user profile does not affect other user profiles on the same computer.
Question: Can I delete built-in user profiles in Windows, like the Administrator profile?
Answer: Built-in user profiles like the Administrator cannot be deleted through standard methods. These profiles are essential for system functionality. It is not recommended to delete or modify built-in profiles as it can lead to system instability.
Question: Can I delete a user profile without deleting the user account?
Answer: No, deleting a user profile in Windows also deletes the associated user account. When you delete a user profile, it removes both the user’s data and the account itself. If you want to retain the user account but remove the user’s data, you can manually back up the necessary files before deleting the profile. However, keep in mind that deleting a user account will also remove access to any resources or permissions associated with that account.
Question: How do I delete a user profile in Windows 10 without administrator rights?
Answer: Deleting a user profile in Windows 10 requires administrative privileges. Without administrator rights, you won’t have the necessary permissions to delete user profiles. If you need to delete a user profile, you’ll need to log in with an administrator account or contact the administrator of the computer to assist you.
Question: Is it possible to recover a deleted user profile in Windows?
Answer: Once a user profile is deleted in Windows, the associated data is permanently removed from the computer. It is not possible to recover the deleted user profile using built-in Windows tools. However, if you have a recent backup of the user profile or if you’ve enabled system restore points, you may be able to restore the user profile from those backups. It’s always recommended to regularly back up important data to prevent permanent loss.
Question: Can I delete a user profile in Windows while logged in to that profile?
Answer: No, you cannot delete the user profile you are currently logged in to. Windows does not allow you to delete your own user profile while you are actively logged in. To delete a user profile, you’ll need to log in with a different user account that has administrative privileges or use an administrator account to perform the deletion.
Question: Will deleting a user profile in Windows remove installed programs?
Answer: Deleting a user profile in Windows does not remove installed programs or applications. Installed programs are typically stored in separate directories and are not directly associated with a specific user profile. When you delete a user profile, only the user-specific data and settings are removed, such as documents, files, desktop icons, and personalized preferences. However, it’s important to note that some programs may store user-specific settings or data within the user profile, and those program-related files may be deleted along with the user profile.
Question: Can I delete a user profile in Windows from the command line?
Answer: Yes, you can delete a user profile in Windows using the command line. The command line tool “net user” allows you to manage user accounts, including deleting them. To delete a user profile from the command line, you can use the following command: “net user [username] /delete”. Replace [username] with the actual name of the user profile you want to delete. It’s important to note that administrative privileges are required to execute this command.
Question: Are there any risks or considerations when deleting a user profile in Windows?
Answer: When deleting a user profile in Windows, there are a few risks and considerations to keep in mind:
- Data loss: Deleting a user profile will permanently remove all associated data, including files, folders, and application settings. Make sure to back up any important files before deleting a user profile.
- System stability: If the user profile belongs to a user who is actively logged in or has running processes, deleting the profile may cause interruptions or system instability. It’s recommended to log out the user or restart the computer before deleting the profile.
- Permissions and access: Deleting a user profile will remove the associated user account, which may cause issues with permissions and access to resources tied to that account. Ensure that any necessary permissions or access rights are reassigned or modified after deleting a user profile.
Question: Can I delete a user profile in Windows from Safe Mode?
Answer: Yes, you can delete a user profile in Windows from Safe Mode. To access Safe Mode, restart your computer and press the F8 key repeatedly before the Windows logo appears. Once in Safe Mode, you can follow the regular procedures for deleting a user profile, such as using the Control Panel, Settings app, or other methods mentioned earlier. It’s important to note that administrative privileges are still required to delete a user profile, even in Safe Mode.
Question: How can I delete a user profile in Windows if it is corrupted?
Answer: If a user profile in Windows is corrupted, it may cause issues with logging in or accessing files and applications. In such cases, it’s recommended to create a new user profile and transfer any important data from the corrupted profile to the new one. Once you’ve successfully transferred the necessary files, you can proceed to delete the corrupted user profile using the regular methods mentioned earlier. Deleting the corrupted profile will remove the associated data and settings, allowing you to start fresh with the new profile.
Question: What are the alternatives to deleting a user profile in Windows?
Answer: Instead of deleting a user profile, you can:
- Disable the user account temporarily.
- Create a new user account and migrate the user’s data and settings.
- Rename the user profile folder to keep it but create a new profile.