If you plan to migrate from an on-premise Exchange Server to Microsoft 365, you can use the Exchange Admin Center (EAC) in Office 365 or PowerShell cmdlets to move the entire data, including the Distribution Groups or Lists, from the on-premise Exchange Server to Microsoft 365. In this article, we will show you how to migrate Distribution Groups from an on-premise Exchange Server to Microsoft 365.
Table of Contents
- Prerequisites
- Create the Distribution Group in Office 365
- Upgrade and Migrate Distribution Groups or Lists to Microsoft 365 Groups
- Upgrade an existing Distribution List or group to Microsoft 365 Groups via Exchange Admin Center (EAC)
- Upgrade an existing Distribution List or group to Microsoft 365 Groups via Exchange PowerShell Cmdlets
- Potential problems causing migration or upgrading Distribution Groups to Office 365 failed
Prerequisites
Please verify below prerequisites to ensure the migration of Distribution Groups to Office 365 is successful:
- You must log in as a global administrator and should be a member of the Distribution List on Microsoft 365.
- You must create the mailboxes on Office 365, and assign licenses to activate them before migration.
- After migrating the mailboxes, you can create Distribution Groups or Microsoft 365 Groups manually in Microsoft 365 Exchange Admin Center (EAC) and add members as they were on on-premises Exchange.
- You may add members to an existing Distribution Group or List in Microsoft 365 and then upgrade the Distribution Group to Microsoft 365, which provides more advanced collaboration features and options.
Create the Distribution Group in Office 365
Step 1: Login to Microsoft 365 or Office 365 Exchange Admin Center (EAC).
Reminder: Ensure that you are logged in as a Global Administrator or as the owner of the Distribution Group.
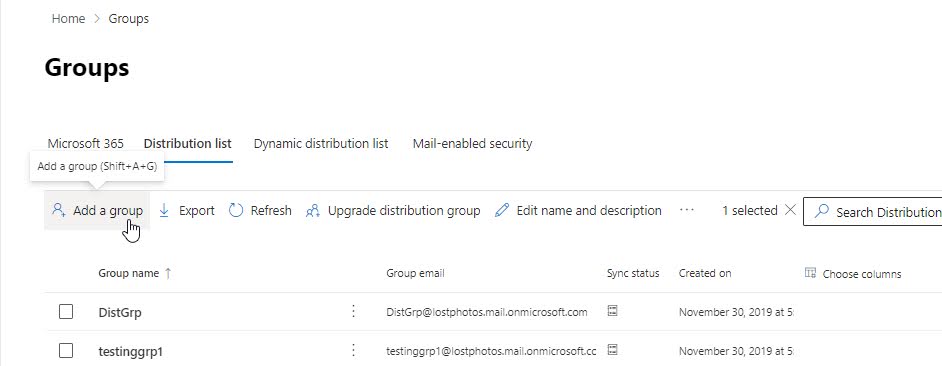
Step 2: Go to Recipients > Groups.
Step 3: Click the Add a group option.
Step 4: Click Microsoft 365 (recommended) to create Microsoft 365 groups or choose Distribution to create Distribution Groups (you can later upgrade to Microsoft 365 group). Click the Next button.
Step 5: Enter the group name and description. Click the Next button.
Step 6: Click on the +Assign Owners option and choose the owner. You must choose the user, the global administrator, or the user you want to be the owner. Only the owner can migrate or upgrade the Distribution Groups or Lists or groups to Microsoft 365 Groups. Click the Next button.
Step 7: Click on the +Add Member option and add the users that belonged to this Distribution Group on your on-premises Exchange Server. Click the Next button.

Step 8: Assign the same Distribution Group email address as it was on on-premises and then choose additional settings based on your organization’s policies. Click the Next button.

Step 9: Review all the changes and then click on the Create group button.

Upgrade and Migrate Distribution Groups or Lists to Microsoft 365 Groups
Use EAC when you need to move or migrate only a few Distribution Groups to Office 365. However, if there are a large number of Distribution Groups, it’s recommended that you use the Upgrade-DistributionGroup PowerShell cmdlets to migrate Distribution Groups to Office 365 at once.
Upgrade an existing Distribution List or group to Microsoft 365 Groups via Exchange Admin Center (EAC)
Step 1: Login to Office 365 Exchange Admin Center (EAC).
Reminder: Ensure that you are logged in as a Global Administrator or as the owner of the Distribution Group.
Step 2: Go to Recipients > Groups.
Step 3: Select the Distribution Group you want to upgrade or migrate to Microsoft 365.
Step 4: Click the Upgrade distribution group option.

Step 5: Click on the Upgrade button.

Warning: This process is irreversible and can’t be undone once the Distribution Groups are upgraded to Microsoft 365.
Step 6: Once the upgrade process is completed, you can click on the Refresh option Microsoft 365 tab to see the changes.

Step 7: If you need to upgrade or migrate more Distribution Groups to Office 365 or Microsoft 365 groups, repeat the same steps again.
Upgrade an existing Distribution List or group to Microsoft 365 Groups via Exchange PowerShell Cmdlets
Step 1: Connect to the Exchange Online (Office 365) PowerShell via the following command in the PowerShell window:
set-executionpolicy unrestricted
Install-Module -Name ExchangeOnlineManagement -RequiredVersion 2.0.3
Import-Module ExchangeOnlineManagement
Connect-ExchangeOnline -UserPrincipalName [email protected]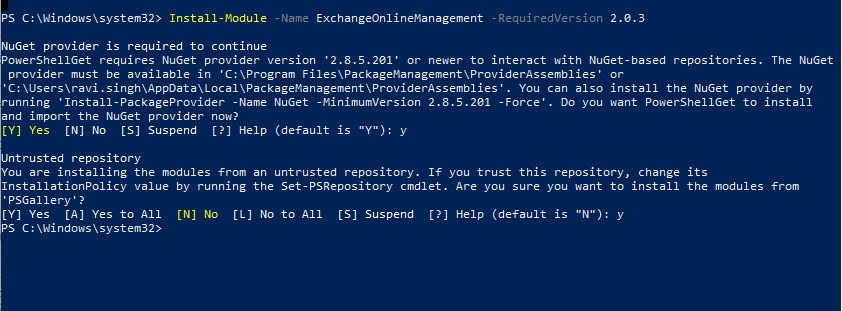
Step 2: Enter the password to login to Office 365 account. Make sure to connect as a Global Administrator.
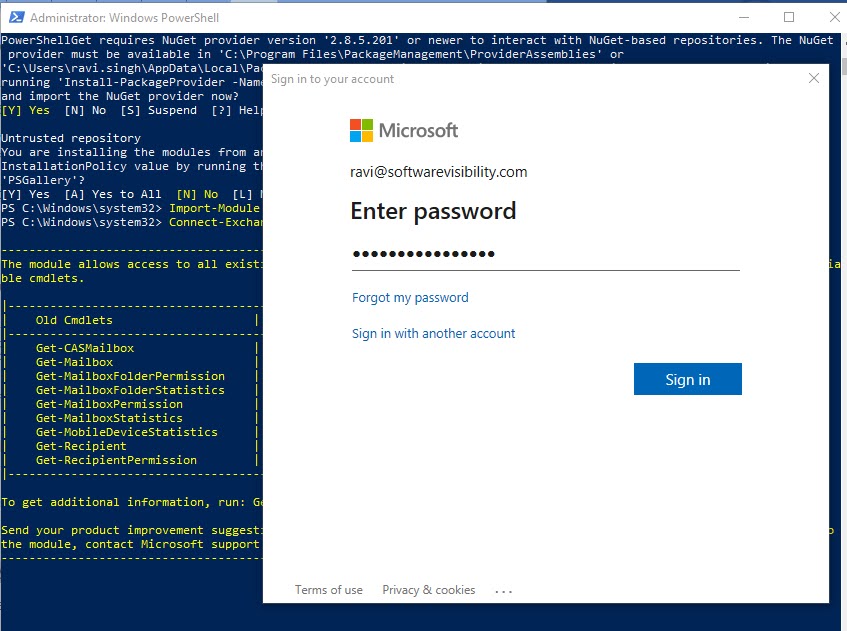
Reminder: Ensure that you are logged in as a Global Administrator or as the owner of the Distribution Group.
Step 3: Once logged in successfully, execute the following commands to check the eligible Distribution Groups that you can upgrade or migrate to Office 365:
Get-DistributionGroup emailaddress | Get-EligibleDistributionGroupForMigration /emailaddress
Get-EligibleDistributionGroupForMigration
Step 4: Execute the following command to upgrade one or more eligible Distribution Groups to Office 365:
Upgrade-DistributionGroup -DLIdentities email address="" /email
Upgrade-DistributionGroup -DLIdentities emailaddress1, emailaddress2,...emailaddressn /emailaddressn /emailaddress2 /emailaddress1
Alternatively, you can use the following commands to upgrade or migrate all eligible Distribution Groups to Office 365:
$All = Get-EligibleDistributionGroupForMigration -ResultSize unlimited
$All | Foreach-Object {Upgrade-DistributionGroup -DLIdentities $_.PrimarySMTPAddress}
Step 5: Open the Exchange Admin Center (EAC) and go to Recipients > Groups > Microsoft 365 tab to verify that the Distribution Groups are successfully migrated to Office 365.
Potential problems causing migration or upgrading Distribution Groups to Office 365 failed
It could be due to one or more of the following reasons causing the migration or upgrading to fail:
- Distribution Groups (DGs) have more than 100 members.
- DGs have only members but no owners.
- DGs have a special character in the alias.
- DGs are configured as a forwarding address for a shared mailbox.
- Mail-enabled security groups.
- Dynamic
- DGs converted to RoomLists.
- DGs are part of another DGs’ Sender Restriction.