Have you ever encountered the frustration of an SSL VPN connection failing at precisely 10%? It’s a scenario that can leave you scratching your head, wondering what’s causing the hiccup in your network security.
In this article, we unravel the mystery surrounding SSL VPN connectivity issues at the 10% mark. We’ll explain why this specific failure point typically indicates a network connection problem to your FortiGate device. Understanding this common culprit is the first step towards troubleshooting and resolving the issue effectively.
So, if you’ve ever wondered why SSL VPN connections seem to hit a roadblock at 10%, join us as we delve into the intricacies of this challenge and equip you with insights to ensure seamless VPN connectivity.
Troubleshooting SSL VPN Failures Behind NAT
Have you ever encountered SSL VPN connectivity issues when your VPN is behind a NAT (Network Address Translation) setup, and it consistently fails at the 10% mark? If so, you’re not alone, and there’s a common reason behind this hiccup.
The problem typically arises because your SSL VPN traffic isn’t reaching your FortiGate device due to NAT restrictions. But don’t worry, there’s a straightforward solution:
Solution: Port Forwarding for SSL VPN
To resolve this issue, you need to create a port forwarding rule for the SSL VPN port and direct it to your FortiGate WAN (Wide Area Network) interface IP, which should be configured on your Internet Service Provider (ISP) modem.
By doing this, you ensure that SSL VPN traffic can pass through the NAT barrier and reach your FortiGate device, enabling successful VPN connections.
For more detailed information and step-by-step guidance on configuring port forwarding for SSL VPN behind NAT, please refer to the steps below:
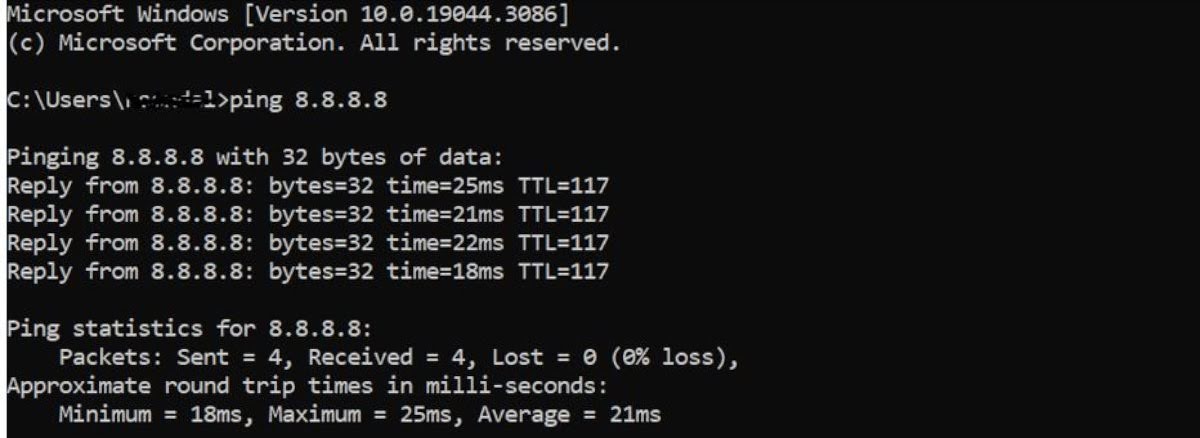
Step 1: Verify Internet Connectivity
Ensure that the remote user’s internet connection is working smoothly. A stable internet connection is crucial for SSL VPN to function correctly.
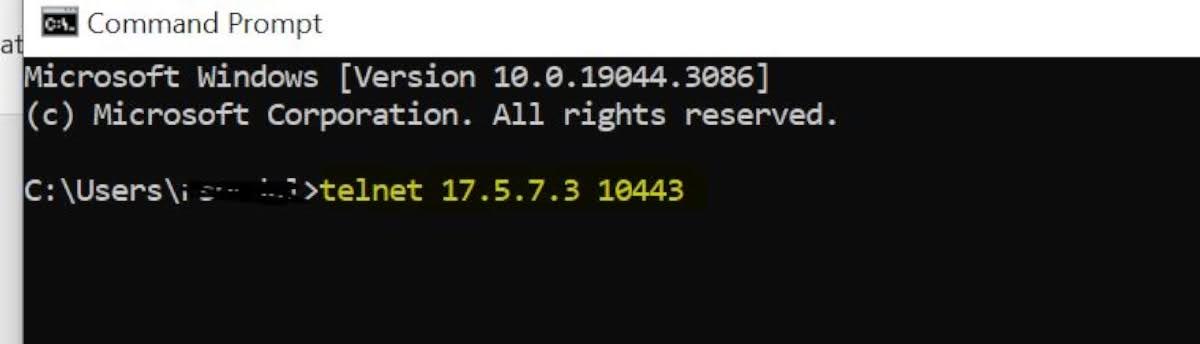
Step 2: Check Telnet Connection
Confirm that you can establish a Telnet connection to the SSL VPN server’s IP address on the SSL VPN port from the remote system. This step ensures that the basic network communication is functional.
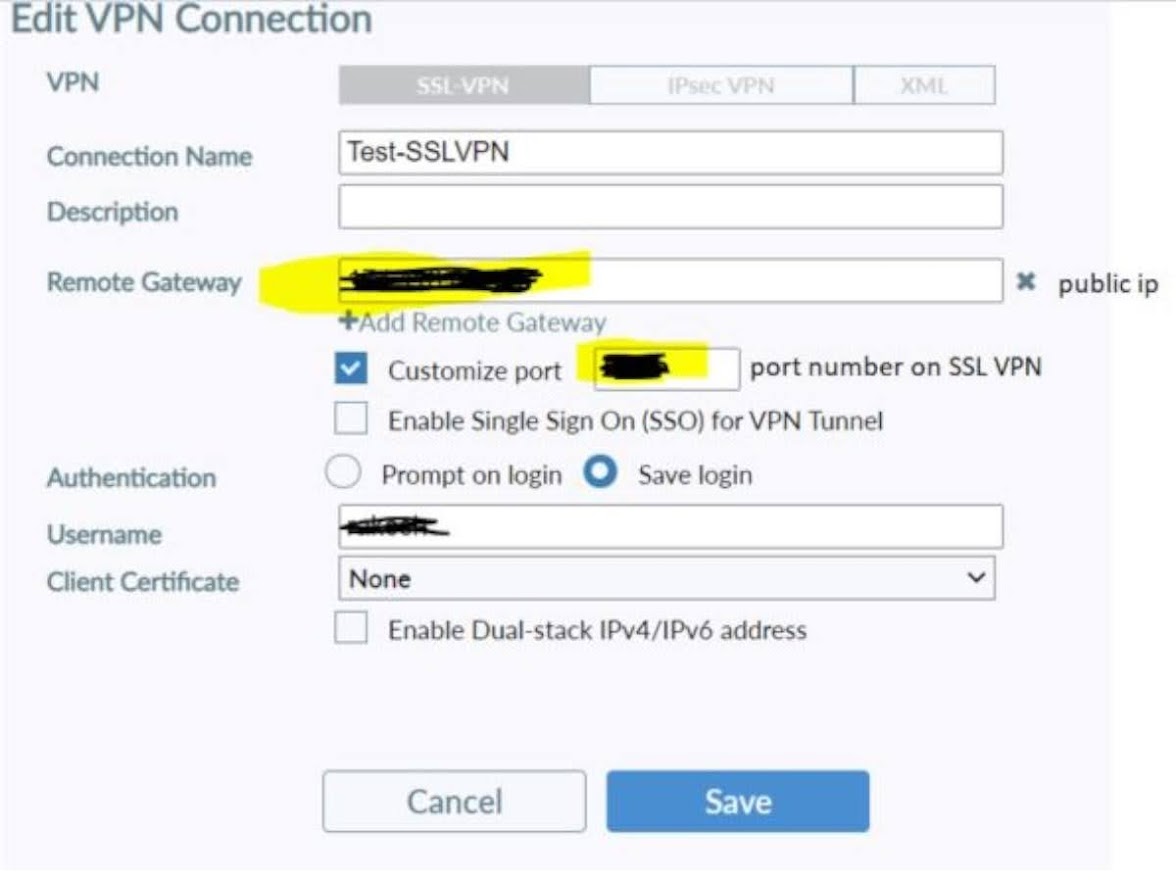
Step 3: Validate FortiClient Configuration
Double-check the SSL VPN configuration in FortiClient. Ensure that all settings are accurate and match the requirements for connecting to the SSL VPN.
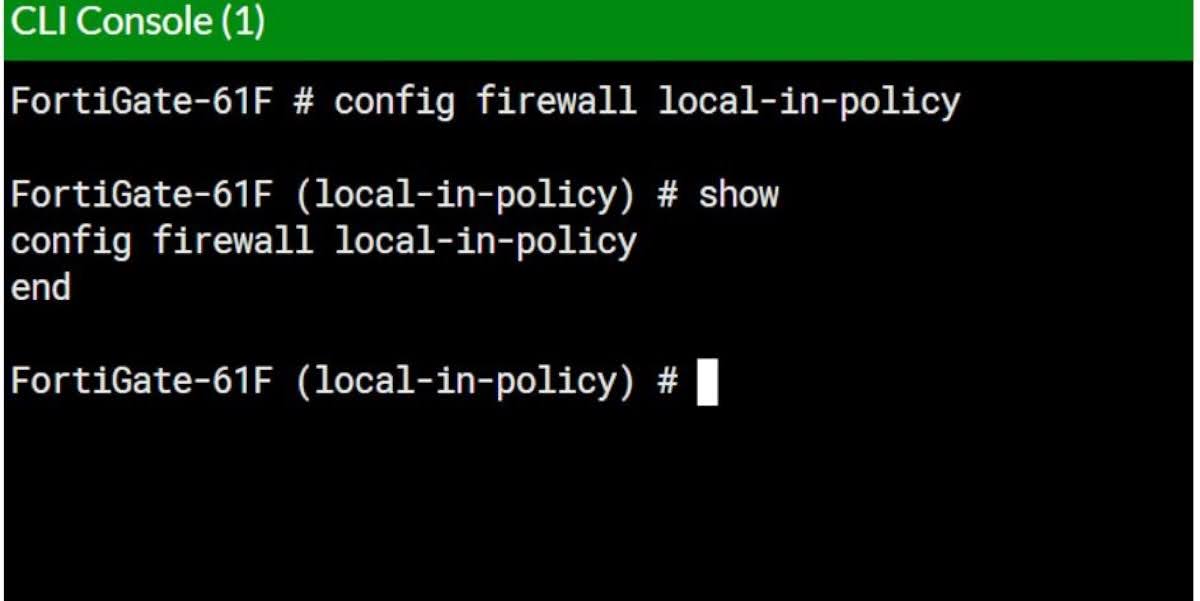
Step 4: Firewall Policy Examination
Inspect your firewall policies. Verify that the external public IP address is not being denied by the local firewall policy. Refer to the provided screenshot to locate the local in policy settings on FortiGate.
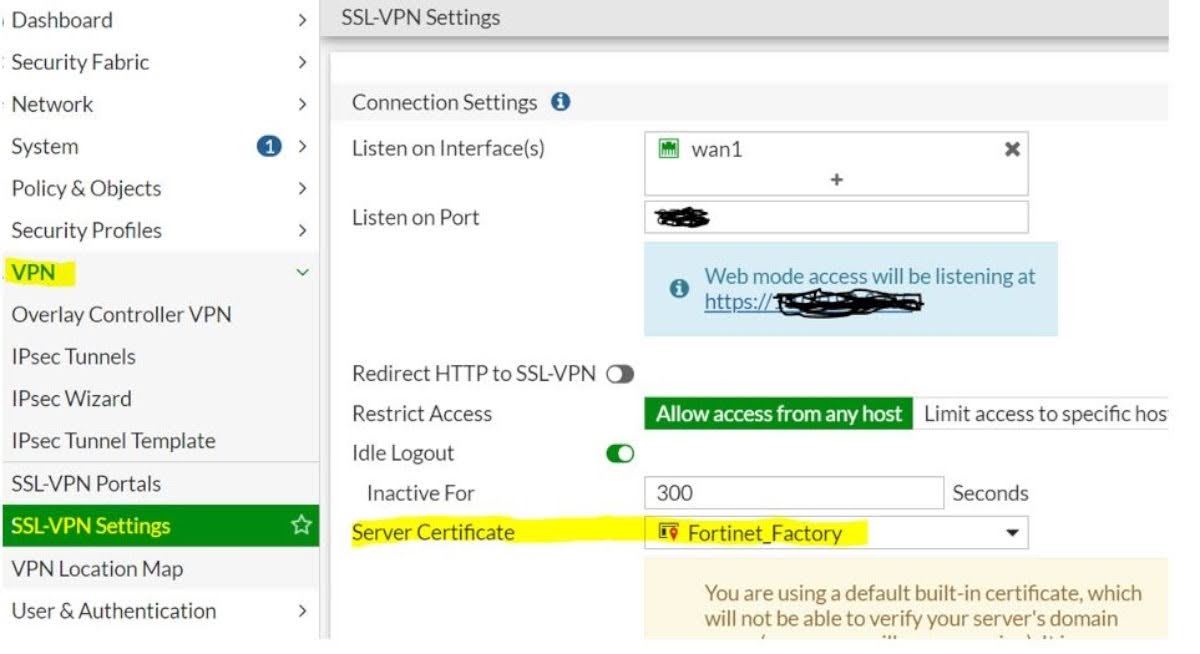
Step 5: Server Certificate Usage
In FortiGate’s SSL VPN settings, make sure to use the correct server certificate. A mismatch in certificates can lead to connection failures.
Step 6: Firewall Policy with SSL-VPN Interface
Ensure that a firewall policy exists with both the Interface and SSL-VPN tunnel interface. This policy is vital for allowing SSL VPN traffic to pass through.

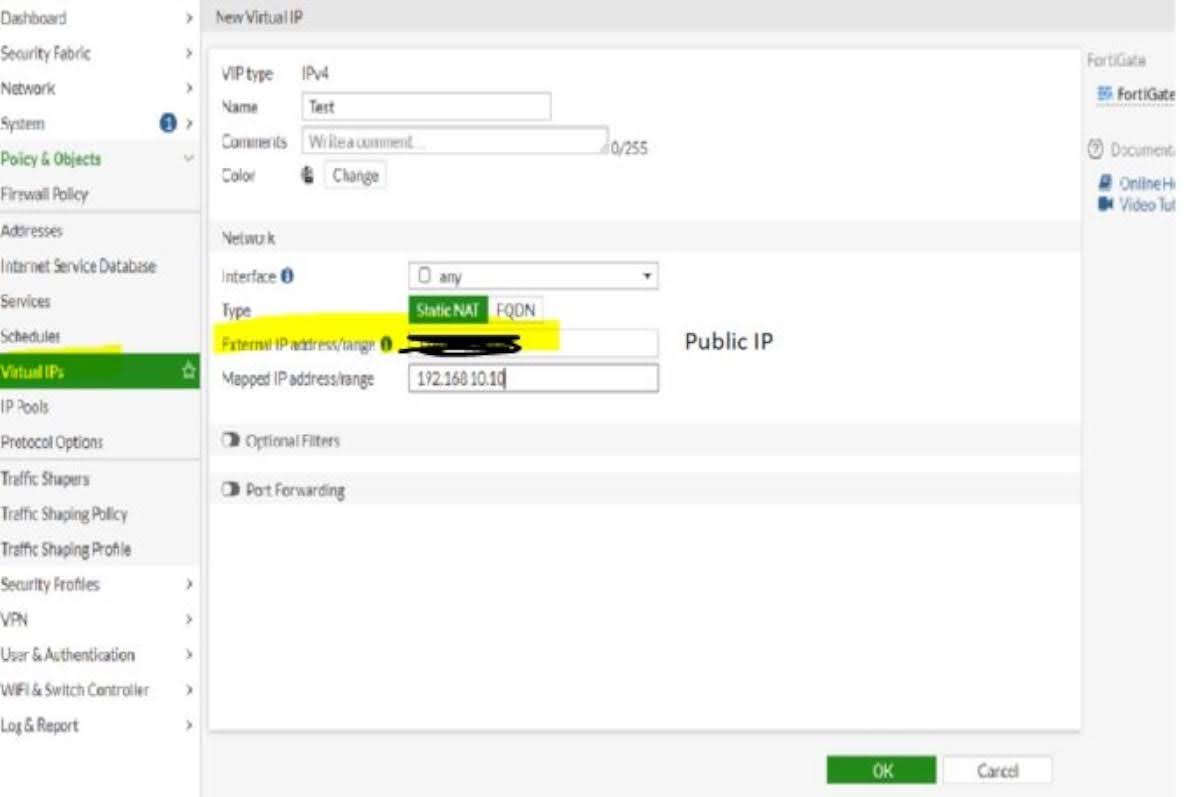
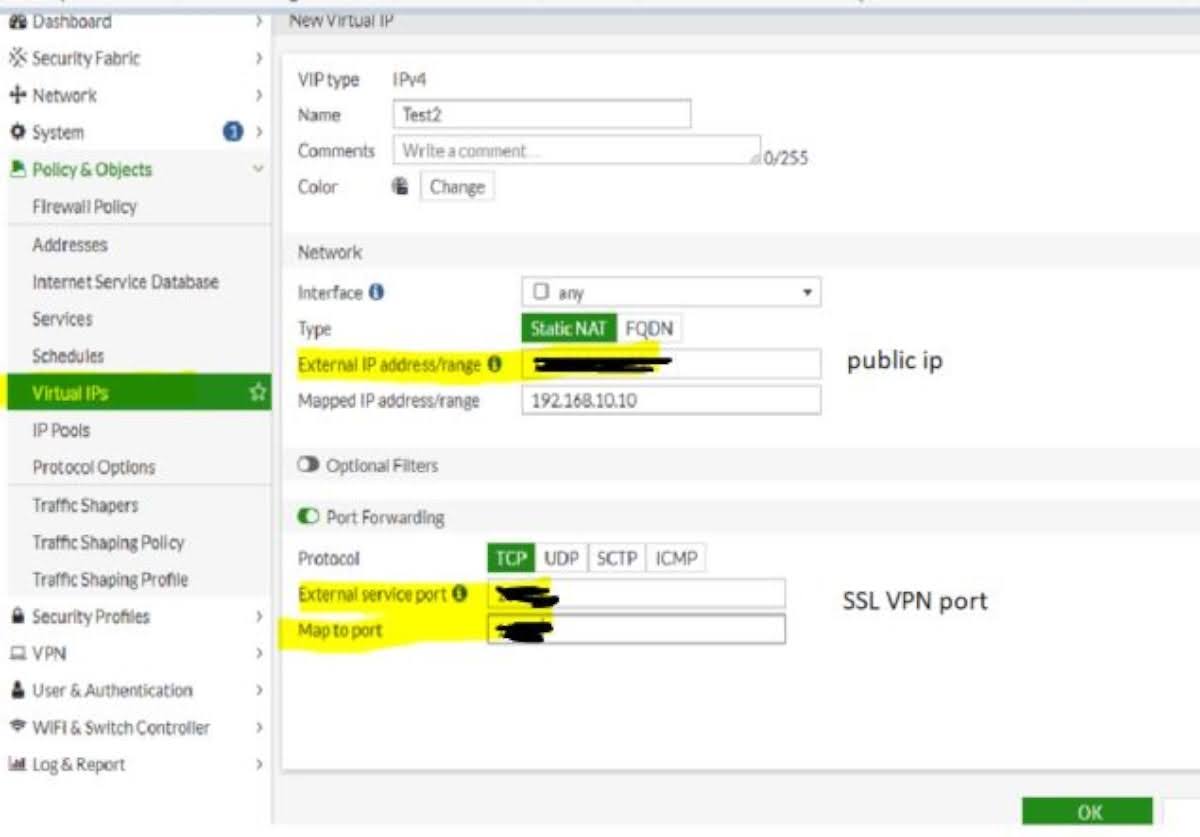
Step 7: VIP Configuration
Check for any open Virtual IP (VIP) configurations on the firewall. Ensure that there are no VIPs that cover all ports with the same external IP, and no VIPs that forward traffic to the same SSL VPN port. These configurations can conflict with SSL VPN functionality.
Following these instructions will help you overcome the 10% SSL VPN failure issue when operating behind NAT, ensuring seamless and secure VPN connections.