This document describes how to configure the SSL VPN with Split tunnel configuration in which the firewall address configured becomes a trusted destination that will not be tunneled through SSL VPN. All other destinations will be tunneled through SSL VPN.
Table of Contents
Scope
FortiGate 7.0.6 or later in 7.0.x and FortiGate 7.2.1 or later in 7.2.x.
Solution
The option ‘Enabled for Trusted Destinations’ has been added in the versions of FortiGate mentioned in this article’s scope. This option, which may be enabled while defining a routing address override object, ensures that only client traffic that does not match the explicitly trusted destination will be directed through the SSL VPN tunnel.
Configuration steps
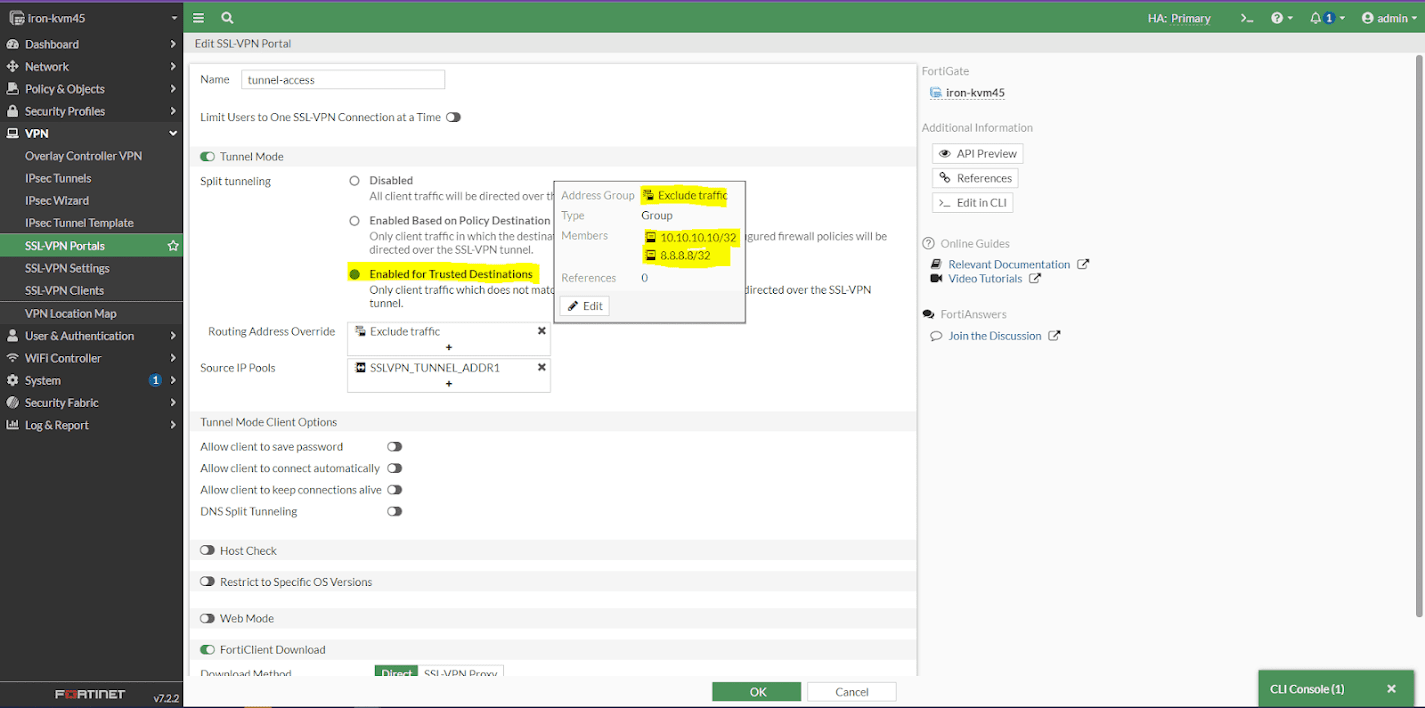
Step 1: Go to VPN > SSL-VPN Portal > Create New or edit an already configured VPN and enable tunnel mode.
Step 2: In the split tunneling section, choose Enabled for Trusted Destinations and select the destination that will not require traffic routing through the VPN interface. Traffic will route through the machine’s local adapter instead.
For example, if the user does not want 8.8.8.8/32 and 10.10.10.10/32 addresses to route through the VPN, they can create an address group as shown below (‘Exclude traffic’) and add the required addresses to the group:
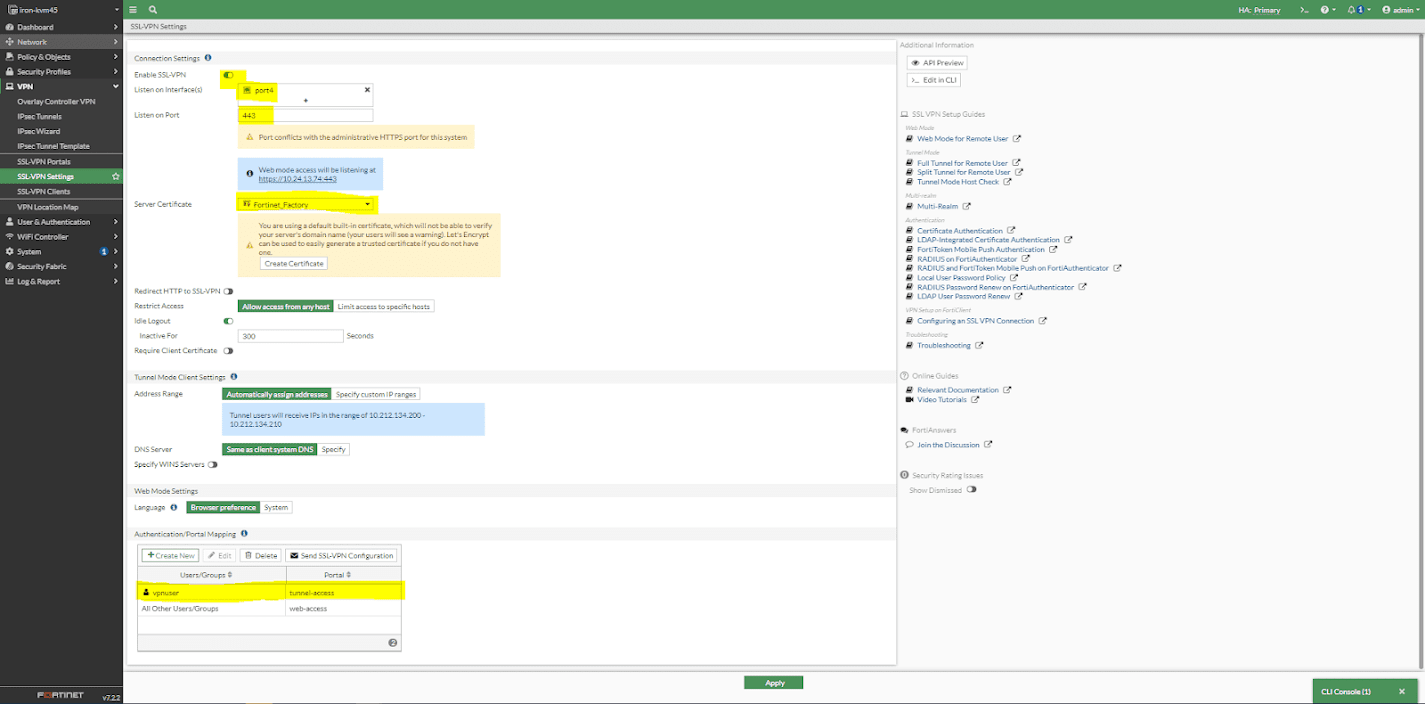
Step 3: Go to VPN > SSL-VPN-Settings and configure the settings as required.
Step 4: Under Authentication/Portal Mapping, create a new rule and map the user with the configured portal.
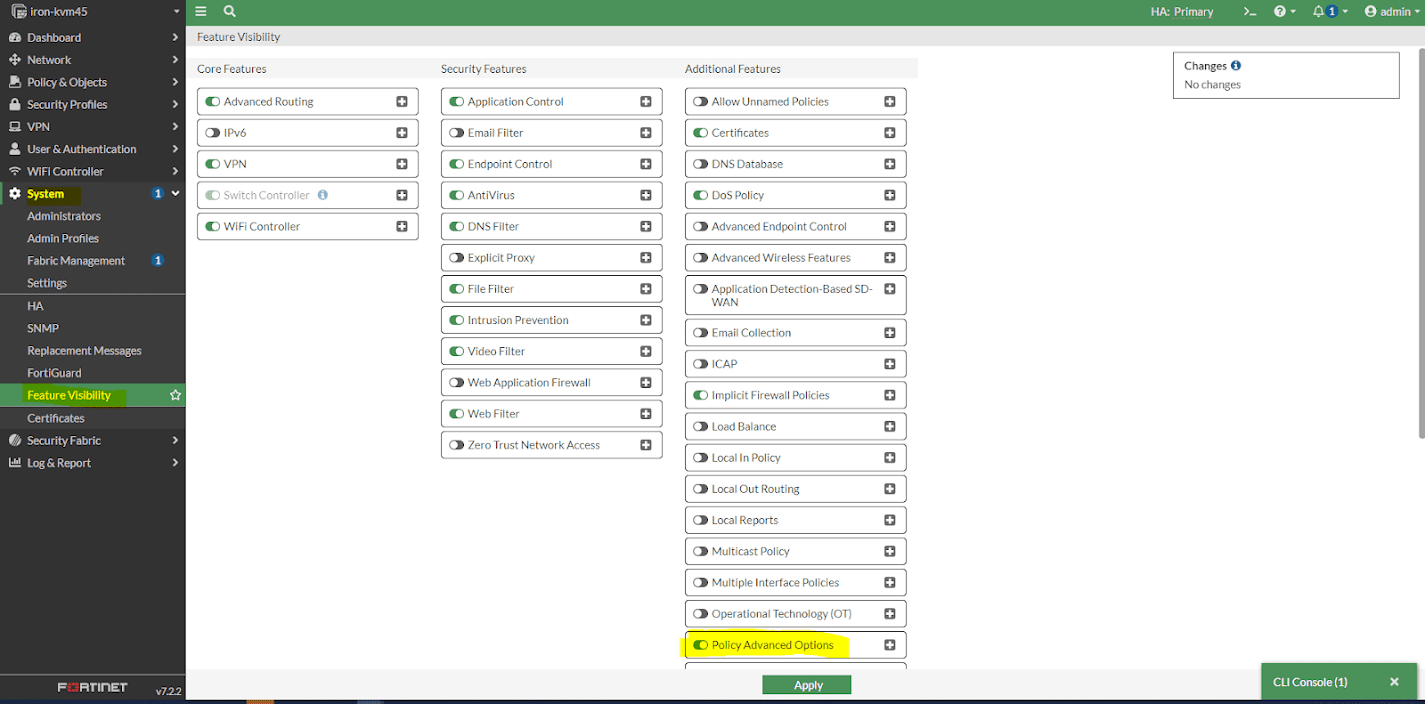
Step 5: To Create the policy, go to System > Feature Visibility and enable Policy Advanced Options:
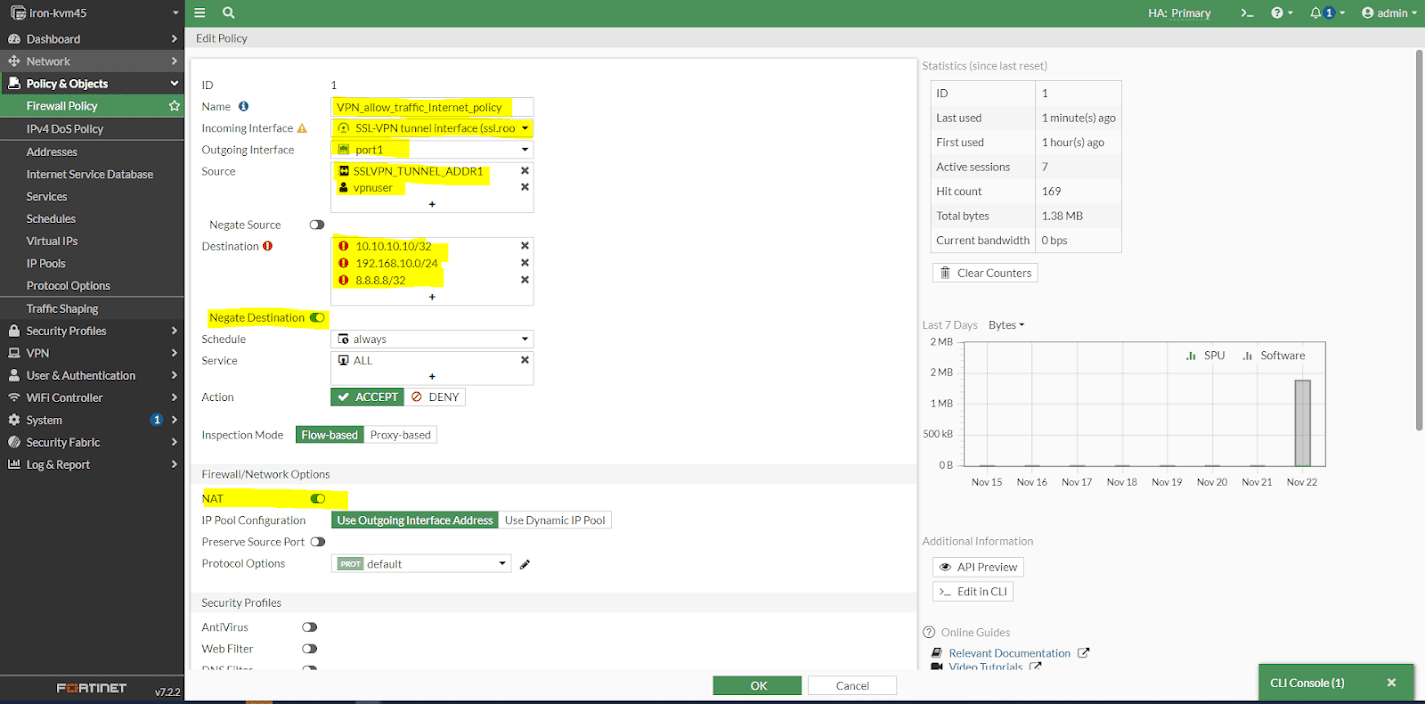
Step 6: Next, create the Internet Policy. Go to Policy & Object > Firewall Policy > Create new and fill in the parameters:
- Define Name: Enter a name, such as ‘Internet Policy’.
- Incoming Interface: Choose SSL-VPN tunnel interface (ssl.root).
- Outgoing Interface: Select the Interface from which the destination is reachable (do not choose the configured destination).
- Source: Add the assigned IP subnet and user for the SSL VPN.
- Destination: Enable Negate destination and add the destination which will not go through the configured policy. This will ensure that, except for traffic going to the configured destination, all traffic will use this policy.
- Add all of the subnets and LAN subnets which were excluded to the internet policy. (In this example: 8.8.8.8/32, 10.10.10.10/32, and 192.168.10.0/24.)
Note: Negate Destination is necessary because it is not possible to call a destination ‘all’ or ‘0.0.0.0/0.0.0.0’ when split tunneling is enabled.
Step 7: Next, create the LAN Policy. Define the parameters as required for a normal SSL VPN LAN policy:

Note: Ensure routing is configured correctly on firewall.
Step 8: Configure the FortiClient on the machine.
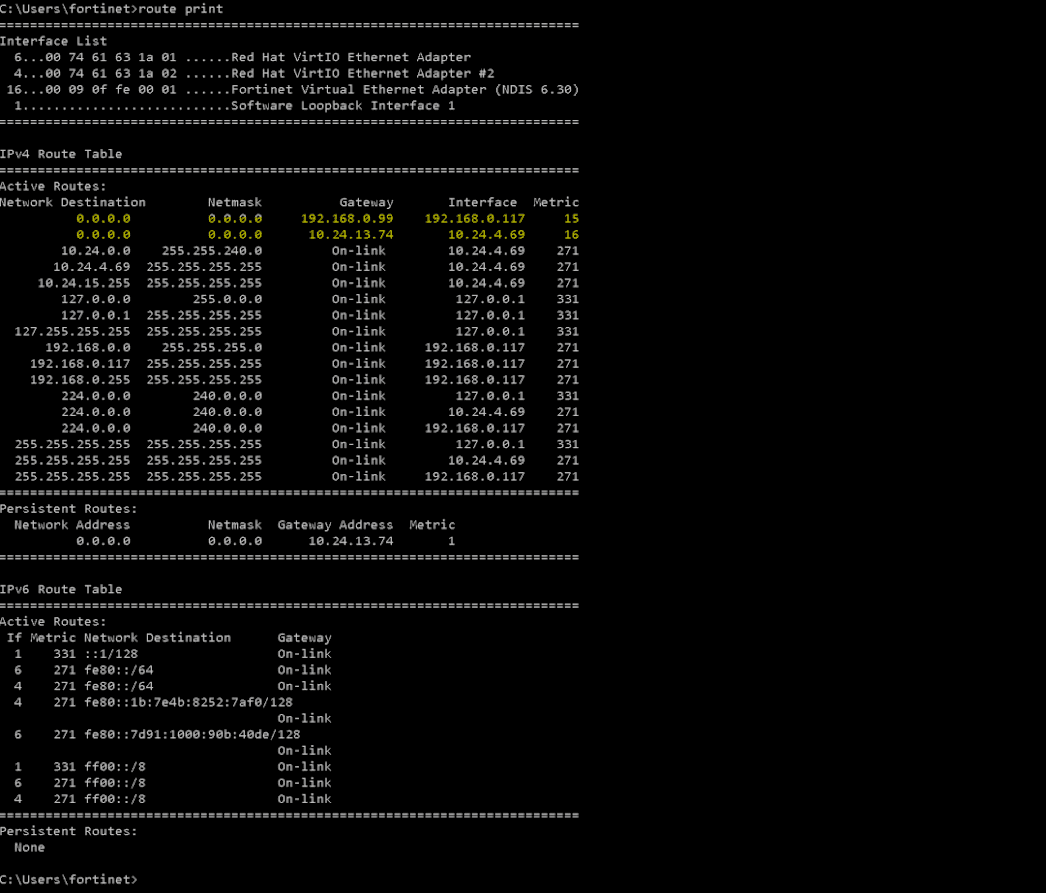
Before connection:
After connection:
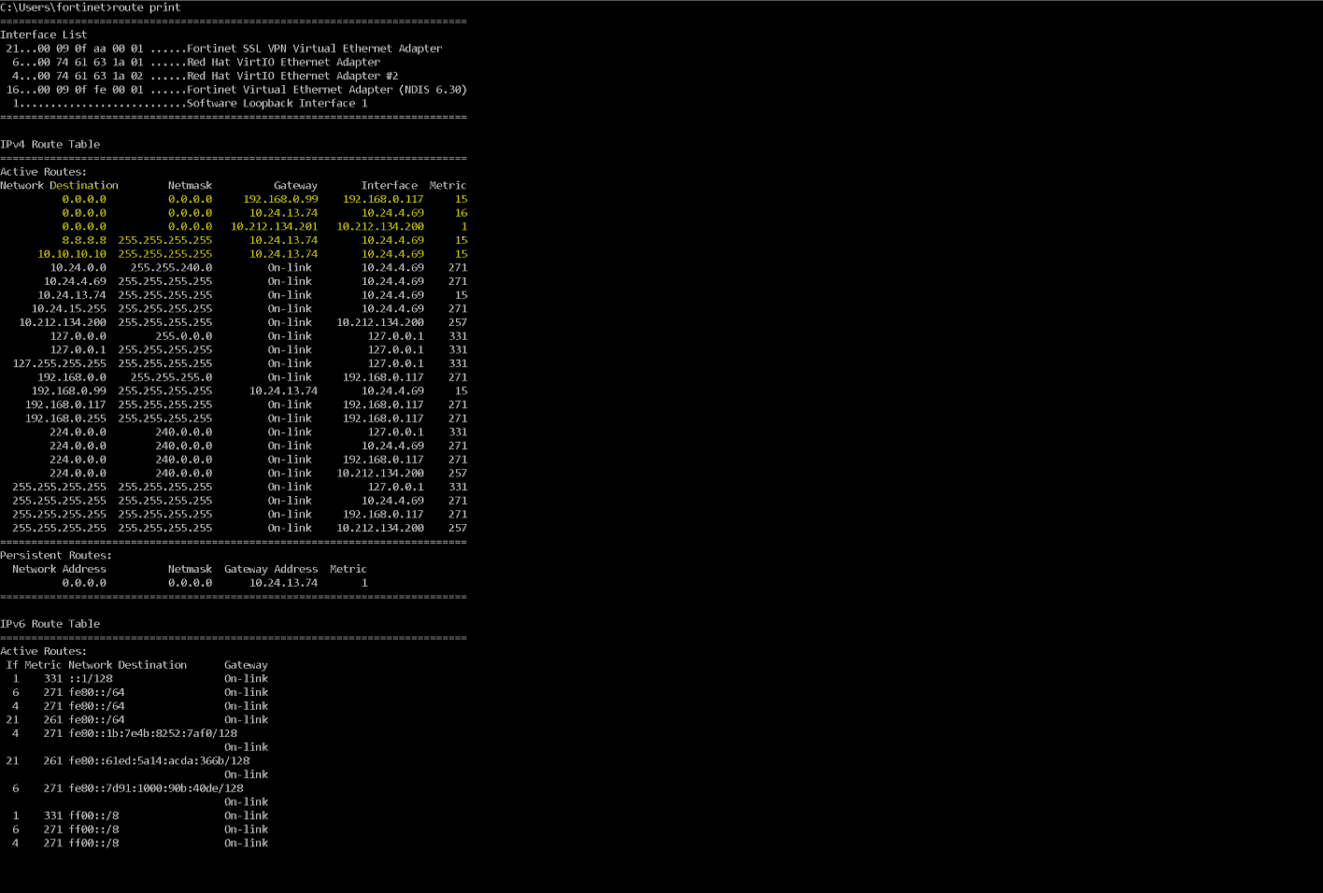
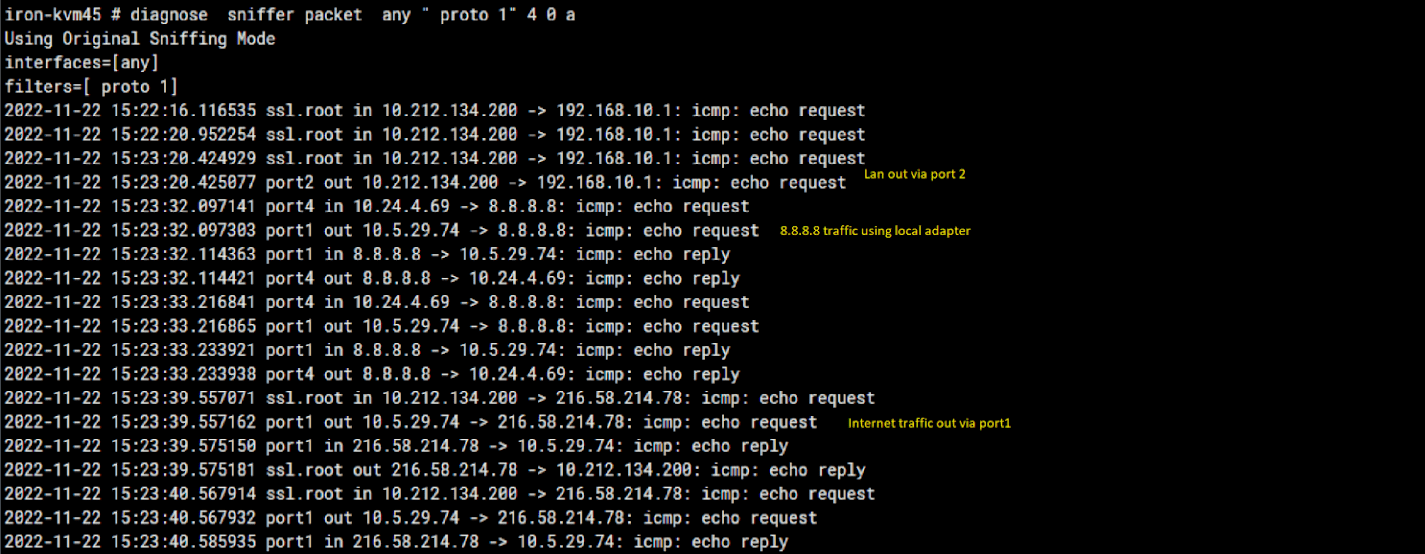
If everything was configured correctly, using a Sniffer on FortiGate will show traffic using the correct interface: