Microsoft has recently announced a new feature for Windows 10 users: Copilot. Copilot is an AI-powered assistant that can help you with various tasks, such as writing code, creating presentations, or finding information. Copilot was originally designed for Windows 11, the upcoming version of Microsoft’s operating system, but it will soon be available for Windows 10 as well.
If you are curious about Copilot and want to try it out before it officially launches, you can do so by following some simple steps. However, be aware that this method involves joining the Windows Insider Program, changing some registry settings, and using a third-party app. These actions may cause some issues or instability on your system, so proceed with caution and at your own risk. We recommend that you backup your important data before attempting this process.

In this blog post, we will show you how to enable Copilot on Windows 10 and give you some tips on how to use it effectively. Let’s get started!
Here are the steps to enable Copilot on Windows 10:
- Download and install Windows 10 build 19045.3754 or newer. This is the latest version of Windows 10 that supports Copilot. You can get it by joining the Windows Insider Program and selecting the Release Preview Channel. To do this, go to Settings > Update & Security > Windows Insider Program and follow the instructions. Alternatively, you can wait for Microsoft to release this build to all Windows 10 users in the near future.
- Update Microsoft Edge to the latest version. Copilot works with Microsoft Edge, so you need to make sure you have the most recent version of the browser. To do this, open Microsoft Edge and go to edge://settings/help. If there are any updates available, install them and restart the browser.
- Download ViVeTool from GitHub and extract the archive in a convenient folder. ViVeTool is a third-party app that allows you to enable experimental features on Windows 10. You can download it from [here] and extract the files to a folder of your choice. For example, you can create a folder named ViVe on your C: drive and extract the files there.
- Open Command Prompt as Administrator and navigate to the folder with ViVeTool files using the CD command. You need to run ViVeTool as an administrator to make changes to your system. To do this, open the Start menu and type cmd. Right-click on Command Prompt and select Run as administrator. Then, use the CD command to change the directory to the folder where you extracted ViVeTool. For example, if you extracted the files to C:\ViVe, you can type CD C:\ViVe and press Enter.
- Type vivetool /enable /id:46686174,47530616,44755019 and press Enter. This command will enable three feature flags that are required for Copilot to work. These flags are: Copilot, Copilot Chat, and Copilot Chat UI. You should see a message saying “Successfully enabled feature” for each flag.
- Restart your computer. You need to restart your computer for the changes to take effect. Save any work you have and click on the Start menu. Then, click on the Power button and select Restart.
- Press Win + R and type regedit to launch Windows Registry Editor. Windows Registry Editor is a tool that allows you to modify the settings of your system. You need to use it to change one more value for Copilot to work. To open it, press the Windows key and the R key at the same time. This will open the Run dialog box. Type regedit and click OK.
- Navigate to Computer\HKEY_CURRENT_USER\SOFTWARE\Microsoft\Windows\Shell\Copilot\BingChat and double-click the IsUserEligible value. This value determines whether you are eligible to use Copilot or not. You need to change it from 0 to 1. To do this, navigate to the following path in the Registry Editor: Computer\HKEY_CURRENT_USER\SOFTWARE\Microsoft\Windows\Shell\Copilot\BingChat. You can copy and paste the path in the address bar of the Registry Editor or expand the folders manually. Then, double-click on the IsUserEligible value and change its value data from 0 to 1. Click OK to save the change. Note: you must sign into Windows with your Microsoft Account; otherwise, the value will reset from 1 to 0 upon each system restart.
- Restart your computer. You need to restart your computer one more time for Copilot to work. Save any work you have and click on the Start menu. Then, click on the Power button and select Restart.
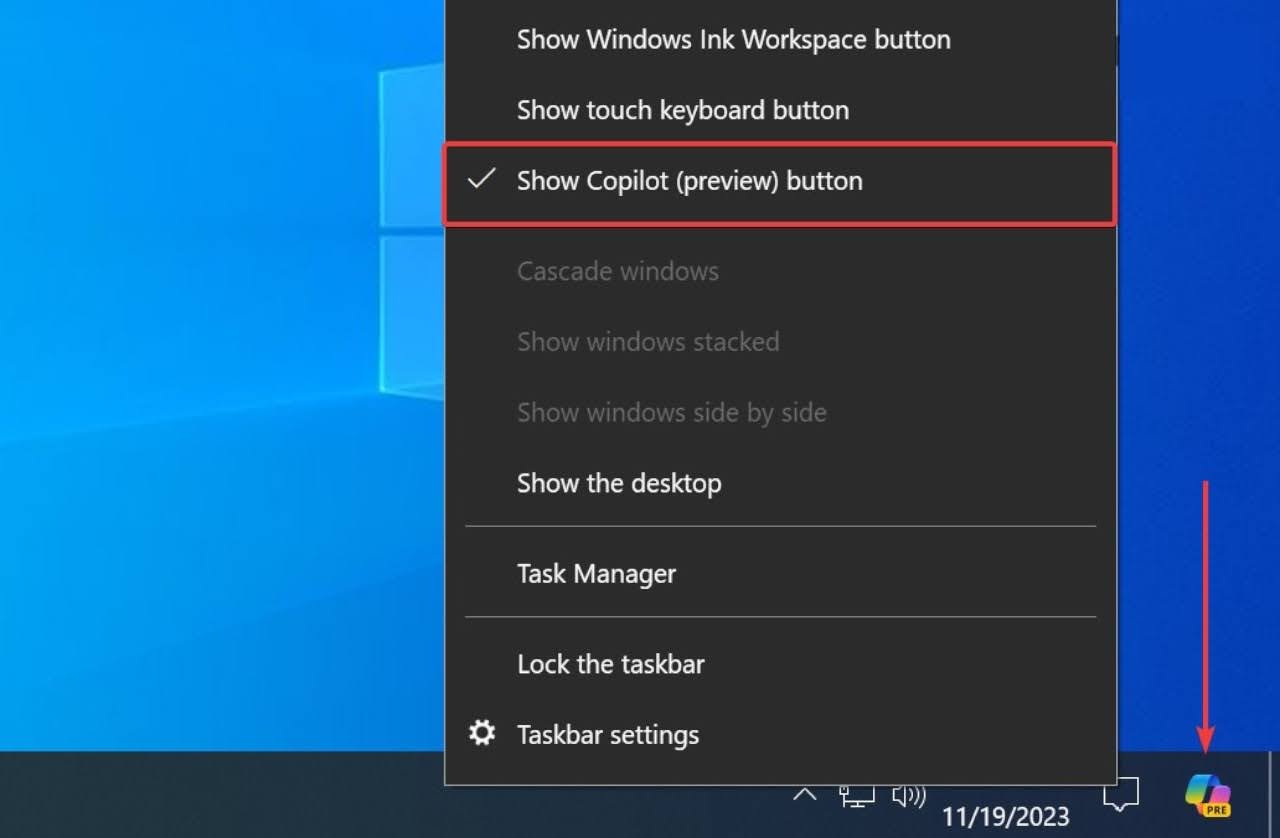
- Right-click the taskbar and select “Show Copilot (preview) button.” The Copilot icon will then appear to the right of the notification center button. You can click on it to launch Copilot and start using it. Note: you will not see the icon if you have the taskbar on the right or left side of the screen. You need to have the taskbar on the bottom or top of the screen for the icon to show up.

Congratulations! You have successfully enabled Copilot on Windows 10. You can now use it to help you with various tasks, such as writing code, creating presentations, or finding information.