Description
Table of Contents
This article describes how to configure Google secure LDAPS in FortiGate using certificate authentication
Scope
FortiGate7.2.0+.
Google Suite supported plans: Business Plus; Enterprise; Education Fundamentals, Education Standard, Teaching and Learning Upgrade, and Education Plus.
Solution
Some LDAP servers require a client certificate to perform peer verification instead of password authentication. Google LDAPS is one example of such a configuration.
Starting with FortiOS 7.2.0, client certificate authentication can be configured when FortiGate is acting as an LDAP client.
Below is an example of Google Suite LDAPS integration.
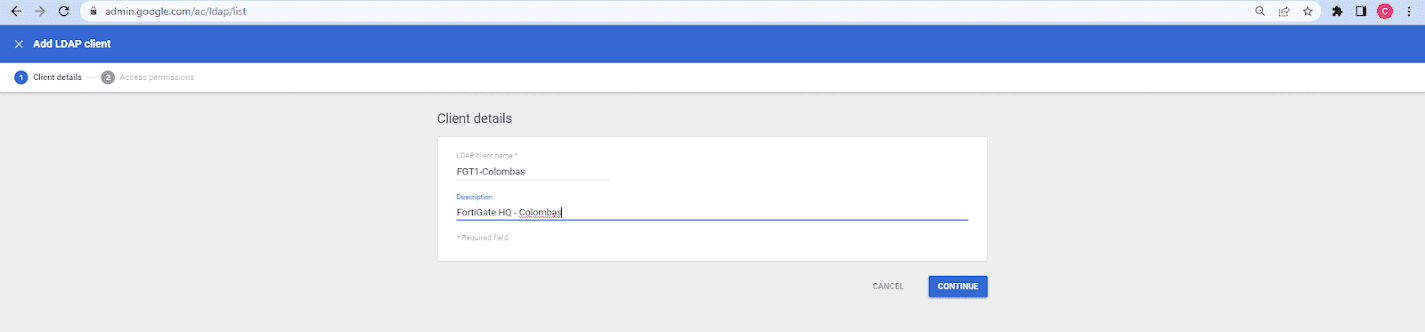
Step 1: Create LDAP Client in Google Suite by navigating to Apps > LDAP, select ‘Add LDAP Client‘, and define the LDAP client name and description. Select ‘Continue‘.
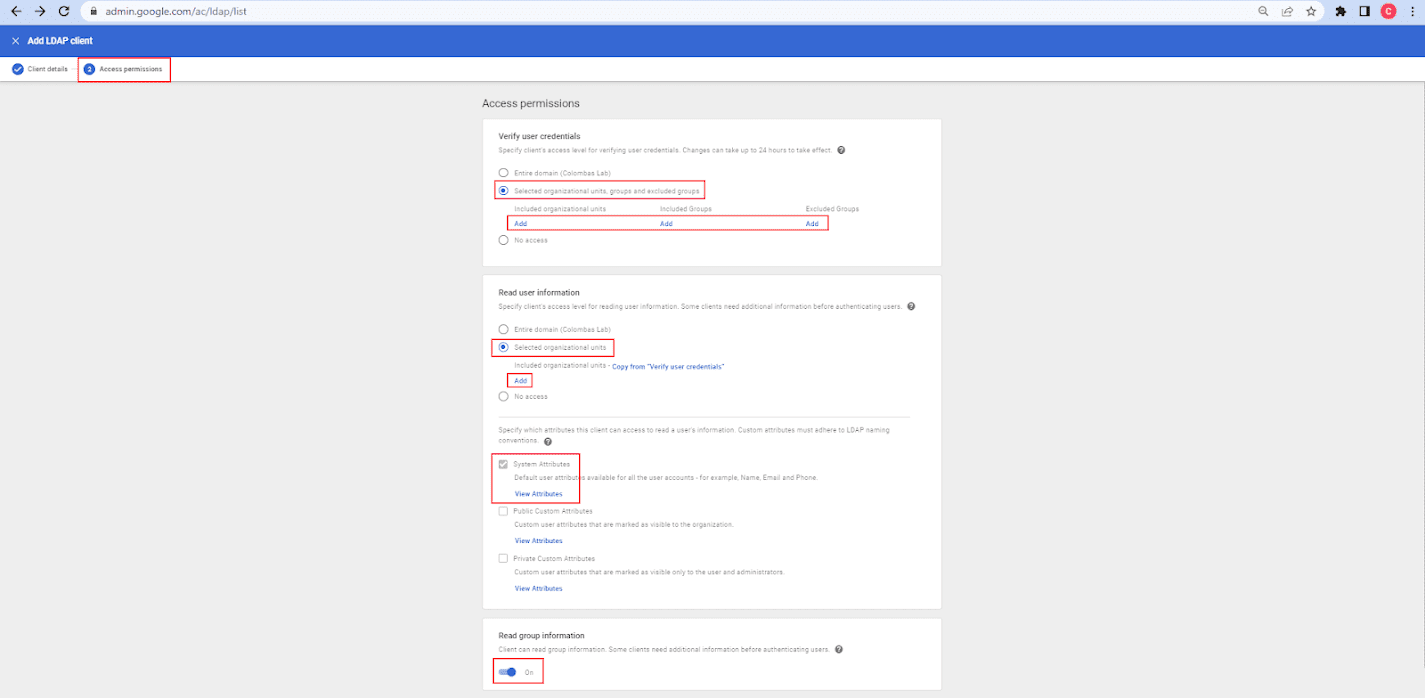
Step 2: Define Access permission to specific groups, OU’s or entire domain. Select ‘Add LDAP Client‘.
Step 3: Download certificate to be later imported to FortiGate.

Step 4: When returned to LDAP Client details, select ‘Service status‘ and turn it on.

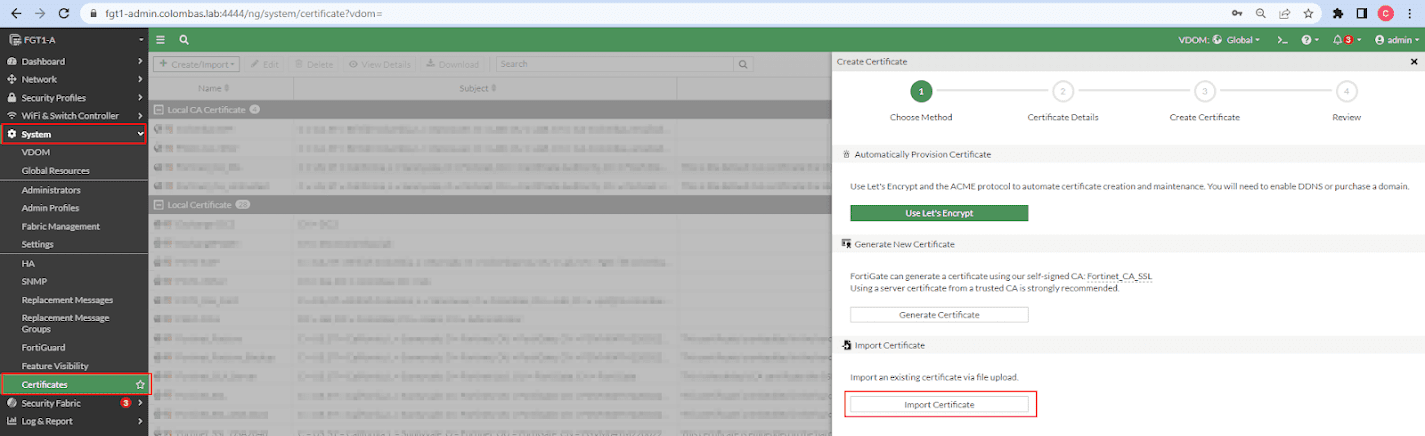
Step 5: Extract the compressed file downloaded from step 3. It should contain the certificate and key files. Import certificate to FortiGate by navigating to System > Certificates, then select Create/Import > Certificate and choose method ‘Import Certificate‘.
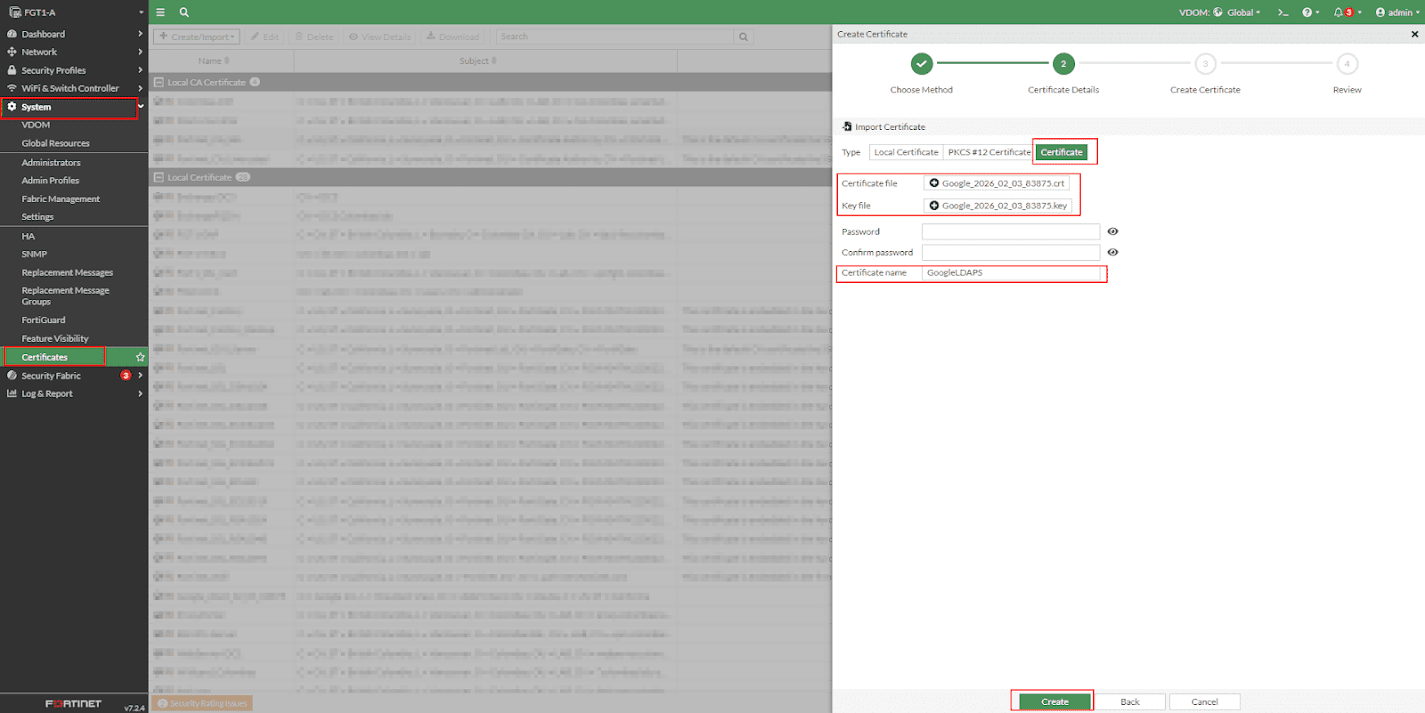
Step 6: Select ‘Certificate‘ and browse to the certificate and key files. Define a certificate name and select ‘Create‘.
Note: Leave password fields empty.
Step 7: Create LDAP server entry.
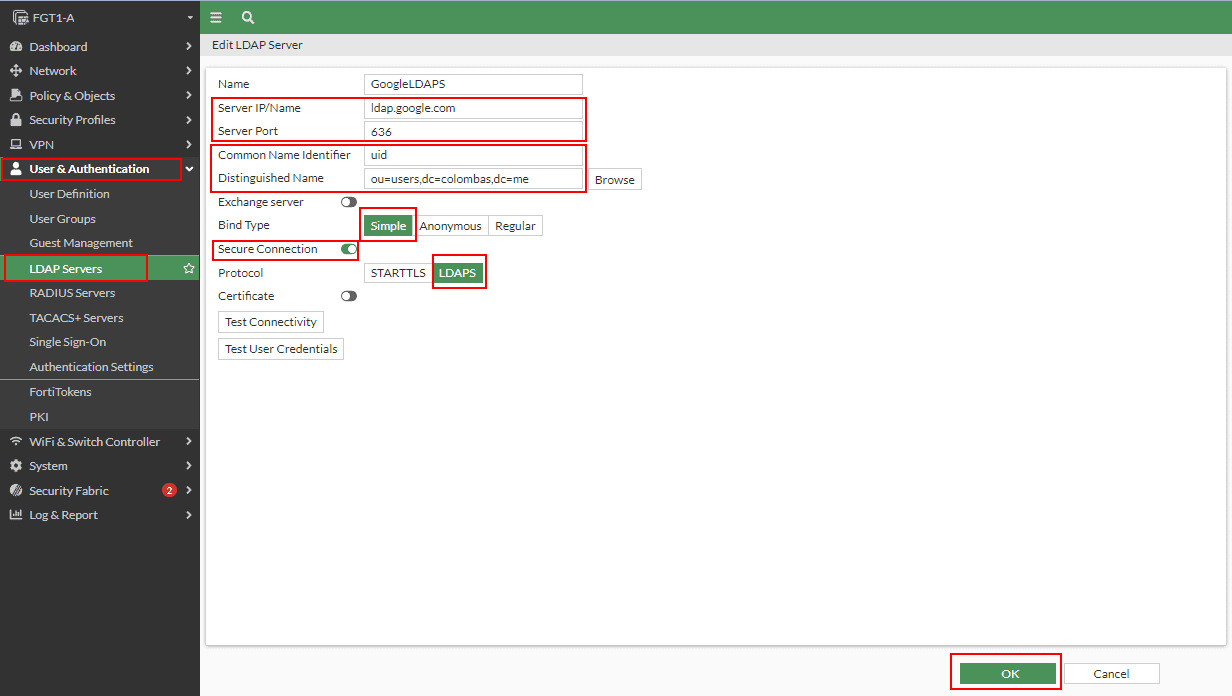
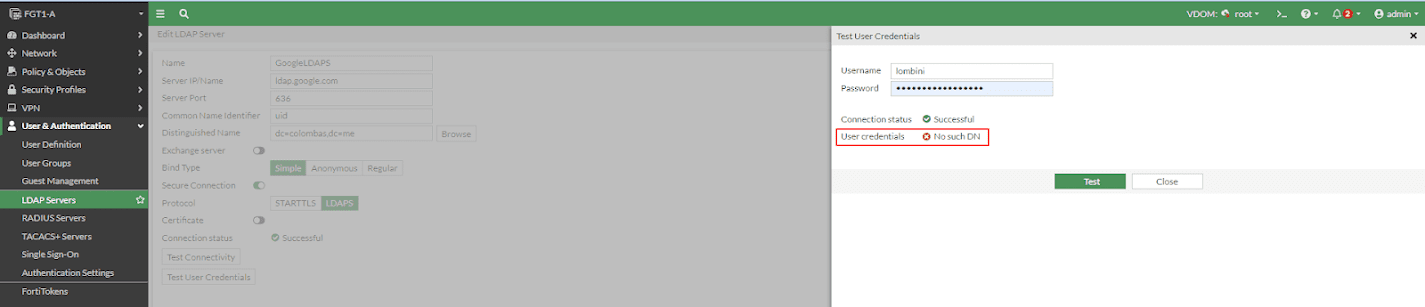
Note: A distinguished Name should contain the OU ‘users’ and any other OU in the path to where users are located. If the DN is incorrect, the following error message will be displayed:
Step 8: Edit from CLI and enable the certificate authentication option.

CLI Configuration
# config user ldad
edit "GoogleLDAPS"
set server "ldap.google.com"
set server-identity-check disable
set cnid "uid"
set dn "ou=users,dc=colombas,dc=me"
set secure ldaps
set port 636
set client-cert-auth enable
set client-cert "GoogleLDAPS"
next
end
Troubleshooting and verification
Step 1: Debug logs can be enabled for the authentication daemon.
# diagnose debug console timestamp enable
# diagnose debug application fnbamd -1
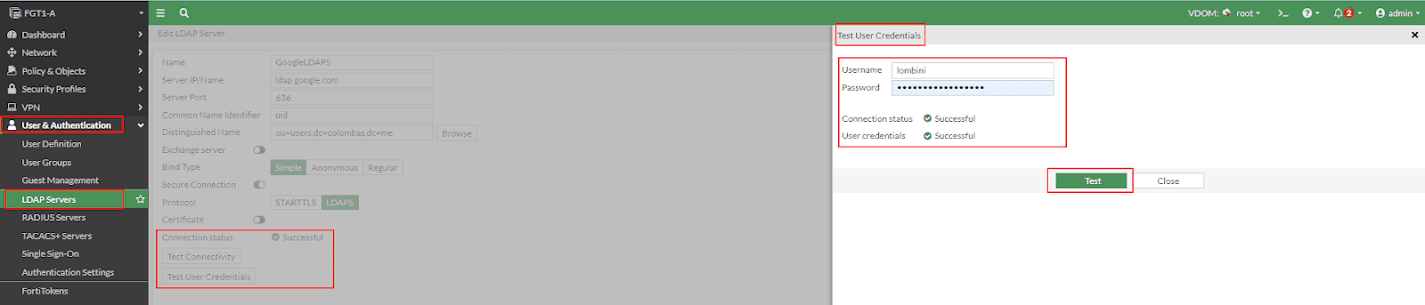
# diagnose debug enableStep 2: Connectivity and User Credentials tests can be run from GUI and CLI. GUI Connectivity Test and User Credentials Test:
CLI Connectivity Test
# diagnose test authserver ldap-direct ldap.google.comCLI User Credentials Test
# diagnose test authserver ldap <server_name> <username> <password>