With the launch of iOS 17, Apple has introduced a host of captivating features and a myriad of UI/UX enhancements, making it a software update worth exploring. While many of these tweaks have been met with applause, there have also been a few eyebrow-raising decisions, at least according to some users who’ve delved into the seventeenth iteration of the OS.
One such decision involves the introduction of a new default notification tone for incoming messages. The classic “Tri-Tone” that iPhone users have grown accustomed to has now been replaced by a tone known as “Rebound.” This change has left some users describing it as “weird,” “horrendous,” and various other colorful synonyms.
To add to the intrigue, rumors have been circulating that you cannot change the default message tone on your iPhone running iOS 17. Fortunately, we’re here to put those rumors to rest. Apple still provides users with the flexibility to customize their message tones, and we’re about to show you exactly how it’s done.
Let’s dive into the steps to regain control over your message notifications and bid farewell to “Rebound.”
Reclaim Your Notification Sound: Modifying iOS 17 Default Message Tone
You’ve made the decision to upgrade to iOS 17, and while it offers an array of features, one aspect has caught your attention—those new message notification tones. The traditional “Tri-Tone” that you’ve grown fond of has been replaced with something altogether different, and you’re not thrilled about it. Fortunately, Apple still allows you to customize your message tones. Here’s how:
Step 1: Access Your Settings
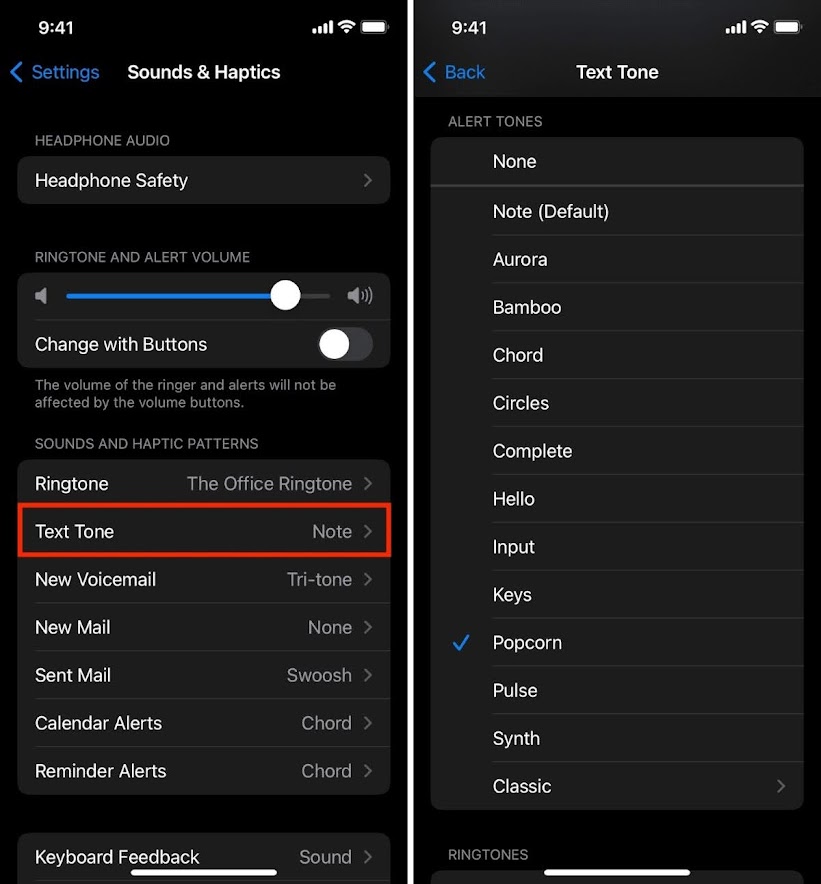
Navigate to your iPhone’s “Settings” app. Once you’ve opened it, scroll down until you find “Sound and Haptics.” This section houses your audio-related settings.
Step 2: Tinkering with Text Tone
Within “Sound and Haptics,” look for “Text Tone.” This is where you can modify your message alert sound.
Step 3: Explore Your Options
Under “Text Tone,” you’ll notice a category labeled “Classic.” This is where all the familiar and beloved older tones reside. Among these options, you’ll find the cherished “Tri-Tone.”
Step 4: Select Your Preferred Tone
Now that you’ve located the “Tri-Tone” within the “Classic” category, simply tap on it to set it as your default message tone.
That’s It! With these simple steps, you’ve successfully reclaimed the “Tri-Tone” as your default message tone in iOS 17.
Should you have any questions or encounter any issues while following these instructions, don’t hesitate to reach out in the comments section below. We’re here to assist you and ensure your message notifications sound just the way you want them to.