Table of Contents
- Problem Symptom
- What is Windows Media Player Network Sharing Service (wmpnscfg.exe and wmpnetwk.exe)?
- Potential Causes
- Why is it consuming so much CPU and memory resources in Task Manager?
- Pre-check
- Solution 1: Disable media sharing in Windows Media Player
- Solution 2: Stop Windows Media Player Network Sharing Service
- Can I stop Windows Media Player Network Sharing Service?
- Solution 3: Disable media streaming
- Solution 4: Set DisableDiscovery registry key to 1
- Solution 5: Uninstall Windows Media Player
Problem Symptom
Windows users have reported that Windows Media Player Network Sharing Service (wmpnscfg.exe and wmpnetwk.exe) process consumes high CPU and memory resources on PC although wmpnscfg.exe and wmpnetwk.exe are not malicious executable. According to the reports, Windows Media Player Network Sharing Service consumes 70% of the entire network’s resources even though it shouldn’t be resource-intensive.


What is Windows Media Player Network Sharing Service (wmpnscfg.exe and wmpnetwk.exe)?
Windows Media Player Network Sharing Service (wmpnscfg.exe and wmpnetwk.exe) is a non-threatening internal system process created by Microsoft for developing communications and media sharing between Windows Media Player and external Media Center networks. Windows Media Player Network Sharing Service (wmpnscfg.exe and wmpnetwk.exe) is located in the following path: C:\Program Files\Windows Media Player. Windows Media Player Network Sharing Service (wmpnscfg.exe and wmpnetwk.exe) process is disabled by default in older versions of Windows.
Follow the below solution steps to resolve Windows Media Player Network Sharing Service (wmpnscfg.exe and wmpnetwk.exe) high CPU memory usage on Windows issue.
Potential Causes
Why is it consuming so much CPU and memory resources in Task Manager?
If Windows Media Player Network Sharing Service (wmpnscfg.exe and wmpnetwk.exe) is located elsewhere instead of the default folder path, it could be infected by malware, you may need to scan your PC using security software.
Pre-check
- Make sure you have the latest Windows Update installed.
- Scan the PC using security software.
Solution 1: Disable media sharing in Windows Media Player
Step 1: Open the Windows Media Player.
Step 2: Click on the Library tab.
Step 3: Click the Media Sharing option from the context menu.

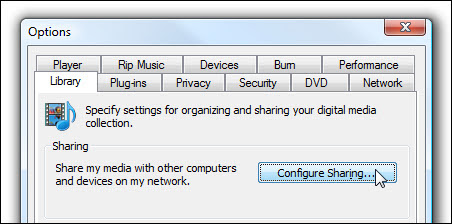
Note: Alternatively, you can open the Options panel, switch to the Library tab, and click on the Configure Sharing button.
Step 4: Uncheck both Find media that others are sharing option and Share my media option.
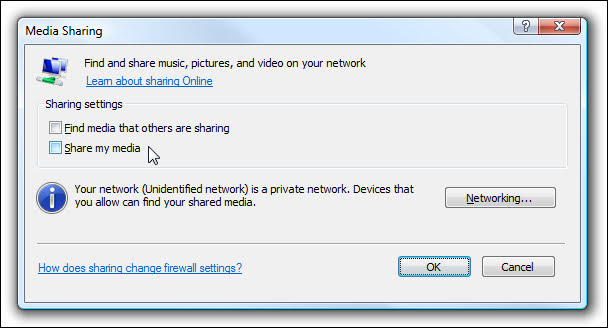
Note: If both options are unchecked, then check them, click on the Apply button, and then uncheck them again and click on the OK button to reset the settings.
Step 5: Click on the Apply button and then OK button.
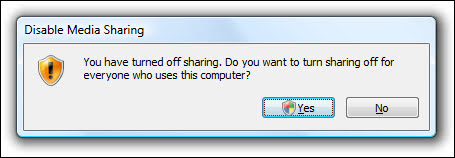
Step 6: The Disable Media Sharing dialog box will prompt with message You have turned off sharing. Do you want yo turn sharing off by everyone who uses this computer?, click on the Yes button to confirm.
Solution 2: Stop Windows Media Player Network Sharing Service
Can I stop Windows Media Player Network Sharing Service?
If you do not use the Windows Media Sharing feature, you should consider disabling Windows Media Player Network Sharing Service to run 24/7 and use a decent amount of system resources. As a result, disabling Windows Media Player Network Sharing Service should improve your system performance and do not affect the PC.
Step 1: Click on the Start button.
Step 2: Type Services and press the Enter key to open the Services window.
Step 3: Scroll down to locate the Window Media Player Network Sharing Service.
Step 4: Right-click on the Window Media Player Network Sharing Service and select the Stop option from the context menu.

Step 5: Right-click on the Window Media Player Network Sharing Service again and select the Properties option from the context menu.
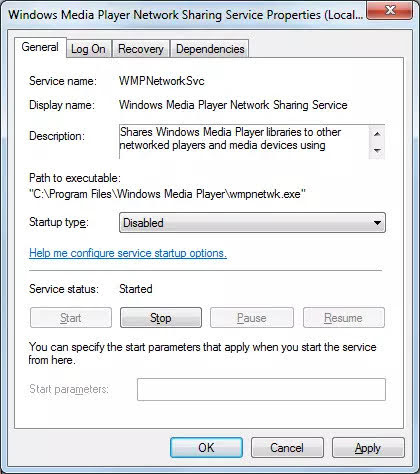
Step 6: Switch to the General tab in the Properties window.
Step 7: Set the Startup type to the Manual option.
Step 8: Click on the Apply button to save the changes.
Step 9: Restart your PC.
Step 10: After the PC starts up, open the Services window again.
Step 11: Scroll down to locate the Window Media Player Network Sharing Service.
Step 12: Right-click on the Window Media Player Network Sharing Service again and select the Properties option from the context menu.
Step 13: Switch to the General tab in the Properties window.
Step 14: Set the Startup type to the Automatic option.
Step 15: Click on the Apply button to save the changes.
Note: If you prefer not to use the Window Media Player, change the Startup type in the Window Media Player Network Sharing Service properties to Disabled.
Solution 3: Disable media streaming
Step 1: Open the Windows Media Player.
Step 2: Click on the Stream tab.
Step 3: Click the More stremaing options… option from the context menu.

Note: Alternatively, open the Control Panel, select the Network and Sharing Center, and select the Media streaming options on the sidebar.

Step 4: Uncheck the Allowed box next to the Media programs on this PC and remote connections option.

Step 5: Click on the OK button to save the change.
Solution 4: Set DisableDiscovery registry key to 1
Step 1: Press Windows key + R to open a Run box.
Step 2: Type regedit and press Enter to open up the Registry Editor. Click Yes to grant administrative privileges when prompted by the UAC (User Account Control). If you are installing as a new OS, you need to press the Shift + F10 key to open the command prompt and type regedit.exe to open the Registry Editor.
Step 3: Navigate to the following location: HKEY_CURRENT_USER\Software\Microsoft\MediaPlayer\Preferences\HME
Step 4: Locate DWORD registry key called DisableDiscovery in the right pane. Create the registry key if it isn’t exist.
Step 5: Double-click on DisableDiscovery and change its value to 1.

Step 6: Click on the OK button and close the registry editor.
Step 7: Restart the PC.
Solution 5: Uninstall Windows Media Player
Step 1: Open the Start Menu.
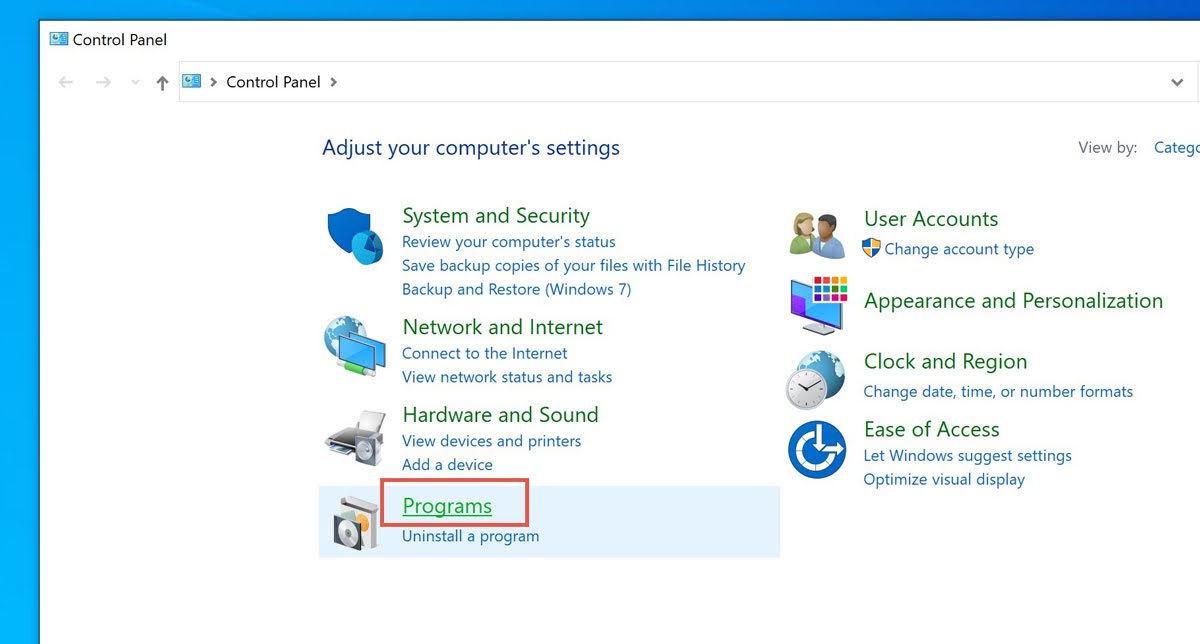
Step 2: Search for the Control Panel and open it.
Step 3: Click on the Programs.
Step 4: Click on the link for Turn Windows features on or off.

Step 5: Scroll down to the Media Features category and double-click on it to expand.

Step 6: Uncheck the box next to the Windows Media Player. Once the confirmation pop-up appears, click on the Yes button.
Step 7: Click on the OK button to save the changes.