Table of Contents
- Problem Symptom
- Potential Causes
- Pre-check
- Solution 1: Restart Windows
- Solution 2: Restart the Windows Update service via Services
- Solution 3: Execute SFC and DISM
- Solution 4: Execute Windows Update Troubleshooter
- Solution 5: Reset SoftwareDistribution folder
- Solution 6: Reset Windows Update Components Manually
- Solution 7: Update Windows using Update Assistant
- Solution 8: Update Windows using ISO file
Problem Symptom
Windows users complain that unable to update Windows to the latest version because the update fails to install with error code 0x8007000E.
The detailed error message is as below:
Windows Update
Updates failed
We can’t finish the update. Try restarting your device and we’ll try again. Error code: (0x8007000e)


- How do I fix/solve Windows 10 Version 1903 update error 0x8007000e?
- How can I fix the Windows update error code 0x8007000E?
- When updating Windows 10, what is error code 0x8007000e and how do I fix this?
- How do I resolve the Microsoft Store error 0x8007000E?
- What is Windows update error 0x8007000e? What is it caused by? How to resolve it?
This article contains step by step guide to resolve Windows updates failed with error 0x8007000e issue.
Potential Causes
Windows update failed with error code 0x8007000E is usually caused by:
- Downloaded update content is corrupted.
- Non-compliant device driver or software.
- Weak Internet connection.
- Corrupt Windows system files.
- Malicious software.
Pre-check
- Temporary disable or uninstall Security/Antivirus software before Windows update installation, reinstall it after the Windows update installation has completed.
- Make sure you have enough free disk space (at least 32GB).
- Disconnect all USB devices and SD Cards such as USB Flash Disks, USB Wireless receiver for mouse or keyboard, etc.
- Install the latest servicing stack update for Windows.
- Download and install the latest device drivers downloaded from PC or Laptop manufacturer official support site.
- Update the BIOS (Firmware).
- Disable the Hard Drive Encryption if it is enabled.
- After the completion of the Windows update download process and during the Windows update installation process, disconnect from network.
Solution 1: Restart Windows
There is a group of Windows processes that are dedicated to installing Windows update. If anyone of it has failed, the Windows update process will resulting in error 0x8007000e. What you need to do is to restart your PC.
Solution 2: Restart the Windows Update service via Services
Step 1: Press Windows + R keys to open the Run command box.
Step 2: Type: services.msc in the Run command box and click on the OK button. Accept the UAC warning if appears.

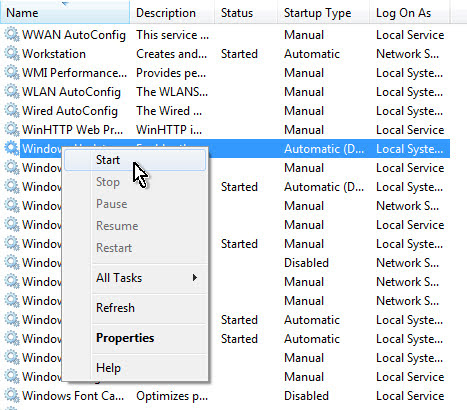
Step 3: In the Services management console locate the Windows Update service.
Step 4: Right-click on the Windows Update service and select Restart option from the context menu.

Solution 3: Execute SFC and DISM
Windows Update Error 0x80070012 can occur if Windows 10 installation is corrupted, you can fix it by executing System File Checker (SFC) and Deployment Image Servicing and Management(DISM):
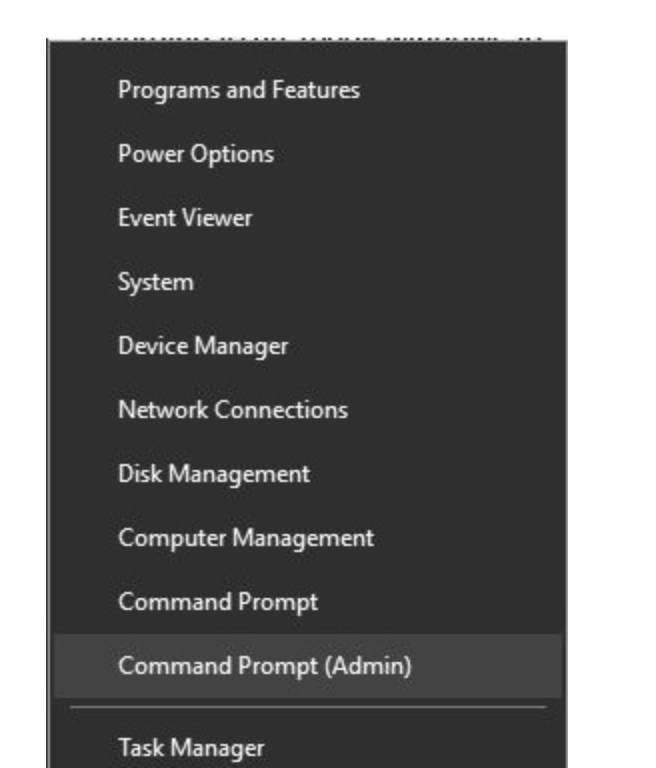
Step 1: Press Windows + X and choose Command Prompt (Admin) from the menu to start Command Prompt as administrator.
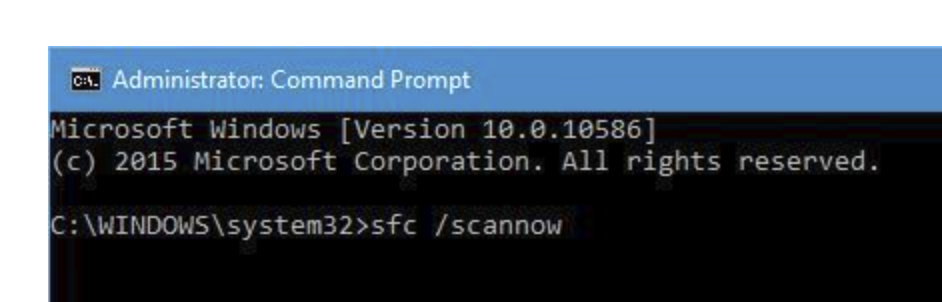
Step 2: Enter sfc /scannow and press Enter. Wait for the process to complete.
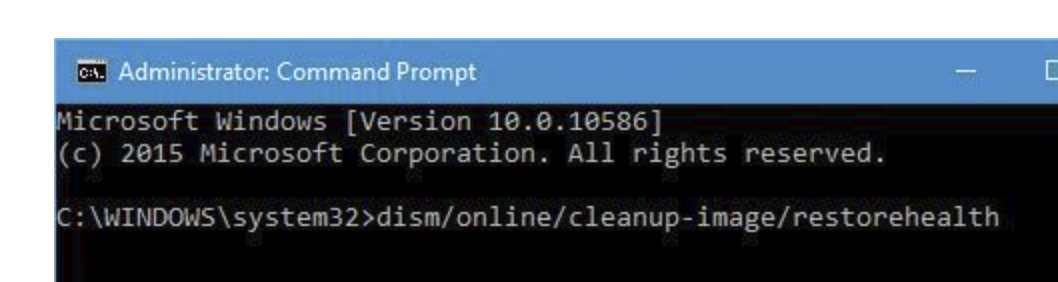
Step 3: Enter dism /online /cleanup-image /restorehealth and press Enter. Wait for the process to finish.
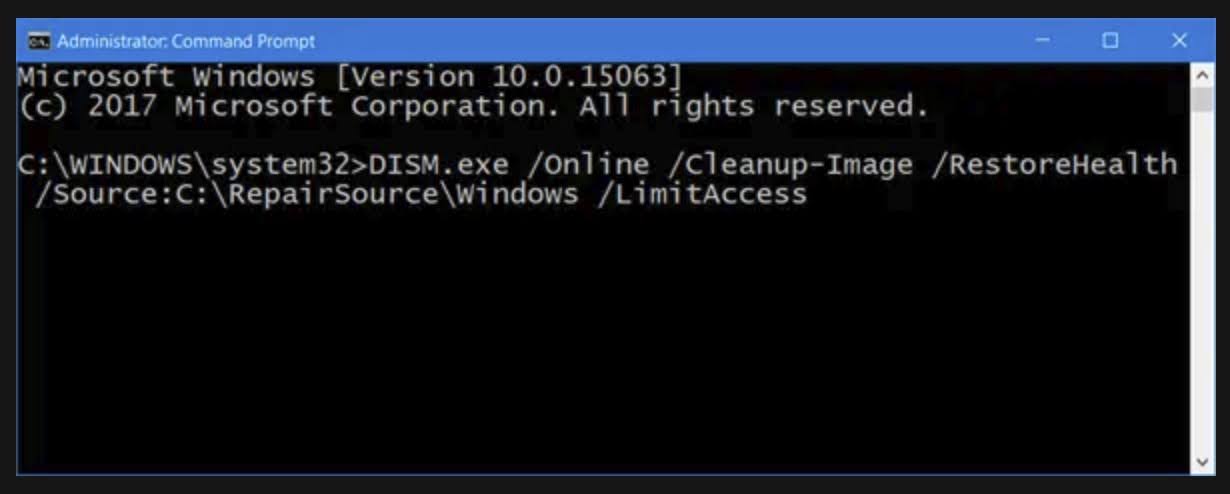
If your Windows Update client is already broken, you will be prompted to run the Windows installation media as the repair source or use the Windows side-by-side folder from network share as the source of the files. Run the following command instead:
DISM.exe /Online /Cleanup-Image /RestoreHealth /Source:C:\RepairSource\Windows /LimitAccess
* Replace the C:\RepairSource\Windows placeholder with the location of repair source media.
DISM will create a log file in %windir%/Logs/CBS/CBS.log and capture any issues that the tool finds or fixes once the process is completed.
Step 4: Restart your Windows.
Solution 4: Execute Windows Update Troubleshooter
Try to execute the Windows Update Troubleshooter and see if that helps to resolve the issue.
Step 1: Click on Start and go to Settings > Updates & Security > Troubleshoot > Additional troubleshooter.
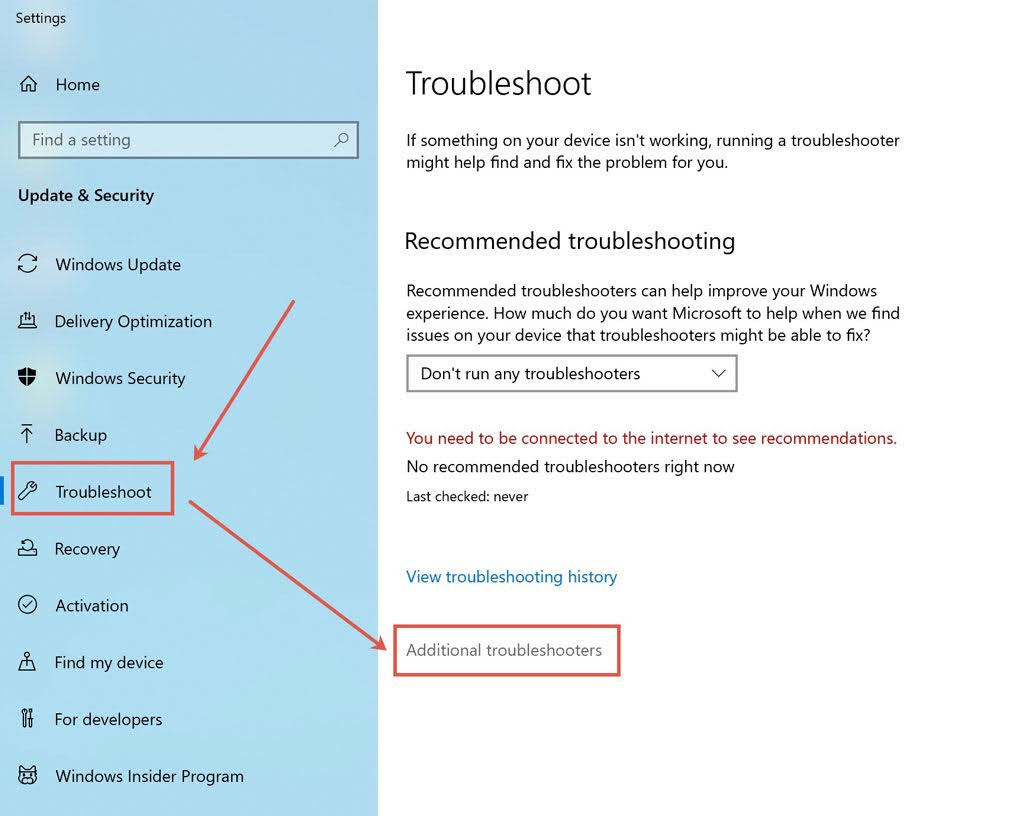
Step 2: Click on the Windows Update in the list of Additional troubleshooters.
Step 3: Click on the Run the troubleshooter button.

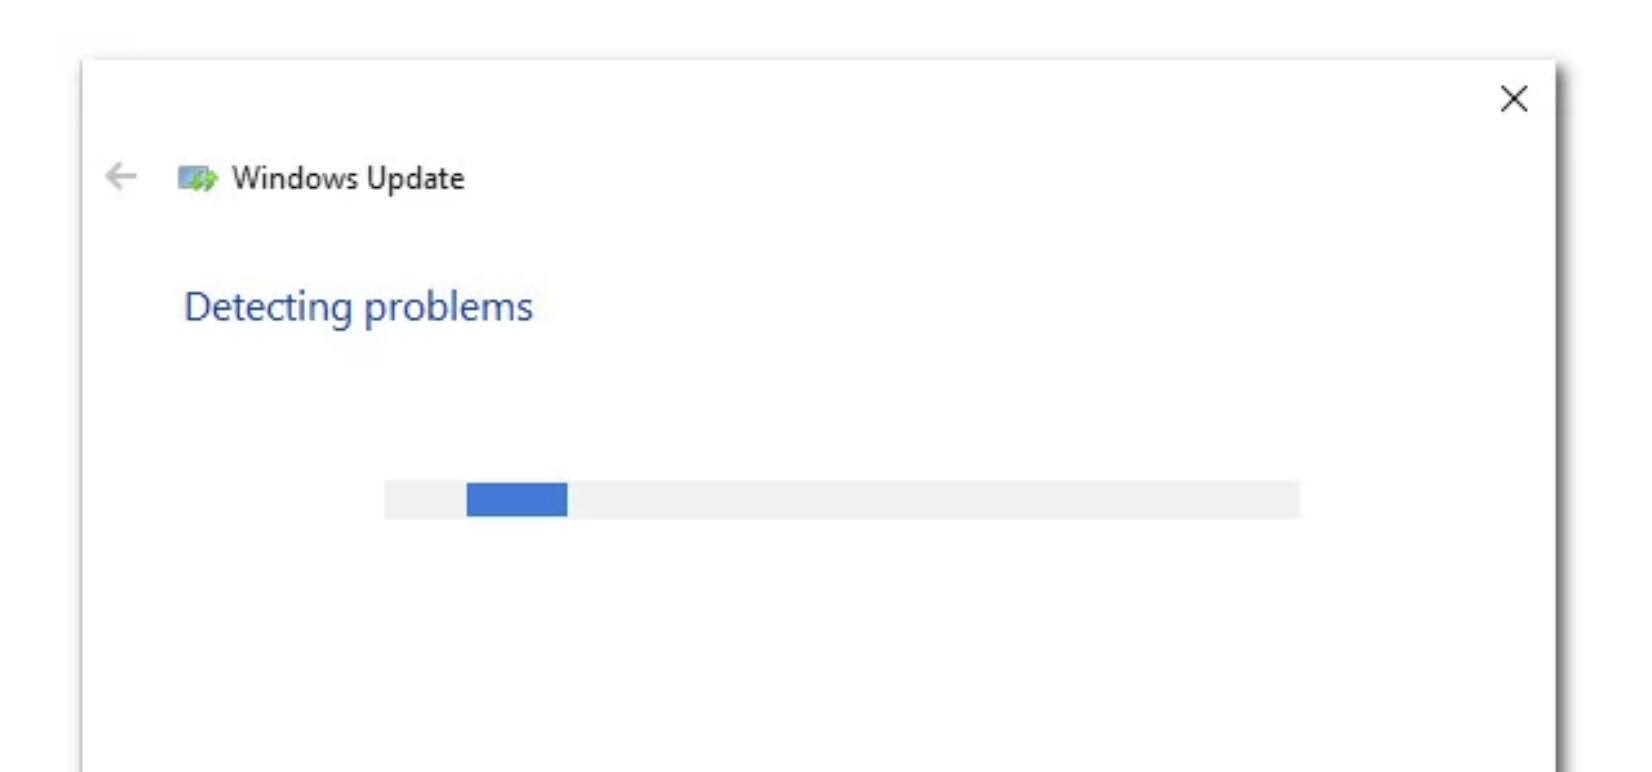
Step 3: Windows Update Troubleshooter will start to scan the system of any inconsistencies.
Step 4: Wait until the analysis is complete, then click on Apply this fix if a viable repair strategy is recommended.
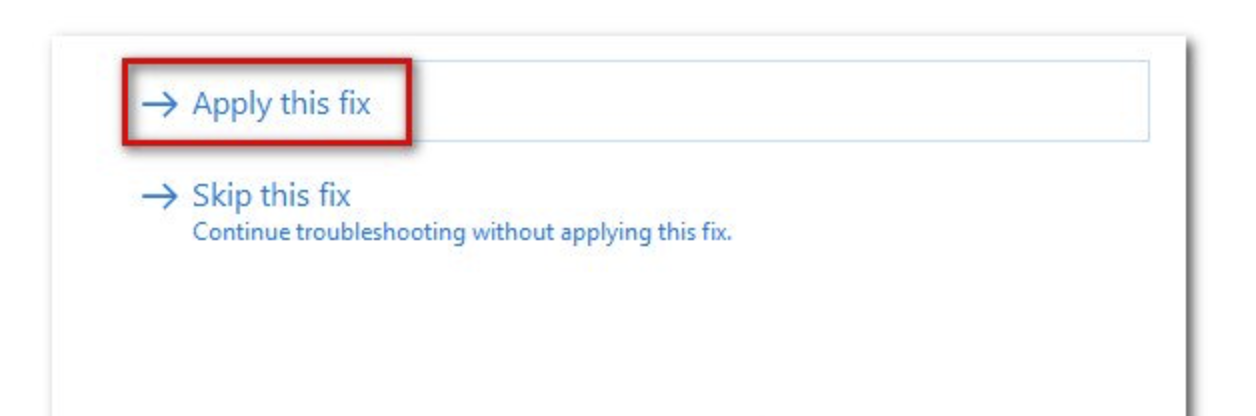
Step 5: Restart your computer.
Alternatively, you can download the Windows Update Troubleshooter, execute it, and check if it helps.
Solution 5: Reset SoftwareDistribution folder
Step 1: Press Windows + R keys to open the Run command box.
Step 2: Type: services.msc in the Run command box and click on the OK button. Accept the UAC warning if appears.
Step 3: In the Services management console locate the Windows Update service.
Step 4: Right-click on the Windows Update service and select Stop option from the context menu.

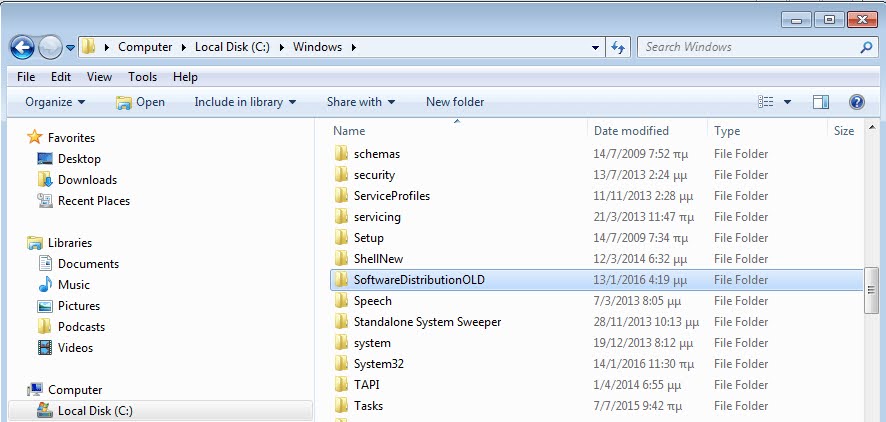
Step 5: Open Windows Explorer and navigate to C:\Windows folder.
Step 6: Find and Delete the SoftwareDistribution folder or rename it to SoftwareDistributionOLD.
Step 7: Open Services management console again.
Step 8: Right-click on the Windows Update service and select Start option from the context menu.
Step 9: Navigate to the Settings > Update and Security and click on the Check for Updates button.
Solution 6: Reset Windows Update Components Manually
Step 1: Type cmd in the Search box.
Step 2: Right-click the Command Prompt and choose Run as administrator option from the context menu.
Step 3: Type the following commands and press Enter after each command:
net stop wuauserv

net stop cryptSvc

net stop bits

net stop msiserver

Ren C:\\Windows\\SoftwareDistribution SoftwareDistribution.old

Ren C:\\Windows\\System32\\catroot2 Catroot2.old

net start wuauserv

net start cryptSvc

net start bits

net start msiserver

pause
Step 4: Wait for the process to be finished and close the command prompt window.
Step 5: Restart your Windows.
Solution 7: Update Windows using Update Assistant
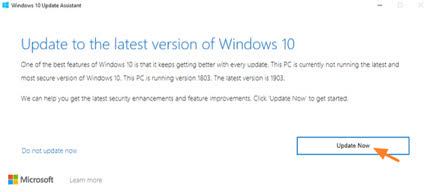
Step 1: Navigate to the Windows 10 download site and click on the Update now button.

Step 2: Save the Windows Upgrade Assistant (Windows10Upgrade9252.exe) file on your desktop.
Step 3: Double click at the downloaded file to open the Windows Upgrade Assistant.
Step 4: Click on the Update Now button to start the Windows update.
Step 5: Let Windows to finish the downloading and the verification.
Step 6: When the verification is reaches 100%, disconnect computer from the Internet, or set it to Airplane mode.
Step 7: Wait until Windows updating system.
Step 8: When prompted, restart your system to install the update.
Solution 8: Update Windows using ISO file
Step 1: Navigate to the Windows 10 download site and click on the Download tool now button to download the Media Creation Tool.

Step 2: Execute the Media Creation Tool and Accept the License Terms at the first screen.
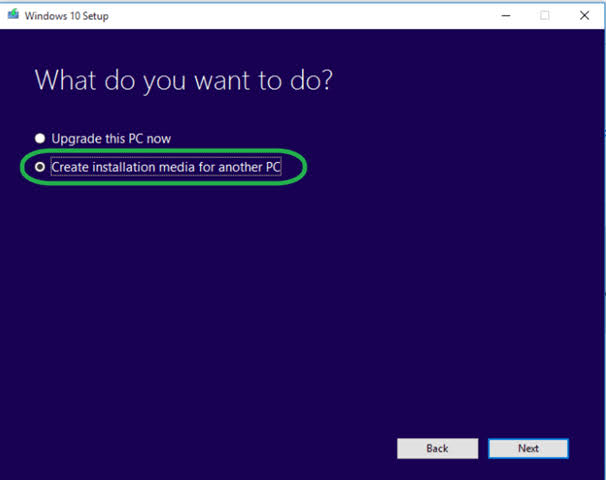
Step 3: Select the Create installation media for another PC option.
Step 4: At on the Next button for Language, architecture and edition.
Step 5: Select the ISO file option and click on the Next button.

Step 6: Save the Windows.iso file to your desktop.
Step 7: The Media Creation Tool will now begin to download the Windows 10 in an ISO format.
Step 8: When the download is completed, close the Media Creation Tool.
Step 9: Disconnect computer from the Internet, or set it to Airplane mode. Temporary disable or uninstall any third-party antivirus.
Step 10: Right click on the Windows.iso file save on your desktop and click on the Mount option from the context menu.
Step 11: Double click at setup.exe application.

Step 12: Choose the Not right now option and click on the Next button.

Step 13: Follow the rest onscreen instructions to update your Windows.