Command prompt (CMD) or PowerShell (PS) return System Error 67 has Occurred error message after users try to map a network drive using net use command. Follow the below resolution method to fix this error.
![[Solved] How to Fix "System Error 67 Has Occurred" when Mapping Network Drive using CMD or PowerShell](https://lh3.googleusercontent.com/vs3-IKA8p-tlEJKXhbzJRBuuIP-Z7Pc-JHR94A45FnJ4jrj1KI1u91O_ghd75QfrYg_uOZm3HmXm2gAKz44xX2Au19w1Ts9tmFxmzn9xnfbUqvube5auvoYY-mBimW7uDlfI0ETQoE_bBgL2pf4OyeGkoF1swDUpiPaHKB5CVmlZLqdml4MPWfIY83btoWHxE7z4GWNWI6Ug2L4NIHJRJ461ADvQ2gt5AKsgc1LnQw9LgLPNCK4dtNEosVH8U-hH0qBtr0tTbYYlvDz-8n0SPNldvSZfO7sTaG849p_cOZ87vniNWx1CLm7U_fUBnN32qo926Pvx0fAocfCcab3_U5dI10Xr_wB-JDuOqtzcIozdzqxiBi_DKSlvsVuD7LFaBqAlemRu4vy7ZqK-YjXFj7gkNNbstMqJqOJAW1tjGtH-7ZrK1tYLKwPKnku8ZUCy2WD5436dubwKekdoS6oCz_fcOwuet86hS3UEJH0JDIqNmj5Aw7VCE7mJ99Vsv2SZYYd3FkqV8vkquZELjLnPV45PGpnhbWeNMy8um_hfA_j1lH44SP0hllH0pfadrY5xl6Av-Vfj9lxOvouPEAyYHxbiPHN6ieezPb0KxBYuL_SM5SKOOcDXAo1keqLh0YNV7l0JlEcn8PG61SlLTE9uVNaMcV3iXhiYcRNVnJ9CNlw9TvJE7rLelJVCUnrg_jeCOYVVyT20g3G1GbxSPvyHFNrDj0fQFrkLtbKuCOUSuR5FXbzD=w628-h288-no)
Solution 1: Verify command syntax
Table of Contents
Use the correct syntax to map a network drive: net use * \\*IP Address*\sharename
Note: Replace *IP Address* with the IP address of the server that you are trying to map.
Solution 2: Updating the latest version of the network driver
- Press Windows key + R to open up Run dialog box.
- Type
devmgmt.mscand then press Enter to open up Device Manager. Click Yes if prompted by the User Account Control (UAC). - Scroll down through the list of installed devices and locate the Network adapters section.
- Expand the drop-down menu associated with Network adapters, right-click on network driver and choose Properties from the context menu.
- Select the Driver tab then click on the Update Driver button.
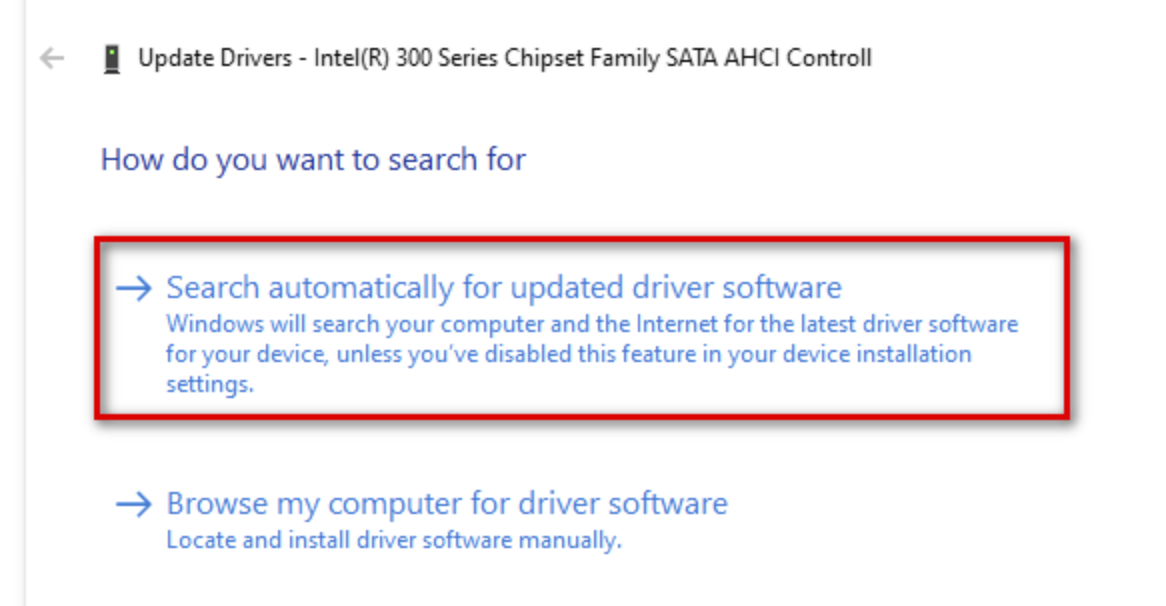
- Click Search automatically for updated driver software hyperlink.
- Follow the on-screen prompts to install the latest network driver.
- Restart your PC.

Solution 3: Enable Hardened UNC Paths policy in Group Policy Editor
- Press Windows key + R to open the Run dialog box.
- Type
gpedit.mscand press Enter to open the Local Group Policy Editor. Click Yes if User Account Control (UAC) prompt. - Navigate to the following location:
Computer Configuration > Administrative Templates > Network > Network Provider - Expand the Network Provider folder, Double-click on Hardened UNC Paths policy setting at the right pane.
- Change the status to Disabled and click Apply to save the changes.
- Restart your PC.


Solution 4: Disable IP Network Address Translator
- Press Windows key + R to open up Run dialog box.
- Type
devmgmt.mscand then press Enter to open up Device Manager. Click Yes if prompted by the User Account Control (UAC). - Click on View from the menu, then click on Show on hidden devices.
- Scroll down the list of installed devices and expand the drop-down menu associated with Non-Plug and Play Drivers.
- Right-click on IP Network Address Translator and choose Disable from the context menu.
- Restart your PC.
