Table of Contents
- Problem Symptom
- Potential Causes
- Pre-check
- Restart device
- Fulfil Rust minimum system requirements
- Solution 1: Close Rust from Background apps
- Solution 2: Update Windows
- Solution 3: Update the graphics card driver
- Update driver in Windows
- For NVIDIA
- For AMD
- Solution 4: Run Steam program as an administrator
- Solution 5: Opt-out of the Steam beta programs
- Solution 6: Terminate background programs
- Solution 7: Verify the integrity of game files
- Solution 8: Change the Power option to High Performance or Ultimate Performance
- Solution 9: Set Affinity for Rust
- Solution 10: Set High Priority for Rust
- Solution 11: Set Launch Options for Rust
- Solution 12: Reinstall Microsoft Visual C++ Runtime
- Solution 13: Reinstall the latest version of DirectX
- Solution 14: Run Rust in DirectX 9
- Solution 15: Set Custom size for Virtual Memory
- Solution 16: Disable Windows Defender Firewall
- Solution 17: Disable Windows Security protection
- Solution 18: Disable In-Game Overlay function
- Disable Discord Overlay
- Disable Nvidia GeForce Experience Overlay
- Solution 19: Disable Xbox Game Bar
- Solution 20: Disable CPU or GPU Overclocking function
- Solution 21: Update and install latest patch for Rust
- Solution 22: Reinstall Rust program
- Reference
Problem Symptom
Many players reported Rust keeps crashing on Windows 11 and Windows 10 PC at startup immediately when it is launched, while loading, joining the server, or it constantly closes unexpectedly during gameplay.
I’m still crashing as much as I did before the update so idk what u fixed
— noah stimson (@StimsonNoah) June 9, 2021
The detailed error message is as below:
rust.exe has stopped working
Windows is checking for a solution to the problem…

RustClient.exe has stopped working
A problem caused the program to stop working correctly.
Windows will close the program and notify you if a solution is available.

Follow the below recommended troubleshooting solution steps to resolve Rust keeps crashing or freezing unexpectedly when startup or during gameplay issue ranging from old graphics drivers to low virtual memory.
Potential Causes
- There are some configurations on which it will cease to run.
- The hardware does not meet the minimum system requirements.
- Outdated or incompatible Graphics GPU Drivers.
- Incompatible PC configuration.
- Outdated Windows.
- Outdated DirectX or too much consumption of resources from DirectX 11.
- Outdated game version or game launcher.
- Lack of administrative privileges because not running Rust as administrator.
- Missing or corrupted system files or game files.
- Overheat due to play the game for a long time.
- Low virtual memory or insufficient memory due to run too many unnecessary opened background running tasks, startup apps, antivirus or security software programs while playing Rust.
- Issues with the Visual C++ Redistributable.
- Overlay apps.
- Bug in the game update.
- Bug in the Steam beta client.
Is your game crashing when getting killed or assigning sleeping bags? This is a bug in the current Steam beta. Make sure you’re opted out of the beta under Steam -> Settings -> Account. pic.twitter.com/dqT6QLQ4qa
— Rust (@playrust) February 3, 2018
Pre-check
Restart device
First of all, restart your computer to refresh the operating system as well as remove corrupt temporary data.
Fulfil Rust minimum system requirements
Checking for Windows update and make sure your PC meets the minimum system requirements to play Rust smoothly. Below are the Rust‘s minimum and recommended system requirements:
MINIMUM system requirements for Windows
Requires a 64-bit processor and operating system
OS: Windows 8.1 64bit
Processor: Intel Core i7-3770 / AMD FX-9590 or better
Memory: 10 GB RAM
Graphics: GTX 670 2GB / AMD R9 280 better
DirectX: Version 11
Network: Broadband Internet connection
Storage: 20 GB available space
Additional Notes: SSD is highly recommended or expect longer than average load times.
RECOMMENDED system requirements for Windows
Requires a 64-bit processor and operating system
OS: Windows 10 64bit
Processor: Intel Core i7-4790K / AMD Ryzen 5 1600
Memory: 16 GB RAM
Graphics: GTX 980 / AMD R9 Fury
DirectX: Version 12
Network: Broadband Internet connection
Storage: 20 GB available space
Additional Notes: SSD is highly recommended.
MINIMUM system requirements for macOS
Requires a 64-bit processor and operating system
OS: OS X El Capitan 10.11
Processor: Intel Core i7-3770 / AMD FX-9590 or better
Memory: 10 GB RAM
Graphics: GTX 670 2GB / AMD R9 280 better
Network: Broadband Internet connection
Storage: 25 GB available space
Additional Notes: Metal is required,
RECOMMENDED system requirements for macOS
Requires a 64-bit processor and operating system
OS: OS X El Capitan 10.11
Processor: Intel Core i7-4790K / AMD Ryzen 5 1600
Memory: 16 GB RAM
Graphics: GTX 980 / AMD R9 Fury
Network: Broadband Internet connection
Storage: 25 GB available space
Additional Notes: SSD is highly recommended or expect longer than average load times.
Visit Rust on Steam Store for the latest system requirements information.
How to check your PC’s hardware specifications
Step 1: Open the Settings app.
Step 2: Navigate to System > About.
Step 3: The basic information about device such as processor and RAM display under Device Specifications.
Step 4: Select the Display option in the left menu pane of the System screen.
Step 5: Under the Display tab, go to Advanced display settings.
Step 6: Click on the Display adapter properties for Display 1 link to open Display Properties dialog.
Step 7: Display Properties dialog will open and display GPU specifications information.
If you found that the hardware is not fulfil for the game’s minimum system requirements, you can upgrade the related component especially CPU and RAM, play the game on a better PC, or you can try to lower some of the game’s graphics settings.


Solution 1: Close Rust from Background apps
Step 1: Press the Windows + I keys to open the Windows Settings app.
Step 2: Scroll down from the left pane and select the Background apps option.
Step 4: Scroll down and look for the Rust program.
Step 5: Toggle off the Rust.
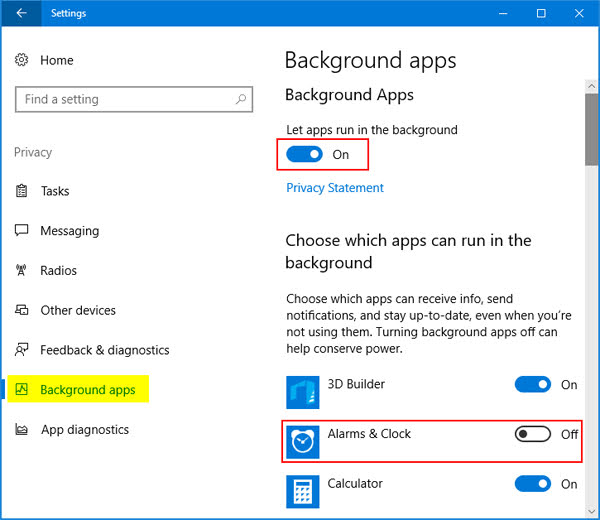
Step 6: Restart your PC.
Solution 2: Update Windows
Step 1: Press the Windows + I keys to open the Windows Settings.
Step 2: Select the Update & security option in the Settings app.

Step 3: Go to the Windows Update section.
Step 4: Click on the Check for updates button, Windows will start to search for the new updates.

Step 5: If there is a new update available for your OS, then download and install it on your computer.
Step 6: Once the new update is installed, restart the computer.
Solution 3: Update the graphics card driver
Check and confirm you have the latest version of graphics card driver installed to ensure smooth gameplay. You can update the graphics card driver manually by going to the manufacturer’s website and search for the most recent correct driver. Be sure to choose only driver that is compatible with your Windows OS version.
Update driver in Windows
Step 1: Press the Windows key + R to open the Run dialog.
Step 2: Type devmgmt.msc in the Run dialog box and click on the OK button or press the Enter key to open the Device Manager.
Step 3: Go to the device category and click on it to expand the section.
Step 4: Right-click on the device name and select the Update driver option from the context menu.

Step 5: Select the Search automatically for updated driver software option for Windows to start to search and install the latest device driver on the computer.

For NVIDIA
Step 1: Download and Install the Nvidia GeForce Experience application.
Step 2: Open the Nvidia GeForce Experience application.
Step 3: Register a new account or login with your existing account.
Step 4: Click on the DRIVERS tab and select the CHECK FOR UPDATES option.

Alternatively, visit official NVIDIA Driver Downloads page to download the latest version of GPU driver.
For AMD
Step 1: Download and install the AMD Auto Detect and Install tool.
Step 2: Once installed, run the application and click the Install option.
Step 3: When it’s finished it will automatically detect your graphics card.
Step 4: After detecting the drivers, it will prompt you to select a version.
Step 5: Select the Recommended Version and click on the Install button.

Alternatively, visit official AMD Drivers and Support page to download the latest version of GPU driver.
Solution 4: Run Steam program as an administrator
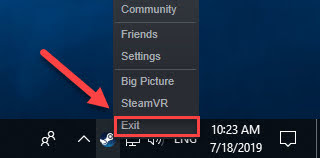
Step 1: If the Steam program is running, right-click the Steam icon on the taskbar and select Exit option from the context menu.
Step 2: Right-click on the Steam Launcher icon and click on the Properties option in the context menu.

Step 3: Click on the Compatibility tab.
Step 4: Check the box next to the Run this program as an administrator option.

Step 5: Click on the Apply button and then select the OK button.
Step 6: Relaunch Rust from Steam.
Solution 5: Opt-out of the Steam beta programs
Step 1: Start the Steam program.
Step 2: Click on the Steam > Settings.

Step 3: In the Account tab, click on the CHANGE… button.

Step 4: Click on the list box for the Beta Participation.
Step 5: Select the NONE – Opt out of all beta programs option.
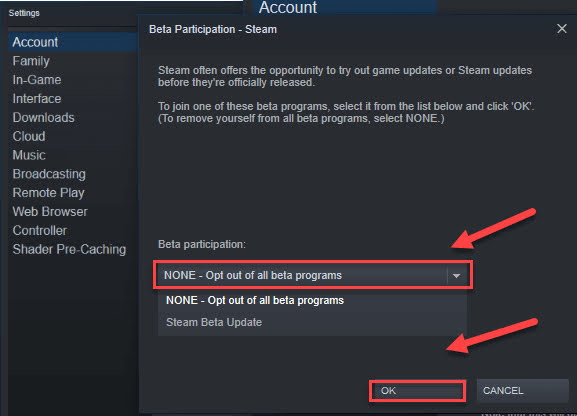
Step 6: Click on the OK button.
Step 7: Reopen the Steam program and launch the Rust game.
Solution 6: Terminate background programs
Step 1: Press on the Ctrl + Shift + ESC to open the Task Manager. Alternatively, right-click on the taskbar and select Task Manager option or Start Task Manager option from the context menu.


Step 2: Go to the Processes tab.
Step 3: Check which process is consume a lot of CPU and Memory resource.

Step 4: Right-click on it and select the End task option or End Process Tree option from the context menu. Additionally, terminate those programs you don’t use currently.
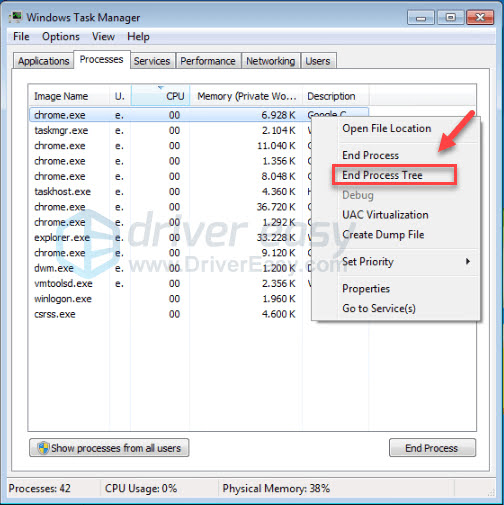

Step 5: Relaunch Rust from Steam.
Solution 7: Verify the integrity of game files
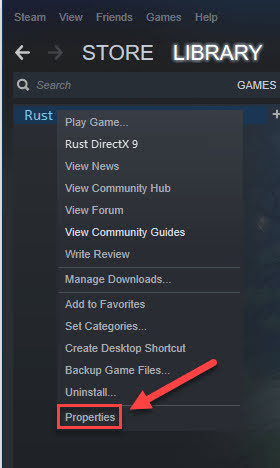
Step 1: Open the Steam program.
Step 2: Go to the LIBRARY.

Step 3: Right-click on Rust and click on the Properties option from the context menu.
Step 4: Click on the LOCAL FILES tab.
Step 5: Select the VERIFY INTEGRITY OF GAME FILES… option.

Step 6: Wait for the scanning process to complete.
Step 7: Relaunch Rust from Steam.
Solution 8: Change the Power option to High Performance or Ultimate Performance
Step 1: Press on the Windows + R key to open the Run Dialog box.

Step 2: Type the following command and press the Enter key: powercfg.cpl

Step 3: Click on the High Performance or Ultimate Performance option.

Step 4: Restart your PC
Solution 9: Set Affinity for Rust
Step 1: Press on the Ctrl + Shift + ESC to open the Task Manager. Alternatively, right-click on the taskbar and select Task Manager option or Start Task Manager option from the context menu.
Step 2: Go to the Details tab.
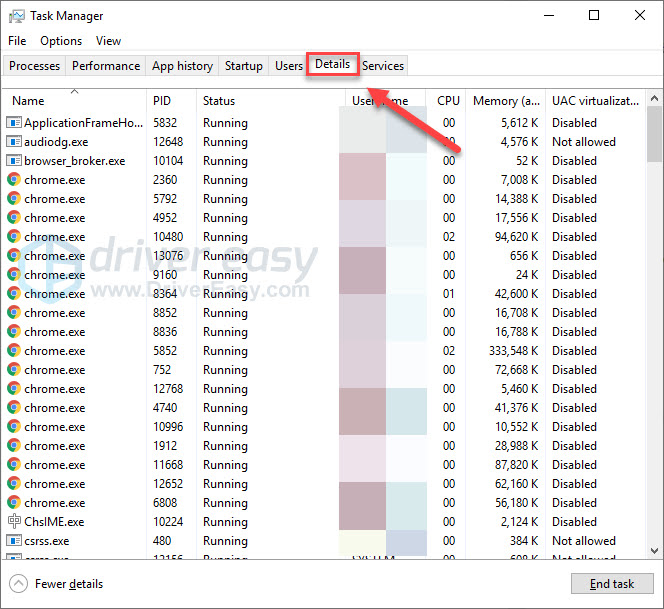
Step 3: Locate Rust from the list of program, right-click on it, and select the Set affinity option from the context menu.

Note: Set affinity option will assign Rust process to only a few cores that already have a cache of the game stored so that it will run faster and perform better.
Step 4: Check all the boxes available and then click on the OK button.

Step 5: Relaunch Rust from Steam.
Solution 10: Set High Priority for Rust
Step 1: Press on the Ctrl + Shift + ESC to open the Task Manager. Alternatively, right-click on the taskbar and select Task Manager option or Start Task Manager option from the context menu.
Step 2: Go to the Details tab.
Step 3: Locate Rust from the list of program, right-click on it, and assign the Set Priority option to High from the context menu.

Step 4: Close the Task Manager.
Step 5: Relaunch Rust from Steam.
Solution 11: Set Launch Options for Rust
Step 1: Open the Steam program.
Step 2: Go to the LIBRARY.
Step 3: Right-click on Rust and click on the Properties option from the context menu.
Step 4: Click on the SET LAUNCH OPTIONS… button.
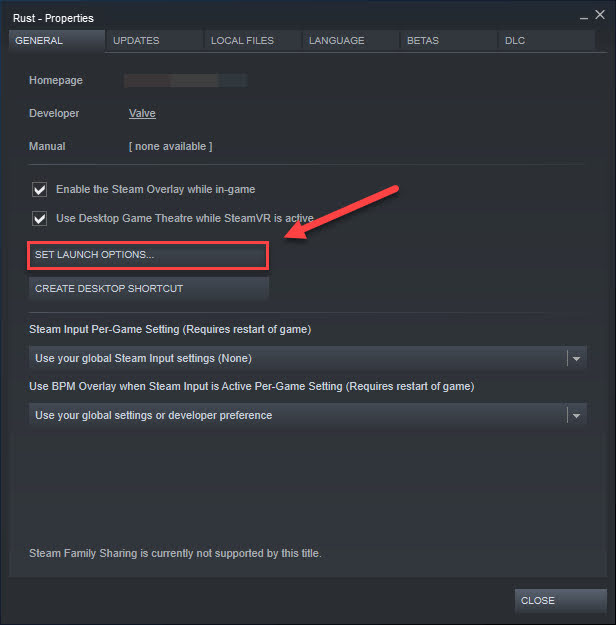
Step 5: Enter below parameter as Launch Options: -high -maxMem=X -malloc=system -force-feature-level-11-0 -cpuCount=X -exThreads=X -force-d3d11-no-singlethreaded

Step 6: Click on the OK button.
Step 7: Restart your PC
Solution 12: Reinstall Microsoft Visual C++ Runtime
Step 1: Press the Windows key to open up the Start Menu.
Step 2: Type Apps & Features and click on it from the search result.
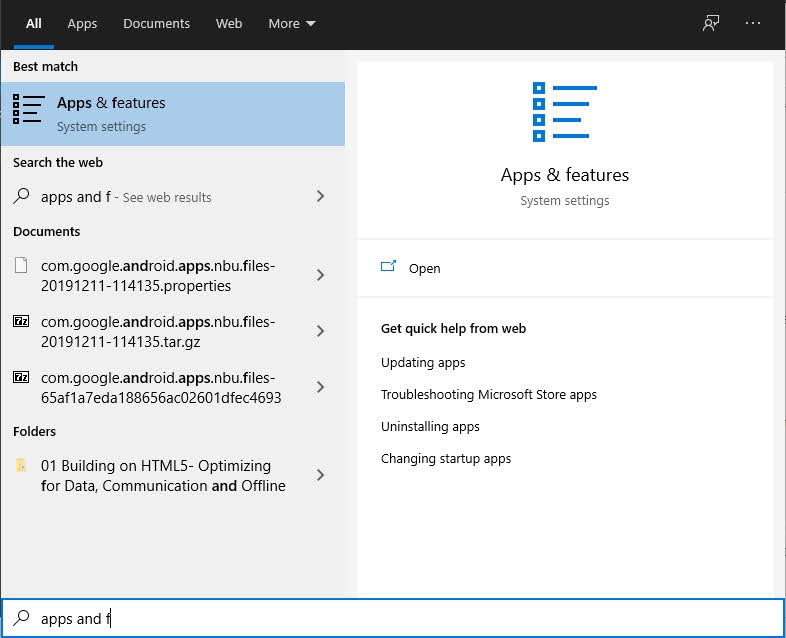
Step 3: Locate the Microsoft Visual C++ program(s) in the list of installed program.
Step 4: Select each Microsoft Visual C++ program and click on the Uninstall button.

Step 5: Download the latest Microsoft Visual C++ Runtime from the official Microsoft website.
Step 6: Double click on the downloaded executable file to start the installation.
Step 7: Restart your PC.
Solution 13: Reinstall the latest version of DirectX
Step 1: Visit the DirectX download page on Microsoft’s site.
Step 2: Select your preferred language from the drop-down box.
Step 3: Click on the Download button to save the DirectX setup file to your computer.
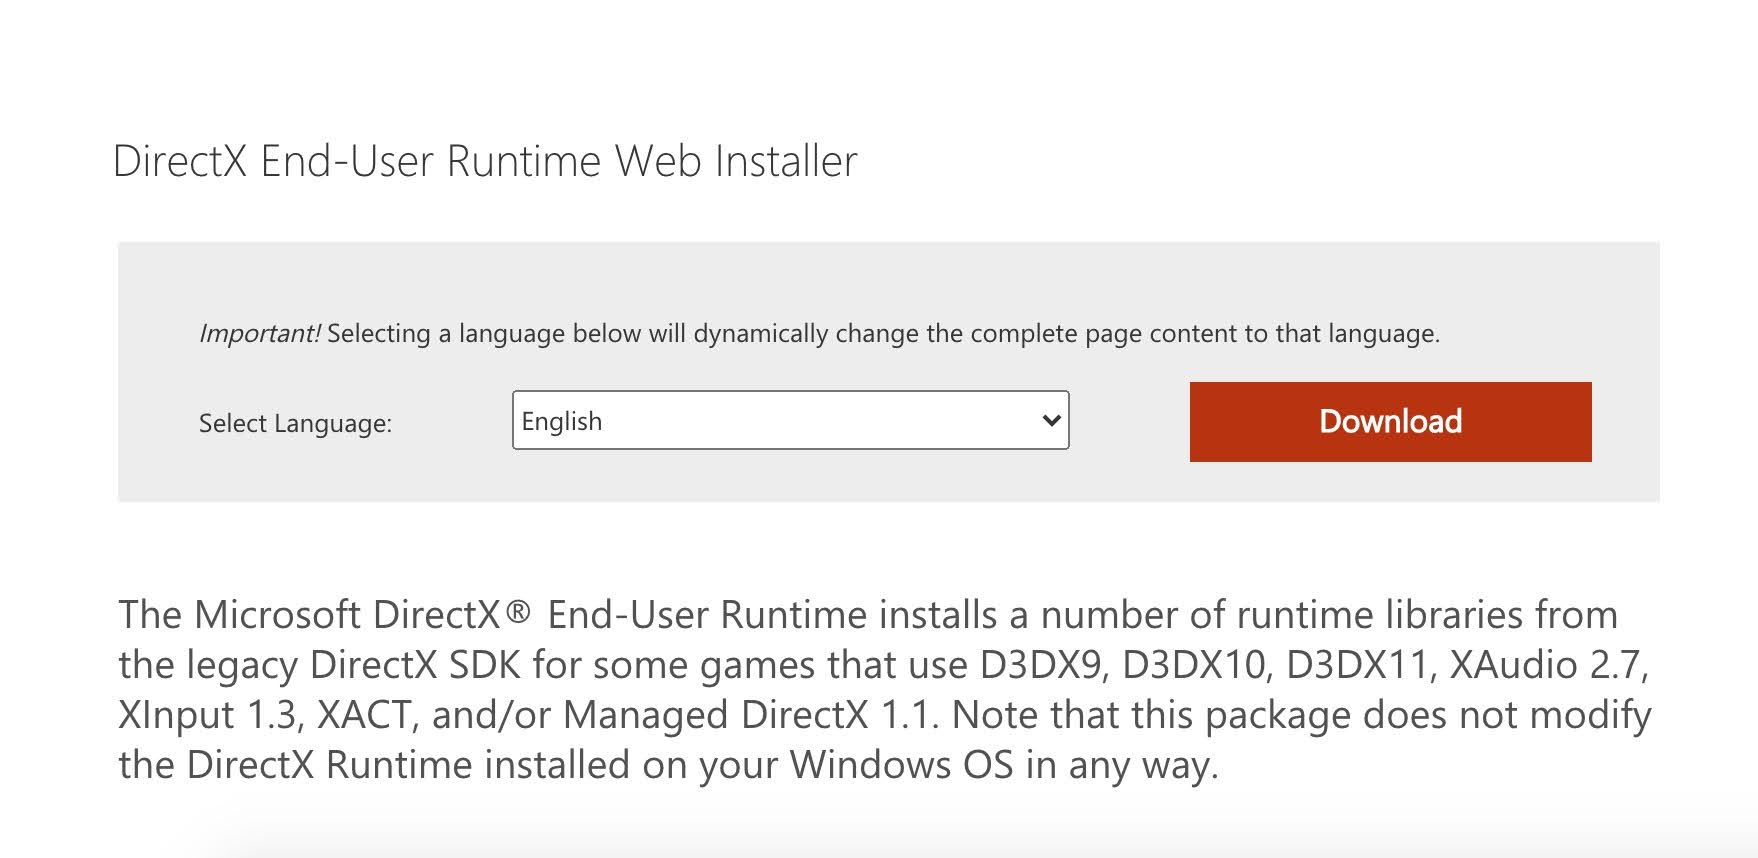
Step 4: Double click on the downloaded dxwebsetup.exe file to start the DirectX installation, follow the on-screen directions from the installation program to complete the installation
Step 5: Restart your PC.
Solution 14: Run Rust in DirectX 9
Step 1: Open the Steam program.
Step 2: Go to the LIBRARY.
Step 3: Right-click on Rust and click on the Properties option from the context menu.
Step 4: Click on the SET LAUNCH OPTIONS… button.
Step 5: Enter below parameter as Launch Options: -dx9
Note: If there were some other Launch Options parameter exist, make sure you separate this with a space.
Step 6: Click on the OK button.
Step 7: Restart your PC
Solution 15: Set Custom size for Virtual Memory
Step 1: Open the Run box.
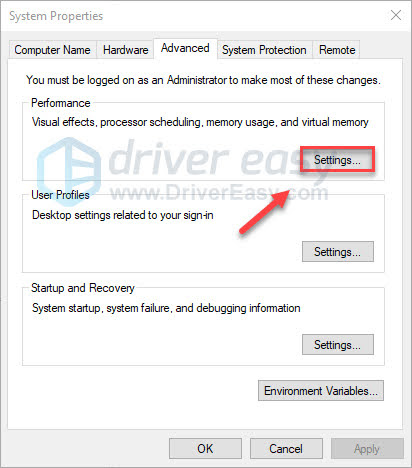
Step 2: Type sysdm.cpl and click on the OK button to launch the System Properties window in the Control Panel.
Step 3: Go to the Advanced tab.
Step 4: Click on the Settings button in the Performance section.
Step 5: Go to the Advanced tab.
Step 6: Click on the Change button in the Virtual memory section.

Step 7: Clear the checkbox next to the Automatically manage paging file size for all drives option.
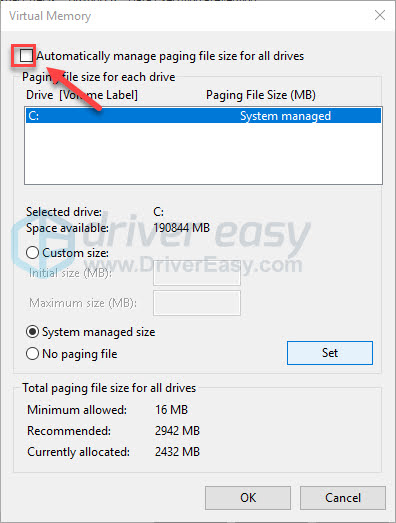
Step 8: Select the C drive.

Step 9: Select the radio button next to the Custom size option.
Step 10: Type 4096 in the text box for Initial size (MB) and Maximum size (MB).

Step 11: Click on the Set button and then the OK button.

Step 12: Restart your PC.
Solution 16: Disable Windows Defender Firewall
Step 1: Click on the Start Menu and type firewall
Step 2: Select the Windows Defender Firewall program from the search result.
Step 3: Click on the Turn Windows Defender Firewall on or off option from the left pane to open the Customize Settings.

Step 4: Select the Turn off Windows Defender Firewall (not recommended) option for both the Private network settings and Public network settings.

Step 5: Click on the OK button to save changes.
Step 6: Restart your PC.
Solution 17: Disable Windows Security protection
Step 1: Press the Windows + I keys to open the Windows Settings app.
Step 2: Click on the Update & Security option.
Step 3: Click on the Windows Security from the left pane.
Step 4: Click on the Open Windows Security button.

Step 5: Click on the Virus & threat protection option at the left pane.
Step 6: Click on the Manage settings link.
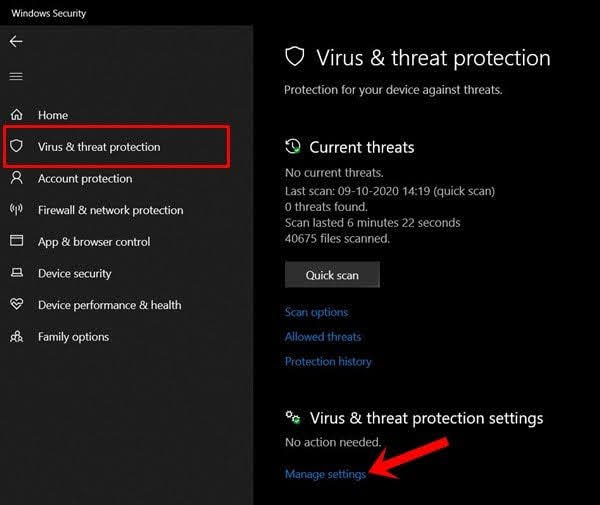
Step 7: Toggle off the Real-time protection option. If prompted, click on Yes to proceed further.

Step 8: Toggle off Cloud-delivered protection and Tamper protection option as well.
Solution 18: Disable In-Game Overlay function
Disable Discord Overlay
Step 1: Launch the Discord app.
Step 2: Click on the gear icon at the bottom.
Step 3: Click on Overlay under App Settings.
Step 4: Toggle on the Enable in-game overlay.

Step 5: Click on the Games tab and select Rust.
Step 6: Toggle off the Enable in-game overlay.

Step 7: Restart your PC.
Disable Nvidia GeForce Experience Overlay
Step 1: Launch the Nvidia GeForce Experience app.
Step 2: Go to the Settings.
Step 3: Click on the General tab.
Step 4: Toggle off the IN-GAME OVERLAY option.

Step 5: Restart your PC.
Note: Keep in mind that you should disable some other overlay apps such as MSI Afterburner, Rivatuner, RGB software, or other third-party apps run in the background always.
Solution 19: Disable Xbox Game Bar
Step 1: Press the Windows + I keys to open Windows Settings.
Step 2: Click on the Gaming option.

Step 3: Go to the Game Bar settings.
Step 4: Turn off the Record game clips, screenshots, and broadcast using Game bar option.

Alternatively you can just search for Game bar from the Windows Settings menu.
Solution 20: Disable CPU or GPU Overclocking function
Sometimes CPU or GPU Overclocking may cause issues with the bottleneck or compatibility. Set the frequency to default for optimal performance.
Solution 21: Update and install latest patch for Rust
Step 1: Open the Steam program.
Step 2: Go to the LIBRARY.
Step 3: Click on Rust from the left pane. It’ll automatically search for the available update.
Step 4: If there is an update available, make sure to click on the Update option.

Step 5: Restart your PC.
Solution 22: Reinstall Rust program
Step 1: Open the Steam program.
Step 2: Go to the LIBRARY.
Step 3: Right-click on Rust and click on the Uninstall option from the context menu.

Step 4: Click on the DELETE button to remove game files.

Step 5: Right-click the the Steam icon on the taskbar and then select the Exit option from the context menu.
Step 6: Press the Windows + E key.
Step 7: Paste the C:\Program Files (x86)\Steam\steamapps\common on the address bar, and press the Enter key.
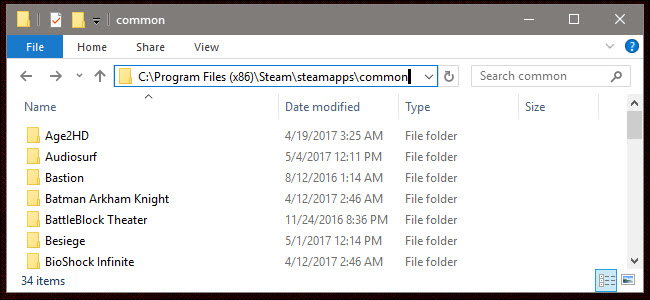
Step 8: Select the Rust folder, and press on the Del key to delete the folder.
Step 9: Relaunch Steam program to download and reinstall Rust.
Reference
- r/playrust > Rust crashes my pc (Please help)
- r/playrust > Can’t open rust after update?
Rust crashes when joining server
Rust crashes on startup
Why is my Rust crashing?