Problem Symptom
Table of Contents
- Problem Symptom
- Potential Causes
- Solution 1: Install the latest Windows updates
- Solution 2: Fix with QuickBooks Tool Hub
- Solution 3: Manually delete the Entitlement file to reenter license and product info
- Solution 4: Clean install QuickBooks Desktop
- Solution 5: Repair or reinstall Microsoft .NET Framework
- Windows 10, 8.1, and 8
- If the .NET Framework 4.5 (or later) checkbox isn’t checked:
- If the .NET Framework 4.5 (or later) checkbox is already checked:
- If the .NET Framework 3.5 SP1 checkbox isn’t checked:
- If the .NET Framework 3.5 SP1 checkbox is already checked:
- Solution 6: Repair Microsoft MSXML (Microsoft XML Core Services) DLL files
- Solution 7: Escalate to technical support
- Solution 8: Save before importing the .QBO file
I am unable to activate or open QuickBooks Desktop due to license related error. The detailed error message is as below:
Could not initialize license properties

[Error 3371, StatusCode -111118] QuickBooks could not load the license data. This may be caused by missing or damaged files.

For troubleshooting steps, note the error and type the followin in a Web browser window:
www.quickbooks.com/support/register.html![[Error 3371, StatusCode -111118] QuickBooks could not load the license data. This may be caused by missing or damaged files.](https://lh3.googleusercontent.com/pw/AM-JKLXPBDDX5Zq0n13QaQCK_TCL9zFUayrIUoJZoKNeseRwaGPgXZ6TN4bxUf39sXnwQYalQ3YLBINbrIx6QqGtb7Dkt-8LkBJP7g4Bu4rOaTf04YYpwNIab4H-N8v_ykM9BYyimPLJxv-HbBRCcKt75Juw_A=w490-h244-no?authuser=0)
Could not initialize license properties

[Error 3371, StatusCode -1] QuickBooks could not load the license data. This may be caused by missing or damaged files.

Click here for steps to troubleshoot.![[Error 3371, StatusCode -1] QuickBooks could not load the license data. This may be caused by missing or damaged files.](https://lh3.googleusercontent.com/pw/AM-JKLWeiThEPYuS8kKGplGHi7PbXZcWy4x3EZcf6lZHq-UxPKnEktgHYwC6Zam87m8_e9zdA_3oHX3Kyn0SBgea9FHGhZ6os5cpKrHByBC7nKglZODj4H-L3wFgFvAJ4JdLrVe2QTSuOk6DjCVJ9VGHZ_Hu7A=w493-h372-no?authuser=0)
Error Number: Error 3371
Error Name: QuickBooks Error 3371
Error Description: Error 3371: QuickBooks has encountered a problem and needs to close. We are sorry for the inconvenience.
Developer: Intuit Inc.
Software: QuickBooks
Applies to: Windows XP, Vista, 7, 8
Follow the below solution steps to resolve “RuntimeError: await wasn’t used with future” issue.
Potential Causes
- Component or file needed by QuickBooks Desktop to run is damaged or missing such as QBregistration.dat which is a QuickBooks Desktop installation file that contains QuickBooks’ license information that needs to be retrieved and validated every time QuickBooks Desktop is made active.
- The damaged MSXML component caused QuickBooks Desktop unable to retrieve the information in the Qbregistration.dat file allowing QB to open.
- MSXML 4 is either not installed or damaged.
- Microsoft Core XML Services DLL (MSXML.dll) file is missing, damaged, or unregistered.
- Microsoft .NET Framework has an issue causing QuickBooks not to work properly.
- The antivirus program quarantines some QuickBooks Desktop files.
- Outdated Windows operating system.
- Damaged or corrupted Windows system files.
- Right Networks and QuickBooks Enterprise with WebConnect users may experience this error if open the file without saving first.
Solution 1: Install the latest Windows updates
Step 1: Click the Windows logo.
Step 2: Select All Programs.
Step 3: Click the Windows Update.
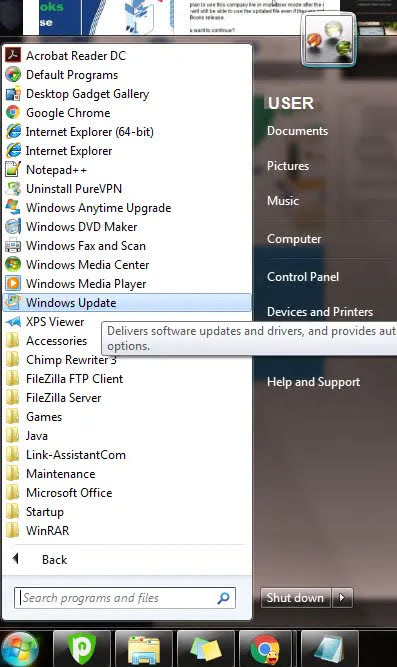
Step 4: After installing the updates, restart your computer.

Step 5: Install the QuickBooks.
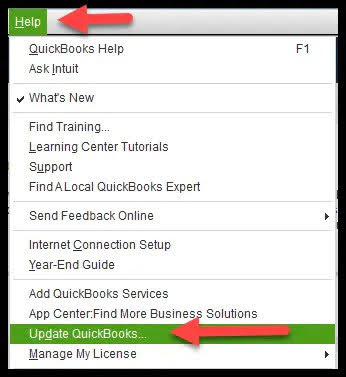
Step 6: Update QuickBooks desktop again.
Refer to Windows Update: FAQ on how to update your version of Windows from Microsoft,
Solution 2: Fix with QuickBooks Tool Hub
The QuickBooks Tool Hub helps fix common errors.
Step 1: Close the QuickBooks before installing the QuickBook Tool Hub.
Note: Recommended to use QuickBooks Tool Hub on Windows 10, 64-bit for the best experience.
Step 2: Download QuickBooks Tool Hub.
Step 3: Double-click to open the downloaded file (QuickBooksToolHub.exe).
Step 4: Follow the on-screen steps to install, accept and agree to the Intuit’s license agreement.
Step 5: After the installation finish, double-click the QuickBooks Tool Hub shortcut icon on the Windows desktop to open it.

Alternatively, you can search in Windows for QuickBooks Tool Hub and select the program.

Step 6: Choose Quick fix my program option from Program Problems tab.

Step 7: Now, click on the OK.
Step 8: Select the Installation Issues option in the QuickBooks Tool Hub program.
Step 9: Select the 3371 Error Fix.

Step 10: Select the OK.
Step 11: Start QuickBooks Desktop and open your data file to inspect whether the error got fixed.
Solution 3: Manually delete the Entitlement file to reenter license and product info
Step 1: Initially make sure to close the QuickBooks desktop software.

Step 2: Close all running QuickBooks processes.
Step 3: Open the Windows Start menu.
Step 4: Type Run into the search box and open the Run app.
Step 5: Type C:\ProgramData\Intuit\Entitlement Client\v8 in the Run box and press the Enter key. If this doesn’t open a folder, enter C:\ProgramData\Intuit\Entitlement Client\v6 instead.

Step 6: Press the Ctrl + Shift + Esc keys together to open the Task Manager.
Step 7: Switch to the Processes tab.
Step 8: Search for the QBW32.EXE process.
Step 9: Choose the process and then click the End Task button.
Step 10: Locate a file called EntitlementDataStore.ecml. Right-click on the file and select the Delete option from the context menu. Select the Yes to proceed.

Step 11: Open QuickBooks and your company file.
Step 12: Follow the on-screen instructions to register QuickBooks again.
Note: If QuickBooks Point of Sale is installed on the same computer, follow the steps to register it again.
Solution 4: Clean install QuickBooks Desktop
Step 1: Download the installer for your version of QuickBooks.
Step 2: Gather license number, product year and version.
Step 3: Open the Windows Start menu.
Step 4: Type Control Panel into the search and open the Control Panel.
Step 5: Go to the Programs and Features.
Step 6: Select the Uninstall a Program.
Step 7: Select your version of QuickBooks Desktop you want to uninstall from the list of programs.
Step 8: Select the Uninstall/Change and then Remove.
Step 9: Select Next. If you don’t see this option, sign out and sign back in to Windows as an admin (or a user with admin rights).
Step 10: When you’re done, reinstall QuickBooks Desktop.

Solution 5: Repair or reinstall Microsoft .NET Framework
Windows 10, 8.1, and 8
Step 1: Close all open programs.
Step 2: Open the Windows Start menu.
Step 3: Type Control Panel into the search and open the Control Panel.
Step 4: Go to the Programs and Features.
Step 5: Select the Uninstall a Program.
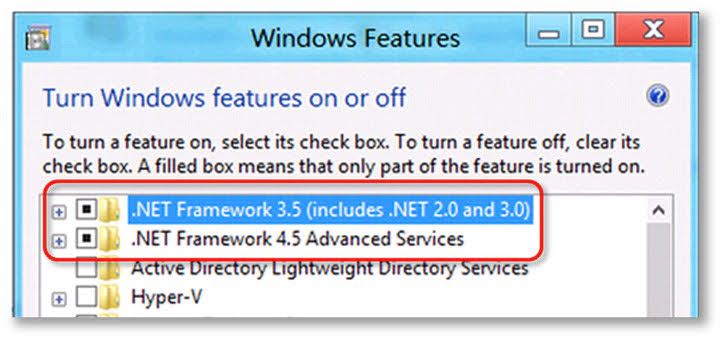
Step 6: Select the Turn Windows features on or off.
Step 7: Find the .NET Framework on the list.
Step 8: Check the settings for both .NET Framework 4.5 (or later) and .NET Framework 3.5 SP1.
Note: The steps to fix .NET. Framework 4.5, 4.6, 4.7, and 4.8 are the same.
If the .NET Framework 4.5 (or later) checkbox isn’t checked:
Step 1: Select the checkbox to turn on .NET Framework 4.5 (or later).
Step 2: Select OK to save your changes.
Step 3: Restart the Windows.
If the .NET Framework 4.5 (or later) checkbox is already checked:
Step 1: Select the checkbox to turn off .NET Framework 4.5 (or later). Don’t turn it back on.
Step 2: Select OK to save your changes.
Step 3: Restart the Windows.
Step 4: When you’re signed in back into Windows, follow the steps to turn on .NET Framework 4.5 again.
If the .NET Framework 3.5 SP1 checkbox isn’t checked:
Step 1: Select the checkbox to turn on .NET Framework 3.5 SP1.
Step 2: Select OK to save your changes.
Step 3: Restart the Windows.
If the .NET Framework 3.5 SP1 checkbox is already checked:
Step 1: Select the checkbox to turn off .NET Framework 3.5 SP1. Don’t turn it back on.
Step 2: Select OK to save your changes.
Step 3: Restart the Windows.
Step 4: When you’re signed in back into Windows, follow the steps to turn on .NET Framework 3.5 SP1 again.
Solution 6: Repair Microsoft MSXML (Microsoft XML Core Services) DLL files
To register MSXML in 64-Bit operating system, perform the following steps:
Step 1: Select the Windows Start menu and type cmd.
Step 2: Right-click the command prompt and select the Run as Administrator option from the context menu.
Step 3: At the C: prompt, enter cd\windows\syswow64.
Step 4: Type regsvr32 MSXML6.dll and press the Enter key.
Step 5: Install QuickBooks Desktop.
To register MSXML in 32-Bit operating system, perform the following steps:
Step 1: Press Windows + R key to open the Run command.
Step 2: Type in cmd, then press the Enter key.
Step 3: Type regsvr32 MSXML6.dll, then press the Enter key.
Step 4: Install QuickBooks Desktop.
Solution 7: Escalate to technical support
You’ll need to work with a qualified IT professional or contact Microsoft. There may be damage to your Windows Operating System.
Solution 8: Save before importing the .QBO file
This fix is only applicable to Right Networks and QuickBooks Enterprise with WebConnect users.