Table of Contents
Problem Symptom
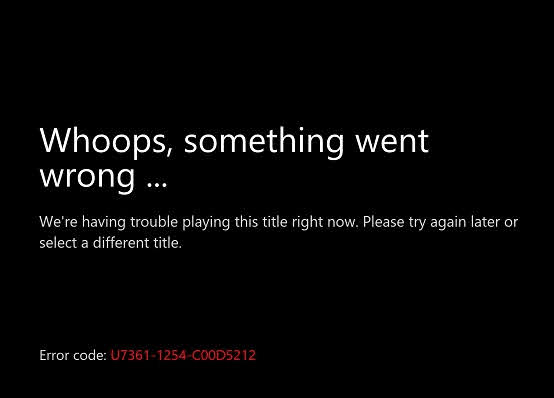
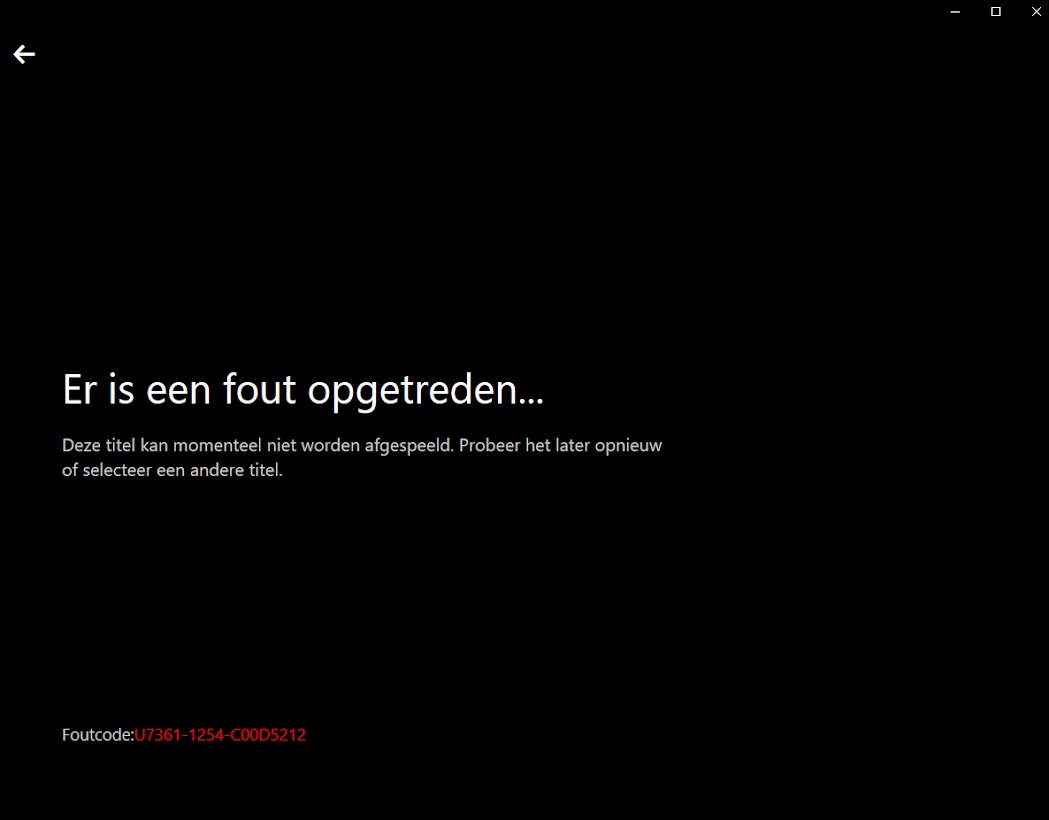
Users experience the error code U7361-1254-C00D5212 on Windows when streaming Netflix movies.
The detailed error message is as below:
Whoops, something went wrong…
We’re having trouble playing this title right now. Please try again later or select a different title.Error code: U7361-1254-C00D5212
Follow the below solution steps to resolve the Netflix U7361-1254-C00D5212 error issue.
Potential Causes
- The outdated audio setting within Windows.
- The obsolete or corrupt audio drivers.
Solution 1: Update the audio driver
Step 1: Type devmgmt.msc in the Search box on the taskbar.
Step 2: Select the Device Manager in the App results.
Step 3: Expand the Audio inputs and outputs category in the Device Manager.
Step 4: Right-click on the listed audio device and click on the Update driver option in the context menu.

Step 5: Select the Search automatically for drivers option from the wizard.
Step 6: Follow the guidelines that appear on the screen to finish updating the driver.
Step 7: Restart the Windows for the changes to take place.
Solution 2: Remove DisableProtectedAudioDG registry key
Note: Recommends to back up the registry before you modify it so that you can restore it if a problem occurs.
Step 1: Type regedit in the Search box on the taskbar.
Step 2: Right-click the Registry Editor in the App results, and select the Run as Administrator option from the context menu. Select Yes if prompted by User Account Control.
Step 3: Locate and select the following registry folder:
HKEY_LOCAL_MACHINE\SOFTWARE\Microsoft\Windows\CurrentVersion\AudioStep 4: Find the DWORD DisableProtectedAudioDG in the right-hand pane.

Step 5: If the DisableProtectedAudioDG value is present, right-click on it and choose the Delete option from the context menu.

Step 6: Exit the Registry Editor.
Step 7: Type cmd in the Search box on the taskbar.
Step 8: Right-click on Command Prompt from the App result, and select the Run as Administrator option from the context menu to open an elevated Command Prompt window. Select Yes if prompted by User Account Control.
Step 9: Type Net stop audiosrv and press the Enter key. The message The Windows Audio service was stopped successfully will display.
Step 10: Type Net start audiosrv and press the Enter key. The message The Windows Audio service was started successfully will display.
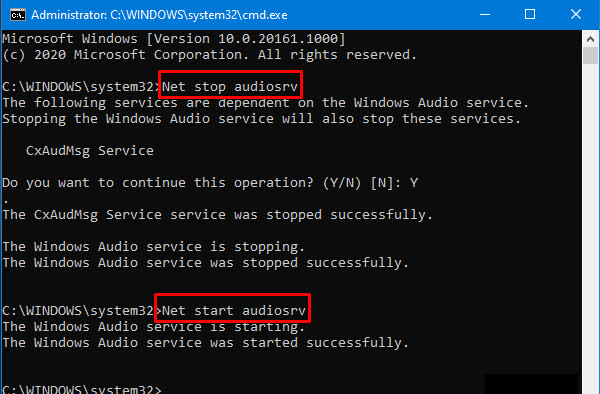
Step 11: Exit the Command Prompt.
Step 12: Try Netflix again.
Solution 3: Uninstall HEVC Video Extensions APPX package
HEVC Video Extension app on Windows 10 may cause the Netflix U7361-1254-C00D5212 error. Perform the below steps to uninstall the HEVC app.
Step 1: Go to Settings > Apps > Apps & features.
Step 2: Scroll down to locate HEVC from the list of installed apps.
Step 3: Click on the three-dots icon at the end of the entry.
Step 4: Choose the Uninstall option from the context menu.

Perform the below steps if you are unable to uninstall HEVC Video Extension app on Windows 10:
Step 1: Open the PowerShell with administrative privileges.
Step 2: Execute the following command in PowerShell to list all the APPX packages installed on the system:
Get-AppxPackage | select Name,PackageFullName,NonRemovableStep 3: Go thru the list and find the HEVC package in the list such as:
Microsoft.HEVCVideoExtension_1.0.42701.0_x64__8wekyb3d8bbweStep 4: Execute the following command to uninstall this package:
Remove-AppxPackage <package name>e.g:
Microsoft.HEVCVideoExtension_1.0.42701.0_x86__8wekyb3d8bbwe