A lot of players reported they have been encountered error 5006 or 2002 when trying to login to Final Fantasy XIV although there is nothing change apply to PC or network before this error happens.
If the server is too busy to process the request, it will prompt the error message “The lobby server connection has encountered an error” with error code 5006 or 2002 at the bottom right corner of the error dialog box.

For those who are login successfully but forced into a queue with another error message “World is currently full. Please wait until an opening is available and try again.” with error code 1017.

The following solution steps to help you fix this error.
Solution 1: Restart Router and PC
Table of Contents
- Solution 1: Restart Router and PC
- Solution 2: Adjust Internet Explorer Settings
- Solution 3: Flush the DNS Cache
- For Windows
- For macOS 10.15
- Solution 4: Reset Network Adapter
- Solution 5: Uninstall WTFast
- Solution 6: Perform Windows clean state
- Solution 7: Add the Game into Windows Firewall
- Solution 8: Add Allowed Port Ranges to Router Firewall
- Solution 9: Disable Router Firewall
- Solution 10: Disable Antivirus and Firewall
- Solution 11: Add Console with DMZ
- Solution 12: Use Different Network or Through Cable
- Solution 13: Use Cross-World Feature
- Solution 14: Change Data Center
Restart PC Restart and router to flush the DNS and clear any temp data that might be causing the issue. Press the power button to turn it off and wait for 30 seconds or more before press it again to power on the device or simply disconnect the power cable from the power outlet.
Solution 2: Adjust Internet Explorer Settings
Step 1: The game will use the Internet Explorer web browser to connect to the internet. Open Internet Explorer, then open the Tools > Internet Options and adjust the following settings:
- Under the General tab, delete ALL browser history.
- Under the Security tab, move the slider to the lowest possible settings or no higher than Medium.
- Under the Privacy tab, click Advanced and select Accept for both First Party and Third Party Cookies.
- Under the Advanced tab, make sure that Allow software to run or install even if signature is invalid is checked. Make sure All SSL and TLS (EXCEPT SSL 3.0) are checked as well, SSL 3.0 should be unchecked.
Step 2: Click on the Apply to save the settings, and then click on the OK button to close the Internet Options menu.
Step 3: Right-Click on the FFXIV launcher icon and select Properties.
Step 4: Go to the Compatibility tab, and change the compatibility mode to Windows 7.
Step 5: Click on the Apply button, and then OK button to save the changes.
Step 6: Restart your PC. Once your PC has been restarted, Right-Click the FFXIV launcher icon once more and select Run as Administrator option.
Solution 3: Flush the DNS Cache
For Windows
Step 1: Go on Start and search for cmd.
Step 2: Right-click on the search result Command Prompt and click on Run as administrator option from the context menu.
Step 3: Type the following command: ipconfig/flushdns and press Enter.

Step 4: Type exit in the command prompt.
Step 5: Reboot your PC.
For macOS 10.15
Step 1: Press Command + Space button, then type terminal and press the Enter button.
Step 2: Type the following command and then press the Enter button
sudo killall -HUP mDNSResponder; sleep 2;
Step 3: Enter your password and press the Enter button.
Step 4: Then press Command + Q buttons to quit Terminal.
Solution 4: Reset Network Adapter
Step 1: Press Windows + R to open a Run box.
Step 2: Type cmd and press Ctrl + Shift + Enter to open up an elevated Command Prompt. Click Yes to grant administrative access if UAC (User Account Control) prompt.
Step 3: Type the following command and press Enter to reset the network adapter: netsh winsock reset
Step 4: Restart the PC.
Alternatively, you can choose to perform execute Network reset option in the System settings.
Step 1: Exit the game and terminate all the game-related processes via Task Manager.
Step 2: Press Windows keys and type network reset.
Step 3: Click on Network Reset from the search results.
Step 4: Click on the Reset now button.

Step 5: Wait for the PC to restart.
Solution 5: Uninstall WTFast
Step 1: Press Windows key + R to open a Run box.
Step 2: Type appwiz.cpl and press Enter to open the Program and Features window.
Step 3: Locate WTFast in the list, right-click on it and choose Uninstall from the context menu.
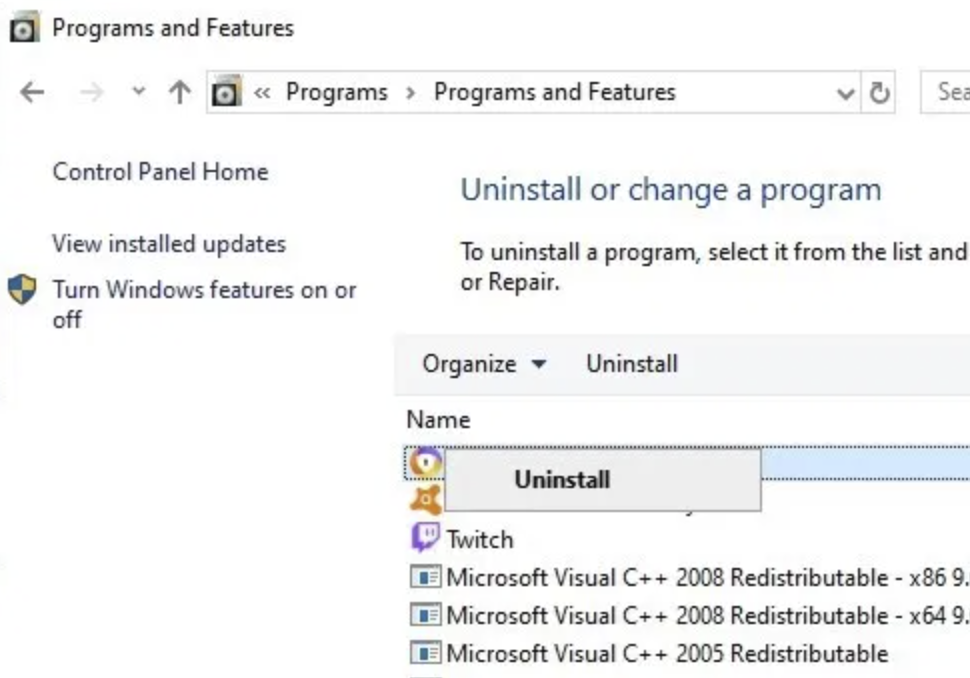
Step 4: Follow the prompts to complete the uninstall steps.
Step 5: Restart your PC.
Solution 6: Perform Windows clean state
Step 1: Open Start and search for msconfig.
Step 2: On the System Configuration window go to the Services tab
Step 3: Check on the Hide all Microsoft service option.
Step 4: Click Disable all button.
Step 5: Go to the Startup tab and click on the Open Task Manager link.
Step 6: Disable all applications in the list to prevent it from startup when the computer is booting up.
Step 7: Close Task Manager and click Apply button in System Configuration windows then click OK.
Step 8: Choose to restart when prompt to do so.
Solution 7: Add the Game into Windows Firewall
Step 1: Open the Control Panel from the Start menu or execute the command control in the Run dialog.
Step 2: Navigate to System and Security and click on Windows Defender Firewall.
Step 3: Click on the Allow an app or feature through Windows Defender Firewall at the left side menu.
Step 4: Click on the Change settings button to enable the other settings that are unavailable.
Step 5: Go to the bottom of the window and click on the Allow another app button.

Step 6: Click on the Browse button and select the folder where you have installed the game.
Step 7: Click on Open and then on Add to allow the game through the firewall.
Step 8: Check the boxes Private and Public in the game and click on the OK button to save the changes.
Step 9: Restart your PC.
Solution 8: Add Allowed Port Ranges to Router Firewall
Check the Firewall setting on your router and make sure that below port ranges added to allow inbound firewall rules:
- TCP 54992 – 54994
- TCP 55006 – 55007
- TCP 55021 – 55040
Solution 9: Disable Router Firewall
Step 1: Log in to your router configuration page, normally is 192.168.1.1
Step 2: Go the Menu and locate the Firewall option. It may also possible that this option is listed under the Connection tab.
Step 3: Open the Firewall Settings and set it to Off or Minimal Security.
Step 4: Click on Save option to save the changes.
Step 5: Restart your PC.
Solution 10: Disable Antivirus and Firewall
The game is known to get blocked by Antivirus as false positive, temporarily disable the antivirus on the computer and then launch the game again.
Solution 11: Add Console with DMZ
Step 1: Log in to your router configuration page, normally is 192.168.1.1
Step 2: Go the Menu and locate the DMZ option in the Settings section of your router. It may also possible that this option is listed under the Security tab.
Step 3: Select the DMZ option and type the static IP address that you assign to your Console.

Step 4: Save the change.
Step 5: Restart the router and PC.
Solution 12: Use Different Network or Through Cable
Step 1: Quit the game.
Step 2: Switch to another network or using cable instead of WiFi. If no other network is available, you can use a mobile hotspot or VPN to check if the issue is caused by your ISP.
Step 3: Launch the game again.
Solution 13: Use Cross-World Feature
Step 1: Select Visit Another World Server from the central Aetheryte and not the shards.
Step 2: Select any other world that you want to visit.
Step 3: Click the OK button to confirm to initiate the transfer process. Remember that the transfer process could not be canceled if initiated once.
Step 4: The transfer will start automatically and a loading screen will be shown around 10 to 15 minutes till complete.
Step 5: Repeat the same process to revert to your original world.
Solution 14: Change Data Center
Step 1: Launch the game.
Step 2: Open the Data Center selection menu and change it to any other data center.
Step 3: Login the game again. If the logged in to the freshly chosen data center successfully, press the X button at the bottom left corner of the screen to logout.
Step 4: Open the Data Center selection menu again and switch back to the original data center.