Problem: Windows 10 users reported encounter Blue Screen of Death (BSOD) error with stop code DRIVER VERIFIER IOMANAGER VIOLATION occurs when a system file or drive like ndis.sys, ntoskernel.exe, hidclass.sys, etc. gets corrupted or damaged.

The detail error message as below:
Your PC ran into a problem and needs to restart. We’re just collecting some error info, and then we’ll restart for you (0% complete)
If you’d like to know more you can search online later for this error: DRIVER_VERIFIER_IOMANAGER_VIOLATION (ndis.sys)
In this article, we have outlined some solution steps to fix the DRIVER VERIFIER IOMANAGER VIOLATION BSOD error.
Table of Contents
- Solution 1: Restart to Normal Mode
- Solution 2: Delete Driver Verifier Manager Existing Settings
- Solution 3: Reset Driver Verifier Manager
- Solution 4: Update Device Driver
- Solution 5: Execute Deployment Image Servicing and Management (DISM)
- Solution 6: Execute System File Checker (SFC)
- Solution 7: Remove Newly Installed Software
- Solution 8: Perform Windows Clean Boot
- Solution 9: Update BIOS or Firmware
- Solution 10: Uninstall Virtualization Software
- Solution 11: Restore System to Earlier Stage
Solution 1: Restart to Normal Mode
You can wait for the PC to restart after automatically or you can hold the Power button for about 5 seconds to perform hard reboot.
In the event that the Windows unable boot into normal mode, you can boot it into safe mode by pressing F4 to start the computer in Safe Mode. If you’ll need to use the Internet, press F5 for Safe Mode with Networking. After that restart the PC again.
Solution 2: Delete Driver Verifier Manager Existing Settings
Step 1: Right-click on the Start menu and choose Run from the menu list.
Step 2: Type verifier and press Enter to open the Driver Verifier Manager window. Click on the Yes button if UAC Prompt.
Step 3: Select Delete existing settings.

Step 4: Click the Finish button.
Step 5: Restart your computer.
Solution 3: Reset Driver Verifier Manager
Step 1: Press the Windows + R key to open the Run box.
Step 2: type cmd and then press CTRL + SHIFT + ENTER to open Command Prompt in admin/elevated mode. Click Yes for the UAC.
Step 3: Type the following command and press Enter: verifier /reset

Step 4: Restart your PC.
Solution 4: Update Device Driver
Refer to the file name stated in the error for example, ndis.sys is the corrupted, missing or crashing system file or drive file. Based on the search on the internet, ndis. sys is a Windows system file related to Network Driver Interface Specification. In this case, you will need to update, roll back or reinstall the Network drivers.
Step 1: Right-click on the Start button and select Device Manager from the menu list.
Step 2: Locate the related device driver from the list.
Step 3: Right-click on it and choose the Update driver option from the context menu.
Step 4: Click on the Search automatically for the drivers or Search automatically for updated driver software option.

Step 5: Windows will start to look for a newer version of the driver from the Internet. If available, you will be prompted about the same.
Step 6: If the newer version of the driver found, proceed with the installation.
Step 7: Restart your PC.
Solution 5: Execute Deployment Image Servicing and Management (DISM)
Deployment Image Servicing and Management (DISM) tool will replace potentially corrupted or missing system files with good ones.
Step 1: Press Windows key once.
Step 2: Type cmd in the search box.
Step 3: Choose Run as administrator option to open an elevated command prompt. If you are prompted for an administrator password or for a confirmation, type the password, or select Allow.
Step 4: Type the following command and press Enter to perform an advanced scan to check if the Windows 10 image has any problems: DISM /Online /Cleanup-Image /ScanHealth
Step 5: Type the following command and press Enter to run an advanced scan and repair any problems automatically: DISM /Online /Cleanup-Image /RestoreHealth

If the Windows Update client is already corrupted, you will be prompted to use a running Windows installation as the repair source or use a Windows side-by-side folder from a network share, as the source of the files. Type the following command and press Enter: DISM.exe /Online /Cleanup-Image /RestoreHealth /Source:C:\RepairSource\Windows /LimitAccess
*Replace the C:\RepairSource\Windows placeholder with the location of your repair source.
Alternatively, you can execute the DISM/Cleanup-Image tool in PowerShell with Run as administrator option.
Repair-WindowsImage -Online –CheckHealth

Repair-WindowsImage -Online –ScanHealth

Repair-WindowsImage -Online –RestoreHealth
Step 6: Once the process is complete, DISM will create a log file in %windir%/Logs/CBS/CBS.log and capture any issues that the tool finds or fixes.
Step 7: Once the DISM scan and repair is completed, close the elevated CMD window and restart the computer.
Solution 6: Execute System File Checker (SFC)
Run System File Checker (SFC) to replace potentially corrupted system files.
Step 1: Press Windows key once.
Step 2: Type cmd in the search box.
Step 3: Choose Run as administrator option to open an elevated command prompt. If you are prompted for an administrator password or for a confirmation, type the password, or select Allow.
Step 4: Type the following command below and press Enter for each line of command: sfc /scannow

Step 5: Wait until the message The operation completed successfully or Windows Resource Protection did not find any integrity violations show then close Command Prompt.
Step 6: Restart the computer.
Solution 7: Remove Newly Installed Software
If you have recently installed any application software on your PC then try to remove it temporarily and see if the error fixed.
Step 1: Press Windows key once.
Step 2: Type control panel in the search box.
Step 3: Click the Control Panel from the search result.
Step 4: Choose to view by Category and then click Uninstall a program.

Step 5: Locate any newly installed program.
Step 6: Right-click on it and click Uninstall.

Step 7: Follow the on-screen instructions to complete the uninstallation process.
Step 8: Restart your computer.
Solution 8: Perform Windows Clean Boot
Start Windows in Clean Boot state will use a minimal set of drivers and startup programs to help eliminate software conflicts that occur when you install a program or an update or when you run a program in Windows.
Step 1: Press Windows key + R to open the Run box.
Step 2: Type msconfig and press Enter to open the System Configuration. If the UAC (User Account Control) prompted then click Yes to grant administrative access.
Step 3: In the General tab, click on the radio button beside Selective startup. Uncheck the Load startup items checkbox.

Step 4: Choose the Services Tab, then check on Hide All Microsoft services and click on Disable all button.

Step 5: Click the Apply button, and then click on the OK button. Choose Restart Later option.
Step 6: Press Windows + R key to open a Run box.
Step 7: Type msconfig and click OK to open the system configuration window.
Step 8: Choose Startup and select Open Task Manager.
Step 9: Disable all applications in the list to prevent it from startup when the computer is booting up.
Step 10: Close Task Manager and click Apply button in System Configuration windows then click OK.
Step 11: Choose to restart when prompt to do so.
Solution 9: Update BIOS or Firmware
Refer to the motherboard’s manual for detailed instructions to access BIOS and update firmware because each model may have different steps.
Solution 10: Uninstall Virtualization Software
Step 1: Press Windows key once.
Step 2: Type control panel in the search box.
Step 3: Click the Control Panel from the search result.
Step 4: Choose to view by Category and then click Uninstall a program.
Step 5: Locate Microsoft System Center Application Virtual Management Server or Microsoft System Center Application Streaming Server.
Step 6: Right-click on it and click Uninstall.
Step 7: Follow the on-screen instructions to complete the uninstallation process.
Step 8: Restart your computer.
Solution 11: Restore System to Earlier Stage
Step 1: Press Windows key once.
Step 2: Type control panel in the search box.
Step 3: Click the Control Panel from the search result.
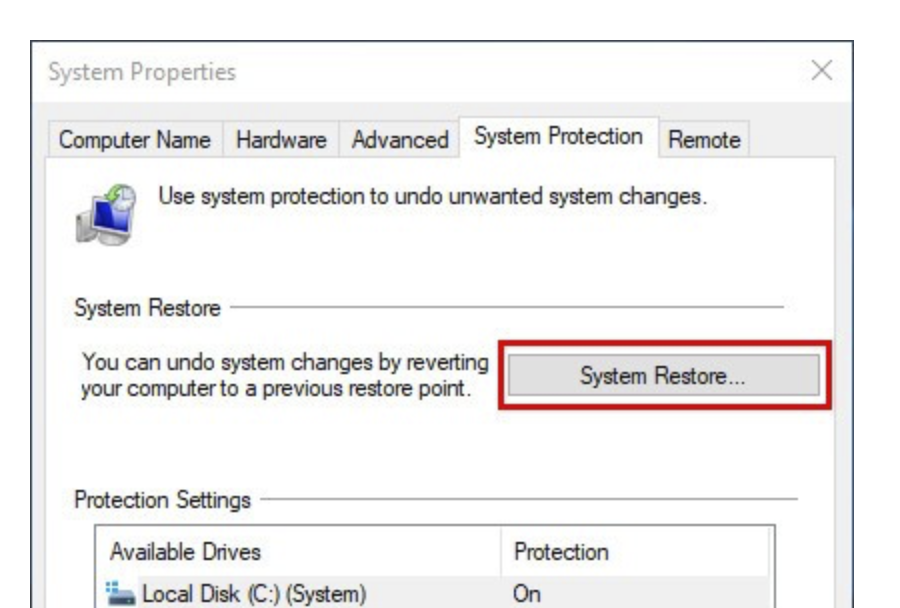
Step 4: Click System > System protection.

Step 5: Click on the System Restore button.
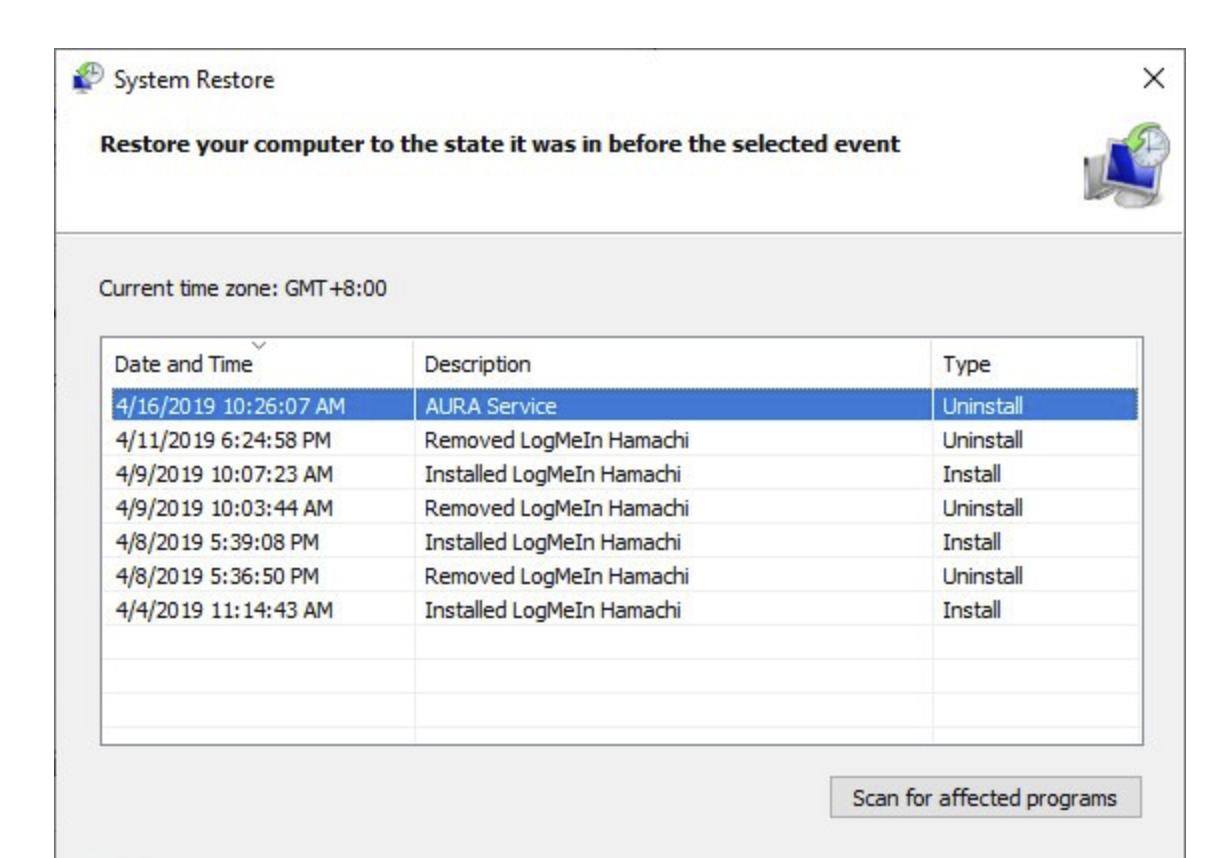
Step 6: Click the Next button to open System Restore wizard.
Step 7: Choose a restore point where the Windows didn’t show any errors. Then follow the on-screen instructions to finish the restore process.
Step 8: Choose to restart when prompt to do so.