Problem Symptom
Table of Contents
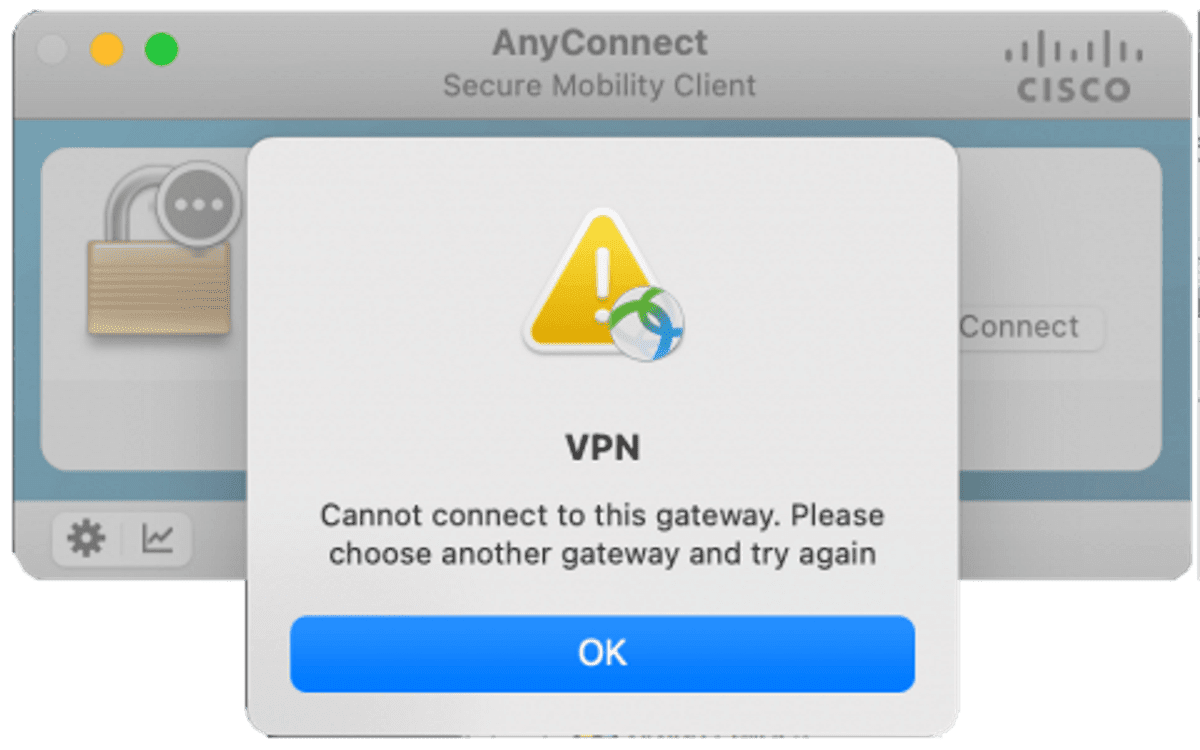
When attempting to connect to the VPN, the Cisco AnyConnect Secure Mobility Client error “Cannot connect to this gateway. Please choose another gateway and try again” start showing on a previously working AnyConnect deployment with certificate.
The detailed error message is as below:
Cannot connect to this gateway. Please choose another gateway and try again
Other related error messages as below:
The VPN connection failed due to unsuccessful domain name resolution

Connection attempt has timed out. Please verify Internet connectivity

The same error keep prompting even after I rebuilt AnyConnect config on the firewall, upgraded the Secure Mobility Client, AnyConnect package in the firewall, Windows, and the ADSM.
Follow the below solution steps to resolve Cisco AnyConnect error “Cannot connect to this gateway. Please choose another gateway and try again”.
Pre-check
Make sure that the user is using the proper address to connect. An incorrect address will result in the error messages found above.
Solution 1: Verify the IP address set correctly
Try to open the browser and went to the AnyConnect URL to see whether connected to the firewall.
Note: Make sure you do not set any static NAT on the firewall to the public IP of the firewall, or you have not to PORT forwarded HTTPS (TCP Port 443) to an internal IP.
Solution 2: Modify vpnva DisplayName registry key
Step 1: Type regedit in the Search box on the taskbar.
Step 2: Right-click the Registry Editor in the App results, and select the Run as Administrator option from the context menu. Select Yes if prompted by User Account Control.

Step 3: Locate and select the following registry folder:
Computer\HKEY_LOCAL_MACHINE\SYSTEM\CurrentControlSet\Services\vpnva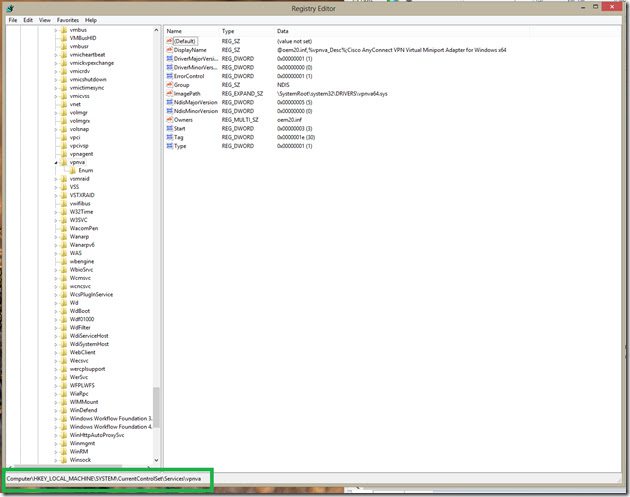
Step 4: Double-click on the DWORD DisplayName in the right-hand pane.

Step 5: Change the string’s value data to:
Cisco AnyConnect Secure Mobility Client Virtual Miniport Adapter for Windows x64
Step 6: Click on the OK button.
Step 7: Close the Registry Editor.
Solution 3: Stop and disable Internet Connection Sharing service
Step 1: Press the Windows + R key to open the Run command.
Step 2: Type services.msc in the Run box and click on the Ok button to open the Services management console.

Step 3: Scroll down to locate the Internet Connection Sharing (ICS), double-click on it to open the Properties window.
Step 4: Click on the Stop button under the Service status section.
Step 5: Click on the dropdown box next to Startup type, and select the Disabled option.
Step 6: Click on the OK button.

Step 7: Close the Services Management console.
Solution 4: Enable proxy settings
For macOS
Follow the below steps to change the proxy preferences on macOS:
Step 1: Choose the Apple menu > System Preferences.

Step 2: Click the Network option, and select a network service in the list on the left.
Step 3: Click on the Advanced option.
Step 4: Click on the Proxies tab.
Step 5: Check for Web Proxy (HTTP) and Secure Web Proxy (HTTPS).

Step 6: Click on the OK button.
For Windows
Step 1: Click on the Start button to open the menu.
Step 2: Open the Control Panel.
Step 3: Click on the Internet Options.

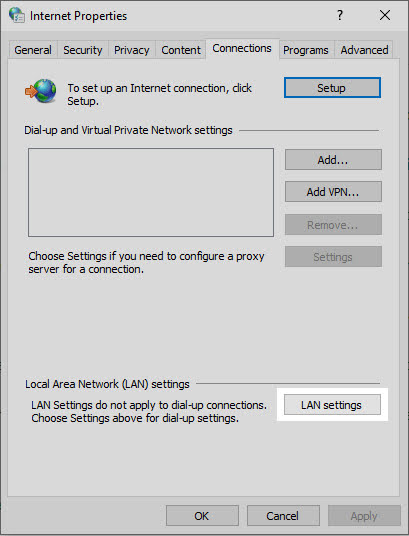
Step 4: Click on the Connections tab.
Step 5: Click on the LAN settings button under the Local Area Network (LAN) settings section.
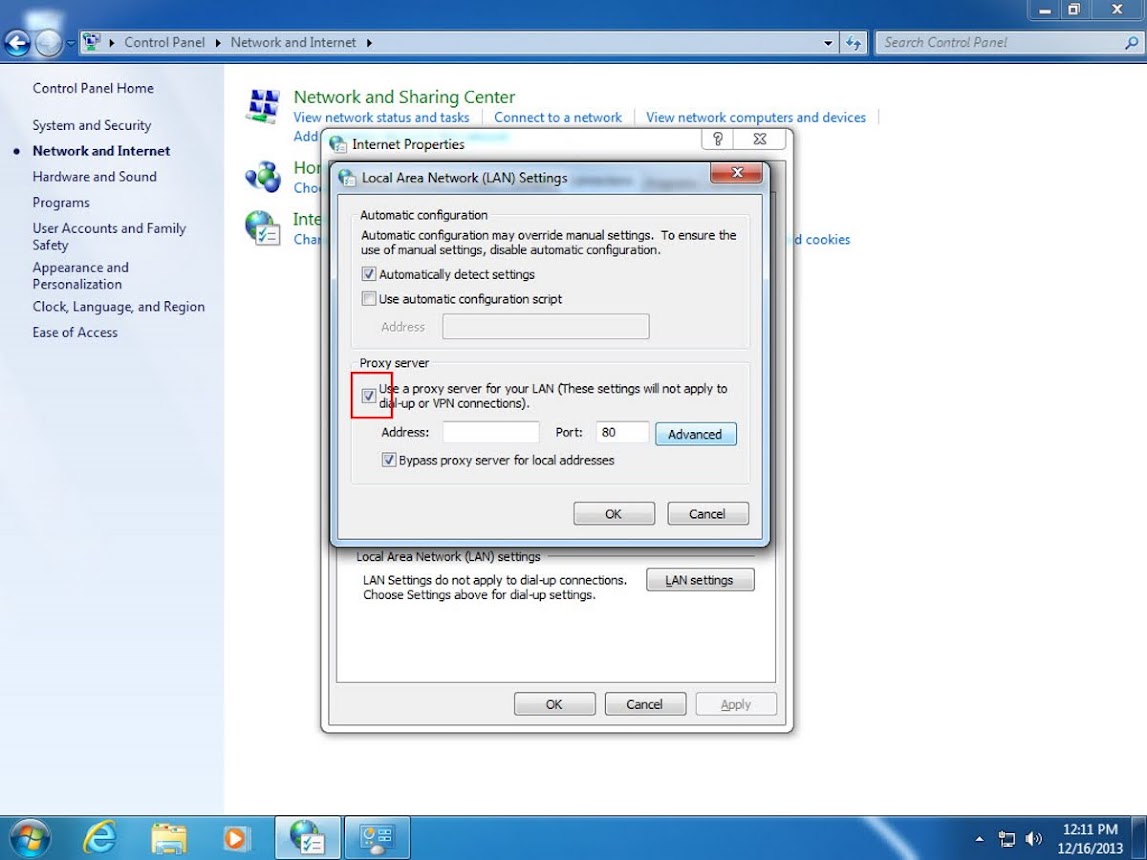
Step 6: Check the Use a proxy server for your LAN (These settings will not apply to dial-up or VPN connections) checkbox.