Problem
Table of Contents
This article outlines the detailed steps for how to configure FortiGate port forwarding for RDP.

The Process is:
- Setup a Virtual IP (with port forward enabled)
- Create a Virtual IP Group
- Allow traffic to the Virtual IP Group
FortiGate Port Forwarding: Create a Virtual IP
Step 1: Go to Policy and Objects >Virtual IPs > Create New > Virtual IP.

Step 2: Give it a name and configure the settings as below:
- Set the Interface to the outside/WAN interface.
- External IP set to the public IP address of the firewall.
- Mapped IP address set to the internal IP address of the server you are forwarding to.
- Enable Port Forwarding.
- Select TCP or UDP.
- Type in the port(s) you want to forward.

Settings to create new Virtual IP
Step 3: Click on the OK button.
FortiGate Port Forwarding: Create a Virtual IP Group
Step 1: From the Virtual IP menu > Create New > Virtual IP Group.

Step 2: Give the group a name and configure the settings as below:
- Set the Interface to the outside/WAN interface.
- Add in the Virtual IP you created above.

Settings to create a Virtual IP Group
Step 3: Click on the OK button.
FortiGate Port Forwarding: Fortigate Add an ‘Address’
If you are port forwarding something like HTTP/HTTPS to a web server, or SMTP to a mail server you can skip this step. For most port forwarding scenarios you would set the source to ALL. Anyway for completeness here’s how to create an Address object.
Step 1: Go to Policy & Objects > Addresses > Create New > Address.

Step 2: Give it a name and configure the settings as below::
- Set the Type to Subnet.
- Type the IP into the IP Range box.
- Set the Interface to outside/WAN.
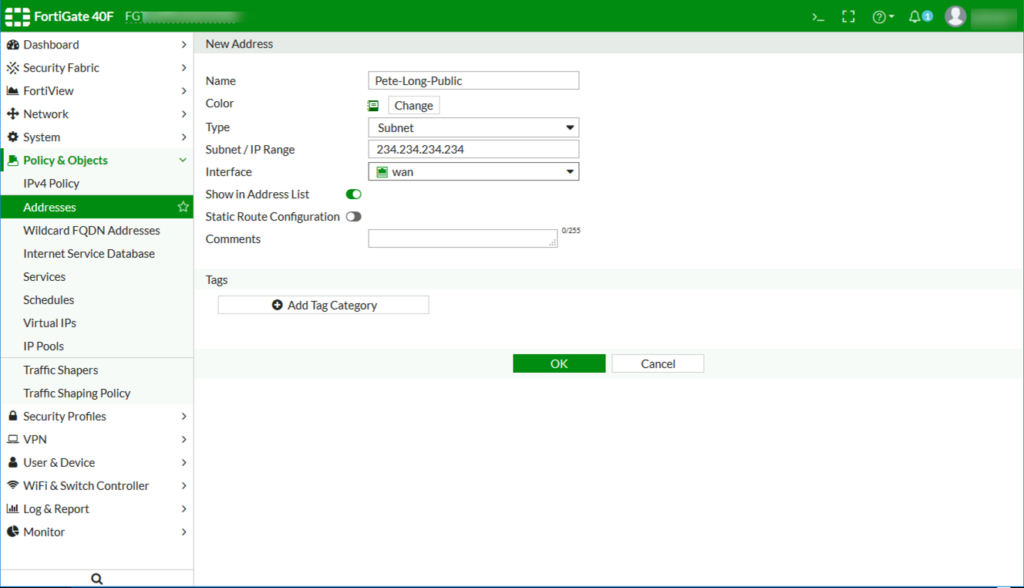
Settings to add an Address.
Step 3: Click on the OK button.
FortiGate Port Forwarding: Allow Port Forwarded Traffic
Step 1: Go to Policy and Objects > IPv4 Policy or Firewall Policy > Create New.

Step 2: Give it a name and configure the settings as below:
- Incoming Interface: Outside / WAN
- Source: For RDP specify the single address you created above for all other port forwarding simply use ALL instead.
- Destination: Your Virtual IP Group
- Schedule: Always
- Service: RDP (or the port you are forwarding if different)
- Allow: Accept

Settings to Allow Port Forwarded Traffic
Step 3: Click on the OK button.
FortiGate Port Forwarding: Troubleshooting Port Forwarding
You can see what’s going on by using the packet sniffer in the firewall.
diagnose sniffer packet {interface} 'host {External IP} and port {Port Number}' 4
e.g: diagnose sniffer packet wan 'host 234.234.234.234 and port 3389' 4

Troubleshooting FortiGate Port Forwarding