What is Google Google Analytics? Google Analytics is a web analytics service offered by Google that tracks and measure website traffic and allows you to visualize report it in a very legible way.
What’s the goal? To install Google Analytics tag to website
Why does it matter? Google Analytics will allow you to get a deeper understanding of customers. It’s the most popular tool to measure and analyze all the data related to website traffic and visitor.
What’s the result? Google Analytics tag is properly installed on website and is firing on all pages.
When do you do this? Ideally as soon you put website online, only once.
Any special requirements? This process only applies to WordPress sites.
️Who should do it? Owner of the website or the person in charge of analytics.
Where this is done? In WordPress Admin Panel and Google Analytics
How long will this take? about 10 minutes
Let’s get started, in 10-min you’ll be ready to measure audience.
Content Summary
Table of Contents
Environment setup
Create a Google Analytics Account
Set Up Google Analytics using WordPress Plug-In
Check if Google Analytics is running correctly
Environment setup
- We recommend that you use Google Chrome browser to navigate the web,
- Administrator Access to WordPress Blog,
- A Google Account (Gmail, G-Suite).
Create a Google Analytics Account
Step 1: Go to the Google Analytics website.
Step 2: You should sign in with Google Account or create one.
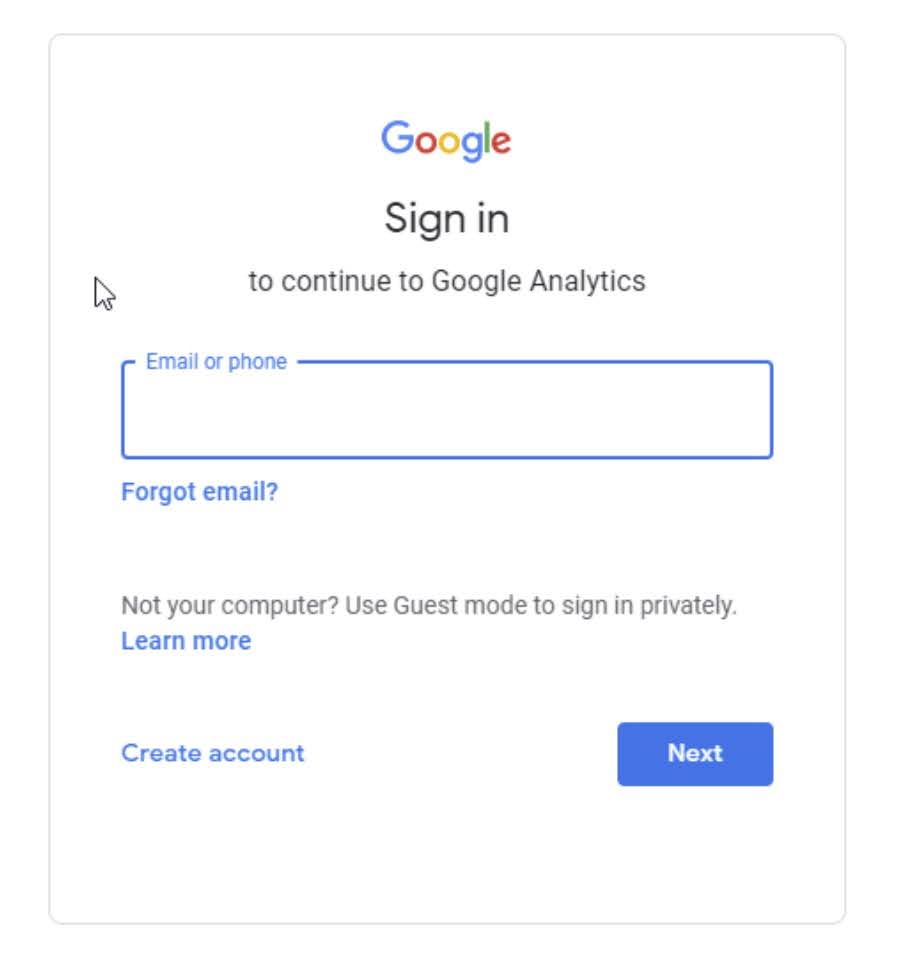
Step 3: Click on Set up for free and on the next page, you will start creating account.

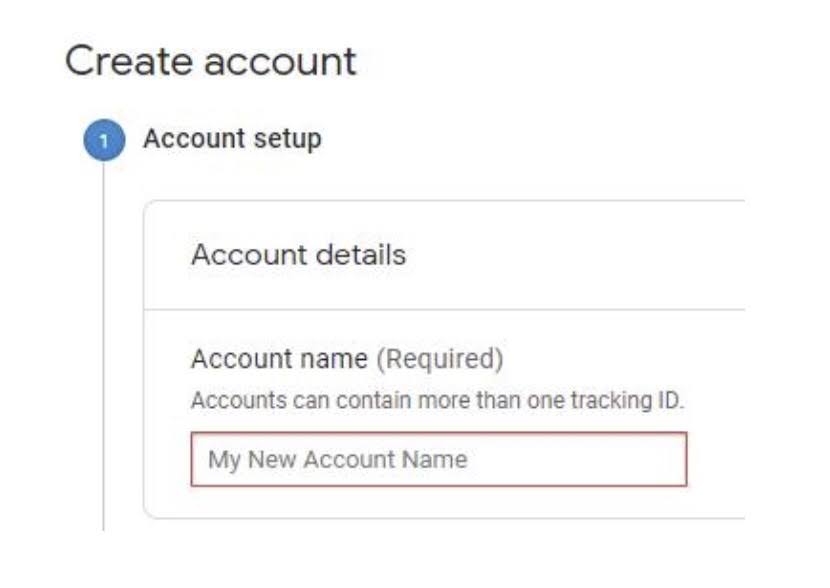
Step 4: You have to name account. We recommend you to put the name of website so you can easily recognize it.
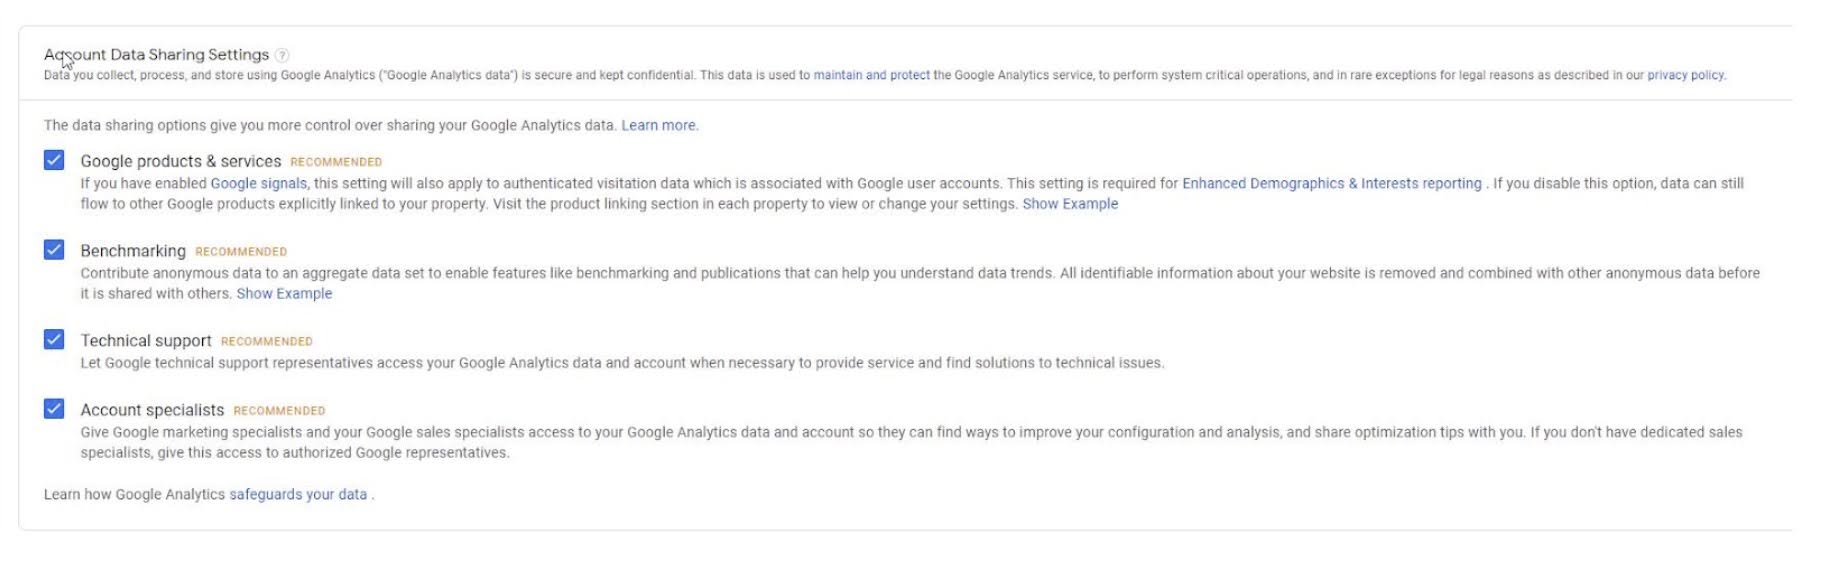
Step 5: You should check all boxes in the Account Data Sharing Setting.
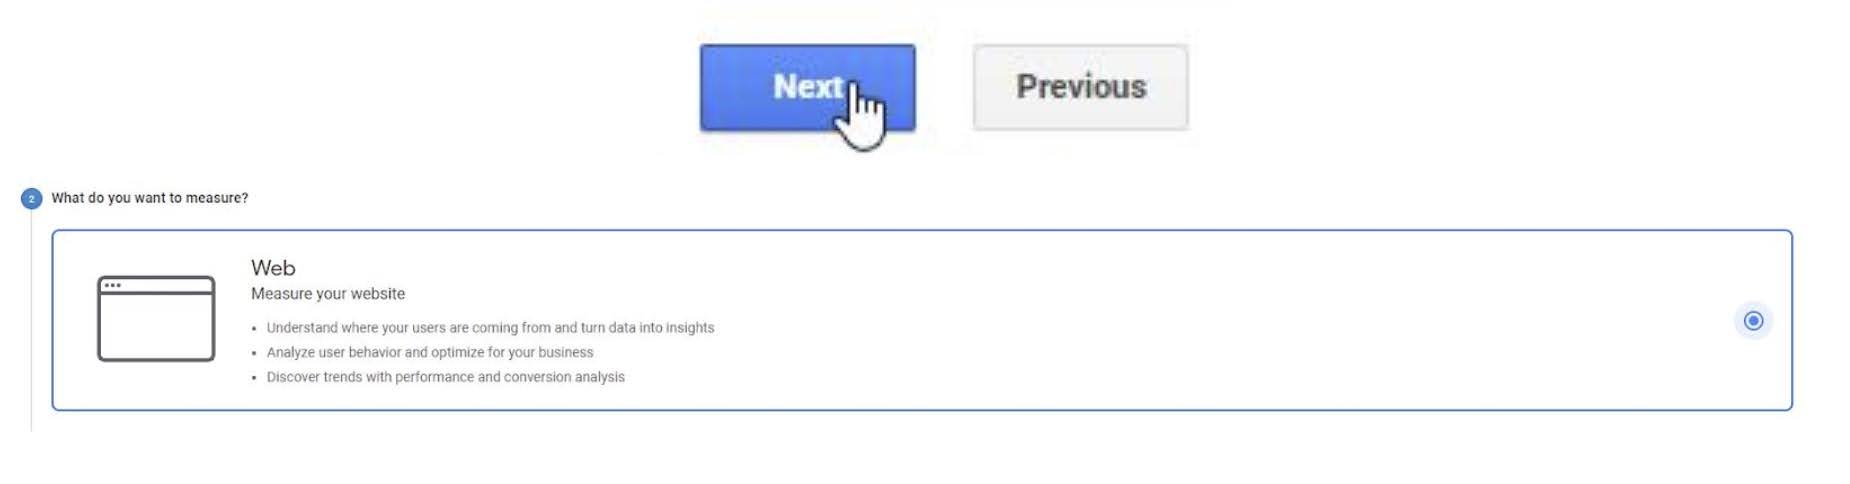
Step 6: Press on Next and choose Web, you are going to measure traffic on the website.
Step 7: Press Next.

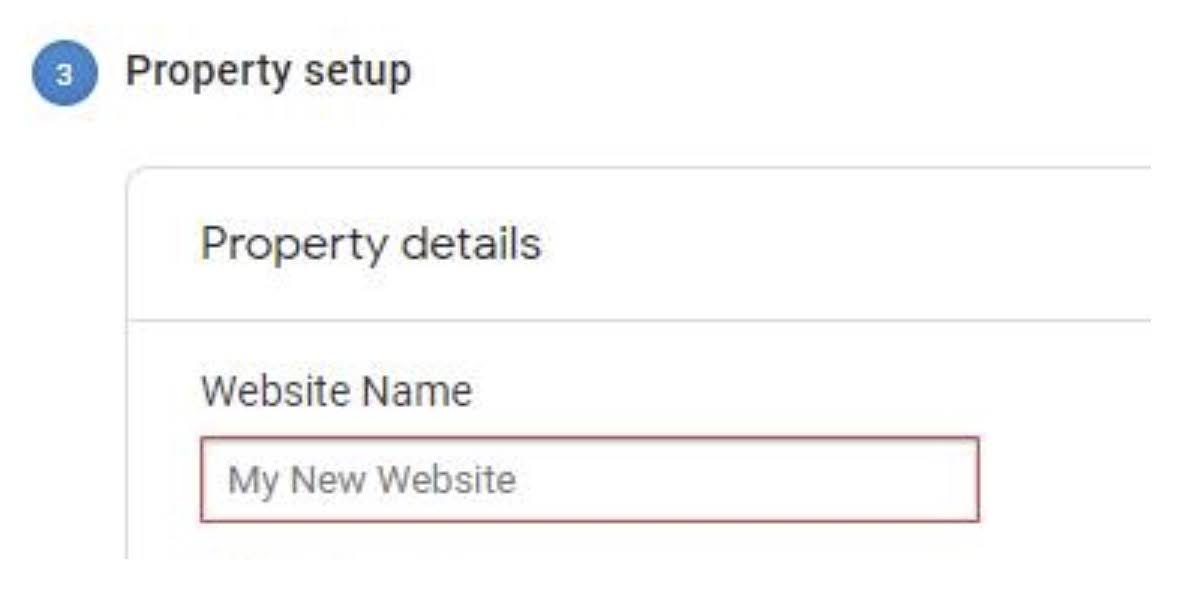
Step 8: Type website name.
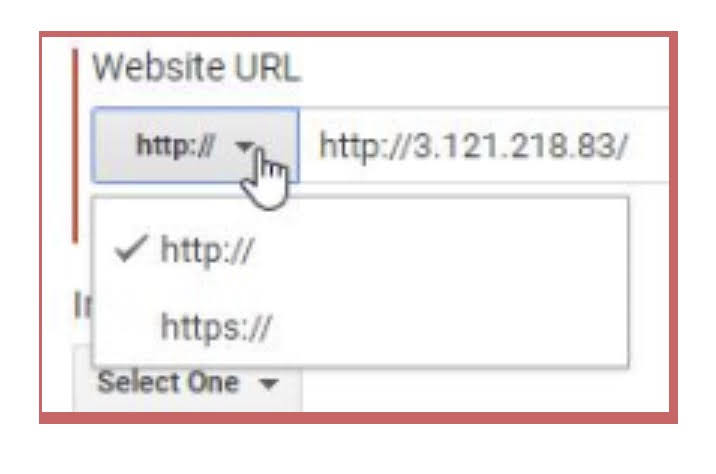
Step 9: Enter website URL and choose http:// or https:// in a dropdown menu.

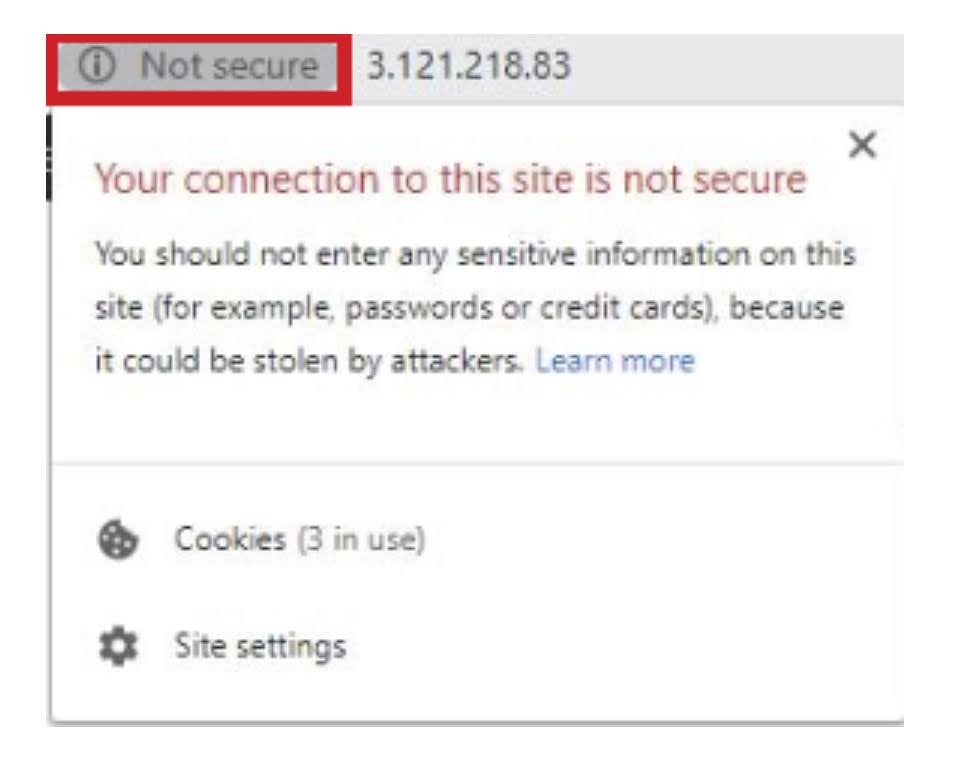
Check if you should choose HTTP:// or HTTPS://
Enter website URL in internet browser, then click just at the left side of the URL Adress Bar and check if it is secured or not. In some cases, there will be a red padlock (not secure) or a green one (secure).
Step 10: If it is secured choose https:// if not – http://.
Step 11: If website is not HTTPS we highly recommend you make the switch ASAP as it’s an important SEO Ranking Factory, we’ll soon release an SOP to explain how to get a free SSL certificate (to move site to HTTPS) using Cloudflare.
Step 12: Select the Industry Category of website.

Step 13: Choose the Reporting Time Zone, in most cases, it will be time zone, but if target audience is in another time zone, choose accordingly.

Step 14: Click Create.

Step 15: Read Google Analytics Terms of Service Agreement.

Step 16: Click I Accept.

Step 17: You should be able to see the Success message.

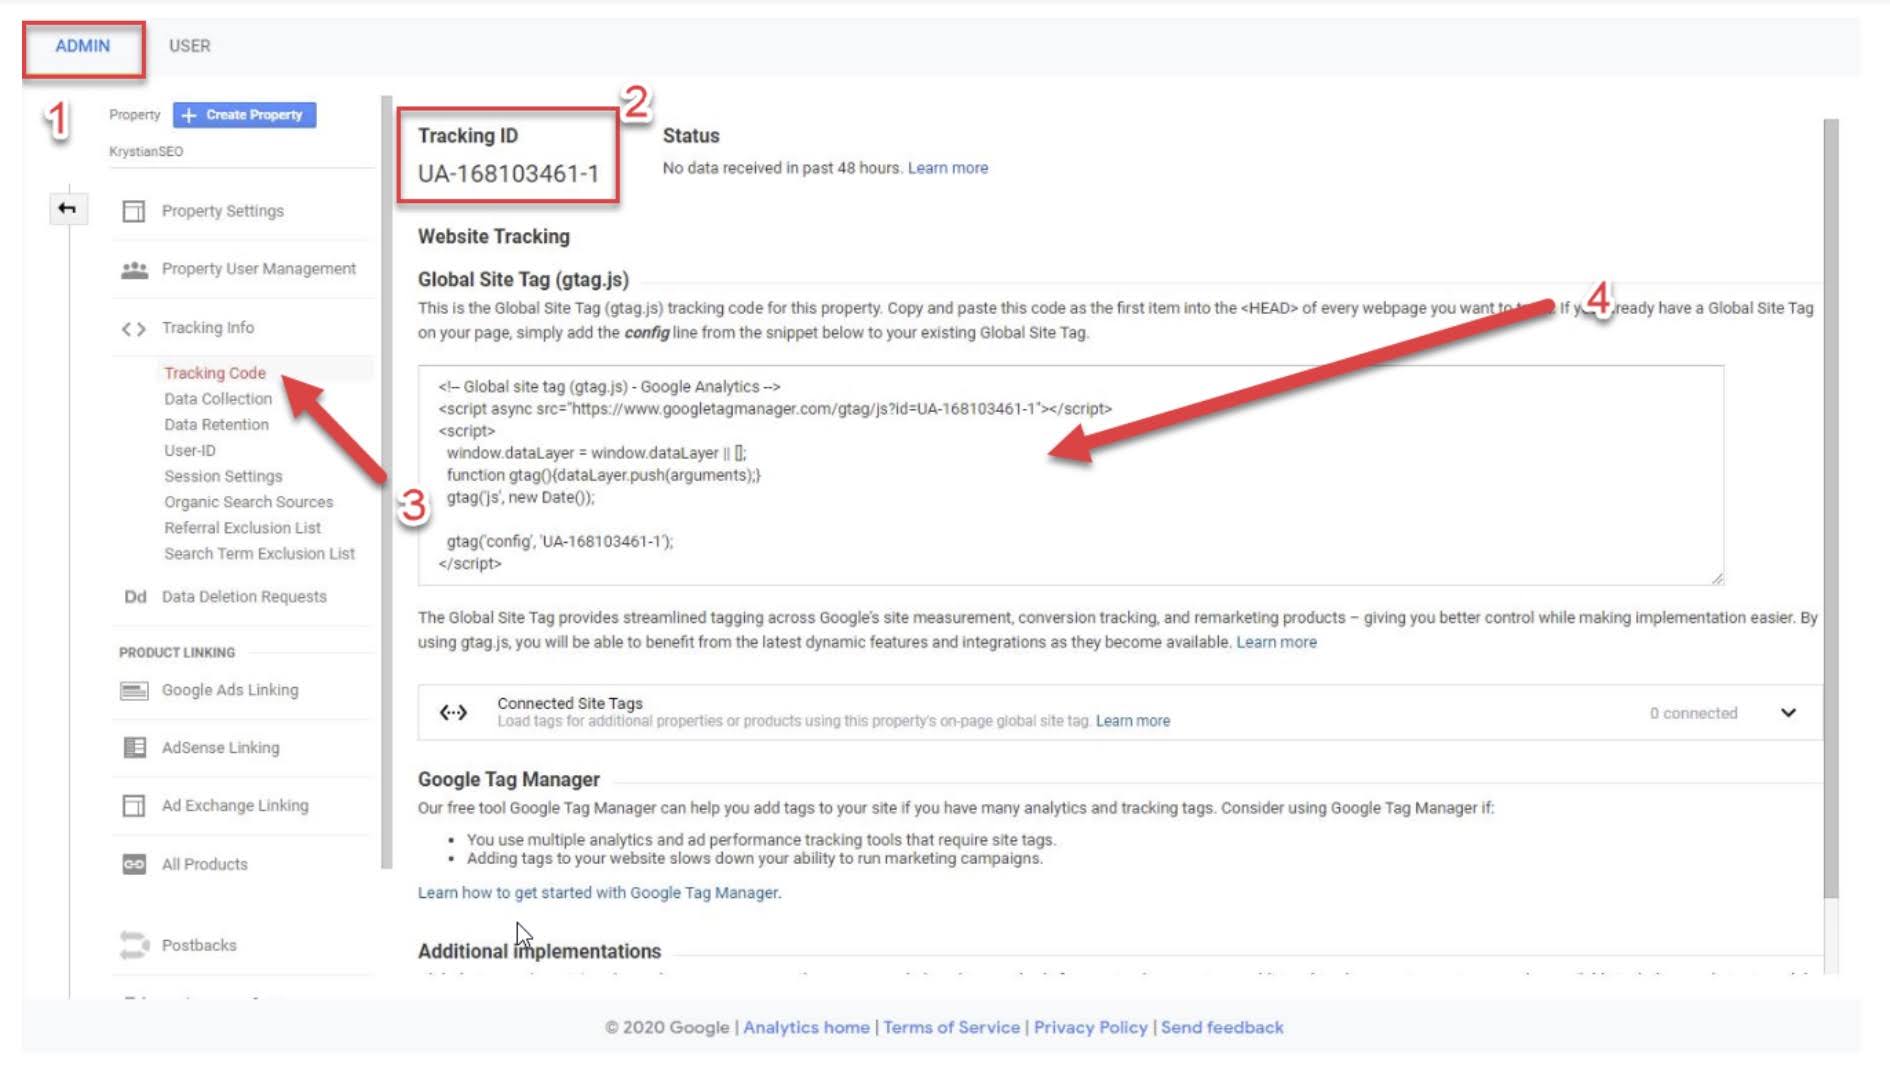
Step 18: You should see Google Analytics Admin Area. Here you can see Google Analytics Tracking ID. Copy it or write it down. There is also a code for website. In case you close it, you can revisit that page by clicking on the Tracking Code under the Tracking info section.
Set Up Google Analytics using WordPress Plug-In
Installing “Header Footer Code Manager” Plug-In
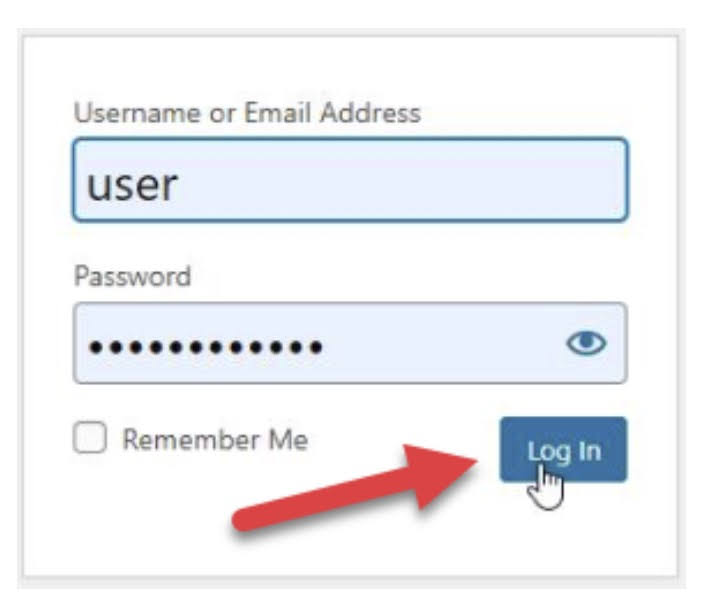
Step 19: Log in to WordPress Admin Area: (Eg: yourblogdomain.com/wp-admin or yourblogdomain.com/wp-login.php)
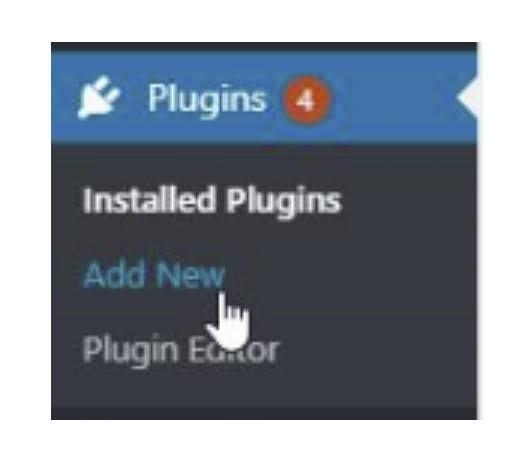
Step 20: On the left side menu, click on Plugins and then Add New.
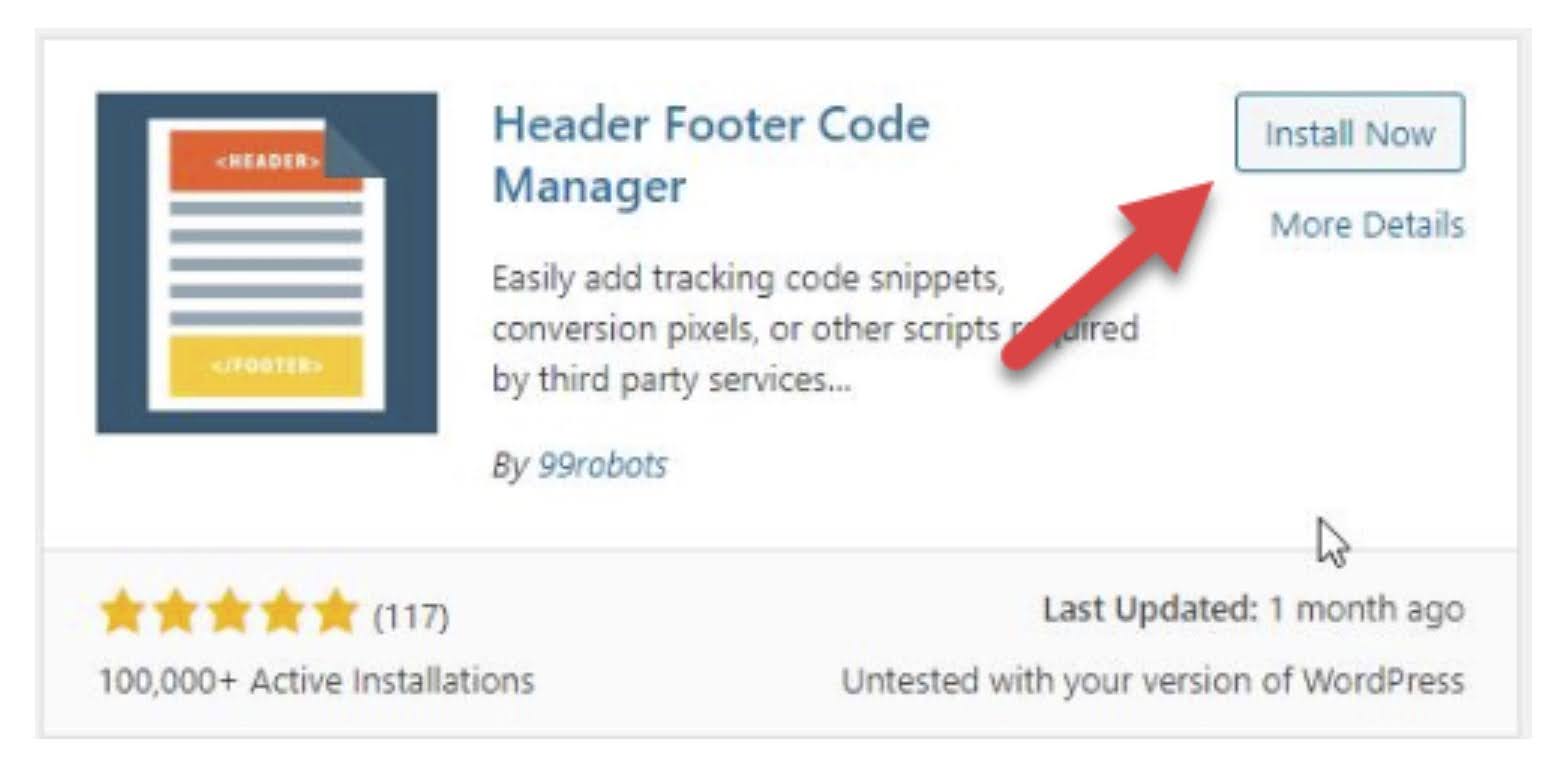
Step 21: In search box at the upper right side of the page search for header footer code manager.

Step 22: You should now find the plug-in below by 99robots, once you find it, click Install Now.
Step 23: Wait while it is installing.

Step 24: And then click on Activate.

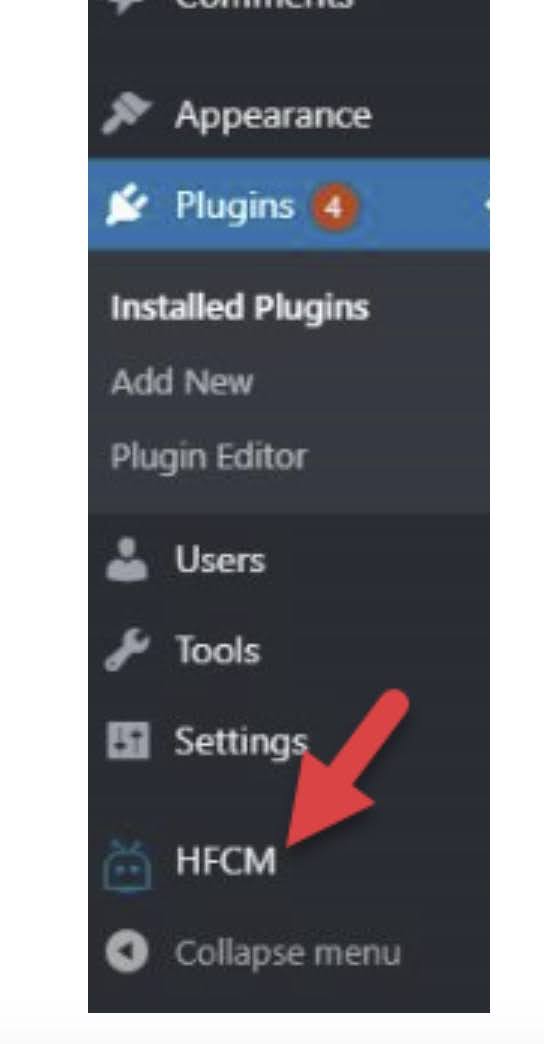
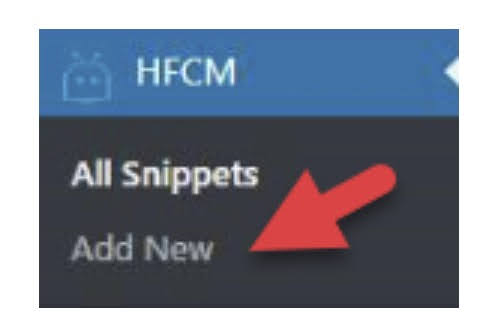
Step 25: Now you should see HFCM appeared on Menu. Click on it.
Step 26: Press on Add New.
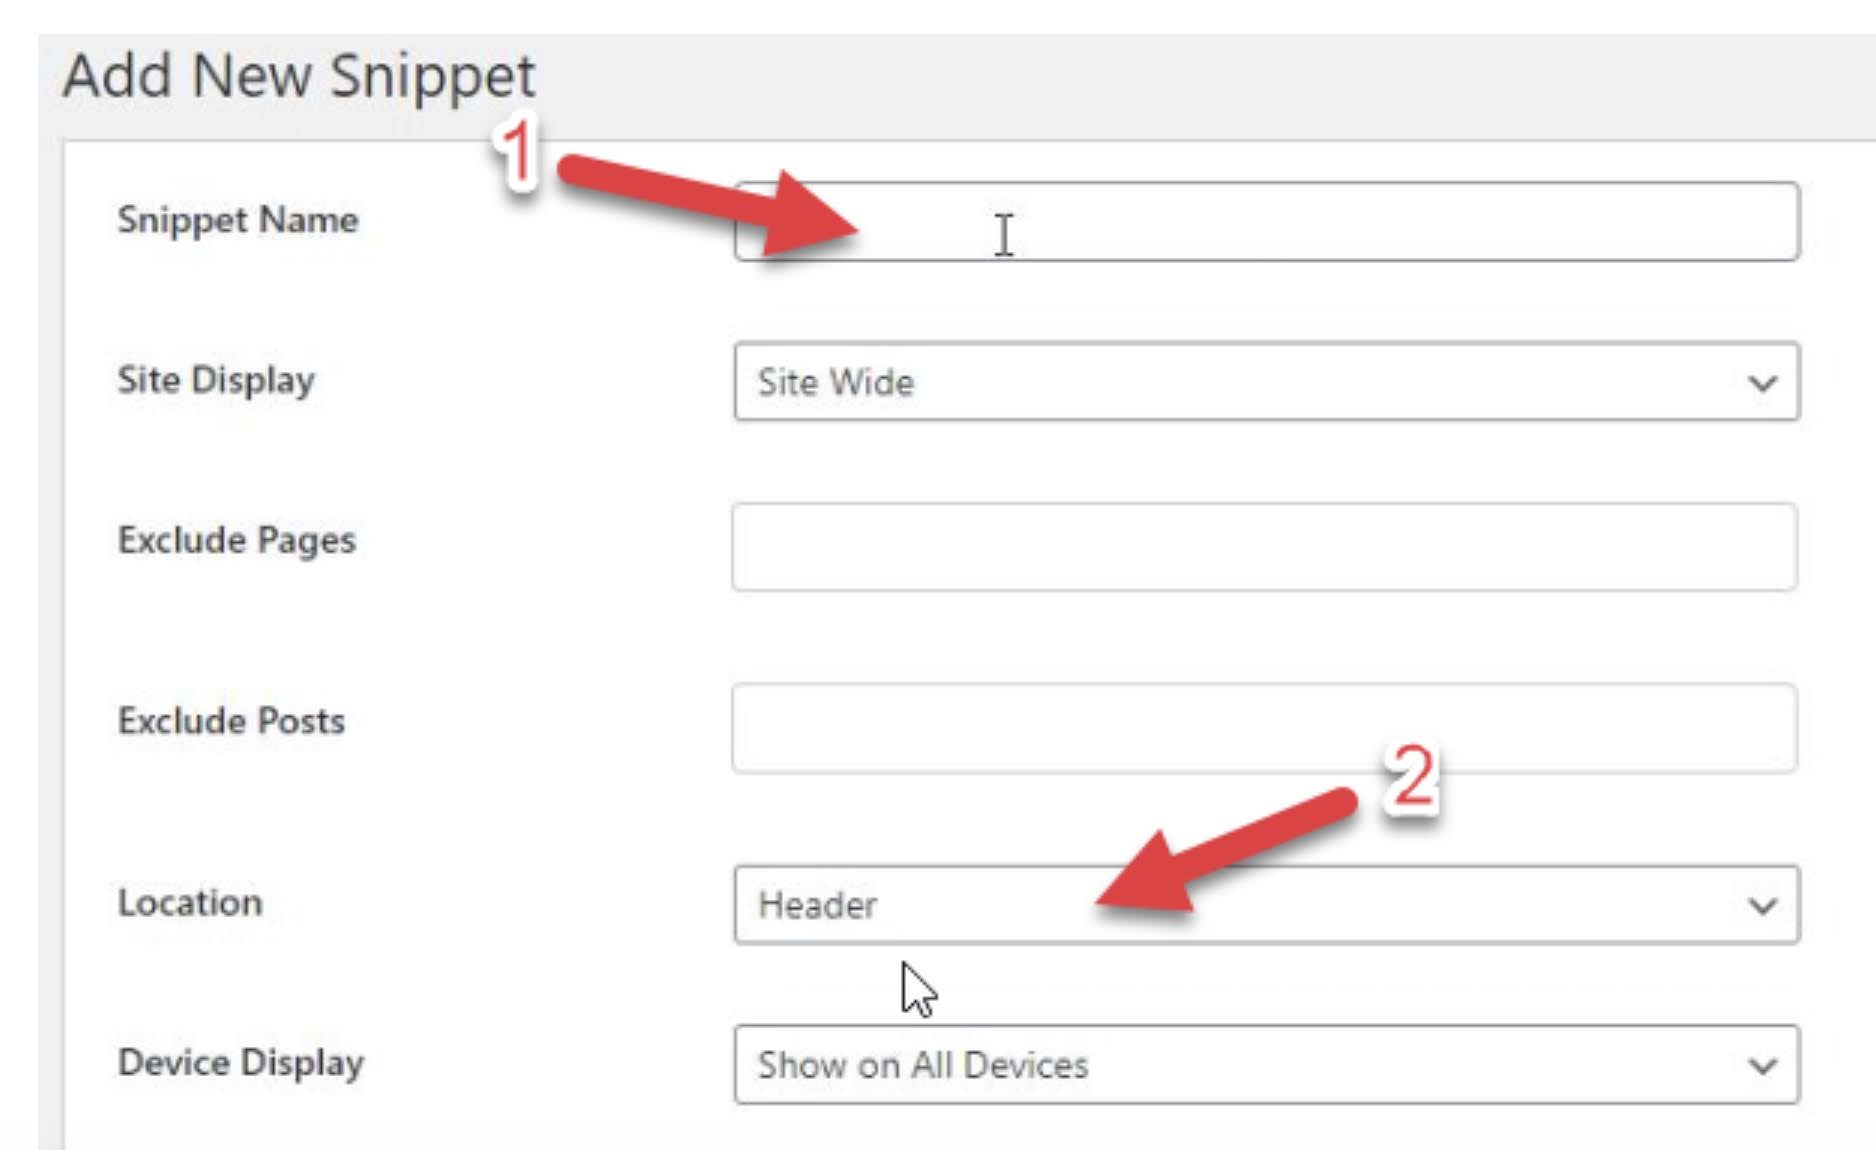
Step 27: Name the New Snippet (for example “Google Analytics”) , and then set Location to Header. Then leave this tab open while you get the Google Analytics code in another tab.
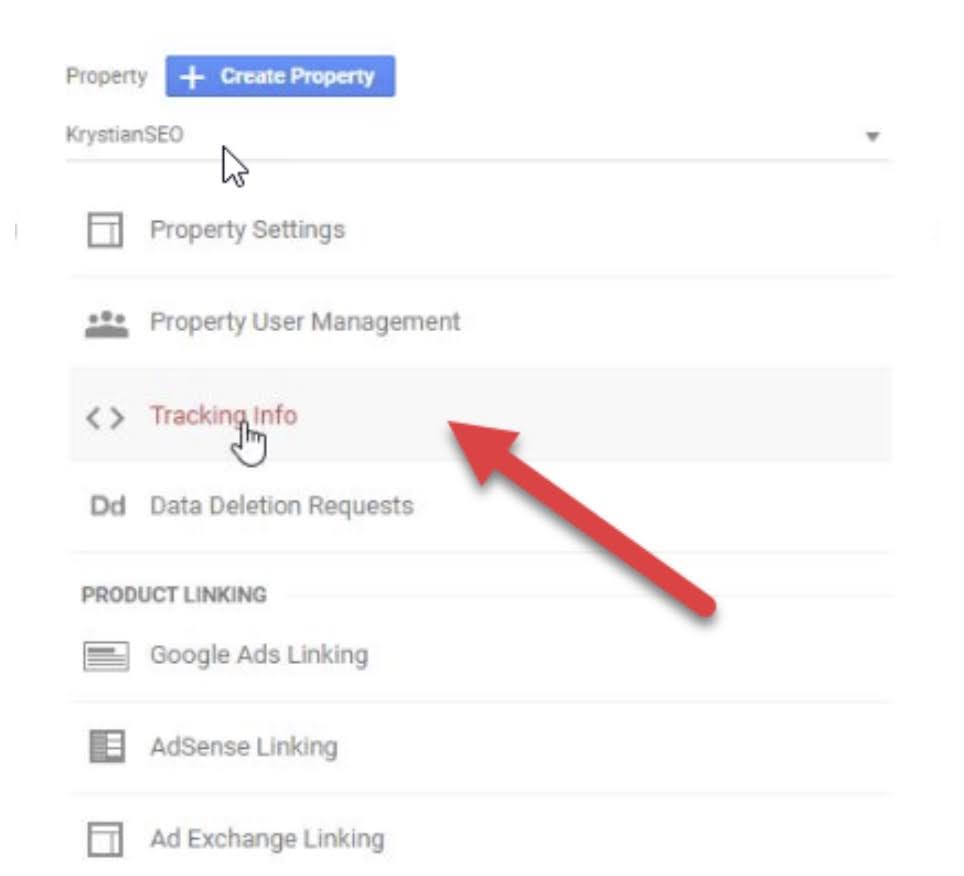
Step 28: Now go back to Google Analytics Admin Panel, (Open it in a new tab of the Internet browser) and click on Tracking Info.
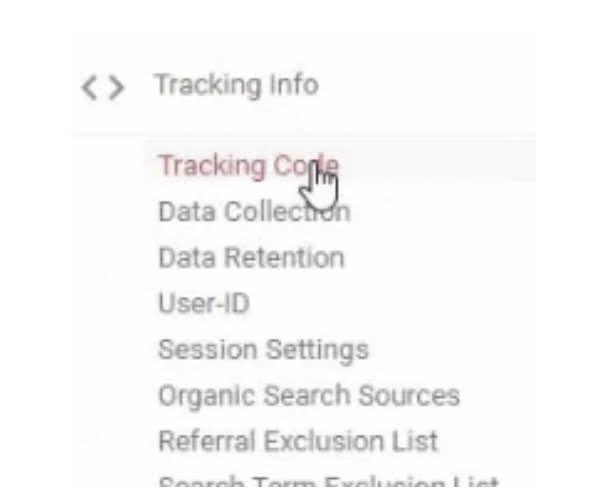
Step 29: And then on Tracking Code.
Step 30: There you should see Google Analytics Tracking Code.
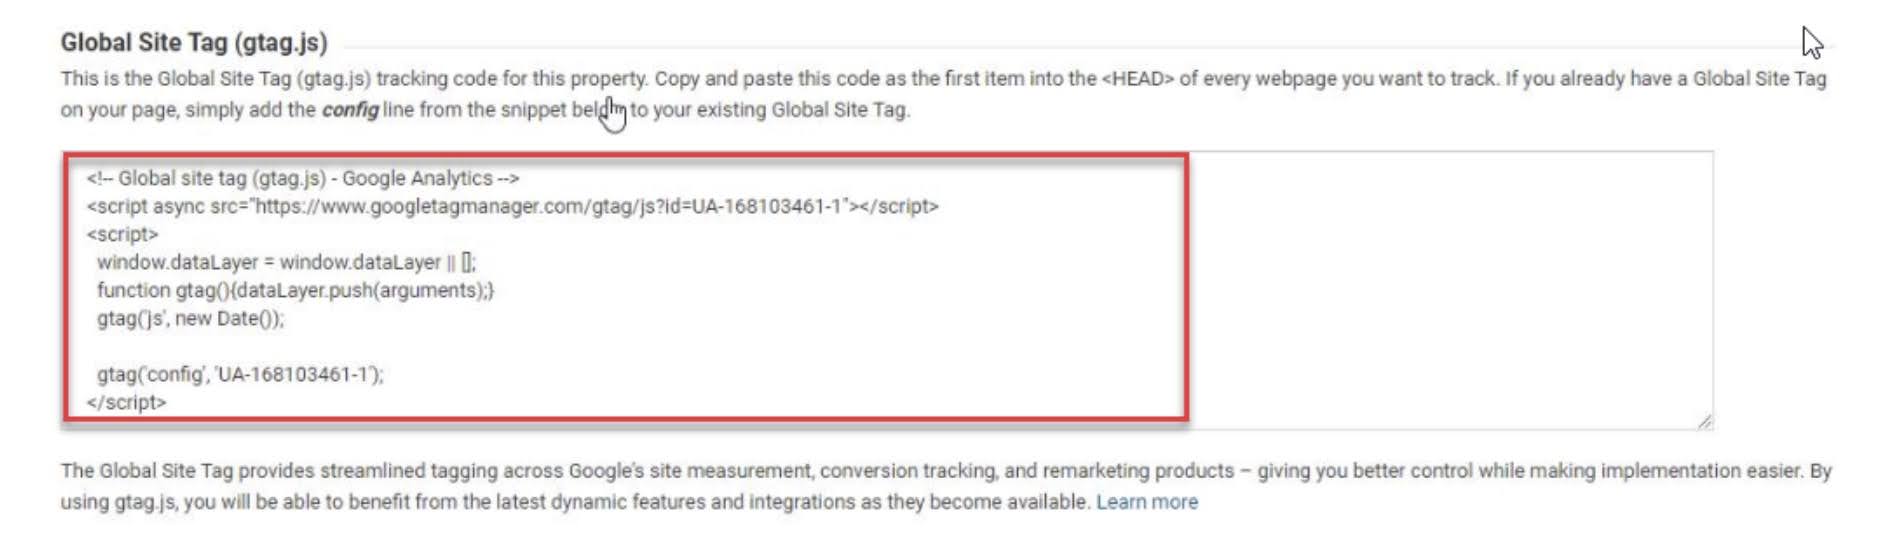
Step 31: Simply Copy It.

Step 32: Go back to the Add New Snippet window and paste the code at the bottom.
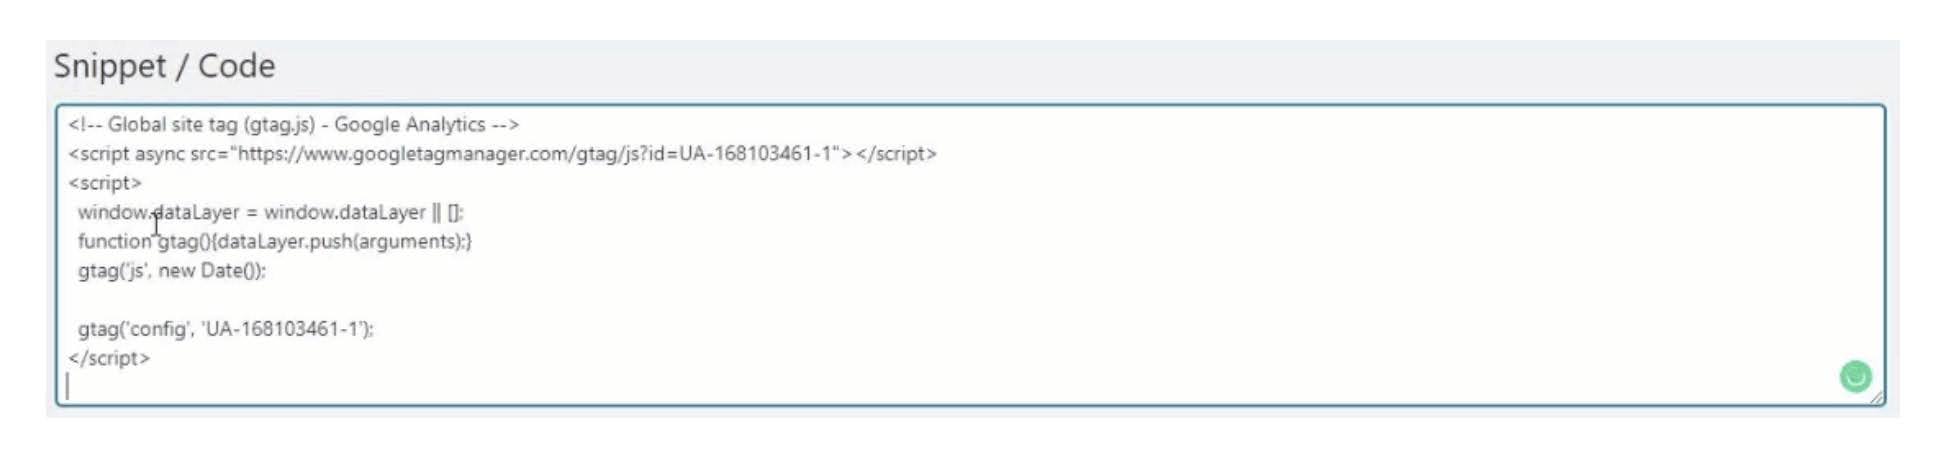
Step 33: Click on Save.

Step 34: Again click on HFCM on WordPress Menu.
Step 35: Here you can see all of Snippets. You should see that Snippet you just added is turned ON (if not click on ON/OFF slider).

Check if Google Analytics is running correctly
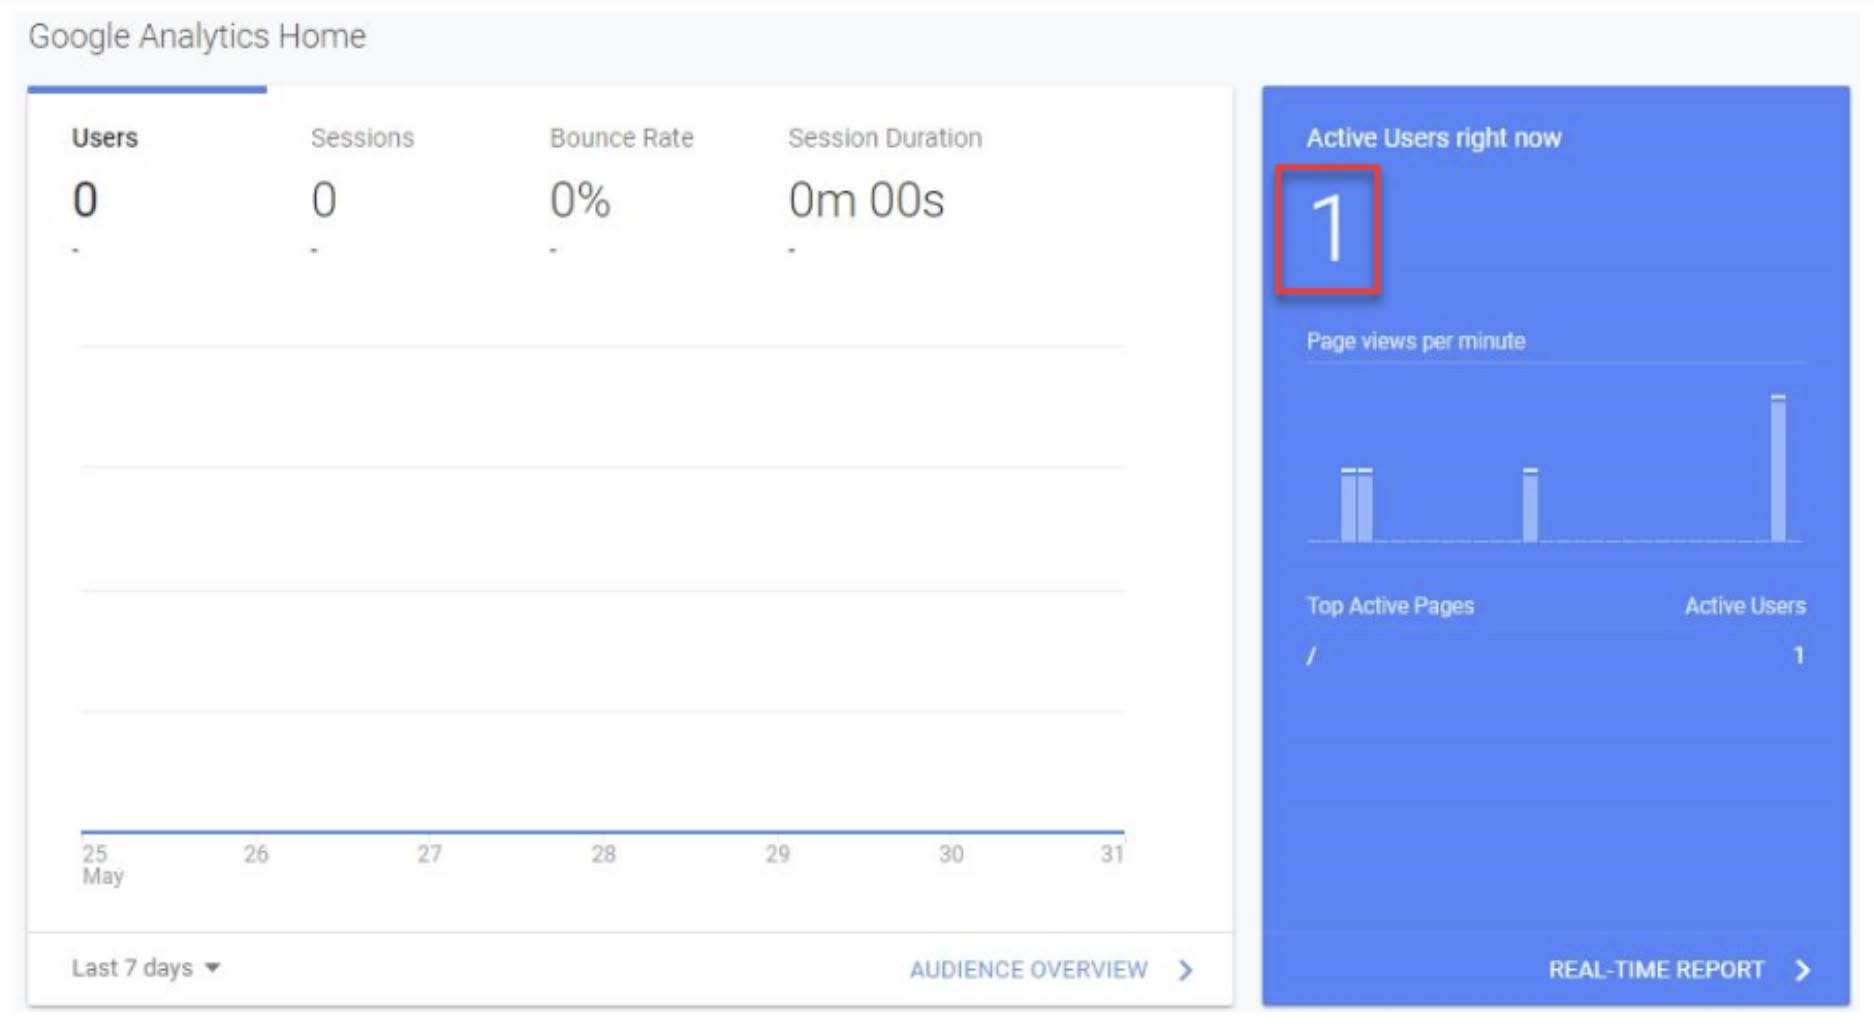
Step 36: Go to website and leave it open in one tab of browser.
Step 37: In another tab open Google Analytics website.
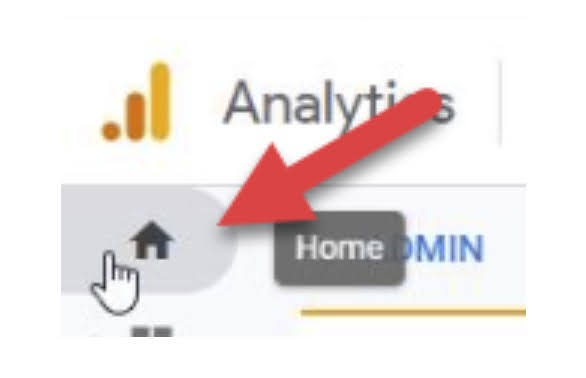
Step 38: In Google Analytics go to Home.
Step 39: If everything is set right, you should see at least one active user right now (it is you).
This is it! You just finished to set up Google Analytics on website and now you can track and measure traffic from website!