This article describes how to add multiple Subject Alternative Name (SAN) fields when creating a user certificate directly on FortiAuthenticator.
Scope
Fortiauthenticator.
Solution
Step 1: Log in to FortiAuthenticator:
- Access the FortiAuthenticator web interface via a web browser.
- Log in with the administrative credentials.
Step 2: Create a Certificate Authority (CA) on FortiAuthenticator (if not already created):
- Navigate to Certificate Management > Certificate Authorities > Local CAs.
- Select ‘Create New‘.
Step 3: Fill in the required details (Common Name, Organization, etc.) and select OK.

Step 4: Create a User Certificate: Config a GUI HTTPS access certificate for FortiGate with URL: fgt.fortilab.com
- Go to Certificate Management -> End Entities -> Local Services.
- Select ‘Create New’.
- Fill in the necessary details:
- Common Name (CN): Name of user or machine.
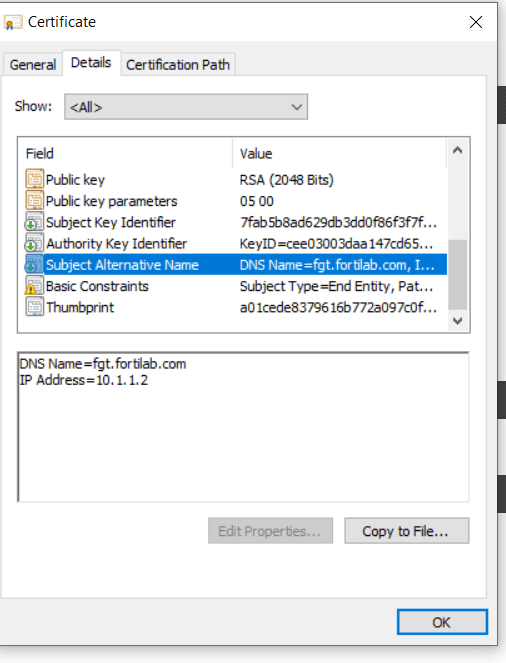
- Subject Alternative Name (SAN): This is crucial for modern web browsers and HTTPS communication. SANs provide additional security and flexibility by allowing multiple identifiers (such as IP addresses, and DNS names) for a single certificate. Add appropriate SANs like the FQDN, IP address, or any other relevant identifiers. It is possible to add multiple values in the SAN field such as URL and IP address. For example: to add hostname fgt.fortilab.com and IP address 10.1.1.2 under the DNS field, add fgt.fortilab.com, IP: 10.1.1.2 . Refer to the screenshot below.
- Select the Local CA created earlier.
- Select OK to generate the certificate:

Step 5: Export the User Certificate:
- Navigate to Certificate Management > End Entities > Local Services.
- Find the newly created certificate.
- Select the Download button to export the certificate along with its private key. Ensure to export it in a format supported by FortiGate (usually PKCS#12).
- Once the certificate is exported, the SAN fields will appear as below: