Table of Contents
Problem Symptom
This process to install Remote Server Administration Tools (RSAT) on Windows 11 has been simplified and easier compared with the previous version of the Windows operating system. Follow the below solution steps to install RSAT on a new Windows 11.

PowerShell command to check whether RSAT features installed
Step 1: Right-click the Start button and select Windows Terminal (Admin) from the context menu to open PowerShell command window.

Step 2: Type or paste the following command and press Enter key to execute it: Get-WindowsCapability -Name RSAT* -Online | Select-Object -Property DisplayName, State
Step 3: The list of all RSAT components installed on Windows 11 will show.

Install RSAT components from Settings app
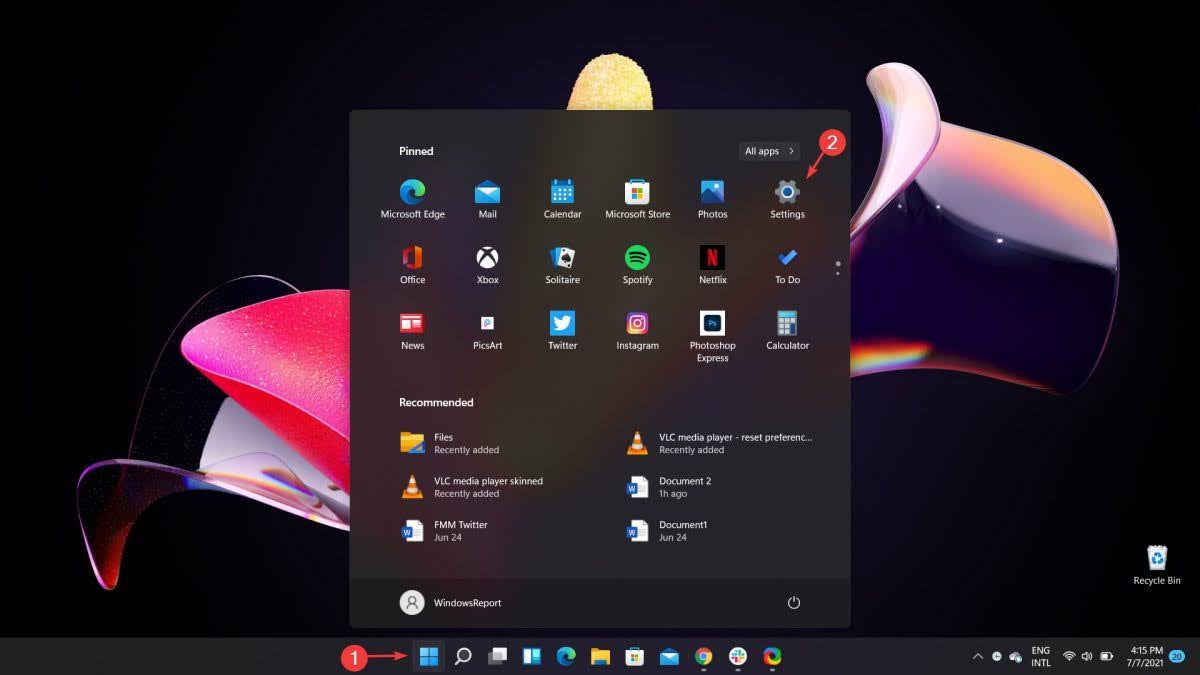
Step 1: Press the Start menu button and click on the Settings app.
Step 2: Select Apps from the left side menu.
Step 3: Click on the Optional features on the right-side menu.

Step 4: Click on the View features button from the Add an optional feature tab, which is colored in blue.

Step 5: Type RSAT in the search tab.
Step 6: Check all the RSAT features you want to install.

Step 7: Close the Settings app.
Install RSAT using PowerShell
Step 1: Right-click the Start button and select Windows Terminal (Admin) from the context menu to open PowerShell command window.
Step 2: To install the RSAT components all at once, type or paste the following command and press Enter key to execute it: Get-WindowsCapability -Name RSAT* -Online | Add-Windows Capability -Online
To install the RSAT components one by one, type or paste the following command and press Enter key to execute it, replacing the tool-name with the actual name of the RSAT tool you want to install: Add-WindowsCapability -Online -Name tool-name

Run the RSAT tool on Windows 11
Step 1: Click the Start button.
Step 2: Click the All apps button.
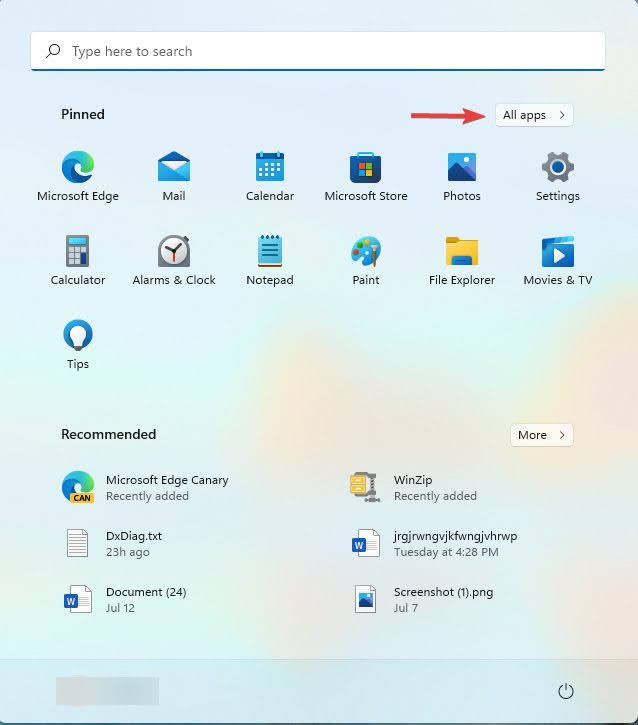
Step 3: Scroll down on the list of apps and select Windows Tools.

Step 4: All the RSAT components installed will show. Double-click on any RSAT tool to launch it.
